

I remember kneeling down on my bathroom tile, sponge in hand, and feeling that sickening give. The bottom of my vanity didn’t just feel wet; it felt like wet cardboard. I reached down to wipe the side, and my finger went straight through the wood. It wasn’t just a little damp; it was complete pulp. That sickening realization that your expensive cabinetry is essentially dissolving is a rite of passage for many homeowners. We spend so much time looking at the latest vanity design trends that we forget the foundation is constantly fighting a losing battle against splashes, leaks, and high humidity. If you’re staring at a swollen toe-kick or a peeling base, don’t panic yet. I’ve been there, and I’ve made the mistake of thinking a quick coat of paint would fix it. Spoiler: it didn’t. In fact, it just trapped the moisture and made the rot spread faster. Today, I’m going to walk you through the four moisture-proof fixes that actually work to save your bathroom storage. We’re talking about moving beyond basic repairs and into real structural solutions.
Stop the Mush Before Your Entire Vanity Crumbles
The bathroom is a hostile environment for wood. Between the steam from your morning shower and the occasional oops from a toddler’s bath time, your vanity base is always in the line of fire. Most standard cabinets are made of MDF or particle board, which acts like a giant sponge the second the factory sealant fails. I learned the hard way that ignoring a tiny bit of swelling leads to a total collapse of the cabinet floor. According to the American Society of Home Inspectors (ASHI), water damage is one of the most frequent issues found during residential inspections, often hiding in plain sight right under your sink. It starts subtly. You might notice a slight discoloration or a door that doesn’t quite close right. But underneath, the wood fibers are expanding and losing their grip. Have you ever touched the base of your cabinet and felt it crumble like a stale cookie? Let me know in the comments if you’re dealing with a mushy situation right now!
Is fixing a rotting base really worth the effort?
The fear most of us have is that we’re just throwing good money after bad. You might be thinking that if the wood is already soft, the whole thing is ruined. The truth is, if the main box is still solid, you can absolutely save it by implementing a moisture-proof base strategy that keeps the wood off the wet floor. Early in my DIY journey, I thought I could just use wood filler and call it a day. That was a disaster. The filler had nothing solid to bond to, and within three months, the rot was back with a vengeance. What you really need is a structural shift, like using a moisture barrier tactic or even switching to a floating design to get that vanity away from the danger zone. Whether you’re doing a full vanity installation for the first time or trying to rescue a 20-year-old heirloom, the base is where your success lives or dies. We also have to think about how we stop cabinet doors from warping while we’re at it, because moisture is a multi-front war. Let’s get into the nitty-gritty of how to rebuild that foundation so it lasts another decade.
Cut Out the Rot Before it Spreads
The first thing you have to do is accept that the soft wood is gone. You can’t revive it. It’s like trying to save a soggy slice of bread by putting it in the sun—it might dry out, but the structural integrity is finished. I remember taking an oscillating multi-tool to my guest bathroom vanity and feeling the resistance change the second the blade hit healthy wood. It was an immense relief. You need to cut back at least two inches past the visible damage. If the floor of the cabinet is sagging, rip it out. By clearing away the pulp, you’re creating a clean slate for a moisture-proof base strategy that actually holds weight. Don’t worry about the gaping hole yet; we’re going to reinforce it from the inside out using a frame that won’t absorb water like a sponge.
Build a Barrier That Water Can’t Breach
Once the rot is gone, you need to protect the ‘end grain’ of your new wood. Think of wood fibers like a bundle of drinking straws; if the bottom is open, they’ll suck up every drop of water on your floor. I always apply a high-quality silicone-based sealant on every cut edge. If your vanity sits against a chilly exterior wall, you must apply the moisture barrier trick to prevent condensation from rotting the back panel. I once skipped this step in a basement remodel, and six months later, the back of the cabinet looked like a petri dish. Now, I always use a layer of closed-cell foam or a specialized membrane between the cabinet and the wall to keep that humidity at bay. 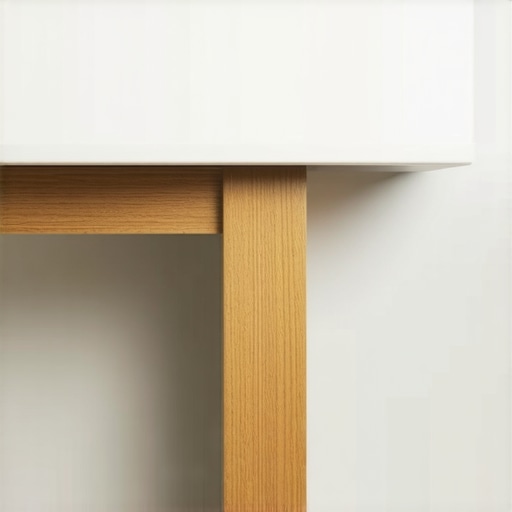
Get the Vanity Off the Floor Entirely
The most effective way to stop rot is to stop the wood from ever touching a wet floor. This is where you have two real options: structural legs or a ‘floating’ conversion. If you’re sticking with a traditional floor-mounted look, replace that mushy toe-kick with pressure-treated lumber or PVC boards wrapped in a matching veneer. It acts like a rubber boot for your cabinet. For those looking for a modern upgrade, check out choosing the perfect vanity style that incorporates a wall-hung design. If you decide to go floating, remember that the weight is no longer on the floor. You’ll need the hidden sub-frame move to support those heavy quartz tops. I’ve seen DIYers rip their drywall right off the studs because they didn’t account for the leverage of a heavy sink.
Master the Alignment and Plumbing Obstacles
Often, the reason water damage started in the first place was a slow, unnoticed leak from a cramped pipe. When you’re reinstalling your saved vanity, don’t just force the pipes through. Use expert vanity installation tricks like oversized cutouts that give the plumbing room to breathe. If your pipes don’t line up perfectly with the back of your newly repaired cabinet, you’ll need to know how to fit a vanity over off-center plumbing without compromising the structural integrity of your base. I used to think a tight fit was a sign of a good job, but in reality, a little ‘wiggle room’ around the drains prevents stress on the joints that leads to those silent, cabinet-killing leaks.Let’s dig deeper into the stuff the big-box stores won’t tell you. Everyone says that switching from particle board to plywood is the ultimate fix for bathroom rot. But here is the contrarian truth: plywood is still a wood product, and even the best marine-grade sheets will delaminate if you don’t manage the physics of your installation correctly. In my years of troubleshooting, I’ve found that the biggest mistake isn’t the material choice—it’s the failure to account for capillary action. If you don’t use a moisture-proof base strategy, water will literally climb up the grain of the wood, no matter how much you paid for it. If you’re building for the long haul, you should look into the anti-flex move typically reserved for heavy islands. This involves internal bracing that prevents the cabinet box from shifting as it undergoes the inevitable micro-expansions caused by humidity. Have you ever fallen into the trap of thinking high-quality wood alone would save you from moisture? Let me know in the comments!
The Hidden Physics of the Floating Vanity
Modern homeowners are obsessed with the floating look, but they often ignore the immense leverage these units place on a wall. According to the National Kitchen & Bath Association (NKBA), the dynamic load of a person leaning on a vanity—combined with the weight of a heavy quartz top—can easily exceed 300 pounds of downward force. If you are just screwing into 2×4 studs with standard deck screws, you are courting disaster. This is where you need to employ the hidden sub-frame move for supporting massive quartz top vanities. Without it, the back of your cabinet will eventually pull away from the wall, creating a gap that invites mold to grow where you can’t see it. I’ve seen entire sleek built-in vanities fail because the installer didn’t use the steel plate move to distribute that weight across multiple studs. 
Can your bathroom wall actually handle a heavy floating vanity?
The short answer is yes, but not without modification. The most common ‘oops’ factor I see with advanced DIYers is forgetting to add solid blocking between the studs before the drywall goes up. If you’ve already closed the wall, you’re not out of luck, but you must use steel plates to stop floating vanities from dipping. This isn’t just about stability; it’s about preventing the plumbing seals from breaking. When a vanity dips even a fraction of an inch, it puts stress on the P-trap, leading to those silent leaks that start the rot cycle all over again.
Stop the Sinking and the Squeaking
If you’re dealing with a floor-mounted unit, don’t just set it on the tile and walk away. Many bathrooms have slightly sloped floors for drainage, and if you shim the vanity without a solid foundation, you create hollow spots that trap water. I recommend the leveling trick for mudroom benches on tile, which involves using non-compressible plastic shims instead of wood ones. This ensures your custom vanity design remains perfectly level, which is critical for door alignment and preventing cabinet doors from sagging over time. Finally, if your bathroom features radiant heat, ensure you’ve mastered mounting vanities over radiant floor heat to avoid puncturing a line—a mistake that turns a $500 repair into a $5,000 catastrophe. By focusing on these structural nuances, you aren’t just fixing a cabinet; you’re building a fortress against the elements.
Ditch the Hand Saw for a Surgical Multi-Tool
If you are going to take on the challenge of saving a rotting cabinet, you need the right gear. I spent years trying to make clean cuts with a standard handsaw in cramped spaces before I finally bought an oscillating multi-tool. It was a total game-changer. This tool allows you to perform ‘surgery’ on your vanity base without having to pull the entire unit away from the wall. I personally recommend the Milwaukee M18 Fuel version because the vibration dampening is incredible, which matters when you’re making precision cuts inches away from your finished tile. When you’re trying to integrate innovative storage solutions to transform your bathroom, being able to notch out a frame with surgical precision is the difference between a professional look and a DIY disaster. I also never start a project without a 360-degree green laser level. Trying to find level in an old house with a bubble level is a recipe for a headache. With a laser, you can see exactly where your smart storage solutions to optimize small bathroom spaces need to sit to avoid that annoying door creep. 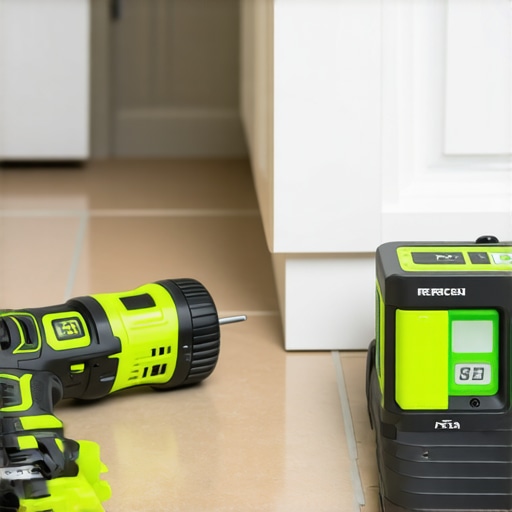
How can I maintain my bathroom storage without losing my mind?
Long-term success isn’t just about the initial fix; it’s about a seasonal checkup. Every six months, I crawl under my sink with a flashlight. I’m looking for the ‘telltale drip’—that white crusty residue on the P-trap that signals a slow leak. I also check the drawer operation. If you notice a hitch in the movement, you should look into why your drawer slides bind and the simple realignment 2 before the friction actually warps the drawer box itself. For the exterior, avoid harsh chemical cleaners that eat through your sealant. A simple damp microfiber cloth followed by a dry one is all you need for effortless storage solutions for a tidy stylish home. If your doors start to look a little wonky, don’t ignore it. Usually, it’s just a loose screw, but if you let it go, the weight of the door will eventually strip the wood. In those cases, I always refer back to why cabinet doors sag and the three hinge solution to provide that extra bit of structural support. According to the Forest Products Laboratory’s Wood Handbook, the Equilibrium Moisture Content (EMC) of interior wood should ideally stay between 6% and 11% to prevent the structural failures we’ve been discussing. Keeping a small hygrometer inside your vanity cabinet can alert you if the humidity is consistently spiking above 60%, giving you time to improve your ventilation before the rot returns.
Smart sensors are the next big thing for vanities
Looking ahead to 2025 and beyond, I predict we are going to see a massive shift toward ‘smart’ bathroom cabinetry. We aren’t just talking about built-in chargers anymore. I’m seeing prototypes for vanities with integrated moisture sensors and automated exhaust fans built directly into the toe-kick. These systems will detect a leak before you ever see a drop of water, potentially saving homeowners thousands in mold remediation. Until those become standard, I highly recommend you try the ‘steel plate move’ on your next floating project to ensure your wall-hung units stay perfectly level. Don’t wait for the wood to start sagging—be proactive and build for the physics of your home!
Mistakes That Taught Me Everything About Bathroom Rot
Looking back at my first few attempts at fixing bathroom storage, I realize I was focused on the wrong things. Here are a few lightbulb moments that changed my approach forever: First, never trust a factory finish alone. Even if a vanity says it is sealed, I now treat every raw seam with an extra bead of clear silicone. Second, capillary action is a silent killer. Water does not just sit; it climbs wood fibers like a wick. If your cabinet base touches the floor directly without a moisture-proof base strategy, you are inviting disaster. Finally, structural integrity always beats aesthetics. You can have the most beautiful custom vanity design, but if the foundation is soft, the whole unit is a ticking time bomb.
The Gear That Saved My Cabinets and My Sanity
If you are ready to tackle this, do not go in under-equipped. I trust these specific tools because they have survived the trenches of my own renovations. I swear by my oscillating multi-tool for precision rot removal because it lets you cut out damage without dismantling the whole room. For any vanity installation for beginners, a green 360-degree laser level is worth its weight in gold to ensure your doors never bind. I also recommend keeping a digital hygrometer inside the cabinet to monitor humidity spikes. For those stuck on layout issues, checking out expert vanity installation tricks will give you the confidence to handle those awkward plumbing pipes without the typical DIY panic.
Build Your Forever Vanity Starting Today
Repairing or installing a vanity is more than just a weekend project; it is about creating effortless storage solutions for a tidy home that actually stands the test of time. Do not let a little bit of soft wood discourage you from achieving the bathroom of your dreams. If you ever feel stuck or need a bit of professional guidance on a specific structural issue, you can always reach out to us directly. You have the tools, the plan, and the physics on your side now. Go save that vanity! Which part of your cabinet is giving you the most trouble right now—is it the mushy base, the sagging doors, or the plumbing nightmare? Let me know in the comments below!