Ever found yourself desperately scrubbing the last inch of clutter from your countertop, only to realize the real culprit is hidden away in a corner you never considered? I used to think my storage was adequate—until I hit that wall where every space was maxed out, and yet, chaos still reigned. That lightbulb moment came when I finally looked beyond the usual spots and discovered just how much space I was missing out on.
Why the Hustle for Hidden Storage Matters Now More Than Ever
In 2026, our homes are more than mere shelters; they’re the hubs of our lives, blending work, leisure, and personal growth. With this shift, the demand for clever storage solutions has skyrocketed, especially in places most of us overlook. Did you know that inefficient storage costs the average homeowner hours every year? According to a recent study, clutter can reduce productivity by up to 15%, not to mention cause unnecessary stress. It’s clear—smart storage isn’t just about neatness; it’s about reclaiming our time and peace of mind.
Is it really worth looking into unconventional spots for built-ins?
Early in my renovation journey, I made the mistake of sticking to traditional locations—like under the sink or along the hallway walls—only to realize I was missing out on overlooked opportunities. If you’re skeptical about what new spots could possibly be worth the effort, I get it. But trust me, innovations in [custom cabinetry](https://customcabinetrypro.com/innovative-storage-solutions-to-transform-your-bathroom) show just how transformative these hidden areas can be. By cleverly utilizing unexpected turns of space, you can significantly boost your home’s efficiency and aesthetic appeal. Are you tired of hitting a dead end with your current storage layout? You’re not alone—and the solution might be closer than you think.
Now that you’re aware of why these hidden spots are game-changers, let’s dive into the practical steps to identify, plan, and install custom built-ins that maximize every inch of your home. Trust me, once you start thinking outside the box, you’ll wonder why you ever settled for the usual storage solutions.
,
Identify Your Space and Needs
Begin by assessing each room, focusing on overlooked corners, underutilized walls, and ceiling voids. For example, I once took a tape measure and sketched out my entire living room, noting every nook and cranny. The messy part was removing existing furniture to get a clear view, but this clarity set the foundation. Think about what you need—storage for books, shoes, or appliances—and note the dimensions accordingly. This prep ensures your design is both practical and seamless. For detailed planning, refer to our full guide on designing custom installations.
Design Efficient Solutions
Create Precise Drawings or Mockups
Use graph paper or digital tools to draft your built-ins, considering functionality and flow. I found that sketching out a closet with adjustable shelves helped decide between fixed or flexible storage. Incorporate features like pull-out baskets or hidden compartments. Keep in mind, the goal is maximizing utility without sacrificing style. To explore latest trends, check our 2025 vanity trend insights.
Select Materials and Hardware
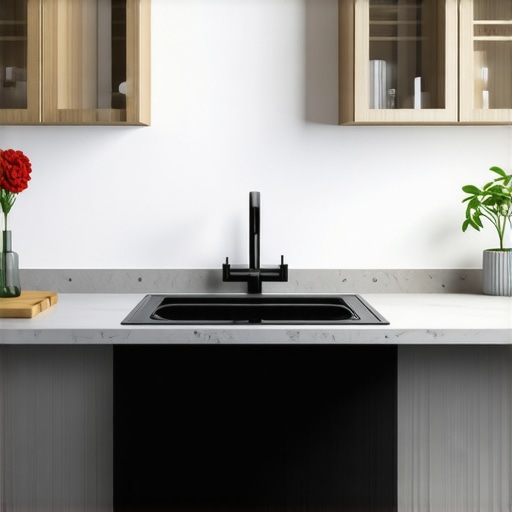
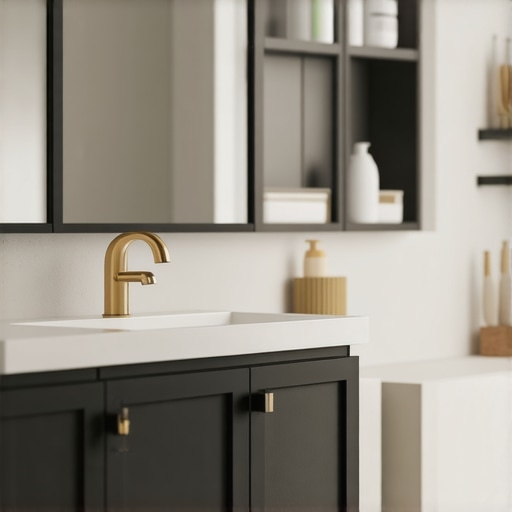
Choose durable, matching materials—laminate, wood, or MDF—based on your budget and aesthetic. I favored plywood for its strength and ease of finishing. Hardware like soft-close hinges and concealed pulls enhance the premium feel. Align materials with your home’s decor for harmony. For inspiration on styles, browse our vanity style guides.
Prepare for Installation
Clear the workspace and gather necessary tools—drills, level, screws, and brackets. I started by marking reference lines with a level to ensure accuracy, then drilled pilot holes to prevent splitting. This phase benefits from a detailed plan to prevent misalignment. For mounting tips and tricks, see our installation guide. Remember, precise measurements are key to seamless integration.
Secure and Finish Your Built-Ins
Attach panels using appropriate brackets or cleats—think of them as the skeleton that holds everything in place. I used heavy-duty L-brackets for floating shelves, ensuring they could handle weight without sagging. Once mounted, finish edges with molding or paint to match your room. This step transforms a basic frame into a polished feature. If you’re hesitant about mounting, consider consulting our expert tips for advice. Proper anchoring prevents disasters and guarantees longevity.
Optimize Your Storage
Organize your items with baskets, dividers, and labels to keep everything tidy and accessible. I learned that grouping similar items reduced clutter and search time. Incorporate adjustable features to accommodate different storage needs over time. Regularly reassess your setup to prevent stagnation. For ideas on smart organization, visit our storage solutions page. The goal is seamless accessibility that feels effortless and keeps your home clutter-free.
Many homeowners embark on renovation projects with the misconception that choosing the most popular vanity style or installing ready-made built-ins guarantees optimal functionality and aesthetic appeal. However, this approach often overlooks the nuanced complexities that can make or break your space’s efficiency. Contrarily, rushing into installation without considering load-bearing requirements or proper support can lead to sagging or structural failure—an issue overlooked by many. According to the National Kitchen and Bath Association, improper support is a leading cause of vanity failure within five years, emphasizing the importance of understanding technical nuances.
What Advanced Mistakes Do Even Experienced DIYers Make?
One common mistake is underestimating the importance of appraising wall strength and wall material compatibility before installing heavy built-ins. For example, attempting to hang a custom vanity on drywall alone, without reinforcement, can result in instability and damage over time. Investing in appropriate mounting hardware and reinforcement, such as steel brackets or wall anchors, is critical and often underestimated by amateurs. For detailed strategies on selecting the right mounting solutions, consider exploring our guide on mounting heavy vanities.
Moreover, a widespread myth is that all storage solutions are universally applicable. In reality, the nuanced differences in material choices, finishes, and hardware significantly impact durability and usability. Selecting inexpensive, low-quality hardware might save costs initially but will lead to frequent replacements and potential damage—especially in humid environments like bathrooms. Remember, optimal storage not only maximizes space but also ensures longevity and safety. To get inspired with high-caliber options, browse our storage solutions collection.
How Can You Avoid Common Pitfalls in Installation
One critical advanced nuance is the importance of precise measurements and planning. Overlooking small details—like the thickness of wall materials or the position of plumbing pipes—can result in misaligned built-ins, gaps, or the need for costly rework. Engaging in meticulous pre-installation planning, including cross-referencing with utility blueprints or consulting with professionals, greatly reduces errors. It’s advisable to review comprehensive guides like our vanity installation guide for expert insights. Remember, rushing this phase often leads to compensation efforts afterward, which can be both time-consuming and expensive. Have you ever fallen into this trap? Let me know in the comments.
Another often overlooked fact is the importance of reinforcing heavy or expansive built-in units to prevent sagging or structural failure over time. Implementing steel brackets, wall studs, or adjustable supports not only prolongs lifespan but also preserves aesthetics. For tips on securing heavy fixtures, check out our installation error fixes. Ultimately, understanding the underlying support structures and material compatibilities is key for enduring, stylish vanities and built-ins.
In summary, superficial choices in vanities and storage solutions often lead to long-term issues, but by appreciating the technical nuances and advanced details—such as load support, material compatibility, and precise measurements—you can craft spaces that are not only beautiful but also durable. For further guidance on selecting the best options for your home, visit our built-in storage ideas. Remember, a well-planned installation saves money and stress in the long run. Do you have questions or experiences you’d like to share? Reach out via our contact page and join the conversation.
Keeping It Working: Essential Tools and Techniques for Longevity
Ensuring your custom vanities and built-ins stay pristine and functional over time requires more than just a careful installation. The right tools and maintenance practices can dramatically extend their lifespan and keep your space looking sleek. From specialized hardware to routine checks, I’ve found that investing in certain equipment and adopting specific methods makes all the difference. For instance, a high-quality level, like the Bosch Cross-Line Laser Level, provides unmatched accuracy during installation, preventing misalignments that could lead to sagging or gaps down the line. Additionally, using a cordless screwdriver with adjustable torque settings minimizes the risk of damaging delicate materials or hardware, ensuring your fixtures remain secure yet gentle. Proper tools are the backbone of precise and durable installation—think of them as the foundation of a long-term success story.
Maintenance is equally critical. Regular inspections of support brackets, hinges, and seals can prevent small issues from escalating. Applying a silicone-based lubricant to moving parts, like soft-close hinges and drawer slides, can keep them functioning smoothly for years. I recommend keeping a toolkit with key items such as a multi-bit screwdriver set, a flexible pry bar for gentle adjustments, and a surface cleaner specifically designed for cabinetry, like the Minwax Wood Cleaner, to maintain finishes without damage. Looking ahead, technological advancements such as smart monitoring sensors embedded in fixtures might soon alert homeowners to loose fittings or potential sagging before visible signs appear, making upkeep even more efficient.
What tools will help your vanity stand the test of time?
Choosing reliable hardware—like steel brackets rated for heavy loads—and adopting strategic reinforcement methods, such as cross-bracing or wall studs, can dramatically improve durability. Verifying support with a torsion box design or adding steel reinforcements in heavy or expansive units can prevent sagging, a common pitfall today. For detailed reinforcement strategies, check out our guide on supporting heavy built-ins. Incorporate routine touch-ups with high-quality paint or sealant to preserve aesthetic appeal, especially in humid environments like bathrooms. This ongoing care ensures your investment remains both beautiful and functional for years to come.
If you’re eager to take your maintenance to the next level, try integrating smart vibration sensors that monitor stability and alert you when supports weaken. Such proactive measures shorten repair cycles and save costs. Remember, a little prevention today avoids costly repairs tomorrow. Would you like to learn more about innovative tools that make upkeep easier? Reach out via our contact page for personalized recommendations.
3 Myths About Built-ins That Held Me Back
One of the most persistent myths I encountered was that built-in storage had to be bulky or disruptive to a room’s aesthetic. I believed that maximizing space meant sacrificing style, which led to frustration and substandard results. Real-world experience taught me that clever design and material choices could create seamless, beautiful solutions that hide clutter efficiently. Letting go of these misconceptions opened up a world of possibilities and transformed my approach to home upgrades.
My Secret Weapon for Mastering Vanity Support
Early on, I underestimated the importance of reinforcing heavy or expansive built-ins. Discovering the value of steel brackets and wall studs as vital support was a game-changer. These reinforcement techniques prevented sagging and maintained structural integrity over time. Trusting reliable tools like steel cross-braces and consulting proper support guides boosted my confidence and ensured durable, long-lasting installations. Embracing these advanced support methods has been pivotal to my success.
Balancing Aesthetics with Practicality
Many DIYers overlook the nuances of material compatibility and hardware quality when planning storage solutions. I learned that investing in high-quality hinges, drawer slides, and finishes not only enhances the appearance but prolongs the lifespan of built-ins. Choosing durable, moisture-resistant materials for bathrooms and modern hardware for sleek looks has made a significant difference. Prioritizing these technical details prevented costly repairs and made my projects stand the test of time.
Where to Go from Here
If you’re eager to elevate your home with custom vanities and hidden storage, start by assessing your space carefully. Use detailed planning and precise measurements, and don’t shy away from unconventional spots—your home’s potential is greater than you think. For step-by-step guidance, our comprehensive vanity installation guide is an invaluable resource. Remember, a thoughtful approach today leads to stunning, functional spaces that bring lasting joy. Ready to transform your home? Dive in, and don’t hesitate to reach out with questions—your perfect built-ins are just a plan away!
Related Posts
Stop the Sag: 3 Hinge Fixes for Heavy 2026 Custom Cabinets
I remember the first time I installed a massive, custom-built…
Best Built-in Storage Solutions & Vanities Installation Guide 2025
I remember the first time I realized my home lacked…
![7 Custom Built-in Hacks for Awkward Living Room Nooks [2026]](https://customcabinetrypro.com/wp-content/uploads/2026/02/7-Custom-Built-in-Hacks-for-Awkward-Living-Room-Nooks-2026.jpeg)
7 Custom Built-in Hacks for Awkward Living Room Nooks [2026]
I remember the exact moment I realized my living room…