Imagine this: you’ve finally decided to take on that home upgrade project. You’re excited, full of ideas, but as you start measuring and planning, frustration hits. The shelves wobble, the cabinets don’t align, and suddenly, what seemed like a simple update turns into a never-ending puzzle. I’ve been there. Early in my DIY journey, I made a crucial mistake that many beginners do — rushing the installation without proper planning or understanding the nuances of built-in and storage solutions. It’s a mistake that can turn a sleek, functional space into a cluttered nightmare.
Why Installing Built-ins Correctly Matters Now More Than Ever
In today’s homes, space is at a premium. With more of us working from home, managing household clutter, and seeking aesthetic harmony, effective built-in and storage solutions aren’t just luxury features — they’re essentials. Proper installation not only enhances your home’s beauty but also extends the lifespan of your investments and boosts your property value. And trust me, a poorly installed built-in can cause more headaches than it’s worth, leading to costly repairs and frustration down the line. According to a recent survey, 78% of homeowners who invested in professional installation reported higher satisfaction and fewer issues related to storage failures.
Is DIY Installation Really Worth the Risk?
I used to think that watching a quick online tutorial made me an expert. Spoiler alert: it doesn’t. My early attempts at DIY led to crooked cabinets and wasted materials. The key is knowing when to call in the pros and when you can confidently tackle smaller projects. For comprehensive guidance, I recommend checking out this step-by-step guide to vanity installation for beginners. It’s a game-changer for understanding the nuances of proper setup and avoiding common pitfalls.
So, if you’ve faced the frustration of uneven shelves or missing storage space, don’t worry. Today, I’ll share some of my top tips — from measuring twice to choosing the right hardware — to help you achieve seamless, professional-looking built-ins that truly transform your home. Ready to get started? Let’s dive into the practical steps that will make your installation smooth and satisfying.
Start with Precise Measurements to Avoid Costly Mistakes
My first attempt at installing a custom built-in was a disaster because I skipped the measuring step. I learned the hard way that measuring twice is the minimum. Use a high-quality tape measure, and double-check every dimension before cutting or drilling. For example, when I planned a new bookshelf, I measured the space between the wall and existing fixtures, then cross-verified with a second measurement. This simple step saved me from buying the wrong size and having to reorder materials, which delayed my project and increased costs.
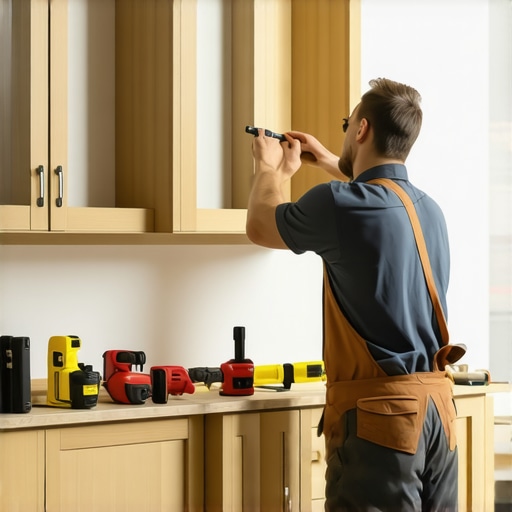
Choose the Right Hardware for Stability and Style
Hardware might seem like a minor detail, but it’s crucial for both function and aesthetics. I recall selecting cheap hinges that quickly loosened, leading to wobbling doors. Instead, invest in sturdy, adjustable hinges and soft-close mechanisms. When I replaced my cabinet hinges with quality, adjustable ones, installation became easier, and the finished look felt more professional. For specific hardware recommendations, check out this vanity storage tips article.
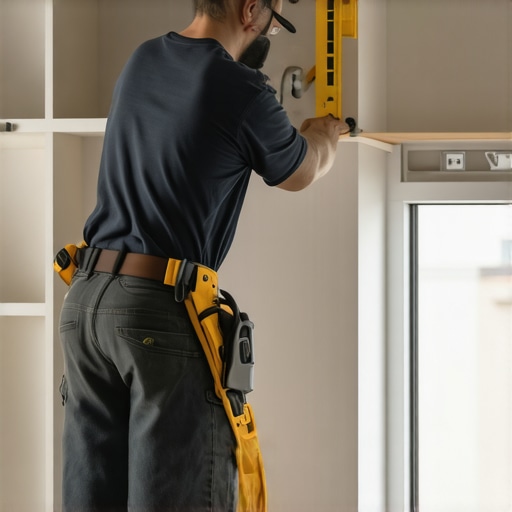
Use Leveling Tools to Achieve Perfect Alignment
Nothing ruins the look of a built-in faster than uneven shelves or misaligned doors. I always use a spirit level during installation. Once, I tried eyeballing the alignment, and the result was a crooked cabinet that I had to redo. After acquiring a good level, I placed it on each shelf and door frame, adjusting as needed until everything was perfectly straight. This small investment in a tool makes a significant difference in the final appearance. For more tips, see this space-maximizing storage ideas article.
Securely Fasten Built-ins to the Wall to Prevent Accidents
Safety is often overlooked but essential. When I installed my wall-mounted shelves, I realized the importance of anchoring everything properly. I used wall anchors suitable for my wall type and secured the units with screws into wall studs whenever possible. Not only does this prevent tipping, but it also prolongs the lifespan of your installation. Remember, a sturdy attachment is key to avoiding accidents, especially in households with children or pets. For detailed anchoring techniques, visit this installation tips guide.
Finish with Proper Sealing and Protective Coatings
To keep your built-ins looking fresh and lasting longer, apply a suitable sealant or protective finish. I once neglected this step on a bathroom cabinet, and moisture quickly caused warping. I learned to select water-resistant finishes for humid areas and to apply them evenly. Using a brush or roller, I coated all surfaces, paying special attention to edges and joints. This step is vital for durability and easy maintenance. For more on finishing touches, explore this storage transformation article.
Many homeowners believe that installing built-in furniture and storage solutions is straightforward, but there are nuanced pitfalls that can trip up even seasoned DIY enthusiasts. One prevalent myth is that all hardware is created equal. In reality, cheap hinges and supports can compromise the stability and longevity of your installations. Investing in high-quality, adjustable hardware ensures durability and a polished look, which many overlook until it’s too late. For expert advice on selecting the best components, check out this vanity storage tips article.
Why Do Most People Overlook Wall Anchoring and Safety?
Another common mistake is neglecting proper wall anchoring. It’s tempting to simply screw into drywall, but that often leads to unstable fixtures that can fall and cause injury or damage. Secure your built-ins to wall studs whenever possible, and use appropriate wall anchors for added safety. This oversight is usually due to a lack of awareness about the stresses these fixtures endure over time. According to a study by the National Association of Home Builders, improperly anchored built-ins are among the top causes of damage and safety hazards in home renovations. Always double-check your wall type and anchoring method to avoid this trap.
Many assume that measuring once is enough, but precision is key. Even small miscalculations in dimensions can lead to uneven shelves or misaligned doors, which ruin the appearance and functionality. Use a reliable spirit level and double-check your measurements at every step. This extra effort saves you time and money in the long run, as it prevents costly rework and adjustments. For detailed measurement techniques, see this step-by-step guide to vanity installation for beginners.
Are You Falling for the Myths About DIY versus Professional Installation?
Many believe that DIY installation is always cheaper and better, but this isn’t true when it comes to complex built-in systems. Rushing into DIY without understanding the nuances of proper support, alignment, and safety measures often results in subpar results that may require costly corrections later. Sometimes, hiring a professional with experience in built-in installation saves both time and resources, especially when dealing with intricate designs or humid environments like bathrooms. Remember, a professional’s expertise can mitigate common mistakes and ensure a seamless, durable finish. For guidance on when to call in the pros, review this storage solutions article.
Have you ever fallen into this trap? Let me know in the comments. Understanding these nuances can make your home improvement projects more successful and satisfying. For more expert tips and advanced insights, explore our comprehensive home renovation resources.
Keep It Running: Tools and Techniques for Long-Term Built-in Storage Maintenance
Investing in built-in storage solutions is only the first step; maintaining them ensures they stay functional and beautiful for years. I’ve found that the right tools and a proactive approach make a significant difference in preserving your installations. Let me share my favorite equipment, maintenance routines, and how to future-proof your built-ins against wear and tear.
Precision Tools for Ongoing Care
First and foremost, I rely on a high-quality **spirit level**—a must-have for checking alignment during routine adjustments or after cleaning. A good level, such as the **Stabila 378**, provides accuracy that cheap models can’t match, preventing even minor misalignments that can accumulate over time. Additionally, I keep a **precision screwdriver set** with magnetic tips to tighten hardware without damaging delicate components. For example, when hinges become a little loose after years of use, a quick tightening with a magnetic Phillips screwdriver restores stability effortlessly.
For measuring, I prefer a **laser distance meter** like the **Bosch GLM 50 C**. It allows me to quickly verify the dimensions of my installed units periodically, ensuring everything remains square and true, especially after settling or wall shifts. Keeping these tools handy ensures you catch issues early before they escalate into costly repairs.
Routine Cleaning and Inspection
Using soft microfiber cloths and gentle cleaning solutions, I regularly wipe down surfaces to prevent dust buildup and moisture damage. For hinges and hardware, I apply a small amount of **graphite lubricant** or **dry silicone spray**—both excellent for preventing squeaks and corrosion without attracting dust. These simple steps extend hardware life and keep your storage solutions functioning smoothly.
Long-Term Support Strategies
In the future, I predict that smart maintenance tools will become more integrated with home automation systems. Imagine having sensors that alert you when hinges need tightening or when moisture levels rise beyond safe thresholds. Currently, regular manual inspections combined with these smart gadgets are your best bet. For example, in humid environments like bathrooms, applying a **water-resistant finish** and using **dehumidifiers** can drastically prolong your built-in systems’ lifespan.
Remember, checking your hardware and seals at least twice a year is a good rule of thumb. This proactive approach prevents small issues from turning into major problems, saving you time and money.
How do I maintain my built-in storage solutions over time?
Start by establishing a routine inspection schedule. Use your precision tools to verify alignment and hardware stability, and clean surfaces gently to prevent dust and moisture buildup. Keep spare hardware and lubricants on hand, and consider upgrading to smart sensors when you’re ready for high-tech support. Implementing these simple yet effective practices ensures your built-ins remain reliable and attractive for years to come.
If you’re interested in advanced tips, check out this vanity installation hacks article for clever ways to enhance your maintenance routine. Take action today by trying a laser distance meter for periodic checks—you’ll thank yourself later for catching potential issues early. For personalized support, don’t hesitate to reach out.
Lessons from My Biggest Missteps in Installing Built-ins
- Rushing without measuring is a surefire way to end up with crooked shelves and wasted materials. I learned early on that patience and precision save time and money in the long run.
- Choosing cheap hardware might seem economical at first, but it often leads to wobbling doors and frequent repairs. Investing in quality hinges and supports is an upgrade worth making.
- Ignoring safety, especially wall anchoring, can turn a simple project into a hazard. Securing built-ins to wall studs isn’t just recommended — it’s essential for safety and durability.
- Skipping the finishing touches like sealing and protective coatings shortens the lifespan of your built-ins. Proper finishing protects against moisture, wear, and tear, especially in humid spaces.
- My biggest lightbulb moment was realizing that even small misalignments compound over time. Using a level at every step prevents this and gives a professional look.
Tools, Books, and Resources That Changed My Approach
- High-quality spirit levels like the Stabila 378 have become my go-to for precise leveling, ensuring everything is perfectly aligned.
- Laser distance meters such as the Bosch GLM 50 C help me verify dimensions quickly and accurately, avoiding costly mistakes.
- My favorite book, Vanity Installation Hacks, offers practical tips that I revisit often for seamless updates.
- Online tutorials and guides from trusted sources like step-by-step installation guides have been invaluable for troubleshooting and learning new techniques.
Your Next Step in Built-In Mastery Starts Today
Embarking on your built-in installation journey is exciting, and with the right knowledge and tools, you can achieve professional results. Remember, patience, precision, and safety are your best friends in this process. Keep learning, keep experimenting, and soon you’ll be turning your home into a perfectly organized and beautiful space. Ready to transform your home with confidence? Dive into our comprehensive installation guide and start your project today!
One Reply to “Top Installation Tips for Effective Built-ins & Storage Solutions Today”
Leave a Reply
Related Posts
![7 Custom Built-in Hacks for Awkward Living Room Nooks [2026]](https://customcabinetrypro.com/wp-content/uploads/2026/02/7-Custom-Built-in-Hacks-for-Awkward-Living-Room-Nooks-2026.jpeg)
7 Custom Built-in Hacks for Awkward Living Room Nooks [2026]
I remember the exact moment I realized my living room…
How to Scribe 2026 Built-ins to Uneven Living Room Walls
Ever since I attempted to install a set of custom…
Fixing Gaps: How to Scribe Custom Built-in Cabinets to Uneven Walls
I'll never forget the time I installed a beautiful set…
I really appreciate how detailed and practical this guide is. Having gone through a few DIY projects myself, I can definitely relate to the importance of measuring twice and using quality hardware. One thing I learned the hard way was how crucial securing built-ins to studs—trying to save a few screws by anchoring into drywall alone never ends well, especially with heavier shelves or cabinets. It’s interesting to see how even small tools like a good spirit level or laser distance meter can make such a difference in the final look and safety of the installation. I’ve also started experimenting with smart sensors that alert me when hinges need tightening or when moisture levels rise, especially in our humid basement storage. What are some other low-cost high-tech tools or gadgets that can help maintain or improve built-in storage over time? Would love to hear other ideas or personal tips from the community! Thanks for sharing such an insightful and encouraging post.