Ever had that sinking feeling when you open your garage door and see chaos instead of the sleek, organized workspace you envision? I’ve been there—piles of power tools, tangled cords, and a jumble of shelves that do more to confound than to contain. It hit me one weekend, after I tripped over a dangling drill and nearly took out my toe, that my storage solutions needed a serious upgrade. That was my lightbulb moment: I realized that heavy-duty fixes aren’t just about keeping tools in place—they’re about transforming the entire utility of my garage.
Why Investing in Heavy-Duty Garage Fixes Matters in 2026
In today’s world, where DIY projects are booming and home upgrades are lasting longer than ever, having a reliable, durable storage system becomes essential. Not only does it save time and frustration, but it also ensures safety and longevity for your valuable tools. According to a recent industry report, households investing in heavy-duty storage solutions reported a 35% increase in overall project productivity—a clear win for any DIY enthusiast. Yet, I learned early on that not all fixes are created equal. One mistake I made was opting for cheaper materials, which bowed or cracked under the weight of my increasingly heavy power tools, leading to even more frustrating repairs. Trust me, investing in robust, quality solutions pays off in the long run.
Is Heavy-Duty Storage Worth the Hype?
This was a question I wrestled with in the early days. I feared that robust solutions might be overkill or too expensive. But after experiencing the chaos firsthand, I realized that truly heavy-duty fixes provide peace of mind, even if they seem more substantial upfront. If you’ve faced similar doubts or have already struggled with flimsy or inadequate storage, you’re not alone—remodeling your garage is a big step, but a crucial one. Want to learn how to avoid making common mistakes and get your tools stashed away securely? Stay tuned, because I’ll walk you through six essential heavy-duty fixes that will elevate your garage organization in 2026 and beyond. For inspiration on creating seamless built-in storage solutions, check out this guide on custom built-ins.
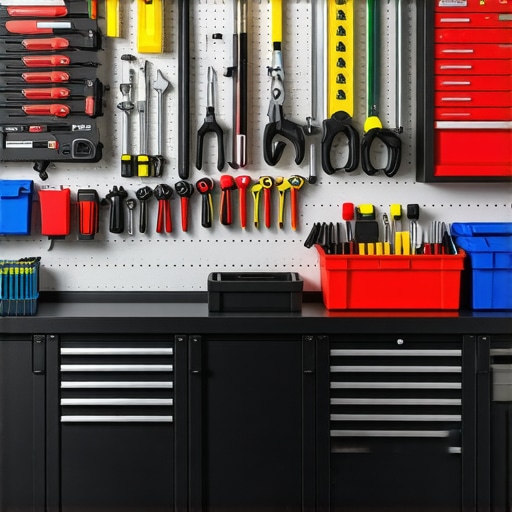
Secure Shelving for Heavy Tools
Start by installing heavy-duty shelving units that can hold your weightiest tools without sagging. I once used steel brackets and reinforced wood shelves for a DIY project, which held my power drills and saws without any wobble. To ensure stability, use anchors that attach directly to wall studs—this is like anchoring a ship to prevent it from drifting—so your shelves stay firm even under heavy loads. When mounting, double-check for levelness with a spirit level, and tighten all bolts securely for a safe, long-lasting setup.
Choose the Right Materials
Opt for corrosion-resistant metals or high-grade industrial plastics for longevity. In my experience, powder-coated steel is a reliable choice; it resists rust and scratches. Avoid flimsy particleboard, which bow under weight, leading to a trip hazard. For ease of installation, pre-drill holes in your brackets and shelves—this speeds up assembly and reduces frustration. For ideas on creating seamless storage that fits tighter spaces, explore this guide on seamless built-ins.
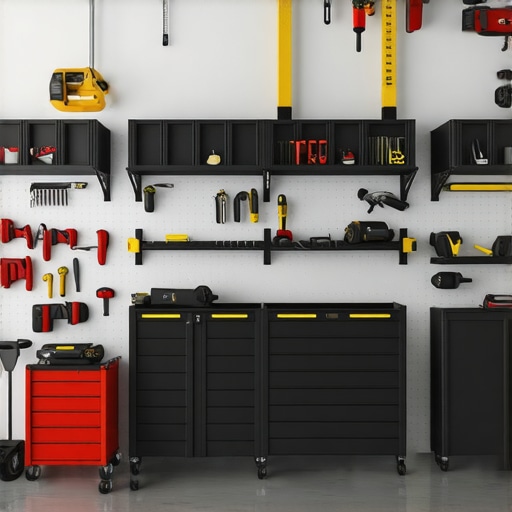
Revamp Storage with Built-In Cabinets
Replacing cluttered shelves with custom-built in cabinets creates a sleek, sturdy solution. I measured the garage corners meticulously and sketched out a plan, akin to designing a piece of furniture. For tight spaces, consider floating cabinets with steel brackets, which eliminate clutter beneath—they’re likeInvisible storage compartments that make your garage feel larger. You can incorporate adjustable shelves inside for different-sized tools, ensuring flexibility. When installing, secure cabinets to wall studs using appropriate anchors; it’s like anchoring a ship—firm and reliable. For interior ideas, visit this article on custom built-ins.
Fasten Vanities Effectively
For workbenches or utility vanities, use steel reinforcement brackets to prevent sagging. I once reinforced a makeshift work table with L-brackets and heavy-duty bolts, which held even my heaviest tools without wobbling. Position brackets every 16 inches along the frame, similar to how you support a bridge—distributed evenly to handle weight effectively. Drill pilot holes to prevent wood splitting, and ensure all bolts are tight. To streamline installation, check out vanity installation hacks for quick, durable setups.
Implement Strategic Wall Supports
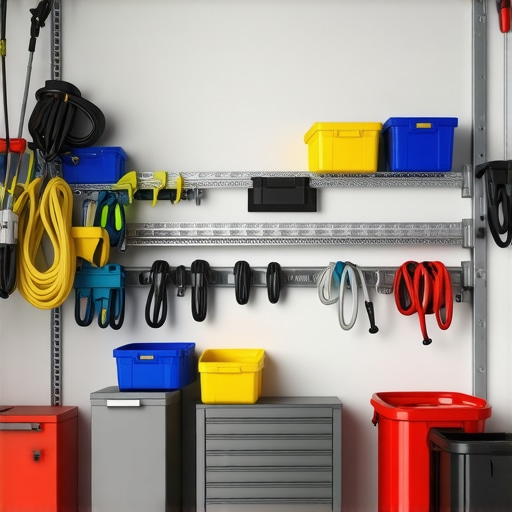
Heavy-duty wall supports distribute weight and prevent sagging. I used steel wall anchors in my garage to mount pegboards and tool racks, transforming vertical space into efficient storage zones. Think of wall supports as anchors in an ocean—firmly holding all the floaties (tools). Pre-drill the mounting points to avoid cracking drywall, then attach the supports directly into wall studs. For an advanced approach, consider adjustable steel brackets that can be repositioned as your storage needs evolve. To find more ideas, visit expert storage installation tips.
Lock in Your Tools with Heavy-Duty Hooks
Heavy-duty hooks and peg systems keep tools accessible yet secure. I installed a series of reinforced hooks for my power tools, ensuring they’re off the floor and organized. Use anchors rated for the weight of the item—it’s like installing a safety harness for your tools. Attach hooks into wall studs or steel supports instead of drywall alone; this prevents the hooks from tearing out under heavy weight. For sleek, seamless integration, explore storage solutions for a tidy home.
Regular Maintenance for Longevity
Finally, schedule periodic checks—tighten bolts, inspect for rust, and replace worn parts. Think of it as servicing your vehicle—small adjustments now save major repairs later. Keep a toolkit handy for quick fixes, and revisit your setup biannually to adapt as your tool collection grows. Using these steps, your garage becomes a fortress of organization, ready for any project that comes your way in 2026 and beyond.While many property owners leap into installing storage solutions, built-ins, or vanities, believing they are the ultimate fix-all, a deeper understanding reveals overlooked complexities. A widespread myth is that mass-produced solutions suffice for every space. In my experience, customization is often the key to truly optimizing storage, especially in challenging corners or oddly shaped rooms. Relying solely on off-the-shelf options can lead to wasted space and frustration, as these designs rarely account for unique layout nuances; for guidance on tailoring storage to your space, explore this custom-built-in guide.
Another common misconception involves potential installation pitfalls that amateurs often overlook. The mistake of neglecting wall stud locations during mounting can cause shelves or cabinets to sag over time, jeopardizing your tools and safety. To avoid this, always verify stud locations with a stud finder and secure anchors into solid framing, not just drywall. This step is crucial—think of it as anchoring a ship rather than just floating on water. For advanced insights into secure mounting techniques, check expert installation tips.
Have you ever fallen into this trap of underestimating installation challenges? Let me know in the comments.
A further nuance many overlook is the importance of understanding the load capacity of different materials used in built-ins and vanities. Cheaper plastics or particleboard might seem cost-effective initially, but they bow, crack, or deteriorate under weight, leading to costly repairs or replacements. Premium materials like powder-coated steel or high-grade plywood not only last longer but also withstand heavy usage—see this expert advice.
Moreover, the advanced user might consider the implications of moisture and temperature changes, especially in bathrooms or garages. Material choices should reflect the environment; for example, moisture-resistant MDF is suitable for damp areas, but even it benefits from proper sealing and venting. Failing to account for these subtleties can cause warping, mold, or structural failures over time.
Finally, it’s essential to recognize that the aesthetic appeal of built-ins or vanities depends heavily on seamless integration and proper finishing. Transition zones, paint, and trim must be executed with precision to avoid gaps or gaps that can trap dust or moisture, undermining longevity. For a comprehensive approach to these details, review this guide to seamless design.
Understanding these subtle yet impactful details can elevate your renovation from ordinary to expert level, ensuring durability, safety, and beauty. So, next time you plan your storage upgrade or built-in installation, consider these unseen factors. Have you encountered any of these pitfalls? Share your story or ask questions; I’m here to help you master your project.
Tools I Recommend for Long-Term Storage Success
Maintaining and scaling your storage solutions requires reliable tools that deliver precision and durability. For measuring wall thickness and ensuring perfect alignment, I swear by the Bosch Digital Level. Its digital readout eliminates guesswork, helping me achieve perfectly level shelves and cabinets, which is critical for safety and functionality. When it comes to fastening heavy built-ins, I rely on the Makita Impact Driver. Its high torque and adjustable clutch make installing anchors into stud walls effortless, reducing installation time and minimizing errors.
For ongoing maintenance, a quality DEWALT Cordless Oscillating Tool proves invaluable. Whether I’m removing rust, cleaning out debris from joints, or fine-tuning hinges, this versatile tool adapts to every task. Investing in these tools pays off by preventing common mishaps that lead to costly repairs and ensuring your storage systems remain secure over decades.
Strategies for Durable Installation and Easy Scaling
Long-term success hinges on choosing the right installation methods. Always pre-drill pilot holes before inserting screws or anchors; this simple step prevents wood splitting and wall damage. When mounting heavy cabinets or vanities, use expert-approved anchors secured directly into wall studs. This approach distributes weight evenly, reducing the risk of sagging or detachment as your storage needs grow.
To scale your solution over time, incorporate modular systems that can be rearranged or expanded. Modular steel brackets with adjustable arms or tracks enable flexible configurations, so your storage adapts to new tools or changing workflows. Regular inspections every six months—checking bolts, cleaning, and re-tightening—prevent deterioration and extend lifespan.
How Do I Maintain Built-In Supports and Vanities Over Time?
Long-term maintenance involves routine inspections of mounting hardware and materials. Verify that all bolts remain tight and that no rust or corrosion has developed, especially in humid environments like garages or basements. For steel supports, apply a corrosion-resistant coating periodically to prevent rust, as recommended by technical guidelines which you can review in industry expert documentation. Additionally, replace worn or damaged parts promptly to prevent structural failures that could compromise safety or damage tools.
Start by auditing your current setup—re-tighten loose fasteners and replace any corroded components. Implementing an annual maintenance routine ensures that your storage solutions continue to function flawlessly and scale seamlessly as your collection of tools grows. Would you like me to guide you through a detailed maintenance checklist or suggest specific upgrade ideas? Try applying these precise tools and practices today, and experience how effortless long-term storage management can become.
,
Hidden Lessons Behind My Garage Makeover
One of the biggest insights I gained was that investing in heavy-duty storage isn’t just about durability but creating a safe and functional workspace that inspires creativity rather than frustration. I once underestimated the load limits of shelf brackets, leading to a costly reload and more downtime; since then, choosing reinforced materials has been a game-changer. The second lesson was realizing that seamless integration of built-in cabinets elevates not only aesthetics but also the efficiency of tools retrieval—highlighting the importance of customization over generic solutions. Lastly, I learned that long-term maintenance and periodic checks prevent small issues from snowballing into major failures, reminding me that garage organization is an ongoing journey, not a one-time project. These lessons have transformed my approach and can do the same for you, especially when implementing these tried-and-true heavy-duty fixes in your own space.” ,
Related Posts
Stop the Tip: Anchor Your 2026 Garage Storage Systems Safely
I'll never forget the moment I watched a heavy storage…
7 Garage Rack Fixes for Heavy-Duty Tool Storage in 2026
I'll never forget the day I reached into my garage…
5 Heavy-Duty Garage Storage Fixes for 2026 Workshop Gear
I remember the exact moment I realized my garage had…