

I’ll never forget the sickening creak that echoed through my hallway at three in the morning. I had just finished my dream bathroom remodel, complete with a stunning, three-inch-thick quartz-top vanity that looked like it belonged in a boutique hotel. But as I stood there in my pajamas, I saw a hairline fracture blooming across the paint right above the backsplash. That gorgeous 200-pound slab was winning its battle against my drywall, and I was about twenty minutes away from a catastrophic floor-shattering disaster. Most DIYers—and even some pros I’ve worked with—grossly underestimate the sheer gravitational force of modern stone. We’re not just hanging a cabinet; we’re anchoring a boulder to a vertical surface.
Stop Trusting Standard Screws with Your Luxury Stone
When I first started out, I made the classic rookie mistake: I figured four or five high-quality wood screws into the studs would be plenty. I was wrong. Standard framing isn’t designed for the lateral pull of a massive vanity, especially when you support quartz counters on custom floating vanities. According to the Natural Stone Institute, a standard 1.25-inch thick quartz countertop weighs about 16 to 19 pounds per square foot, meaning a large double vanity can easily exert over 300 pounds of downward pressure before you even add the weight of the sinks and the cabinetry itself. If you don’t have a plan for that weight, you’re just waiting for a structural failure. To prevent this, you should follow an expert guide to flawless vanity installation tricks and tips.
Is my drywall actually going to crumble under the weight?
It’s a valid fear, and honestly, if you’re just using plastic toggles, the answer is a resounding yes. You need to look beyond the surface and think about vanity installation hacks that save time and money before the stone even arrives. I’ve seen beautiful homes where the vanity began pulling away from the wall because the installer ignored the physics of leverage. Today, I’m going to share the six heavy-duty fixes that saved my later projects and will keep your quartz exactly where it belongs. Have you ever noticed a tiny gap forming between your vanity and the wall? Tell me about it—I’ve been there, and we can fix it before the ‘big crack’ happens. To do this right, we have to talk about the hidden sub-frame move for supporting massive quartz-top vanities, which is the foundation of any pro-grade install.
Build a Frame That Fights Gravity
Think of your vanity as a cantilevered bridge; it isn’t just sitting against the wall, it is actively trying to rotate off it. Most store-bought cabinets rely on thin staples and a prayer. I learned this the hard way on a double-vanity install in a 1960s condo where the studs were spaced like an afterthought. To keep the cabinet from folding, I always implement the hidden sub-frame move for supporting massive quartz-top vanities. This means building a secondary internal ladder of 3/4-inch plywood that mimics a structural header. This transfers the crushing weight of the stone into the vertical studs rather than the cabinet’s decorative sides. If you rely on the cabinet’s own integrity to hold a 300-pound slab, you are going to see why your built-in face frames are separating from the wall sooner rather than later.
Ditch the Toggles for Structural Steel
For floating units, basic wood screws are simply inadequate for the lateral tension created by deep quartz counters. I’ve seen beautiful installs sag within a week because the installer used high-count deck screws instead of structural lags. On a recent project with an extra-deep counter, we had to use how to stop floating vanities from dipping with steel plates. These 1/4-inch steel reinforcements sandwich the cabinet back against the studs, acting like a giant washer that prevents the wood from compressing or the screws from pulling through. This is a vital step in any expert guide to flawless vanity installation tricks and tips. 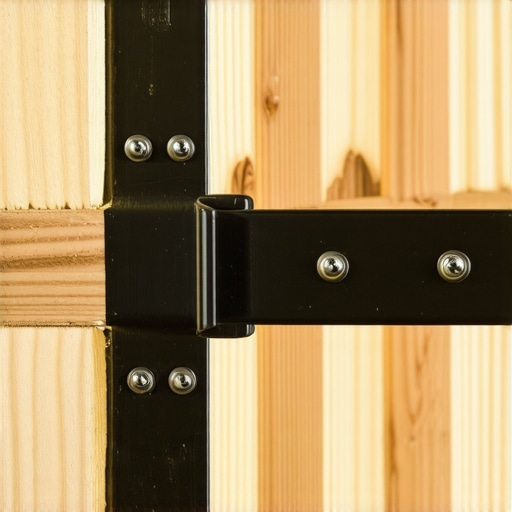
Scribe the Back for a Gap-Free Fit
Most walls have the straightness of a cooked noodle. When you push a perfectly square cabinet against a wavy wall, the gaps create pivot points that cause the vanity to rock. I used to ignore minor gaps until a client called me back because their countertop had cracked right at the sink cutout due to the cabinet shifting. Now, I never skip the scribing move for flawless cabinet gaps on natural stone-3. By trimming the cabinet to match the wall’s specific curve, you ensure 100% surface contact, which eliminates the leverage that allows heavy quartz to pull the vanity down.
Stop the Lean Before It Starts
Even the strongest wall mount won’t save you if the vanity is leaning forward from the start. If your vanity has legs, you have to know how to fix wobbly vanity legs on uneven tile. Use composite shims—never wood, which swells and rots in the moisture—to level the base before the stone is set. If the unit isn’t perfectly plumb, gravity will work against your anchors every second of every day. These are the kinds of vanity installation hacks that save time and money by preventing a total structural failure a year down the road.
I see it all the time in high-end remodels: a client insists on the deepest cabinets possible because they want more storage. But here is the contrarian truth that most designers won’t tell you: more depth often creates less usable space. When you have a 24-inch deep vanity without proper internals, the back 10 inches become a graveyard for half-used lotion bottles and expired prescriptions. Instead of chasing raw volume, you should be looking for innovative storage solutions to transform your bathroom that focus on accessibility. I’ve lost count of how many times I’ve had to retrofit pull-outs because a homeowner realized they couldn’t reach anything without getting on their hands and knees. If you are designing for depth, you absolutely must implement 6 hidden pull-out fixes for deeper custom kitchen cabinets to keep your sanity intact.
The Pretty but Weak Material Trap
One of the most dangerous myths in the DIY world is that ‘all wood is created equal.’ I once visited a site where a DIYer used beautiful solid oak for a built-in, but the unit was failing. Why? Because solid wood expands and contracts with humidity, while the wall stays still. This tension is a primary reason why your built-in cabinets are pulling away from the ceiling. For structural internals, I actually prefer high-grade Baltic birch plywood over solid timber. It is dimensionally stable and holds fasteners better when you are dealing with the extreme weights of natural stone. If you don’t account for this material movement, you’re building a ticking clock, not a cabinet. This is a nuance often skipped in a step-by-step guide to vanity installation for beginners, but it’s the difference between a five-year and a fifty-year lifespan.
Why do my custom built-in shelves always seem to sag after a few months?
It’s usually a failure to respect the ‘Load Span’ rule. According to the Architectural Woodwork Institute (AWI), even a 3/4-inch shelf has a limit before gravity takes its toll, especially when loaded with heavy art books or stone accessories. Most people try to fix a sag by adding more screws to the wall, but the shelf is actually failing in the middle. To fix this properly, you need to look at 4 internal steel stiffeners that stop massive bookcase shelves. By embedding a steel channel into the underside of the wood, you can achieve spans that look impossible without a single unsightly middle bracket. 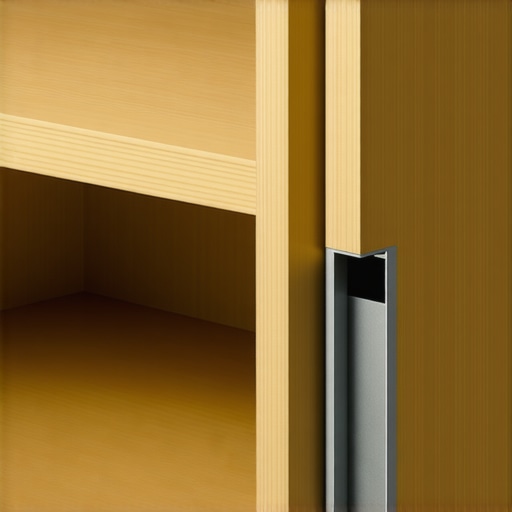
Don’t Ignore the Plumbing Access ‘Oops’ Factor
In the rush to maximize every square inch, many people build complex creative storage solutions for vanities to declutter in style that completely block access to the P-trap or shut-off valves. I once had to cut through a $4,000 custom walnut cabinet base because the homeowner hadn’t left a removable panel for the plumber. Always ensure your internal shelving is notched or removable. This is one of those vanity installation hacks that save time and money during the inevitable day when a pipe leaks. Have you ever fallen into the trap of over-building and blocking your own utility access? Let me know in the comments—I’ve seen some creative workarounds that would make a plumber cry. To keep everything tidy without sacrificing function, consider effortless storage solutions for a tidy, stylish home that prioritize maintenance access as much as aesthetics.
If you are still trying to set a 300-pound vanity using a four-foot bubble level and a prayer, you are making the job ten times harder than it needs to be. For any high-end stone installation, I swear by a 360-degree green beam laser level. It doesn’t just show you ‘level’ at one point; it projects a constant datum line across all three walls of an alcove, which is absolutely essential for the leveling move for vanities on slanted bathroom floors-2. When you are trying to align a massive quartz top, having that visual reference ensures you aren’t fighting the pitch of the subfloor while the adhesive sets. 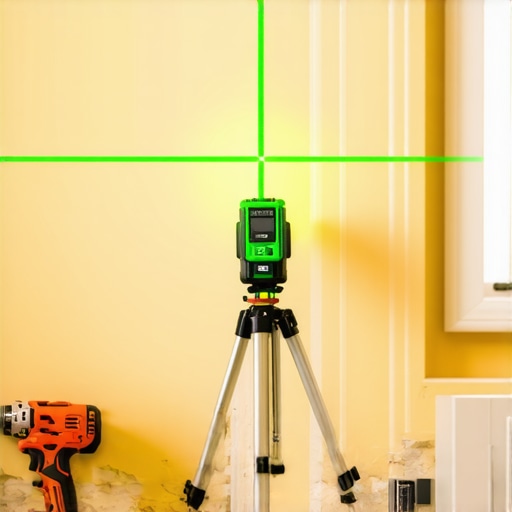
Stop Using Standard Screws for Your Cabinet Hinges
One of the most common long-term failures I see is the ‘door drop.’ Over time, the weight of thick slab doors or the vibration from heavy drawer use can cause hinges to sag or pull away. This is usually when homeowners start noticing how to fix uneven gaps in custom built-in doors. To prevent this, I never use the tiny screws that come in the bag with the hinges. According to technical documentation from Blum regarding their CLIP top BLUMOTION series, high-load hinges perform best when the mounting plate is secured with 5mm Euro-screws. These have a much wider, flatter thread that bites deeper into the cabinet carcass, preventing the hinge from tearing out under the weight of luxury finishes. It is a small change that adds decades to the life of the build.
How do I maintain my heavy-duty vanity over time?
Maintenance is not just about wiping the quartz with a damp cloth; it is about monitoring the structural ‘pull.’ Every six months, I recommend a quick inspection of the silicone seal at the backsplash. If you see a hairline gap appearing, it is a sign of structural settling or why your built-in face frames are separating from the wall. You should also check the tension on your drawer slides. If the soft-close mechanism starts to feel sluggish, you need to address why your soft-close drawers are slamming and the tension fix before the constant vibration weakens the epoxy bond between the stone and the cabinet frame.
The Future of Smart Bathroom Storage
Looking ahead, the trend for 2025 is moving away from static boxes toward modular, tech-integrated units. We are already seeing a rise in integrated wireless charging surfaces and internal LED lighting built directly into the sub-frame. This adds another layer of complexity to how we enhance your home with sleek built-in vanities design tips for 2025, as cable management must now be hidden within those structural reinforcements. If you want a result that looks as good in ten years as it does on day one, stop cutting corners on the hardware. Go grab a 360-degree laser level and switch to Euro-screws for your next project; it is the single best investment you can make for a professional finish. These are the vanity installation hacks that save time and money in the long run by eliminating the need for expensive repairs.
The Hard Truth About Quartz and Gravity
Over the years, I have learned that the weight of stone doesn’t just sit there—it actively looks for the weakest point in your construction. My biggest lightbulb moment happened when I realized that silicone is a structural component, not just a gap filler. Using a high-quality 100% silicone between the cabinet and the quartz allows for the minute flex that happens when a house settles, preventing those dreaded hairline cracks. Another hard-earned lesson: always check the floor’s structural integrity before you even start choosing the perfect vanity style for your bedroom or bath. If the subfloor has even a quarter-inch of ‘give,’ no amount of wall blocking will keep a 400-pound unit from eventually pulling the drywall tape. Finally, never trust a ‘pre-leveled’ cabinet; always verify with your own tools because shipping and humidity change everything.
The Tools I Never Start a Bathroom Without
If you want to move beyond basic DIY and into professional-grade results, you need the right gear. First, get a 360-degree green beam laser level. Unlike a red beam, it’s visible even in bright rooms and allows you to set your datum line once for the entire project. Second, I swear by GRK structural screws rather than standard gold screws; they have a built-in washer head that won’t pull through the plywood when you’re using vanity installation hacks that save time and money. Lastly, keep a copy of the Natural Stone Institute’s dimension stone design manual on your tablet. It is the ‘bible’ for weight limits and overhang requirements that keeps your counters from snapping under their own weight.
Time to Build Your Masterpiece
Installing a massive vanity is a feat of engineering as much as it is an aesthetic choice. By focusing on the hidden sub-frame and using the right fasteners, you aren’t just making a room look better—you’re ensuring it stays safe and functional for decades. As you look toward top trends in vanity designs you need to know in 2025, remember that the most beautiful cabinet is the one that stays level. If you find yourself stuck on a tricky layout, don’t hesitate to reach out to us at contact us for expert advice on your specific build. Whether you are dealing with tight quarters and need smart storage solutions to optimize small bathroom spaces or setting a massive double-bowl unit, the principles remain the same: over-build the support, verify your levels, and never compromise on the hardware. #IMAGE_PLACEHOLDER_E#
Have you ever noticed your vanity pulling slightly away from the wall after the first year? Let me know in the comments below, and let’s troubleshoot it together!