

I’ll never forget the sound of three hundred pounds of camping gear and power tools hitting the concrete at 2 AM. It was 2018, and I had just finished what I thought was a weekend masterpiece of organization. I’d used those cheap little ribs of plastic we all have in our junk drawers, convinced that if I used enough of them, they’d hold. Spoiler alert: they didn’t. I woke up to a ‘Swiss cheese’ drywall disaster and a very expensive mountain of broken plastic bins. That failure taught me the hard way that the 16-inch intervals between your wall studs are never where you actually need them to be when you’re trying to create effortless storage solutions for a tidy stylish home. If you are tired of measuring, marking, and eventually swearing because your stud finder is lying to you, I’ve got your back. We are going to walk through how to bypass those elusive wooden beams entirely without compromising the safety of your overhead gear.
Give Up on Finding Studs and Try These Strategies Instead
I used to think that if I couldn’t hit a stud, I couldn’t hang anything heavier than a picture frame. I was wrong, but my mistake was thinking a standard anchor was the solution. You see, the real secret isn’t just about the screw; it’s about how you distribute the load across the surface of the wall. When I was first starting out, I ignored why plastic wall anchors fail for heavy shelving, and I paid the price in home repair bills. Today, we are focusing on tactics that rely on mechanical advantages—things like toggle wings, specialized mounting plates, and horizontal cleats. These methods allow you to reclaim every square inch of your garage wall, regardless of what’s happening behind the drywall. If you have been struggling with a ceiling-mounted system specifically, you might want to look into the structural fix for sagging garage ceiling racks to ensure your overhead bins stay where they belong. We are going to solve the ‘dead zone’ problem once and for all so you can finally get those heavy bins off the floor.
Is it really safe to trust drywall with your heavy gear?
It is the number one question I get from neighbors when they see me bolting massive racks into ‘thin air.’ The skepticism is healthy! According to the Gypsum Association’s GA-216 specifications, while a standard 1/2-inch drywall panel is surprisingly resilient in shear strength, its ability to resist ‘pull-out’ forces is where most DIYers fail. The key is using fasteners that ‘grip’ the back of the board or, better yet, using a secondary substrate like a plywood ledger. I once tried to hang a full set of winter tires using only standard screws and hope—it didn’t end well. Have you ever spent an hour drilling ‘pilot holes’ only to realize you’re hitting nothing but air and insulation? Drop a comment or reach out; I need to know I’m not the only one who has turned their garage into a giant piece of Swiss cheese before finding the right way. If you happen to be working with a concrete wall instead of drywall, you should definitely check out the concrete wedge anchor move for a completely different kind of rock-solid hold. Let’s dive into the specific hardware that actually makes these ‘floating’ mounts possible.
Why Toggle Bolts Outperform Standard Plastic Anchors
When you are dealing with a wall that has more ‘dead space’ than actual wood, the standard plastic expansion plug is your worst enemy. It relies on friction against the thin edges of the drywall, which eventually crumbles under the weight of a heavy cabinet or tool rack. Instead, you need a mechanical grip. A heavy-duty toggle bolt works by pushing a spring-loaded wing through a pre-drilled hole; once inside the wall cavity, those wings snap open, distributing the weight across a 2-inch or 4-inch span of the drywall’s backside. This is the exact same logic used when you see why your heavy mirror cabinet is tilting and the toggle bolt fix in action. The larger the surface area you engage on the back of the board, the less likely you are to see that sickening ‘punch-through’ failure that ruins your afternoon and your drywall.
Spread the Weight with a Plywood Ledger Plate
Sometimes, even the best toggle bolt isn’t enough if you’re hanging something with a narrow mounting point, like a tall pantry or a heavy vanity. In these cases, the pro move is to create your own substrate. I remember a specific job where I had to mount a massive vanity over a section of wall where the previous owner had inexplicably cut out the studs for a recessed cabinet that was never installed. I was essentially staring at a four-foot gap of empty air. My solution was to mount a 3/4-inch thick plywood ledger directly to the drywall using a ‘grid’ of six toggle bolts. This created a rock-solid platform that I could then screw my effortless storage solutions for a tidy stylish home into at any point. By using the hidden plywood cleat for mounting heavy tool walls, you effectively turn the entire wall into one giant stud.
Stop the Sag with Horizontal Steel Bracing
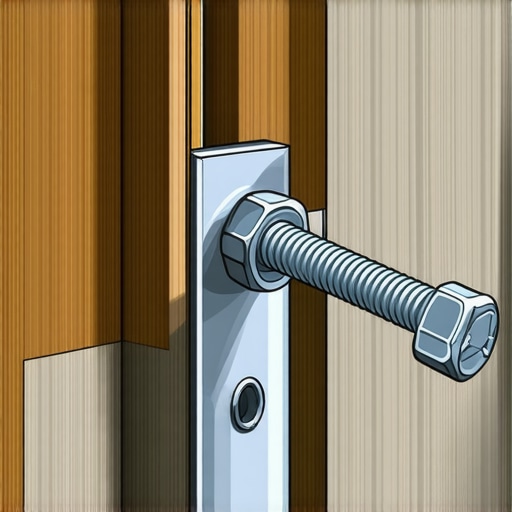
For those of us with garages that resemble more of a workshop than a parking space, tools represent a massive, concentrated load. If you are mounting a French cleat system or a series of heavy tool bins, you cannot rely on vertical points alone. Horizontal steel channels are the answer. These rails act as a bridge, tying together several toggle anchors across the horizontal plane. This prevents the top of the shelf or rack from pulling away from the wall—a common failure point in DIY builds. If you’ve ever noticed your rack leaning forward, you need to stop garage tool walls from sagging with horizontal steel bracing immediately. It’s the difference between a system that lasts a decade and one that pulls a chunk of your house down in six months. I once ignored this and tried to hang a rack of heavy sledgehammers; the resulting hole in the wall was big enough to crawl through. Don’t make that mistake; use the rail to bridge the gaps.
The Toggle Bolt Logic for Modern Bathroom Vanities
This technique isn’t just for the garage. In modern homes, especially with the trend toward floating vanities, you often find yourself without a stud exactly where you need it for the mounting rail. Using the toggle bolt method for anchoring heavy mirrored bathroom cabinets is a life-saver here. You can use high-strength 1/4-inch toggles to secure the vanity’s internal support rail directly to the drywall, provided you use enough of them to distribute the shear force. Never rely on a single anchor; always space them every 4 to 6 inches to ensure the load is shared. This ensures that even if someone leans heavily on the edge of the sink, the vanity stays level and the plumbing remains undisturbed.
More Screws Aren’t Always the Answer
Most DIYers think that if a shelf is heavy, the solution is just to throw more hardware at it. But here is a contrarian take: over-fastening is a real thing. I’ve seen homeowners turn a perfectly good piece of drywall into a perforated sheet of paper. If you drill too many holes in a tight horizontal line, you’ve essentially created a ‘tear here’ strip. Instead of adding a fifth or sixth anchor in a cluster, you should be looking at vertical distribution or using a ledger board. When you are looking for effortless storage solutions for a tidy stylish home, remember that structural integrity depends on the quality of the connection, not the quantity of holes you drill.
Don’t Crush the Drywall Paper
The most common ‘oops’ factor I see isn’t the choice of anchor—it’s the installation torque. If you drive that screw until the anchor flange crushes the drywall’s paper face, you’ve already failed. Drywall gets its strength from the tension between the gypsum core and the paper skin. Once you break that skin, the core just crumbles like a dry biscuit. This is a huge reason why most floor-to-ceiling cabinets gap at the top over time; the anchors are slowly crushing the substrate. Always stop your drill the moment the flange is flush with the wall. If it’s sunken in, you’re better off moving the hole two inches to the left and starting over.
Why does your heavy cabinetry gap at the top even when it is perfectly level?
This is the advanced level of the ‘floating’ game. Often, it is not the anchor’s fault—it is the wall’s movement. In technical guidelines often cited by the Architectural Woodwork Institute (AWI), they highlight how environmental changes cause seasonal ‘drywall hump’ and structural settling. When you mount a heavy built-in, you aren’t just fighting gravity; you’re fighting the home’s breathing. If you are mounting against an exterior wall, you must follow the moisture barrier rule for cabinets on cold outer walls. Condensation behind a cabinet can soften the drywall over a single winter, turning your ‘rock-solid’ toggle bolts into loose teeth. Have you ever fallen into this trap? Let me know in the comments.
Build a Sub-Frame for Massive Stone Tops
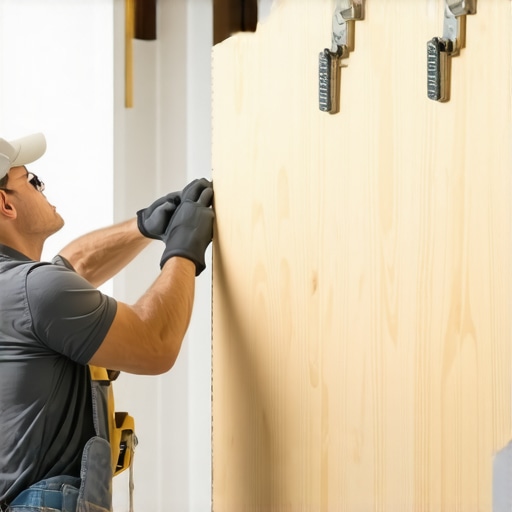
If you are moving beyond simple shelves and tackling a floating vanity with a quartz or marble top, toggle bolts alone are a gamble. You need to distribute that weight across the largest possible area. I always recommend the hidden sub-frame move for supporting massive quartz top vanities. By building an internal wooden or steel skeleton that anchors at multiple points, you’re no longer asking a small patch of drywall to do the heavy lifting. This is the difference between a vanity that stays put and one that ends up on your toes. For those aiming for a professional finish, our expert guide to flawless vanity installation tricks tips covers the final alignment steps that prevent that dreaded ‘dipping’ look common in amateur builds.
I’ve spent years tinkering with these setups, and the one thing I’ve learned is that ‘set it and forget it’ is a myth. Every house breathes. If you live in a climate with four seasons, your walls are expanding and contracting more than you think. I make it a habit to do a ‘torque check’ every six months. I grab my impact driver—specifically my Milwaukee M12 with a bit of finesse—and gently check the tension on my toggle bolts. Don’t go ham on them; just ensure they haven’t rattled loose from the vibration of heavy garage doors or floor traffic. This is especially vital for high-traffic areas where you used vanity installation hacks that save time and money to get things off the ground quickly.
Stop the creeping sag before it starts
If you’re serious about this, stop using a bubble level for your layout. It’s 2024; get a self-leveling cross-line laser. I use the Bosch GLL series because it allows me to project a perfectly level line across an entire 20-foot garage wall simultaneously. Without it, you’re just guessing, and when you’re building creative built-ins for seamless storage and home aesthetics, a 1/8-inch error at one end becomes a massive, ugly gap at the other. If you’re tackling something complex like the recessed mounting hack for bathroom medicine cabinets, that laser is the difference between a professional finish and a DIY disaster that you’ll have to stare at every morning.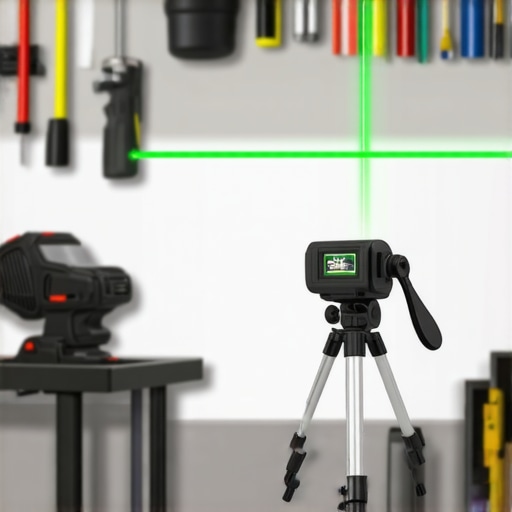
Invest in a cross-line laser or prepare for a headache
Looking ahead, I see the industry moving toward ‘active’ support systems—modular frames that allow for quick adjustments without re-drilling the drywall. We are already seeing this with high-end European cabinetry. But for now, we rely on solid physics. According to the Wood Handbook (General Technical Report FPL–GTR–282) from the USDA Forest Service, the equilibrium moisture content of wood in most homes fluctuates between 6% and 11% annually. That change is enough to loosen a screw that isn’t perfectly seated in its substrate. So, if you’ve noticed why cabinet doors sag and the three-hinge solution is starting to look like your next weekend project, don’t ignore it. That sag is often a symptom of the wall ‘breathing’ your hardware loose over time.
How do I maintain these heavy built-ins over the long haul?
Maintenance is all about the hinges and the base. For bathroom setups, I always check for ‘wicking.’ Even if you used smart storage solutions to optimize small bathroom spaces, a tiny plumbing leak can ruin the integrity of your mounting points. If you feel any ‘give’ when you lean on your vanity, it’s time to pull the drawers and check the anchors for signs of drywall crumbling. I highly recommend trying the ‘shim and snug’ method: if a gap appears at the wall, don’t just tighten the screw; insert a thin composite shim to fill the void first. This prevents you from crushing the drywall core further while restoring that rock-solid feel. Go ahead and grab a set of composite shims today—they are the cheapest insurance policy you can buy for your floating furniture and help you achieve expert guide to flawless vanity installation tricks tips without hiring a contractor.
Lessons I Paid for in Drywall Dust
After a decade of hanging everything from massive built-ins to floating vanities, I’ve realized that the most common mistakes aren’t about strength, but about foresight. First, never assume a wall is flat; always check for bows before you tighten a toggle. Second, the moment you feel a drill bit ‘wander,’ stop—you’re likely hitting a metal plate designed to protect a wire. Third, don’t overlook the moisture barrier rule for cabinets on cold outer walls, because a damp wall turns drywall into mush, regardless of your hardware. Finally, always over-spec your anchors. If the cabinet weighs fifty pounds, build the support for a hundred. You never know when someone will use a floating shelf as a handhold.
Gear That Actually Makes the Difference
I don’t leave for a job site without a few specific items that transform a stressful installation into a smooth process. I swear by Toggler Snaptoggles; they are significantly more reliable than the old-school spring wings. For ensuring effortless storage solutions for a tidy stylish home actually look professional, I rely on a self-leveling laser rather than a hand level. I also keep a stash of composite shims to prevent the crushing issue I mentioned earlier. If you are just starting out, my expert guide to flawless vanity installation tricks tips lists the exact drill bits that prevent the drywall from shattering on the backside.
Your Wall Can Handle More Than You Think
It is easy to get paralyzed by the fear of a sagging cabinet or a collapsing rack, but once you understand the mechanics of weight distribution, the ‘missing stud’ is no longer a dealbreaker. By using ledgers, steel channels, and high-performance toggles, you can achieve effortless storage solutions for a tidy stylish home even in the trickiest spaces. Don’t let a lack of wooden beams stop you from reclaiming your space and getting organized. Whether you are using vanity installation hacks that save time and money or building a custom tool wall, the physics remains the same. Go ahead, clear that floor space and start building.
Have you ever had a heavy shelf or cabinet come crashing down because of a failed anchor? Let me know your biggest DIY disaster in the comments below—I promise not to judge!