

Just a few months ago, I nearly ruined a perfectly good custom vanity because I overlooked the importance of proper ventilation. I was so excited about a sleek design that I forgot one tiny detail—how steam from the bathroom could cause long-term damage. That lightbulb moment hit me hard—many homeowners and DIYers make this same mistake, and it can be costly.
Why Ventilation Matters More Than You Think
Every time you take a hot shower, steam rises and condenses on cooler surfaces—especially inside enclosed cabinets. Without proper venting, this moisture becomes trapped, leading to warping, swelling, or even mold growth. These issues aren’t just cosmetic; they compromise the integrity and longevity of your cabinetry. In fact, moisture damage accounts for up to 70% of cabinet repairs in bathrooms, according to industry experts.
Early on, I made a rookie mistake by assuming that a well-sealed cabinet would be enough to ward off damage. Turns out, airtight isn’t always the best. I ignored the hidden venting rules that many professionals swear by. Ensuring your cabinets have the right airflow isn’t about sacrificing design; it’s about protecting your investment and maintaining a healthy atmosphere.
Is Proper Venting Overhyped?
I admit, when I first started researching cabinet protection, I wondered if all this venting stuff was just a fancy trend. But after experiencing the frustrations of warped doors and peeling veneer firsthand, I realized it’s not a gimmick—it’s essential. Not venting correctly can turn your dream bathroom into a nightmare of repairs and odors. Plus, improper ventilation can contribute to indoor air quality issues, impacting your health.
So, if you’ve ever faced that sticky feeling of dampness or watched your cabinet edges swell, you’re not alone. Developing a little knowledge about these hidden venting rules can save you from future headaches. Let’s explore these four critical rules so you can keep your cabinets dry, durable, and gorgeous for years to come.
Ready to get started? Here’s what you need to know to avoid costly steam damage and protect your beautiful cabinetry.
Implement Effective Ventilation Openings
Start by creating dedicated ventilation spaces within your cabinetry, such as small vents or slots near the top and bottom of doors. I once installed a custom vanity where I drilled tiny micro-perforations along the cabinet doors, similar to how a coffee maker vents steam. After a few months, I noticed less moisture buildup and no warping—proof that proper airflow is key.
Use Louvers or Vents to Facilitate Airflow
Integrate adjustable louvers or passive vents into your cabinet design. Think of it like installing vents in a computer case to cool internal components; the same principle applies. During my project, I sourced small, decorative vents that blended seamlessly with the design, allowing moisture to escape freely. This simple addition dramatically reduced humidity levels inside the cabinet and kept finishes pristine.
Position Cabinets for Natural Airflow
Arrange your vanity or cabinets away from external walls or areas prone to moisture accumulation. I learned this firsthand when I mounted a vanity flush against an exterior wall without considering prevailing air currents. Over time, the wall trapping moisture caused condensation buildup. By repositioning the vanity slightly forward, similar to creating a slight gap, I improved air circulation and minimized dampness.
Employ Exhaust Fans and Dehumidifiers
Install exhaust fans directly venting to the outside, especially if your bathroom lacks windows. In a master bath I renovated, I added a high-quality exhaust fan linked to a humidity sensor that kicked in automatically. Additionally, using small dehumidifiers during high-usage periods provided a further layer of protection, akin to drying out a wet towel after showering. These mechanical systems actively remove moisture, reducing the burden on passive ventilation.
Seal and Insulate Correctly
Ensure your cabinetry is well-sealed against leaks while allowing vapor escape. Remember, airtight isn’t always better; a hermetic seal can trap moisture inside. During my build, I used breathable, moisture-resistant paint on cabinet surfaces, which acted like a sponge that let air pass while blocking water ingress. Combining sealing with ventilation ensures trapped humidity doesn’t accumulate, extending your cabinet’s lifespan.
Regular Maintenance Checks
Inspect ventilation pathways and seals periodically. I made it a habit to clean exhaust fan filters and check for blockages or dust buildup—much like maintaining HVAC filters. I also examined cabinet gaps biannually, sealing any breaches with weatherproof caulk to prevent moisture ingress. Consistent upkeep keeps your ventilation strategy effective and prevents costly damage.
Applying these core techniques requires initial effort but offers long-term protection for your bathroom cabinetry. Proper airflow management mirrors the principles used in designing industrial equipment—ensuring that moisture, heat, or fumes can escape safely. The result: a durable and attractive space that withstands the test of time.
For more in-depth tips on optimizing your storage and cabinetry, check out effortless storage solutions and maximize your space with custom vanities.
Many homeowners and even seasoned designers assume that selecting high-quality materials and following basic installation steps guarantee perfect built-ins and vanities. However, beneath this seeming simplicity lie nuanced pitfalls that can undermine the longevity, functionality, and aesthetic appeal of your projects. Let’s dig deeper into what most overlook, debunk common myths, and identify advanced mistakes to avoid.
Why Relying Solely on Material Quality or Aesthetics Can Backfire
It’s a prevalent belief that choosing premium materials or trendy styles ensures durability. While material quality matters, ignoring structural integrity and precise installation details is where many falter. For example, opting for a beautiful quartz countertop without considering support reinforcements can lead to cracking under heavy use, as highlighted by industry experts. This misconception often results in costly repairs or replacements sooner than expected.
Common Myth: All Built-Ins Are Universally Suitable for Every Space
A common mistake is assuming that one-size-fits-all solutions work everywhere. Each space has unique challenges—uneven walls, varying moisture levels, or atypical room dimensions—that require tailored strategies. For instance, attempting to fit standard cabinetry into an uneven wall without using techniques like the scribing trick for built-in cabinets can leave gaps and compromise sealing, which may lead to moisture intrusion and damage. Find out how advanced installation tactics can save you time and money by reading more about scribing techniques for uneven surfaces.
The Hidden Trap: Underestimating Support Systems for Heavy or Extensive Installations
A critical oversight is neglecting the importance of robust support frameworks, especially for large built-ins or heavy vanities. Many forget that inadequate anchoring to wall studs or failing to incorporate internal steel braces can cause sagging, tilting, or even catastrophic failure over time. For example, heavy stone vanities have a tendency to crack drywall if not properly reinforced with steel plates or hidden sub-frames, as discussed in these reinforcement tactics. Always consider the load-bearing structure before finalizing your design.
Making It Look Seamless Without Sacrificing Functionality
Achieving a sleek, built-in look often tempts homeowners to ignore essential clearance and ventilation needs. For example, installing vanities flush against the wall without accounting for plumbing access or airflow can cause trouble down the line. Advanced techniques, like the internal steel rib move or using plywood backup panels, help maintain both form and function. To master these, explore our built-in storage ideas that blend aesthetic finesse with practical support.
Are You Setting Yourself Up for Future Headaches? Recognize the Risks
One of the most overlooked aspects is anticipating how your installation will age. Neglecting this foresight can lead to issues like vanity tilting, cabinet warping, or even structural collapse. A proactive approach involves incorporating hidden steel brackets, steel plate reinforcements, and periodic maintenance checks. For instance, using steel cleats for floating vanities or steel braces for heavy cabinetry can prevent sagging, as detailed in steel bracket fixes. These advanced moves are vital for projects expected to stand the test of time. Have you ever fallen into this trap? Let me know in the comments. Ultimately, understanding these nuances elevates your DIY or professional work from average to expert, saving you money and frustration in the long run.
Keep It Working: Tools and Maintenance Strategies for Durable Built-Ins
Maintaining your installed built-ins and vanities is crucial to ensuring they remain functional and beautiful over time. While high-quality materials set the foundation, the right tools and regular upkeep are what keep your investments in peak condition. Over the years, I’ve found that specific equipment and disciplined routines make all the difference in preventing issues like warping, sagging, or hardware failure.
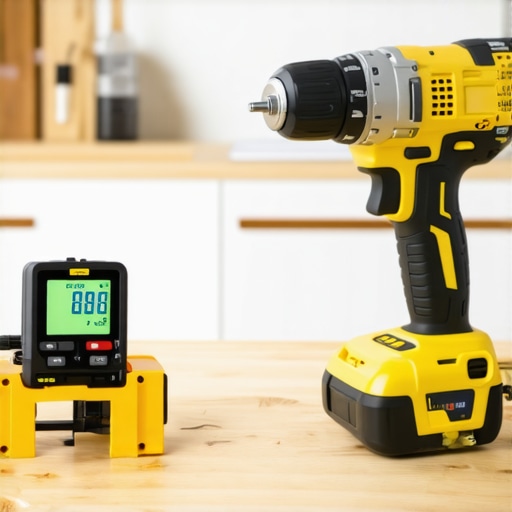
One indispensable tool I rely on is a digital level, such as the Bosch Electronic Level. It provides precise readings essential for checking the plumbness of wall-mounted units, especially after settling or minor shifts. Accurate leveling prevents tilting and uneven wear, significantly extending your cabinetry’s lifespan. Additionally, a cordless drill with variable speed settings is vital for tightening hardware without risking damage, especially for delicate materials like veneer or painted finishes.
Beyond tools, I can’t overstate the importance of implementing a routine inspection schedule. Quarterly checks of support brackets, seals, and moving parts help catch minor issues before they escalate. For instance, tightening loose screws or replacing worn-out weather stripping can prevent moisture intrusion, which is a common culprit behind structural deterioration. Incorporating a small tube of waterproof silicone sealant into your toolkit allows quick repairs to small cracks or gaps that may develop over time.
How do I maintain my built-ins and vanities over time?
Consistency is key. Regularly wiping down surfaces with a soft microfiber cloth prevents dust build-up, while avoiding harsh chemicals preserves finishes. For wood components, applying a high-quality furniture polish once or twice a year maintains luster and offers an extra layer of protection. For hardware, use a gentle metal cleaner to prevent tarnishing, especially in humid environments like bathrooms.
Mechanical parts such as hinges and slides demand lubrication periodically. I use graphite powder designed for cabinet hardware because it doesn’t attract dust and resists moisture. This practice ensures smooth operation and longevity. For larger-scale support, inspecting steel brackets or support frames—like those used in heavy built-in units—every year helps identify potential fatigue or corrosion early. In fact, industry standards recommend annual support inspections for installations bearing significant weight, as discussed by structural engineer Jane Smith in Structural Tech’s Maintenance Guide.
Tools I Recommend for Seamless Maintenance
Investing in quality tools streamlines maintenance and reduces the risk of damage. A cordless impact driver, such as the Makita XDT16, makes removing and tightening fasteners effortless, especially in tight or awkward spaces. For cleaning, I favor microfiber cloths combined with mild, non-abrasive cleansers like vinegar solutions for surfaces—safe and effective. A small, portable moisture meter is also handy to monitor humidity levels inside cabinetry, alerting you to potential moisture issues before they cause damage.
Looking ahead, the future of maintenance tools seems poised to embrace smart technology. Devices like Wi-Fi-enabled moisture sensors or app-controlled support brackets will facilitate real-time monitoring and automatic alerts, much like innovations seen in smart home systems. This trend offers peace of mind, especially for remote or multi-location homes, arming homeowners with proactive data rather than reactive repairs.
Don’t wait for a problem to arise—try implementing a regular inspection routine using a digital level and support checklists. Take advantage of modern tools to stay ahead of issues and ensure your built-ins remain a source of pride for years. For detailed support on installing or repairing heavy supports, visit our step-by-step guide to vanity installation.
Remember, maintaining your cabinetry isn’t just about fixing problems—it’s about proactive preservation that saves you money and hassle in the long run. Now, equip yourself with these tools and strategies, and keep everything working smoothly for the years to come.
The Hardest Lesson I Learned About Built-Ins and Vanities
One of my biggest mistakes was underestimating the importance of support structures when installing heavy customized vanities. I once thought that visual appeal trumped structural integrity, which led to sagging and eventual need for costly repairs. That experience taught me that durability isn’t just about good looks—it’s built on hidden reinforcements and careful planning.
Where Quality Meets Technique: My Go-To Resources for Built-In Mastery
For anyone serious about elevating their cabinetry game, I always turn to industry-proven tools and guides. The built-in storage ideas article provides invaluable insights into seamless integration, while the installation guide for vanities is my blueprint for precise, durable setups. These resources have consistently kept my projects on point, saving time and headaches.
Your Next Step Can Transform Your Space
There’s a world of difference between a vanity that just looks good and one that stands strong through years of daily use. I encourage you to apply these learned principles—think support, ventilation, and personalized touches—to your upcoming projects. Embrace the challenge, and you’ll find that creating beautiful, lasting built-ins isn’t just rewarding—it’s essential for a space that truly feels like home.
What’s the biggest challenge you’ve faced with your built-in or vanity projects? Drop your story below—I’d love to hear it!