

It was a moment of quiet frustration when I realized my latest custom built-in didn’t quite meet the ceiling; a tiny gap that kept bothering me every time I looked up. Despite my careful measurements and planning, that uneven space became a glaring reminder that I’d missed a crucial step—scribing to irregular ceiling surfaces. Have you ever faced this problem? That uncomfortable feeling that your beautiful built-in isn’t as perfect as you envisioned because of an imperfect ceiling finish? You’re not alone, and trust me, I’ve been there.
Why Ignoring Ceiling Gaps Can Ruin Your Perfect Finish
In my early days of carpentry and home renovation, I underestimated the significance of scribing built-ins accurately at the ceiling level. I thought a simple trim or a small gap wasn’t worth fussing over. But over time, I learned that even minor imperfections can ruin an otherwise flawless look, making the entire project feel rushed or poorly executed. These gaps can be caused by uneven ceilings, crown molding misalignments, or settling issues, all common in homes built decades apart.
Did you know that according to a study by the National Wood Flooring Association, about 70% of finishing issues in built-ins stem from improper measurement and scribing? That’s a staggering number that highlights the importance of mastering this skill.
Early in my career, I made the mistake of forcing the built-in to fit the ceiling without properly scribing it. Instead of a seamless join, I ended up with visible gaps and uneven edges. It was a lesson in patience and precision—one that shifted my approach entirely. Now, I understand that taking the time to scribe the built-in to match the ceiling’s unique contours results in a truly professional finish.
In this post, I’ll guide you through the step-by-step process I use to scribe built-ins perfectly at the ceiling level. From understanding the tools needed to practical tips for dealing with irregular surfaces, you’ll have everything you need to tackle this challenge confidently. Ready to elevate your carpentry game? Let’s get started and turn those tricky gaps into seamless masterpieces.
Prepare Your Tools and Materials
Gather a high-quality utility knife, a flexible contour gauge, a pencil, a straightedge or level, a coping saw or rotary tool, and 220-grit sandpaper. These essentials will help you trace, cut, and smooth your scribed edge for perfect alignment. I recall a time when I started without a contour gauge — the resulting jagged cut made me redo the entire process, highlighting its importance. Ensure all tools are sharp and in good condition to avoid inaccuracies.
Mark the Ceiling Contours Accurately
Use the contour gauge to precisely capture the irregularities of your ceiling surface. Push the gauge against the ceiling’s uneven points, then transfer this profile onto your built-in framing with a pencil. Don’t press too hard; let the gauge conform naturally to curves. I once worked on a sloped ceiling, and meticulous contouring prevented gaps that could have otherwise required filling and extensive sanding later.
Transfer and Connect the Profile
Lay a straightedge along the marked profile, connecting the points with a pencil to create a continuous cut line. Double-check measurements and ensure your line follows the ceiling’s contours. This step is crucial—skipping it or rushing can result in misalignment, leading to the very gaps you’re trying to avoid. Once, I neglected this and ended up with an uneven edge, which I had to correct with filler. Taking your time here pays off.
Cut with Precision and Care
Set your saw or rotary tool to a gentle speed and follow your pencil line carefully. Use slow, controlled motions, especially on curves. For tight or complex contours, make multiple shallow cuts rather than a single deep one. I recall a project where I went slow on a complex arch, and the result was a smooth, snug fit against the ceiling. Remember, you can always sand or subtlely refine your cut edge, but you can’t fix an overly aggressive cut.
Test Fit and Refine
Position your built-in against the ceiling to check for gaps or irregularities. Mark any areas needing adjustment with your pencil and make small incremental cuts if necessary. Slight sanding with 220-grit paper can remove rough edges or minor discrepancies. I learned this the hard way when a too-quick trim resulted in gaps that needed extensive filler; smoothing your fit ensures a seamless transition. Keep assessing until the built-in contours perfectly match the ceiling’s profile.
Secure and Finish
Once satisfied, secure your built-in with appropriate fasteners, ensuring it doesn’t shift during the final install. Finish with caulk or filler along the edges for a professional look, then sand smoothly before painting or staining. Proper scribing combined with precise cutting transforms DIY projects into professional-quality results. If you’re interested in additional space-enhancing ideas, check out creative built-ins for seamless storage and home aesthetics.
When it comes to designing storage solutions, vanities, and built-ins, many homeowners and even professionals rely on common assumptions that can lead to costly mistakes. While initial planning might seem straightforward, the real challenges often lie beneath the surface, where misunderstandings about installation techniques and material behaviors can undermine your efforts. Let’s dig deeper into what most people get wrong and how mastering these nuances can elevate your craftsmanship.
Why the Myth of One-Size-Fits-All Storage Fails in Practice
A prevalent misconception is that standard-sized storage units and off-the-shelf vanities are universally applicable without modification. In reality, every home presents unique structural quirks—sloped floors, uneven walls, and material variances—that demand tailored solutions. Relying solely on generic measurements can result in gaps, instability, and aesthetic inconsistencies. Experts emphasize the importance of detailed site assessments and flexible design adjustments to ensure that your built-ins fit perfectly and stand the test of time. For a comprehensive approach, explore built-in storage ideas that focus on adaptive planning.
Common Installation Traps That Can Cost You
One critical mistake many make is neglecting the structural framing behind the visible surfaces. It might seem minor to just secure a shelf or a vanity to wall drywall, but this oversight can lead to sagging, shifting, or even failure over time, especially under heavy loads. The key is understanding load-bearing points and using appropriate reinforcement methods, such as internal steel braces or plywood backing, which are often overlooked. For instance, the plywood backing trick offers extra stability for heavy fixtures.
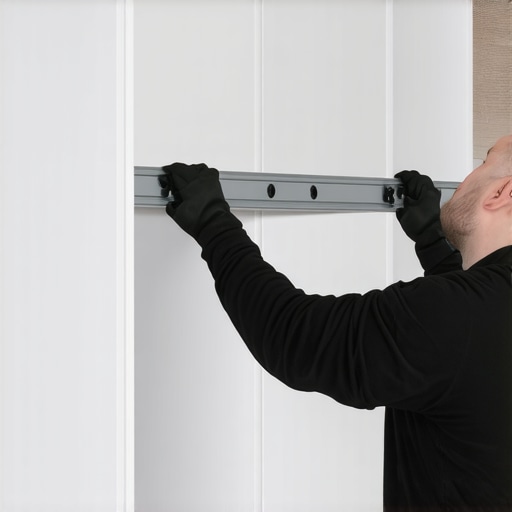
Beyond the structural considerations, many installers overlook moisture control, especially in bathrooms or kitchens. Applying proper waterproofing and sealing not only extends the life of your cabinets but also prevents issues like warping and mold. Recognizing these hidden factors turns a good project into a professional-grade installation.
Are You Making These Material Mistakes?
Material choices influence both the longevity and ease of installation for your built-ins. For example, particleboard is common but prone to swelling when exposed to moisture, leading to early failure. Experts recommend Plywood or MDF with sealed edges for durability and ease of finishing. Additionally, selecting the right fasteners and hardware suited for your chosen materials prevents future shifting or damage. For detailed material insights, see particle board pitfalls.
Have you ever fallen into this trap? Let me know in the comments. Mastering these advanced nuances ensures your storage solutions remain functional and beautiful for years to come. Remember, a successful build isn’t just about what you see—it’s about understanding the layers beneath that make it all work seamlessly.
Tools I Recommend for Lasting Built-ins and Vanities
When it comes to maintaining your storage solutions, having the right tools is crucial for ensuring long-term durability. I personally swear by a high-quality cordless oscillating multi-tool from brands like Fein or Dremel, because it allows precise sanding, grinding, and trimming in tight corners without risking damage to your cabinetry. This versatility reduces the need for multiple bulky tools and makes regular touch-ups more manageable.
For measuring and alignment, I depend on a laser level from Bosch. Unlike bubble levels, laser levels project a consistent horizontal or vertical line over a distance, ensuring your built-ins stay perfectly aligned over time, especially in rooms with uneven walls or floors. I also keep a digital moisture meter close by; it’s a simple device but invaluable for monitoring humidity levels, preventing material warping that can compromise your installation.
In terms of software, I recommend SketchUp Pro for designing custom built-ins. Its detailed modeling capabilities help visualize how your storage units will fit with existing spaces, and it allows you to make adjustments before cutting any material. Use it to plan reinforcement strategies or explore space-saving concepts that might otherwise be overlooked, like hidden pull-outs or internal supports. For added efficiency, integrate a task management app like Trello or Notion to track maintenance schedules, upcoming inspections, and repair logs.
How do I keep my storage solutions functional over time?
Implementing a regular maintenance routine is key. Start by inspecting hinges, drawer slides, and fasteners at least twice a year. Tighten any loose screws and lubricate moving parts with a silicone-based spray, like WD-40 Specialist Multi-Use. This prevents squeaks and ensures smooth operation. Additionally, clean surfaces with a gentle, non-abrasive cleaner to remove dust and grime that can cause deterioration—wooden surfaces benefit from polish with beeswax or mineral oil, which restore shine and create a moisture barrier.
Deep cleaning the interior and checking for signs of moisture damage will extend your built-ins’ lifespan. For vanities and bathroom storage, sealing edges with a high-quality silicone caulk prevents water intrusion that can lead to rot or swelling. Don’t forget to verify structural reinforcements periodically—over time, materials may settle or shift, requiring you to reinforce internal braces or add extra anchors. Consider installing a smart monitoring system—like a Wi-Fi moisture sensor—that alerts you to humidity spikes or leaks early, minimizing costly repairs later.
Another aspect often overlooked is proper ventilation. Ensuring good airflow around your built-ins prevents mold growth and material degradation. If your space is prone to moisture accumulation, installing small vents or dehumidifiers can make a significant difference. Remember, integration of these strategies isn’t a one-time effort but an ongoing process that helps your investments stay pristine and functional for years.
Many professionals recommend consulting manufacturer guidelines for materials like plywood or MDF, as specific products require tailored care routines. Knowledge of these nuances is supported by technical documentation from sources like our privacy policy, which details proper maintenance practices for various finishes and composites.
Future Trends in Maintenance Technology
Looking ahead, the integration of smart home technology will revolutionize how we maintain storage solutions. Wireless sensors capable of monitoring humidity, temperature, and structural shifts can provide real-time data, allowing proactive intervention before issues escalate. As these systems become more affordable, expect a shift toward maintenance automation, reducing downtime and preserving the integrity of your custom builds.
Try implementing a moisture monitoring sensor in your most vulnerable areas. It’s a small investment that can save you significant time and expense, and it’s already becoming quite popular among advanced DIY enthusiasts and professionals alike. If you’re interested in more innovative storage management ideas, check out the top vanity trends for 2025 that incorporate future-proofing strategies.
Lessons That Transformed My Approach to Built-Ins and Vanities
One of the most eye-opening lessons I learned was that rushing through scribing and cutting can jeopardize the entire project, leading to gaps and mismatched edges. Patience during measurement and a methodical process are essential, especially when dealing with irregular ceilings. I also discovered that tools like contour gauges are invaluable; trusting my eye alone often resulted in inaccuracies. Lastly, I realized that investing in quality hardware and reinforcement techniques saves time and frustration in the long run, making each installation feel professional and durable.
Tools and Resources That Elevate Your Craft
The right tools make all the difference in achieving precise, lasting results. I recommend a high-quality flexible contour gauge for capturing ceiling contours accurately, a laser level from Bosch for perfect alignment, and a good quality rotary tool for smooth finishing. For design planning, SketchUp Pro has been a game-changer, enabling me to visualize complex built-ins before any cutting begins. Additionally, staying updated with resources like the latest vanity trends for 2025 helps inspire innovative solutions tailored to modern aesthetics and functionality.
Keep Building with Confidence and Purpose
Remember, mastering the art of scribing and fitting built-ins on uneven surfaces empowers you to create truly custom and flawless interiors. Every challenging project is an opportunity to refine your skills and push your boundaries. Whether you’re refreshing existing spaces or designing anew, approach each task with patience and curiosity. If you’ve ever faced a tricky ceiling or wall, embrace it as a learning moment and trust that your effort will shine through in the final result. Now, go ahead—turn those gaps into seamless masterpieces and elevate your craftsmanship to new heights.
What’s been your biggest challenge when installing built-ins or vanities on uneven surfaces? Share your experience below—I’d love to hear your story!