

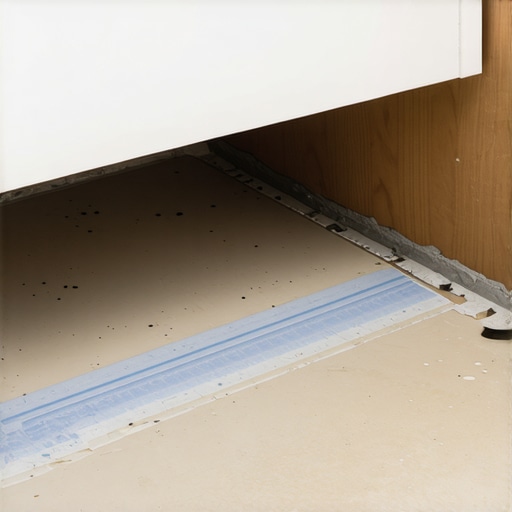
I’ll never forget the sinking feeling I had a few months ago when I opened my bathroom cabinet and noticed soggy, discolored flooring beneath my vanity. It seemed like a nightmare come true—water had sneaked in, damaging not just my vanity but threatening the entire structure of my bathroom. That unsettling realization was my lightbulb moment—knowing I needed a better way to prevent vanity base rot before it was too late.
Why Waterproofing Your Vanity Base Should Be a Top Priority
Water damage is a sneaky culprit, silently eroding the foundation of your cabinets and causing irreversible harm. If you’re like me, you might think a quick seal around the edges or some paint is enough. But over time, moisture seeps in through tiny cracks, especially in humid environments or poorly sealed installations, leading to base rot that can compromise your entire vanity. According to a study by the HGTV Design Center, untreated water infiltration causes most vanity-related damages, costing homeowners hundreds—sometimes thousands—just to repair or replace.
Early on, I made the mistake of ignoring small leaks and assuming that regular cleaning or superficial caulking would suffice. Spoiler alert: it doesn’t. Water finds its way into the tiniest gaps and can invade your cabinetry, especially where plumbing meets the base. This not only wastes your money but also risks mold growth and structural instability. Knowing this motivated me to seek better waterproofing strategies—ones that provide a sturdy barrier against moisture while being easy enough for a DIY enthusiast to implement.
Is the Waterproofing Hype Overblown?
Initially, I wondered if all the fuss was just marketing. But after a few close calls with water damage, I realized that skipping proper waterproofing is like leaving your front door unlocked—you’re begging for trouble. One common mistake I made early on was relying solely on superficial fixes like decorative paint or silicone sealants around plumbing fixtures, which quickly degraded over time. The truth is, comprehensive waterproofing isn’t just a trend; it’s a necessity, especially if you want your vanity to stand the test of time without rotting away.
In the upcoming sections, I’ll guide you through five proven waterproofing fixes that transformed my bathroom and can save yours from similar fate. Ready to keep your vanity dry and durable? Let’s get started!
**Note:** For more ideas on optimizing storage and preventing water issues, check out creative storage solutions for vanities.
Start with a Thorough Inspection of Your Vanity Base
Before diving into waterproofing, examine your vanity for existing leaks, cracks, or rot. I once noticed a small crack behind my sink that seemed minor but later found it was a water highway for moisture to invade my cabinet. Use a flashlight and a mirror to inspect hidden corners and joints. Mark problem areas with a pencil. This step pinpoints where you need to focus your efforts and prevents surprises later.
Clean and Prepare Surfaces for Seamless Adhesion
Remove any existing caulk, grime, or loose material. I used a putty knife and a degreasing cleaner to scrape and scrub the surfaces. A clean, dry surface ensures that sealants and waterproof membranes adhere properly. Think of it like preparing a canvas before painting—neglect this, and the waterproofing might peel or crack prematurely.
Apply a Waterproof Membrane for a Base Shield
Choose a flexible, waterproof membrane designed for bathroom environments—such as a liquid rubber or a peel-and-stick waterproofing sheet. I opted for a liquid membrane, which I rolled onto the vertical and horizontal surfaces of the base, creating a seamless barrier. Use a brush or roller, ensuring even coverage, especially at joints and corners, where water typically seeps in. Allow it to cure as per manufacturer instructions before proceeding to the next layer.
Seal Gaps with High-Quality Silicone
After the membrane cures, seal all joints, seams, and edges with a silicone sealant rated for wet areas. For critical points like where plumbing passes through the base, I squeezed a generous bead of silicone, then smoothed it with a wet finger. Picture this step as adding waterproof stitches—it’s vital to prevent moisture from sneaking in through the tiniest cracks. Pay extra attention to corners and around fixtures, where water most often infiltrates.
Install a Moisture Barrier Below and Behind the Vanity
Enhance protection by adding a moisture barrier, such as a polyethylene sheet, behind the vanity and beneath the base if accessible. When I renovated, I cut a sheet to size and stapled it to the studs behind the cabinet. This creates a secondary shield against wall moisture, particularly in humid bathrooms.
Reinforce Vulnerable Areas with Structural Supports
If your vanity base is prone to movement or has previously experienced water damage, reinforce it with steel brackets or hidden steel plates. For example, I installed steel L-brackets at the corners where the base meets the wall, preventing shifting that could crack seals. Think of this like adding steel bones—strengthening the structure ensures it endures moisture over time.
Finish with Protective Coatings and Regular Maintenance
Top off your waterproofing with a marine-grade paint or a specialized bathroom sealant on exposed surfaces for extra durability. Routine checks for leaks, especially around plumbing connections, help catch issues early. During my project, I scheduled bi-annual inspections and touched up sealant as needed, preventing major problems.
By systematically sealing, reinforcing, and maintaining your vanity base, you’ll create a barrier that not only prevents rot but also prolongs the life of your cabinetry. Remember, the key is to think of waterproofing as an ongoing process, much like caring for a garden—consistent effort yields lasting results. For ideas on how to organize the space inside your vanity, explore creative storage solutions for vanities.
 Many homeowners believe that installing built-in cabinets or vanity units is a straightforward process—simply measure, order, and assemble. However, this oversimplification often leads to costly mistakes and delays. One prevalent myth is that standard off-the-shelf storage solutions are sufficient for all spaces. In reality, each room’s unique architecture and your specific needs require tailored designs. For instance, a custom approach to vanity installation ensures flawless fit and optimal functionality, which you can explore in our expert guide to vanity installation.
Another nuance many overlook is the importance of supporting structures beneath built-ins. Relying solely on wall anchors often isn’t enough, especially for heavy or long-span installations. Hidden steel brackets or internal steel reinforcements can prevent sagging and wobbling, saving you from future headaches. Fun fact: recent studies indicate that proper internal bracing significantly extends the lifespan of built-in furniture—something bare minimum DIYers might miss.
Beware of the trap of underestimating clearance and space planning. A common mistake is installing vanities or cabinets without accounting for door swings or hardware protrusions. This oversight leads to awkward access and reduced usability. More advanced practitioners incorporate detailed 3D modeling or perform space simulations to visualize the final setup—something I highly recommend if you’re aiming for perfection.
What about the myth that installed storage must always match the room’s existing decor? While aesthetic consistency is important, the real advantage lies in integrating functional maximization—using innovative creative storage solutions to make every inch count. Clever designs like hidden drawers or tiered shelving can transform cluttered spaces into organized retreats.
Be cautious of common installation pitfalls: neglecting to reinforce against moisture or structural shifts, especially in bathrooms or humid environments, can lead to rot and failure over time. This nuance is backed by industry experts who emphasize moisture-proofing techniques, such as using sealed steel supports or moisture barriers. Implementing these details not only enhances durability but also preserves your investment.
Finally, aligning your storage design with future accessibility needs saves costly renovations down the line. Adjustable shelving, modular components, and flexible configurations adapt to changing circumstances—an advanced concept that many underestimate during initial planning.
Are you aware of these hidden factors? Recognizing and addressing them can mean the difference between a temporary fix and a lasting solution. Remember, thoughtful planning and expert input are your allies in creating functional, durable storage. Want to dive deeper? Check out our built-in storage ideas for more insights.
Have you ever fallen into this trap? Let me know in the comments.
Tools I Recommend for Long-Term Storage Maintenance
Maintaining storage solutions, especially built-in vanities and cabinets, requires precision and reliable equipment. I personally swear by a high-quality cordless drill with adjustable torque settings. It’s indispensable for securing shelves and supports without damaging delicate materials. Additionally, a digital laser level ensures your installations are perfectly aligned, preventing sagging or tilting over time. For sealing seams and joints, I use a professional-grade caulking gun paired with a silicone sealant rated for wet environments—this combination provides a durable, water-resistant barrier that withstands humidity and temperature changes.
Another underrated tool is a moisture meter. Regular use helps detect early signs of humidity ingress behind cabinets or within walls, allowing proactive intervention before rot or mold develops. I prefer models with instant readings and a broad humidity range, which helps in diagnosing tricky spots. For cleaning and surface prep, a microfiber cloth combined with isopropyl alcohol creates a dust- and grease-free surface, ensuring adhesives and sealants bond properly and last longer.
Software and Methods That Save Time and Enhance Durability
When it comes to planning and troubleshooting, I rely on CAD software tailored for cabinetry design. Programs like SketchUp or 20-20 Design enable me to model precise dimensions, visualize storage layouts, and identify potential issues—saving time and material costs down the line. Moreover, implementing a maintenance schedule is crucial: I set reminders every six months to inspect seals, tighten supports, and check for moisture damage. This proactive approach extends the longevity of built-ins and prevents costly repairs.
For documentation and future upgrades, maintaining detailed digital records of your storage projects is invaluable. Photos, measurements, and notes stored in cloud services like Google Drive or Dropbox allow quick reference if adjustments are needed later, such as re-sealing or reinforcing supports.
The Trend Toward Smarter, More Durable Storage
Looking ahead, I believe technology will make storage maintenance even smarter. Innovations like smart moisture sensors integrated into cabinetry can alert you proactively about humidity spikes, dodging rot before it begins. Additionally, advances in corrosion-resistant hardware are making installations more durable, especially in high-moisture environments. Embracing these tools and trends now ensures your storage solutions remain functional and attractive for years to come.
How do I maintain my storage solutions over time?
Regular inspections and the right tools are your best allies. Use a moisture meter periodically to catch hidden leaks, and check supports and seals every six months. Incorporate software planning and digital records to keep track of upgrades or repairs. By staying vigilant and leveraging technology, you can prevent most issues before they become expensive problems. For an extra edge, try sealing all joints with a high-quality silicone sealant every year—it’s a simple step that significantly boosts longevity. Want a deeper dive into support reinforcement techniques? Explore our guide to heavy-duty anchoring and elevate your maintenance game.
Lessons Only Experience Can Teach About Vanity Waterproofing
- One unexpected insight I gained was the importance of considering ventilation and humidity control alongside waterproofing. No matter how well you seal, poor airflow can trap moisture, leading to hidden damage over time.
- Another revelation was the value of choosing the right materials—like flexible membranes and high-quality sealants—that accommodate bathroom movement and temperature fluctuations, preventing cracks and leaks.
- Lastly, I learned that ongoing maintenance, such as regular inspections and re-sealing, is vital. Waterproofing isn’t a one-and-done deal; it’s an active process that safeguards your investment for years to come.
Top Picks for Waterproofing Your Vanity and Beyond
- Liquid Rubber Waterproof Membrane: This versatile product creates a seamless, flexible barrier, ideal for vertical and horizontal surfaces. It’s trusted for its durability and ease of application.
- High-Grade Silicone Sealant: A necessity around plumbing fixtures and joints, ensuring an elastic, water-resistant seal that adapts with bathroom movement.
- Moisture Meter: Regular monitoring is easier with a reliable moisture meter, helping catch leaks early—saving money and preventing mold growth.
- CAD Design Software: Planning your waterproofing approach with tools like SketchUp ensures comprehensive coverage and reduces costly errors.
Keep Your Bathroom Dry and Happy: Take Action Now
Investing in proper waterproofing for your vanity base is an act of care and foresight. Think of it as giving your bathroom a protective armor—one that keeps mold, rot, and costly repairs at bay. Remember, the key is regular upkeep and using quality materials, which make a significant difference in longevity. Ready to transform your space into a water-resistant sanctuary? If so, don’t wait—start today and enjoy a bathroom that lasts a lifetime.
What’s the biggest waterproofing challenge you’ve faced? Share your stories below—your experience might help others avoid common pitfalls!