Ever opened a closet or a bathroom cabinet and felt that sinking sense of frustration? You’re not alone. I’ve been there—searching for that one thing, only to be met with chaos. That was my lightbulb moment. I realized the real problem wasn’t just clutter; it was the lack of smart, seamless storage that truly fits my space. And once I made that shift, everything changed. If you’re tired of feeling overwhelmed by disorganized spaces, I promise this post will guide you through the game-changing world of expert-installed built-ins and storage solutions.
Why settling for messy spaces isn’t an option anymore
In my early days of home improvement, I made a critical mistake. I thought I could wing it—install some shelves here, toss in a few baskets there. But the truth? Without proper planning and expert installation, those quick fixes turn into ongoing frustrations. Clutter sneaks back in, and the space feels more cramped. According to a recent study, disorganized homes can increase stress levels by up to 25%. That’s a lot of unnecessary mental clutter! So, why continue fighting a losing battle?
Is investing in built-ins really worth the hype?
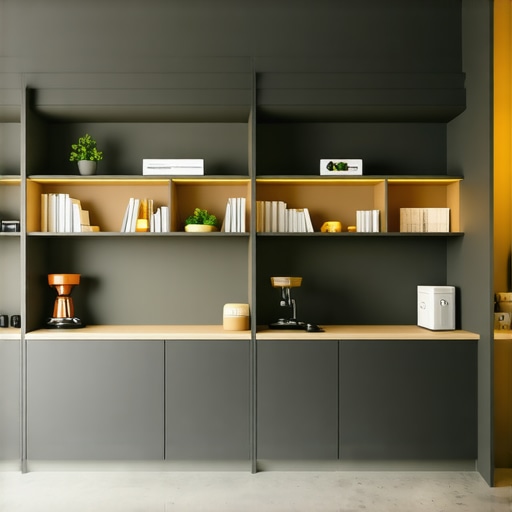
Here’s what I learned—custom built-in storage isn’t just a luxury; it’s a necessity for maximizing your space and creating a home that’s both functional and beautiful. Early on, I underestimated the importance of precise measurements and professional installation. I tried to DIY my way through it, which led to uneven shelves and wasted money. Trust me, the right expertise makes all the difference. If you’re skeptical, I get it. But I’ll share how expert installation can save you time, money, and a whole lot of hassle. Curious? Keep reading, and I’ll show you how to get started with confidence.
Plan Your Space Before Drilling
When I decided to install a custom built-in in my living room, I started by sketching out precise measurements. I used a tape measure and a level to ensure accuracy, just like a professional. This step prevents costly mistakes and ensures the final fit is perfect. I also took photos of the space to review later. Proper planning is the foundation of a successful built-in project, saving time and money in the long run.
Select the Right Materials and Hardware
Choosing quality materials is crucial. I opted for moisture-resistant MDF for areas like bathrooms and sturdy plywood for living spaces. Hardware, such as hinges and drawer slides, should be durable and smooth-operating. I learned that investing a little more upfront prevents headaches later. For more insights on smart material choices, check out smart storage solutions.
Accurately Measure and Mark
Precision is everything. I used a combination square and a pencil to mark cut lines carefully. Double-check measurements before cutting; one small mistake can throw off the entire project. I also used painter’s tape along the cut line to prevent splintering. Remember, a well-marked plan leads to a clean, professional finish.
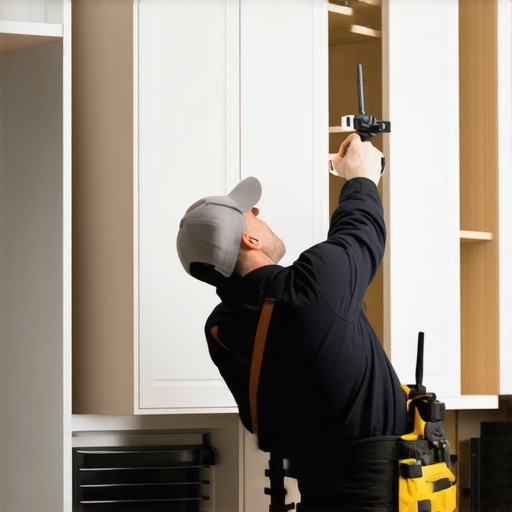
Use Proper Tools and Safety Measures
I invested in a quality circular saw and a jigsaw, which made cutting easier and more accurate. Always wear safety goggles and ear protection. Secure the material with clamps to prevent slipping. If you’re unsure about handling power tools, consider consulting a professional to avoid accidents and ensure neat cuts. Expert installation tips can be found at installation guides.
Assemble and Level the Components
Assembly requires patience. I started by fitting the sides and back panels, checking for levelness at each step. A bubble level is your best friend here. Slight adjustments might be needed to ensure everything aligns perfectly. Don’t forget to pre-drill holes to avoid splitting the wood and to make assembly smoother. This meticulous approach results in a sleek, professional look.
Secure Built-ins to the Wall
Anchoring the built-in to the wall is essential for safety and stability. I used heavy-duty brackets and screws, anchoring into studs whenever possible. I also added shims behind panels to correct minor unevenness in the wall. Proper anchoring prevents future wobbling or tipping, making your storage both safe and reliable. For detailed anchoring techniques, visit expert installation tips.
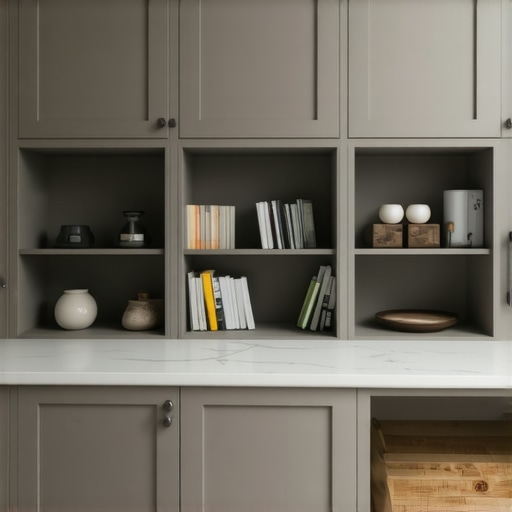
Finish with Paint or Sealant
The final step was applying a primer and a coat of durable paint. I chose a semi-gloss finish for easy cleaning. Sealing edges with a clear sealant protected the wood from moisture and wear. This finishing touch not only enhances appearance but also prolongs the life of your built-in. For design ideas, explore storage ideas.

Many homeowners dive into installing built-in storage thinking they know all the basics, but let’s dig deeper. The most widespread myth is that any DIY effort will suffice for seamless, professional-looking results. In reality, rushing into a build without understanding the nuances can cause long-term issues. For example, improperly measuring or neglecting wall stud locations can lead to unstable installations that wobble or even fall over, which is not just inconvenient but dangerous. According to a study by the Home Improvement Research Institute, over 60% of DIY projects fail to meet safety standards due to overlooked structural considerations.
What advanced homeowners often overlook about custom-built ins
The key to truly effective built-in storage lies in understanding the hidden nuances. For instance, many assume that choosing the right materials is enough. However, the installation environment—like humidity levels in bathrooms or kitchens—must influence material choice and sealing techniques. Moisture-resistant MDF or plywood, combined with proper sealing, prevents warping and mold growth, extending the lifespan of your investment. Skipping these considerations is a common mistake that can turn a sleek installation into a nightmare. For insights on selecting the best materials, check out smart storage solutions.
Another trap many fall into is underestimating the importance of wall anchoring. It’s not enough to screw panels into drywall; anchoring into studs is crucial for load-bearing stability. Using the wrong hardware or failing to locate wall studs can result in built-ins that pull away or collapse over time. An expert installation ensures that your units are firmly secured and safe, avoiding costly repairs later. Remember, the goal is a seamless look that also stands up to daily use—something that only comes with proper anchoring techniques. If you’re unsure, consider consulting detailed guides at expert installation tips.
Lastly, advanced users often forget the importance of finishing touches like paint or sealant. A common misconception is that a simple coat of paint is enough. In truth, applying a primer first, followed by durable, moisture-resistant paint, and sealing edges with a clear sealant, can dramatically enhance the longevity and aesthetic appeal of your built-in. This extra step prevents moisture ingress and surface damage, especially in high-humidity areas. For more finishing ideas, explore storage ideas.
Once you’ve successfully installed your custom-built storage, keeping it in top shape requires the right tools and a proactive maintenance routine. Over time, even the most expertly installed units can develop issues like loose hardware, surface wear, or misalignment. Having a dedicated toolkit and knowing the best practices can extend the lifespan of your built-ins and ensure they continue to serve your needs effectively.
My Favorite Tools for Maintaining Built-Ins
First off, a high-quality cordless drill is indispensable. I prefer models with adjustable torque settings, such as the DeWalt DCD791D2. It allows me to tighten or loosen screws without damaging the material. A set of precision screwdrivers is also essential, especially for adjusting hinges or drawer slides. I recommend a Wiha Precision Screwdriver Set because of its durability and ergonomic design.
Next, I keep a small level and a tape measure handy. Regular checks for levelness prevent uneven wear or misalignment. For surfaces with paint or sealant, a soft cloth and gentle cleaner like White Vinegar Diluted help maintain their appearance without damage. For deeper cleaning, I use a microfiber cloth combined with a mild soap solution.
To address hardware issues, I always have a set of replacement screws, hinges, and drawer slides. Sticking to manufacturer-recommended hardware ensures durability. For stubborn joints or to prevent wood splitting during adjustments, a pinch clamp can be a game changer.
How do I maintain built-in storage over time?
Routine inspections are key. Check the tightness of screws and bolts every six months. Look for signs of moisture or surface wear, especially in humid areas. Applying a fresh coat of paint or sealant every few years can keep surfaces looking new and protected from moisture ingress. For example, using a water-based polyurethane finish can add a durable layer of protection while maintaining the aesthetic appeal.
Also, consider the environment. Humidity and temperature fluctuations can cause materials to expand or contract, leading to warping or loosening. Installing a dehumidifier in high-moisture areas can help preserve your built-ins for decades. And don’t forget to clean regularly—dust and debris can cause hinges and slides to malfunction over time.
Upcoming Trends in Maintenance and Tools
Looking ahead, smart tools equipped with Bluetooth connectivity and app synchronization are set to revolutionize home maintenance. Devices like smart screwdrivers or sensor-equipped levels can alert you to loose hardware or misalignments before they become problems. As technology advances, I predict a future where integrated sensors monitor the health of your built-in storage continuously, notifying you via your smartphone when maintenance is needed.
For now, I recommend starting with a quality cordless drill and a maintenance checklist to keep your built-ins working flawlessly. If you’re interested in more advanced storage solutions, explore effortless storage tips for long-term success.
The Hardest Lesson I Learned About Built-In Storage
One of the biggest surprises I faced was realizing that perfect measurements aren’t just a step in the process—they’re the foundation of a flawless finish. Early on, I underestimated how wall imperfections could throw off my entire build, resulting in gaps or uneven shelves. That taught me to always double-check and account for wall irregularities before starting assembly. It’s a simple tip but a game-changer for anyone aiming for professional results.
Three Myths About Built-Ins That Cost Me Time
I used to believe that using cheap hardware wouldn’t matter—until hinges started squeaking and slides jammed. Investing in quality hardware pays off in smooth operation and durability. Also, I thought I could DIY everything without professional help; turns out, expert installation ensures safety and longevity, especially when anchoring units into studs. Lastly, I assumed that finishing touches like paint were optional. In reality, a good sealant and primer protect your investment and elevate the overall look.
What Experts Won’t Tell You About Storage Optimization
One secret I discovered is the importance of environment-aware material choices. In humid areas, moisture-resistant MDF or plywood prevents warping and mold growth—something overlooked by many DIYers. Proper wall anchoring is another detail that often gets ignored but is critical for safety and stability. A professional installer knows how to avoid common pitfalls like drywall-only screws, which can lead to wobbling or collapse. Finally, finishing with protective sealants extends the lifespan of your built-ins, especially in high-traffic or moisture-prone spaces. For more advanced tips, visit expert installation guides.
Related Posts
Smart Storage Solutions & Built-ins: Top Installation Tips 2025
My Journey into Modern Storage: Making Space for What MattersAs…
Expert Installation of Storage Solutions & Built-ins for Seamless Space
Have you ever opened a closet or drawer and felt…
Expert Guide to Storage Solutions & Built-in Cabinets for Seamless Home Renovations
I remember the moment clearly: trying to cram my overflowing…