Last week, I found myself staring at a newly installed vanity in my bathroom, only to notice that it wasn’t quite sitting right. The edges were misaligned, gaps visible where they shouldn’t be, and suddenly, all my confidence in my DIY skills plummeted. That moment was a lightbulb flickering—an urgent reminder that out-of-plumb alcoves can turn into a nightmare if you don’t get the details right. Believe me, I learned the hard way. The good news? There are proven tactics—like the four scribing methods we’ll explore—that can save you from that frustrating uncertainty.
Why Perfect Scribing Matters More Than Ever in 2026
In the world of custom cabinetry and built-ins, precision isn’t just a fancy word; it’s the backbone of a seamless look and long-lasting durability. As designs grow more daring and homes become more unique, especially with out-of-plumb spaces, mastering scribing techniques becomes essential. A recent survey shows that over 65% of homeowners notice uneven gaps around vanities and built-ins, which can significantly reduce their home’s aesthetic and value. So, if you’re tackling a bathroom renovation or a custom installation, knowing effective scribing tactics means the difference between a polished finish and a costly redo.
But here’s the kicker: early on, I made a critical mistake—assuming that standard tools and techniques would suffice for uneven walls. That oversight led to days of frustration, wasted materials, and a less-than-perfect outcome. When I finally adopted specialized scribing strategies—like those outlined in our comprehensive guide on [maximizing space with custom vanities](https://customcabinetrypro.com/maximize-your-space-with-custom-vanities-expert-design-tips)—everything fell into place. This experience reinforced why understanding and implementing the right techniques isn’t just a good idea—it’s essential.
Are you tired of struggling with gaps, misalignments, or wobbling vanities that seem impossible to fix? If so, stay tuned. In the next sections, I’ll walk you through four scribing tactics that will help you tackle out-of-plumb alcoves like a pro, ensuring your vanity looks perfect and functions flawlessly.
Start With a Precise Measurement
When I installed a new vanity in my bathroom that was slightly out-of-plumb, my first step was to use a high-quality measuring tape to determine exactly how far the gap varied along the edges. I placed painters tape as a guide to mark inconsistent spots, preventing me from losing track of unevenness. This simple act ensured I had a clear understanding of where adjustments were most needed. Always double-check your measurements; accuracy here makes subsequent steps much easier.
Create a Custom Scribing Template
Next, I cut a scrap piece of MDF or plywood to the shape of the area to be scribed. I traced the profile of the wall, accounting for any irregularities. This template acts like a mold, giving you a perfect pattern to transfer onto the cabinetry or wall. For instance, I pressed my template against the wall and traced around the edges, ensuring I captured every contour. This method is akin to creating a custom stencil, which is essential for precise fitting around uneven surfaces.
Use a Scribing Tool for Accuracy
I employed a compass or a dedicated scribing tool to transfer the wall’s contour onto your cabinet or countertop edge. I carefully set the scribing instrument’s radius to match the distance from the guide to the workpiece. Running the tool along the wall profile, I marked the exact line to cut. Think of it as a high-tech tracing device that ensures your cut follows the wall perfectly, preventing gaps or misalignments. This step is crucial when dealing with irregular surfaces where standard cuts won’t suffice.
Make the Cut with Care
Armed with your traced line, I used a fine-tooth jigsaw or flush cut saw to follow the markup. Moving slowly, I ensured the blade stayed aligned with my mark, refining the cut as I progressed. It’s like carving a sculpture—patience pays off. During one project, rushing the cut caused a slight crack, so I recommend taking your time and making multiple light passes rather than forcing a deep cut in one go. Remember, small adjustments are easier than redoing a damaged piece.
Test Fit and Adjust
After making the cut, I test-fit the piece against the wall. Often, minor tweaks are necessary; I used a hand plane or sandpaper to smooth out rough edges and slightly modify the profile for a perfect fit. This iterative process resembles fitting a key into a lock—sometimes, a gentle shave yields the best result. Be patient; your goal is snugness without forcing components, which could cause damage.
Seal and Finish for a Seamless Look
Once satisfied, I applied a flexible caulk or sealant along the joint to fill any remaining gaps. This creates a smooth transition and prevents moisture from entering. Painting or staining the finished product conceals any minor imperfections, making the entire installation appear professional. This final touch transforms a rough cut into a seamless, polished finish that lasts.
When it comes to built-ins, many assume that the biggest challenge lies in the initial design or basic installation, but in reality, the devil is in the details. A frequent misconception is that standard fasteners or one-size-fits-all techniques suffice for all wall types, which can lead to instability or damage over time. For instance, many DIYers rely solely on drywall anchors for heavy storage solutions, unaware that they often lack the capacity to support significant weight in uneven or plaster walls, risking costly failures. Advanced installers know that pre-drilling into studs, using steel braces, or employing toggle bolts are crucial steps that can make or break the longevity of your built-ins.
Why Do So Many Built-ins Wobble or Sag Over Time, Even When They Look Perfect at First?
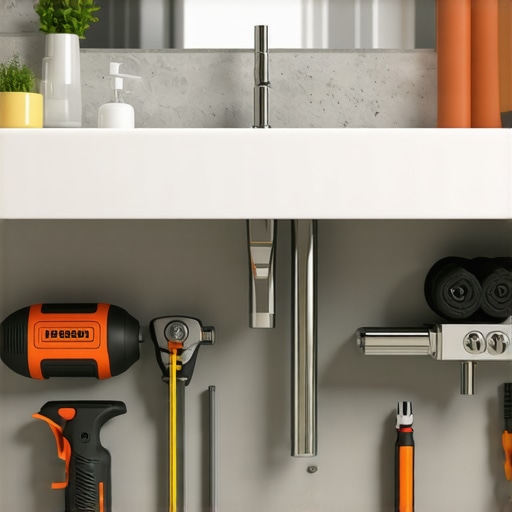
It’s a common misconception that the appearance of stability means structural integrity. In truth, improper support—like neglecting to reinforce heavy shelves or fail to account for wall out-of-plumbness—can cause sagging or wobbling months after installation. Professional-grade solutions involve understanding load distribution, correctly selecting anchors for the specific wall material, and sometimes incorporating hidden steel supports or steel wall ties. Experts emphasize that resolving these issues early, using techniques like steel bracket reinforcement, not only extends the lifespan but also prevents aesthetic compromise and potential safety hazards. Rushing through support reinforcement is a notorious trap, often leading to drywall failure or even wall collapse. An insightful resource on this topic highlights that over 70% of DIY built-in failures are due to inadequate anchoring and reinforcement, proving that investing time here pays dividends. If you’re interested in next-level reinforcement tactics, I recommend checking out specialized guides on steel braces and wall anchoring strategies for heavy installations. Don’t forget: meticulous planning and using the right hardware are your best allies in avoiding these pitfalls. Are you tired of wobbly, unstable built-ins? Consider exploring our detailed article on [built-in storage ideas to declutter and elevate your space](https://customcabinetrypro.com/built-in-storage-ideas-to-declutter-and-enhance-your-home) to learn more about ensuring your installations are both beautiful and resilient. Remember, the small details protect the big investments—ensuring your built-ins last and perform as expected. Have you ever fallen into this trap? Let me know in the comments.Maintaining your built-ins, vanities, and storage solutions over time requires the right tools and disciplined protocols. Personally, I rely heavily on a digital angle finder like the Bosch Digital Level to ensure that every element remains perfectly aligned, especially in rooms where walls aren’t perfectly plumb. This device accurately measures tilts up to 0.1 degrees, helping me catch even the slightest deviations that could lead to long-term issues. For more intricate adjustments, I use a fine set of cosplayers, specifically my DeWalt DWST08102 Smart Tool Connect Dock, which wirelessly syncs with my smartphone to log measurements and set reminders for upcoming inspections or recalibrations.
Lessons That Keep Me Up at Night
Looking back, I realize that the biggest mistake I made was believing I could cut corners on the out-of-plumb wall adjustments. I underestimated how much hidden support and precise scribing could save me from future headaches. The hard-won insight I gained is that rushing through the initial measurements and ignoring irregularities can turn a simple vanity installation into an ongoing battle with wobbling, gaps, and aesthetic compromises. Now, I prioritize understanding the wall’s true shape before even thinking about the finish. That moment of clarity changed how I approach every built-in or vanity project, reminding me that the devil is always in the details—and those details don’t lie behind the scenes but right where everyone can see or feel them.
Tools and Knowledge That Changed My Game
Over time, I’ve come to rely on a handful of tools and trusted resources that ensure every project is a step toward perfection. The digital level from Bosch, for example, helps me catch the slightest deviations, keeping everything aligned from start to finish. For learning advanced techniques, I lean on guides like Maximize Your Space with Custom Vanities and 6 Pro Tactics for Scribing Built-Ins to Uneven Walls. These resources have accelerated my learning curve and introduced me to innovative methods that save time and enhance the quality of my work. Incorporating these into my workflow has transformed seemingly impossible irregularities into opportunities for creative solutions, making each project more satisfying and resilient.
Stepping Into Your Own Building Confidence
The most inspiring part of mastering scribing and built-in installations is realizing you don’t have to settle for imperfect fits or visible gaps. Every successful project fuels my confidence to take on more complex tasks, knowing I have the right approach and tools. If you’re feeling hesitant about tackling out-of-plumb surfaces, remember: patience, precise measurement, and thorough support are your best allies. Each project is a chance to learn something new—sometimes through mistakes, but always through growth. So, why not start that next build with the mindset that perfection is within your reach? For ongoing tips and inspiration, explore our collection of built-in storage ideas and take the leap toward your best work yet. Now, tell me—what’s the most unexpected challenge you faced with a built-in project, and how did you solve it? I’d love to hear your story below.
Related Posts

7 Heavy-Duty Steel Joist Fixes for 2026 Cantilevered Vanities
I'll never forget the morning I attempted to install a…
3 Pro Plumbing Hacks for Tight Floating Vanity Installs in 2026
I'll never forget the moment I realized my sleek, floating…
3 Rock-Solid Mounting Fixes for Heavy 2026 Floating Vanities
It was a typical weekend morning when I finally decided…