

I remember the cold sweat I broke into when the delivery guys for my first major renovation asked, ‘Where do you want the slab, boss?’ I pointed at the sleek, minimalist vanity I’d just bolted to the wall. They looked at the cabinet, then back at the 350-pound quartz slab, and one of them actually chuckled. ‘Good luck with that,’ he said. That snicker haunted me for the rest of the day. I spent hours that night staring at the 5/8-inch particle board sides of that vanity, realizing I was about to commit a structural sin. I’d seen so many vanity installation hacks that save time and money, but none of them addressed the sheer crushing force of a 3cm stone top. I ended up pulling the whole thing off the wall and rebuilding the guts of it. Today, I’m going to share exactly how I do that now—the ‘Hidden Sub-Frame Move’—so you don’t have to experience that 2 AM panic.
Your Vanity Cabinet Wasn’t Built for This Kind of Weight
Look, I’m a fan of quartz. It’s durable, beautiful, and feels like luxury. But we have to be realistic about the physics of it. A standard bathroom cabinet is often the ‘weak link’ in your bathroom remodel. If you just plop a heavy stone top onto a standard box, you are relying on the sheer strength of a few staples and some glue. I made the mistake of trusting a factory-built frame once, and by the time the seasons changed, the humidity and the weight had caused the side panels to flare out. The doors wouldn’t shut right, and the mitered edges of the stone started to show a tiny, terrifying gap. According to industry data from the Natural Stone Institute, 3cm quartz slabs weigh approximately 15 to 20 pounds per square foot. On a standard 72-inch vanity, you’re looking at a static load that would make a gym rat blush. Before you even think about the plumbing, you need to consult an expert guide to flawless vanity installation tricks tips to ensure your base is level, but even a level cabinet can fail if it’s not reinforced. Have you ever noticed your vanity doors starting to rub or stick after a new countertop was installed?
Is a custom frame actually worth the extra effort?
Some folks will tell you that a sub-frame is overkill. They’ll say, ‘I’ve been doing this for years and never had a problem.’ Well, I’ve also seen ‘years’ of sagging cabinets in homes where the owners didn’t realize their vanity was slowly bowing. The sub-frame isn’t just about stopping a total collapse; it’s about rigidity. It’s the difference between a vanity that feels solid as a rock and one that creaks when you lean on it to brush your teeth. If you are working with a floating design, you might even need to consider how to stop floating vanities from dipping with steel plates. But for a standard floor-mounted unit, the ‘Move’ involves building a secondary skeleton inside the cabinet that transfers every ounce of that quartz weight directly to the floor. It’s a bit of extra work up front, but it’s the only way to sleep soundly knowing your expensive stone isn’t going to crack because of a flimsy piece of MDF. Let’s get into the nitty-gritty of how we build this skeleton without losing your precious drawer space.
Don’t Trust the Glue: Build a Real Skeleton
The ‘Hidden Sub-Frame Move’ is essentially building a table inside your cabinet. You want the weight of that stone to travel through wood, not through the staples holding a side panel together. I remember a job in a 1920s bungalow where the owner bought a ‘solid wood’ vanity that was actually just thin plywood with a thick veneer. When we dry-fitted the marble, you could actually hear the wood fibers protesting. I had to stop everything and build an internal cage. It felt like a setback at the time, but three years later, that stone hasn’t moved a millimeter.
Swap Weak Materials for Plywood Stays
Most mass-market vanities use a ‘stretch rail’ made of MDF or particle board across the top. Rip that out. It’s useless for structural integrity. Instead, cut 3-inch wide strips of 3/4-inch Baltic birch or ACX plywood. These will be your new top cleats. You can see why particle board shelves sag and the plywood replacement logic applies here too; plywood has the cross-grain strength to resist the compression of the stone. Screw these strips into the side panels from the inside using pocket holes, or through the side if the cabinet is tucked between two walls where the screw heads won’t show.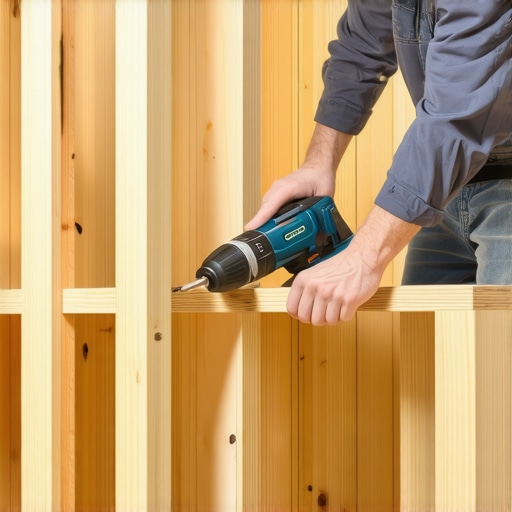
Direct the Weight Straight to the Floor
This is the most critical part of the ‘Move.’ Take four 3/4-inch plywood blocks—about 4 inches wide—and glue and screw them vertically into the inside corners of the cabinet. They should run from the underside of your new top cleats down to the very bottom of the cabinet box. If you have a toe-kick, make sure these vertical ‘legs’ sit directly over the floor-contact points. This creates a solid column of wood. You aren’t just relying on the cabinet walls anymore; the stone sits on the cleats, the cleats sit on the vertical blocks, and the blocks sit on the floor.
Level the Base Like Your Life Depends on It
Even the strongest frame will fail if it’s ‘racked’ or twisted. Before the stone goes on, use your 4-foot level. If your floor is wonky—and most bathroom floors are—you’ll need to shim the base. I’ve found that step-by-step guide to vanity installation for beginners techniques often miss the micro-adjustments needed for stone. If the cabinet is off by even 1/8th of an inch across its length, that quartz slab will only be supported at two points. That’s how you get cracks. I always use a laser level to ensure my internal skeleton is perfectly horizontal. If you’re dealing with a particularly tricky floor, check out these expert guide to flawless vanity installation tricks tips for shimming strategies that don’t compress over time.
Reinforce the Center for Extra-Wide Units
If your vanity is wider than 48 inches, that center span is a danger zone. This is where you see the ‘smile’ shape happen—the stone stays straight, but the cabinet bows down in the middle. I always add a center ‘bridge’ support. It’s a vertical plywood divider that connects the front and back rails, aligned with the space between drawer banks. This is similar to how we how to support extra-wide kitchen drawers without dragging, by creating a rigid midpoint that refuses to budge under the static load of a 3cm slab.
Why silicone alone won’t save your vanity from shifting
Most people think that a thick bead of silicone between the stone and the cabinet is enough to ‘glue’ the unit together. In my experience, that’s a dangerous assumption. Silicone is a sealant and a flexible adhesive; it’s designed to allow for some movement, not to prevent it. If your floor settles or your house shifts—even by a hair—silicone will flex. Without that internal skeleton I mentioned earlier, the weight of the 3cm quartz can actually shear the bond of the silicone over time. I’ve seen beautiful marble tops literally slide an eighth of an inch because the installer relied on glue rather than mechanical support and a perfectly level base. This is a common nuance that separates a DIY job from a professional, long-lasting installation.
Does your bathroom humidity actually change your vanity’s dimensions?
This is where things get technical. According to the Architectural Woodwork Institute (AWI), wood can expand or contract significantly based on relative humidity. If you live in a climate where summers are humid and winters are dry, your cabinet box is constantly ‘breathing.’ If you don’t stop cabinet-doors-from-warping-in-humid-bathrooms-2 by using stable materials like plywood, that movement puts immense stress on the stone-to-cabinet connection. This is why you need innovative storage solutions to transform your bathroom that account for structural stability first and aesthetics second. A vanity that looks great in the showroom might fail in a steamy bathroom if the frame isn’t built to handle the environmental load.
Stop the drain-tightening trap before it leaks
The biggest trap I see pros and DIYers fall into is the ‘drain-tightening trap.’ They set the stone, silicone the sink, and then immediately tighten the drain flange with all their might. Because the silicone is still wet, the pressure of the wrench can slightly tilt or shift the sink away from the stone. When it finally dries, you’re left with a drain that leaks because it’s not perfectly flush with the basin. Wait 24 hours. Let the structure settle. If you’re trying to maximize your space with custom vanities expert design tips, don’t rush the physics of the assembly. I once had to pull a whole double-sink unit apart because the plumber got over-eager with the channel locks before the adhesive set. It’s an expensive mistake that’s easily avoided with just a little patience and better timing.
Have you ever fallen into this trap or noticed your vanity top shifting after a year? Let me know in the comments. If you’re still feeling unsure about the process, check out this expert guide to flawless vanity installation tricks tips for more advanced techniques that the big-box stores won’t tell you about. It’s these small, hidden details that make the difference between a vanity that lasts five years and one that lasts fifty.
Ditch the Cheap Bubble Level for a Professional Laser
I’ve learned the hard way that a standard two-foot bubble level is practically a toy when you’re trying to balance a 400-pound slab of quartz across a long run of cabinets. I personally use a self-leveling cross-line laser, like the Bosch GLL series, because it gives me a perfectly horizontal reference line across the entire bathroom. If your vanity is even slightly tilted, the stone’s weight isn’t distributed; it’s concentrated on one or two points. This is where you see the frame start to buckle. Beyond the laser, you need a high-torque impact driver to set your structural screws deep into the studs. I’ve seen installers try to use a standard drill, but the screws often fail to bite properly, causing the vanity to pull away from the wall under the strain of a 3cm top. If you’re worried about the base, you can always refer back to vanity installation hacks that save time and money to ensure your initial placement is solid before the weight goes on.

How do I maintain my vanity structure over time?
Maintenance starts with keeping things dry. Moisture is the silent killer of structural integrity in a bathroom. If you have a slow leak under the sink, that plywood skeleton we built will eventually soften, leading to a catastrophic failure of the stone top. I make it a habit to check the structural blocks every six months. If you notice any swelling in the wood or if your drawers are starting to bind, you need to stop cabinet doors from warping in humid bathrooms-2 by addressing the ventilation and humidity first. Additionally, check the gap between the stone and the cabinet. If that gap is widening, your floor might be settling, and you may need to add more shims. For those with more complex, modern setups, using the hidden support rail for floating master vanities-2 provides an extra layer of security that traditional floor-mounted units often lack.
The Shift Toward Integrated Steel Frameworks
Looking ahead to 2025 and beyond, I predict we’re going to see a complete departure from wood-only frames for heavy stone. We are already seeing more ‘hybrid’ designs where the cabinet is just a decorative shell around a hidden steel chassis. When you innovative storage solutions to transform your bathroom, you’re often adding even more weight via heavy pull-out racks and drawer systems, which makes internal reinforcement vital. If you’re planning a high-end remodel, start thinking about the steel plate move for drywall mounted floating vanities as a standard requirement, not an upgrade. In fact, technical guides from Cosentino (the manufacturers of Silestone) emphasize that perimeter support must be continuous and level within 1/8th of an inch across the entire surface to prevent localized stress fractures. Don’t wait for your stone to crack; be proactive. I highly recommend you maximize your space with custom vanities expert design tips by incorporating these rigid metal reinforcements into your initial design. **My challenge to you:** On your next project, add just two vertical plywood ‘legs’ to your cabinet corners and see how much more solid the entire unit feels before the stone even arrives.
Hard-Earned Wisdom from the Back of the Cabinet
Over the years, I’ve realized that the ‘perfect’ installation isn’t the one that looks the best on day one; it’s the one that still looks identical on day one thousand. One lightbulb moment for me was realizing that most cabinet failures start at the fasteners. Even if the wood is strong, if you’re using thin staples, the weight of a 3cm slab will eventually pull the joints apart. Always upgrade to structural screws. Another lesson? Never assume your walls are flat. If there’s a gap between the vanity and the wall, the weight of the stone can actually pull the cabinet backward, causing it to ‘rack.’ Always shim the back before you tighten the wall anchors. Finally, remember that effortless storage solutions for a tidy stylish home start with a base that doesn’t sag under pressure.
The Gear That Makes the Difference
If you’re serious about doing this right, stop relying on the hardware that came in the box. Here is what I keep in my truck for every stone-top job. First, GRK R4 multipurpose screws—they have incredible sheer strength compared to standard gold screws. Second, 3/4-inch Baltic Birch plywood. This is the only material I trust for sub-frames because it doesn’t have the internal voids found in cheaper shop-grade ply. If you want to understand the material science better, look at why particle board shelves sag and the plywood solution 2. Third, a quality self-leveling laser. It’s the only way to ensure your support blocks are all on the same plane across a 72-inch span.
Take the Leap and Build It to Last
Installing a heavy stone top can be intimidating, but once you understand how to transfer that load directly to the floor, the ‘fear factor’ disappears. You aren’t just installing a cabinet; you’re engineering a piece of furniture that will witness decades of morning routines. By taking these extra steps to enhance your home with sleek built-in vanities design tips for 2025, you’re ensuring your investment is protected. It’s the same level of care required for the structural fix for floor to ceiling library units 2—stability is the foundation of luxury. Go build something solid.
Have you ever heard your cabinet ‘creak’ or seen a new gap appear after a heavy stone top was installed? Let me know your experience in the comments below!