

I remember the exact moment my thirty-six-inch wide pot-and-pan drawer decided it had finally had enough of my cast-iron collection. I was reaching for a heavy skillet to sear some steaks when I pulled the handle and heard a sickening, wooden groan followed by a distinct *thud*. The drawer didn’t just feel heavy; it had literally jumped its tracks and was now grinding against the cabinet frame like a tectonic plate. It was embarrassing, frustrating, and honestly, a little bit heartbreaking because I had built that kitchen myself. I realized then that my “good enough” approach to hardware was a recipe for disaster. If you have ever felt that soul-crushing resistance when trying to open a drawer or noticed your beautiful cabinet faces are starting to overlap, you are in the right place. Today, I am going to show you exactly how to fix those sagging monsters and turn them back into the effortless storage solutions they were meant to be.
The Hidden Physics of the Wide Drawer Failure
When I first started out, I made the classic rookie mistake of thinking a hundred-pound slide was a hundred-pound slide regardless of the drawer’s width. I was dead wrong. I installed standard side-mounts on a massive forty-inch base and wondered why my large kitchen drawers drag despite the math seemingly working out on paper. What I didn’t account for was the leverage. A wider drawer puts immense lateral stress on the bearings, causing them to flare out and eventually fail. According to industry experts at Fine Woodworking, the dynamic force of a drawer being pulled quickly can actually double the effective weight of the contents, meaning that 50-pound stack of plates is hitting your hardware with 100 pounds of force every time you are in a rush to make dinner. To prevent this, you have to look beyond the weight rating and focus on structural rigidity. I eventually learned that using the heavy-duty dowel strategy for wide drawer bases was a game-changer for keeping those boxes square. Have you ever felt that terrifying moment when a drawer feels like it’s about to fall onto your toes?
Is high-end hardware actually worth the extra money?
It is easy to look at a pair of sixty-dollar slides and compare them to the twenty-dollar versions at the big-box store and think you are being ripped off. I used to think the same thing until I had to replace three sets of cheap slides in one year. The truth is that for any drawer wider than 24 inches, you are no longer in the territory of “standard” hardware. You need slides designed for high-torque environments that can handle the racking that happens when you pull the handle from one side instead of the center. If you ignore this, you’ll eventually find that your drawer slides bind constantly, leading to damaged cabinet interiors and frayed nerves. Investing in the right support system now isn’t just about luxury; it’s about making sure your kitchen doesn’t literally fall apart under the weight of your daily life.
Build a Box That Refuses to Twist
The first step to a permanent fix isn’t actually the hardware; it’s the box itself. Most wide drawers fail because they “rack”—which is just a fancy way of saying they turn from a rectangle into a trapezoid when you pull them from one side. To stop this, I always ditch the standard quarter-inch drawer bottoms that come with many pre-fab units. They are flimsy and offer zero structural integrity. Instead, I use half-inch or even three-quarter-inch plywood for the bottom and glue it into a deep dado. I remember a 42-inch master suite vanity job where I skipped the center support because I was in a rush. The client called me back two months later because the drawer bottom had turned into a literal bowl under the weight of glass perfume bottles and heavy hair products. I had to rip it out and rebuild the entire unit using the heavy-duty dowel strategy for wide drawer bases to keep the frame from blowing out. Now, for anything over thirty inches, I always add a longitudinal stiffener—a strip of hardwood running front-to-back under the bottom panel to prevent the “belly” effect that leads to large kitchen drawers dragging on the cabinet floor. 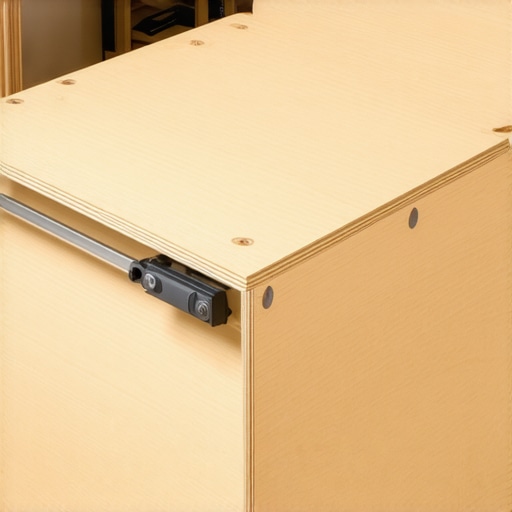
Swap Out the Slides to Handle Massive Loads
If your drawer is already sagging, your side-mount slides are likely bent or the bearings have flattened out. I recommend switching to heavy-duty undermount slides. Unlike side-mounts, which essentially “hang” the weight on a few small screws, undermounts support the drawer from beneath, distributing the load across the entire length of the steel rail. This is the same principle used in high-end built-in storage ideas to ensure heavy items don’t compromise the structure. When you install these, you have to be precise to the sixteenth of an inch. If the cabinet isn’t perfectly square, you’ll find your drawer slides bind before the drawer is even half-closed. I use a pair of dedicated magnetic slide jigs to hold the rails perfectly level while I drive the screws into the cabinet carcass, ensuring they are anchored into solid wood rather than thin veneer.
Get the Alignment Perfect Without Losing Your Mind
Once the slides are in, the battle is usually won or lost in the adjustment phase. Most modern high-end slides have three-way or even four-way adjustment tabs located under the drawer box. If your drawer front is crooked or overlapping with the cabinet door below, don’t unscrew the hardware—use the thumbwheels. I’ve spent hours in my early years unscrewing and re-screwing slides only to realize I could have fixed the gap in ten seconds with a click of a plastic wheel. You can learn how to stop drawer dragging with this under-mount slide adjustment by focusing on the rear hooks first. When the rear of the drawer is properly engaged with the hole in the back of the box, the front will naturally fall into place. This is especially critical for deep units, as it is the only way to stop heavy pantry drawers from jumping tracks when they are fully extended. If you are working with older cabinets where the mounting surface is crumbly, remember that why particle board shelves sag and the plywood replacement is often necessary to provide the structural bite your new heavy-duty hardware requires to stay put.Most people assume that if the bubble is in the center of their level, the installation is a success. I’m going to challenge that right now: in an old house, a ‘perfectly level’ cabinet can be a functional nightmare. If you force a rigid cabinet box to sit level against a wall that is bowed or ‘bellied,’ you are actually twisting the carcass. This torque travels straight to your hardware, which is why your drawers feel sticky even when the slides are brand new. To get a truly professional finish, you need to master the scribing trick for installing vanities against out-of-square walls. By shaving the back of the cabinet to match the wall’s imperfections, you keep the box square and the hardware stress-free. Let’s dig deeper into the physics of weight and moisture that most tutorials ignore.
Can a floating vanity actually support a double-thick marble top without steel?
I’ve seen dozens of floating vanities start to ‘smile’—where the center sags and the doors begin to pinch at the top. The common myth is that standard wood screws into studs are enough for any load. They aren’t. For massive stone surfaces, you need the internal support move for heavy stone vanities, which often involves integrated steel brackets or specialized blocking. According to the Kitchen Cabinet Manufacturers Association (KCMA) ANSI/A161.1 standards, high-end cabinets must withstand significant load testing, but those ratings are only valid if the mounting surface is perfectly flat. If there is even a 1/8-inch gap behind your mounting rail, you are creating a lever that will eventually pull the screws right through the plywood. 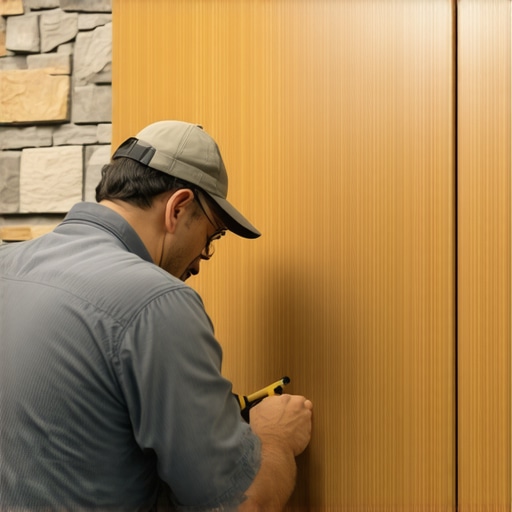 This brings us to the ‘Oops’ factor that ruins more bathrooms than anything else: the hidden climate of the cabinet. We spend so much time on structural rigidity that we forget about the wood’s breathability. I once installed a beautiful custom unit only to have the client call me back because the doors were curving like potato chips. I didn’t use the moisture barrier trick for vanities against cold walls, and the temperature differential between the bathroom air and the cold exterior wall caused the wood to move at different rates. If you want to stop cabinet doors from warping in humid bathrooms, you must seal every single edge, including the ones you can’t see once the cabinet is installed. Another advanced mistake is over-reliance on the floor for support. In many expert-guide-to-flawless-vanity-installation-tricks-tips, we discuss how the floor is often the least stable part of the room. This is why I always look for the hidden support system for heavy marble vanity tops that anchors primarily into the wall studs. This ensures that as the house settles or the joists flex, your expensive stone doesn’t crack. Have you ever fallen into the trap of over-tightening your mounting screws only to see your cabinet face frame split? Let me know in the comments.Beyond the initial install, I’ve realized that the real secret to a kitchen that stays pro for decades is what you do after the dust settles. I never leave a job site without checking the tension on every single screw. Wood is a living material; it breathes and moves, and those vibrations from daily use can back out even a long screw. If you are managing a heavy kitchen, you will eventually see why your integrated waste bin is sagging because of the sheer repetitive force of opening it fifty times a day. To fight this, I use a drop of medium-strength thread locker on the mounting bolts of my heaviest units. It’s a small step that separates the amateurs from the guys whose work doesn’t need a callback in three years. For my toolkit, I swear by a set of long-reach magnetic bit holders and a high-torque, low-speed driver. You need that finesse so you do not strip out the pilot holes in why particle board shelves sag and the plywood replacement.
How do I keep my heavy drawers from fighting me every morning?
Maintenance isn’t just about fixing things when they break; it is about preventing the friction that causes the break in the first place. Once a year, I take five minutes to vacuum the dust out of the slide tracks. It sounds tedious, but according to the Architectural Woodwork Institute (AWI) Quality Standards, debris is the number one killer of ball-bearing efficiency in heavy-duty hardware. I follow that up with a light coat of dry PTFE spray. Avoid WD-40 or grease; they just attract more kitchen grime and turn into a sticky paste that makes your drawer slides bind. If you have already noticed a slight resistance, check your vanity installation hacks to see if the box has shifted even a fraction of an inch. A quick adjustment of the mounting clips can take five pounds of pressure off your arm every time you reach for a pot. Looking ahead, I suspect we are going to see a massive shift toward internal steel reinforcement as a standard for residential work. We are pushing wood to its physical limits with 48-inch wide drawers and massive stone tops. Relying on the internal support move for heavy stone vanities is just the beginning. In the next few years, I expect smart hardware that can notify you when a slide is out of alignment. Until then, you have to be the sensor. I challenge you to go into your kitchen right now, pull out your heaviest drawer, and check the rear mounting bracket. If it is loose, tighten it today—do not wait for the thud.
The Lessons Only a Broken Drawer Track Could Teach Me
After decades in the shop, I’ve realized that the spec sheet is only half the story. Here are the hard-won insights that transformed how I approach wide drawers:
- Handle Hubris Kills Hardware: On a drawer wider than 30 inches, using a single center pull is a recipe for racking. I always suggest two handles or a long bar. If you pull from one side, you’re forcing one slide to do 90% of the work while the other binds.
- Listen for the “Seat”: A pro knows the sound of a slide engaging. If you don’t hear that crisp, metallic click when you push the drawer in for the first time, your alignment is off. Don’t force it, or you’ll be wondering why your integrated waste bin is sagging sooner than you think.
- Pilot Holes Aren’t Optional: Hardwood will split and particle board will crumble if you skip the pre-drill. I use a self-centering Vix bit to ensure every screw is perfectly perpendicular to the slide.
The Toolbox Essentials That Save My Back
I don’t believe in buying every gadget, but these items are non-negotiable for my heavy-duty builds. I trust them because they eliminate the guesswork that leads to hardware failure.
- Magnetic Slide Jigs: I personally use the Kreg version because it clamps directly to the face frame, freeing up my hands to drive screws accurately without the slide slipping.
- Dry PTFE Lubricant: Unlike grease, this doesn’t turn into a “grime paste.” A quick spray once a year keeps even the heaviest pots feeling weightless and prevents the friction that leads to vanity installation hacks later down the line.
- High-Torque Impact Driver with Finesse: I recommend a driver with a specialized “wood mode.” It provides the power to sink long screws into studs but slows down at the finish to prevent stripping out the holes in your expert guide to flawless vanity installation.
Build for a Lifetime of Heavy Lifting
Mastering these wide, heavy drawers is one of the most rewarding parts of cabinetry. There is a specific kind of satisfaction in watching a forty-inch drawer full of cast iron glide shut with a gentle push. It transforms your kitchen from a source of frustration into a suite of effortless storage solutions. You don’t have to live with grinding tracks or sagging bottoms; just a little extra structure and the right hardware can make your cabinetry feel brand new again. Have you ever struggled with a drawer that just refused to stay on its tracks? Let me know in the comments below!