

I will never forget the sound—a slow, agonizing creak that echoed through my freshly tiled bathroom at 2 AM. I had just finished a DIY remodel and was so proud of that sparkling white quartz countertop. It looked stunning in the dim light. But by morning, the top drawer of the vanity wouldn’t budge. The sheer weight of that gorgeous stone was literally crushing the standard plywood frame of the cabinet. I made the classic rookie mistake of assuming a ‘solid wood’ label meant it could handle a 200-pound slab without extra help. It is a gut-wrenching feeling to watch your expensive investment slowly buckle, and I am here to make sure you do not have to experience that same sinking feeling—both literally and figuratively. Today, we are going to dive into the nitty-gritty of making sure your bathroom furniture does not fold like a lawn chair under the pressure of modern design. If you are eyeing a heavy stone surface, you need to understand that most stock cabinets are built for aesthetics first and structural loads second. We will talk about how to reinforce these units so they last as long as your home. If you have already started your project, you might want to check out my expert guide to flawless vanity installation to get the basics right before we add the heavy stuff.
Why Your Beautiful New Slab Might Be a Vanity Killer
Standard 3cm quartz counters can weigh upwards of 20 pounds per square foot. According to data from the Natural Stone Institute, a typical double vanity top can easily exceed 250 pounds once you factor in the backsplash and heavy under-mount sinks. Most off-the-shelf vanities are constructed with 1/2-inch or even 3/8-inch side panels held together with staples and glue. That is a recipe for disaster. Early in my career, I installed a beautiful double-sink setup only to have the center rail bow so badly the plumbing started to leak because the sink dropped an eighth of an inch. It was embarrassing, but it taught me that vanity installation for beginners usually misses the most crucial part: the internal skeleton. When you place that much weight on four thin walls, the joints begin to ‘creep’ or slowly move over time.
Is a standard wood cabinet actually strong enough for stone?
The honest answer is: usually not without some strategic help. While the wood itself might be strong, the way it is joined is the weak link. You are not just fighting weight; you are fighting the physics of downward pressure over years of use. Over months, even a slight flex can lead to hairline cracks in your quartz or, worse, a catastrophic failure of the cabinet box. This is why I always recommend the hidden sub-frame move for anyone serious about longevity. Have you ever noticed your vanity drawers starting to stick after a new counter was installed, or seen a gap forming at the wall? Drop a comment below; I would love to hear if you are seeing those warning signs right now. We need to address the structural integrity before the stone even arrives on the truck.
Build a Frame That Won’t Buckle
To prevent a ‘pancake’ situation, you need to think like a structural engineer, not just a cabinet installer. Most factory units rely on the back panel for stability, but that thin particle board is a joke when you are dropping a heavy slab on top. I start by adding vertical 3/4-inch plywood ‘ribs’ inside the box. Think of these as the pillars of a bridge; they transfer the weight directly from the top rail down to the base or the floor. I remember a project where the client wanted a 72-inch double vanity with an integrated trough sink. The plywood flexed just by leaning on it. I installed three vertical supports and tied them into the toe kick. It felt like a tank afterward. If you are doing this yourself, use wood glue and 1.25-inch pocket screws—never just finish nails. This is one of those vanity installation hacks that save time and money in the long run because it prevents the stone from cracking the cabinet joints over time.#IMAGE_PLACE_HOLDER_B#
The Steel Bracket Advantage for Extra Insurance
If you are worried about the center bowing, especially on wider units, I swear by heavy-duty steel. You can buy L-brackets or flat steel bars to reinforce the top stretchers. I have seen guys use how to stop floating vanities from dipping with steel plates to create a rigid bridge that the stone sits on. This is crucial if you have a massive sink cutout where the wood becomes thin and brittle. I once had a client who insisted on a heavy marble top with a very wide vessel sink; the front rail was only two inches wide. I routed a channel into the wood and epoxied a steel bar inside. That bar took all the tension, and the wood just became a decorative cover. This keeps the weight from transferring into the drawer slides, which is the primary cause of binding.
Ditch the Standard Screws for Lag Bolts
Most people follow a step-by-step guide to vanity installation for beginners and think four drywall screws into the studs will hold. They will not. When that stone goes on, the vanity wants to pull away from the wall. You need at least 3-inch lag bolts with washers. I learned this the hard way on a floating vanity job where the whole unit sagged nearly a quarter inch as soon as we set the quartz. We had to pull the stone off—which is a nightmare once the silicone sets—and redo the wall blocking. Now, I always check the stud locations twice and use the hidden sub-frame move to ensure the weight is distributed across the entire wall assembly, not just the cabinet’s flimsy back rail.
Why the Base is Your Secret Weapon
If you are installing a floor-mounted unit, do not just set it on the tile and hope for the best. The toe kick needs to be perfectly level and reinforced. If there is even a tiny gap, the weight of the stone will force the cabinet to ‘settle’ over the first month, causing the doors to go out of alignment or the plumbing to stress. I use composite shims every six inches to ensure there is no ‘bounce’ in the base. It is the same logic used for the steel reinforced toe kick for heavy appliance storage—you want the floor to do the heavy lifting, not the cabinet staples. When the base is solid, the rest of the structure stays square, which is the only way to keep your innovative storage solutions to transform your bathroom working smoothly without drawers sticking or handles hitting the frame.Everyone assumes that ‘solid wood’ is the hallmark of quality, but I’ve spent decades fixing ‘high-end’ vanities that literally tore themselves apart at the seams. Solid wood is a living material; it breathes, expands, and contracts. In a high-humidity bathroom environment, a solid oak side panel will move differently than the cherry face frame it is glued to. This tension eventually leads to the dreaded ‘joint pop.’ This is exactly why cabinet doors warp in humid bathrooms, causing them to rub against the frame or fail to close entirely. In my professional opinion, a 13-layer Baltic Birch plywood box is far superior for longevity because those alternating layers cancel out the wood’s natural urge to move.
Is Plywood Actually Superior to Solid Wood for Wet Areas?
The short answer is yes, specifically regarding the cabinet box. According to the Architectural Woodwork Institute (AWI), engineered wood products like high-grade plywood offer significantly higher dimensional stability in environments with variable moisture. When you combine this stability with the moisture barrier trick for vanities against cold walls, you create a unit that won’t swell and bind the hardware. 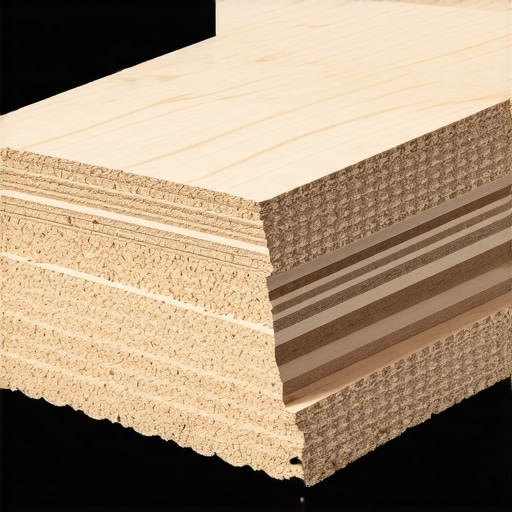 I’ve seen beautiful solid mahogany units develop hairline cracks in the finish within two years because the wood moved but the brittle lacquer couldn’t. If you want the look of solid wood, use it for the door faces, but keep the structural carcass plywood for the sake of the stone sitting on top. Another nuance most DIYers—and even some pros—miss is the ‘Drawer-Pipe Conflict.’ It is the ultimate ‘Oops’ factor in modern bathroom design. We all want innovative storage solutions to transform your bathroom, which usually means deep, full-extension drawers. But if you haven’t checked your drain height before the cabinet is built, that bottom drawer is going to slam right into the p-trap. I once watched a homeowner try to ‘notch out’ a drawer with a jigsaw to make it fit, which destroyed the drawer’s structural integrity and caused the slides to fail. Instead, you should learn how to fit a vanity over off-center plumbing pipes or use a U-shaped drawer kit designed for this exact scenario. The final trap is failing to adjust the hardware after the stone is set. A 250-pound slab will cause the cabinet to compress slightly. Even a 1/32-inch shift can cause a soft-close slide to catch. This is why your drawer slides bind a few weeks after a ‘perfect’ installation. You must revisit the site after 30 days to perform a final calibration. Following an expert guide to flawless vanity installation isn’t a one-day job; it’s a process that accounts for the house settling. Have you ever fallen into the trap where the plumbing ruined your dream drawer layout or your solid wood cabinet started to crack? Let me know in the comments; I’d love to help you troubleshoot your specific setup.I never walk onto a job site without my digital inclinometer. While a bubble level is great for rough framing, a heavy 3cm slab of quartz requires precision down to the tenth of a degree. If that base isn’t dead-on, the stone will eventually find the low spot, and that is when you see those gut-wrenching hairline cracks. I also swear by a long-reach impact driver for those deep lag bolts; trying to tighten a 3-inch screw with a manual wrench inside a cramped cabinet is a recipe for stripped heads and loose mounts. This is one of those vanity installation hacks that save time and money because it ensures the cabinet is fused to the wall studs from day one, preventing any future shifting under load.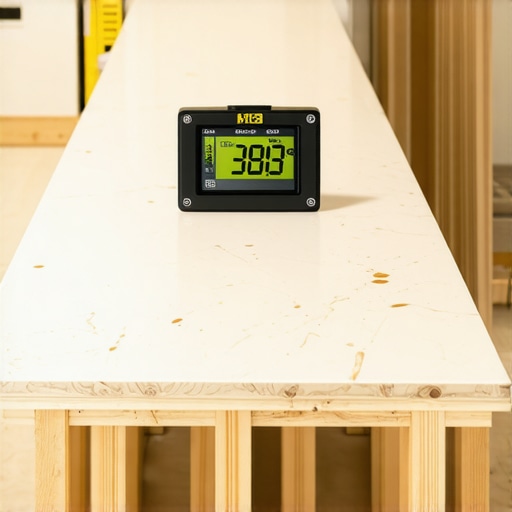
How do I maintain my vanity’s alignment over time?
Maintenance isn’t just about wiping down the countertop; it is about the internal hardware that bears the weight. According to technical documentation from Blum, dynamic load capacity—the weight a drawer can handle while in motion—is heavily influenced by the precision of the installation. If your drawer box is even slightly out of square, the ball bearings in the slides will wear unevenly and eventually fail. This is exactly why your drawer slides bind after the first few months of use. I make it a strict rule to return to my projects after 30 days—once the stone has fully settled—to tweak the three-way adjustments on every hinge and slide. It only takes ten minutes with a Pozi-drive screwdriver, but it prevents a ‘drawer-dropping’ service call a year later. If you have extra-heavy doors, you should also look into the three hinge solution to distribute the weight more effectively.
Stop Relying on Luck and Start Using Data
Looking ahead, the industry is shifting toward integrated diagnostics within the cabinetry itself. We are already seeing top trends in vanity designs you need to know in 2025 that include moisture sensors built into the cabinet floor. Imagine getting a notification on your phone because a slow leak started behind your reinforced sub-frame before it could rot the wood. We’re moving from ‘strong’ cabinets to ‘smart’ structural systems. In the meantime, you can future-proof your setup by using moisture proof base fixes to protect your investment from the ground up, especially in high-humidity zones. My prediction is that within five years, adjustable ‘smart feet’ will automatically level themselves to compensate for house settling. For now, go check your drawer alignment today. If one side is even slightly lower than the other, your stone has likely settled, and you need to perform a simple slide recalibration before the hardware wears out permanently.
Hard-Earned Lessons from a Decade of Crushed Cabinetry
Over the years, I have seen more ‘high-end’ bathrooms fail than I care to admit, and it is rarely the stone that is at fault. The first big lesson I learned is the Tape Measure Lie: just because a vanity fits your wall doesn’t mean it fits your plumbing. Always verify your p-trap depth before building your internal reinforcements. Secondly, I have moved away from rigid construction adhesives for stone; they are too brittle. High-quality silicone acts as a shock absorber, allowing for the microscopic shifts that happen as a house breathes. Another ‘lightbulb moment’ was the Paper Test. If you can’t slide a single sheet of paper between the vanity frame and the stone at every contact point, you have a pressure spike that will eventually cause a fracture. Finally, never trust the plastic leveling feet that come in the box. They are rated for the empty cabinet, not a 300-pound assembly. I now use composite shims exclusively to ensure a rock-solid foundation. Following an expert guide to flawless vanity installation means looking beyond the surface and focusing on these invisible details.
The Precision Gear Every Pro Should Own
If you want to move beyond guesswork, you need to upgrade your toolkit. I never start a heavy install without a Digital Inclinometer. A standard bubble level can hide a 0.2-degree slope that will cause your drawers to drift open on their own. For technical data, I constantly refer to the Blum Technical Library; their load capacity charts are the gold standard for knowing exactly how much weight your slides can actually carry before they fail. I also keep a copy of the Natural Stone Institute’s dimension stone design manual nearby to calculate the exact weight of different quartz and marble densities. For the actual fastening, ditch the generic wood screws and invest in 3-inch GRK Rugged Structural Screws. They have a built-in washer and incredible shear strength, ensuring your vanity installation hacks that save time and money don’t result in a sagging unit three years down the road.
Creating a Legacy of Quality in Your Home
At the end of the day, a bathroom remodel is about more than just aesthetics; it is about the peace of mind that comes from knowing your home is built to last. When you take the extra time to reinforce that frame and align those slides, you are investing in a space that will remain functional and beautiful for decades. As we look toward the top trends in vanity designs you need to know in 2025, it is clear that structural integrity is becoming just as important as the finish. Whether you are adding innovative storage solutions to transform your bathroom or simply upgrading to a heavier stone, do not skip the skeleton. You have the tools and the knowledge to do this right. Have you ever noticed a hairline crack in your grout or stone after a new installation? Let me know in the comments below, and let’s figure out how to stabilize it together.