

I still remember the sickening sound of my heavy-duty shelving unit slowly peeling away from the garage wall. It was a humid Saturday afternoon, and I had just finished loading up my collection of power tools and car parts. Then came the crunch. Those shiny steel studs, which I’d assumed were ‘modern and better,’ had buckled like a cheap soda can because I treated them exactly like old-fashioned 2×4 wood. It was an embarrassing mess that taught me a hard lesson: you cannot bully metal into holding weight with a standard wood screw. If you have ever stared at a metal-framed wall and felt that pang of anxiety about whether it can actually support your gear, I have been there. We are going to change that today by looking at the specific ways to turn those flimsy-feeling channels into a rock-solid foundation for your [effortless storage solutions for a tidy stylish home](https://customcabinetrypro.com/effortless-storage-solutions-for-a-tidy-stylish-home). I will show you the exact tactics I used to fix my own garage disaster so you never have to hear that ‘crunch’ in the middle of the night.
Stop Treating Metal Like Solid Timber
Most of us were raised on the gospel of the lag bolt. In a wood stud, you just find the center and drive it home. But steel studs are often 25-gauge or thinner, meaning the metal is barely thicker than a few stacked playing cards. My biggest mistake early on was assuming the ‘bite’ of a screw into that thin metal was enough to resist the leverage of a heavy shelf. It isn’t. In fact, according to the Steel Stud Manufacturers Association (SSMA), the thickness of non-structural studs can be as little as 0.0179 inches, which provides almost no thread engagement for standard fasteners. To make things work, you have to stop relying on the thickness of the stud and start relying on specialized hardware. Much like learning the [toggle bolt strategy for hanging heavy bathroom mirrors](https://customcabinetrypro.com/the-toggle-bolt-strategy-for-hanging-heavy-bathroom-mirrors), garage storage requires a shift in physics. Have you ever had a rack start to sag the moment you put your first toolbox on it? It is a frustrating moment, but it usually means you are just one anchor-change away from success.
Can these thin metal strips really handle the weight?
It is the question every DIYer asks the first time they poke a hole in the drywall and see that hollow C-channel. It feels flimsy. If you push it with your thumb, it might even flex. However, when we use the right [4 tactics for mounting heavy mirrors to steel studs](https://customcabinetrypro.com/4-tactics-for-mounting-heavy-mirrors-to-steel-studs-2) and apply them to the garage, we find that steel is incredibly strong in vertical compression; it just needs help with ‘pull-out’ force. By spreading the load and using the right mechanical interlock, those studs will outlast the shelving itself. Before we get into the heavy lifting, we need to understand exactly which anchors provide the grip that steel studs lack.
Grab the Right Hardware Before You Drill
To win the battle against thin metal, you need to abandon the hardware aisle’s ‘all-purpose’ drawer. Metal studs require a mechanical interlock to handle weight. When I was learning how to secure built-in desks to thin metal studs, I realized that the secret isn’t the screw; it is the anchor behind it. Specifically, you need a heavy-duty snaptoggle. Unlike old-school spring toggles that fall into the wall if you remove the bolt, snaptoggles stay in place with a plastic strap. I used these for a massive pegboard project last summer. I had dozens of heavy wrenches and a bench grinder to hang. By using 1/4-20 toggles, I created a clamping force that squeezed the drywall and the steel stud together like a vise. This provides the lateral strength that a simple screw lacks.
Make the Switch to Snaptoggles
Start by drilling a clean 1/2-inch hole through the center of the stud. It feels wrong to drill such a large hole into a skinny stud, but the structural integrity comes from the wide flange of the toggle, not the hole size itself. Insert the metal channel, pull the straps tight, and snap them off. You are left with a threaded collar that won’t move. This is why why plastic wall anchors fail for heavy shelving—they rely on friction and expansion, and a hollow metal stud has zero material for them to expand against. I remember my first attempt at a heavy-duty storage wall where I used standard self-tapping screws. Three days later, the screws had simply ripped out of the thin gauge steel, leaving gaping holes. Now, I use the toggle bolt method for anchoring heavy mirrored bathroom cabinets as my go-to blueprint for any heavy metal-stud installation. 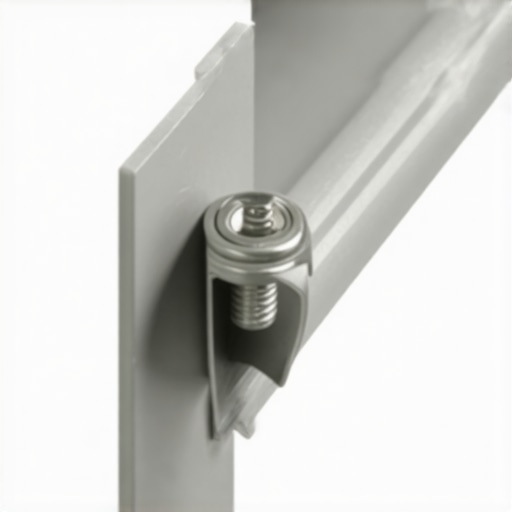
Distribute the Load with a Plywood Cleat
If you are mounting a wide rack or a multi-bin system, don’t try to hit every stud with a single bracket. Instead, employ the hidden plywood cleat for mounting heavy tool walls. This was the ‘aha’ moment after my garage shelf disaster. I cut a strip of 3/4-inch ACX plywood and ran it horizontally across three studs. I secured the plywood to each stud with two snaptoggles. Now, instead of the shelf putting 200 pounds of pressure on two isolated points, that weight is distributed across six anchors and three vertical channels. This prevents the metal from buckling under the ‘pull-out’ force of a heavy shelf.
Stop the Sag with Horizontal Bracing
For truly industrial-sized loads, like a rack for winter tires or a heavy workbench, you must stop garage tool walls from sagging with horizontal steel bracing. Metal studs are great at standing up, but they are weak against twisting forces. When you pull down on a shelf, you are effectively trying to twist that C-channel out of its track. Adding a horizontal runner—either a thick plywood cleat or a specialized steel track—locks those vertical studs together. It turns a collection of flimsy strips into a structural cage that can handle almost anything. This is a strategy I often use when built-in storage ideas to declutter and enhance your home call for floating elements that need to survive daily use.I’ve seen DIYers drill six holes into a single vertical span of a metal stud, thinking they were making it bulletproof. In reality, they were turning that stud into a perforated strip of paper. According to the American Iron and Steel Institute (AISI), the structural integrity of cold-formed steel relies heavily on the flange’s continuity. When you riddle it with holes, you invite the metal to twist and fail under stress. It’s a common trap: we think quantity equals quality, but with steel, it’s all about the quality of the ‘clamp’ rather than the number of punctures. This brings me to a contrarian view that often gets me looks at the hardware store: I rarely use the pre-drilled holes on shelving brackets. Why? Because they almost never align with the center of the stud while maintaining the layout I want. Instead of forcing the bracket to fit the wall, I use the hidden plywood backing for heavy pot racks logic. I create a secondary mounting surface. It feels like extra work, but it’s the only way to ensure you aren’t compromising the stud’s ‘web’—the flat part of the ‘C’—which is the only part you should ever be anchoring into.
How do you handle the flex in extra-wide vanity spans?
When you move from the garage to the bathroom, the stakes get higher because of the materials. If you’re mounting a heavy stone top, you can’t just ‘hope’ the metal holds. Most people assume the cabinet box provides all the support, but in a metal-stud home, the wall-to-cabinet interface is where the disaster happens. I always implement the hidden sub-frame move for supporting massive quartz top vanities. If you don’t, that quartz will eventually ‘dip,’ causing the caulk line to tear and why your vanity plumbing is leaking into the cabinet base. 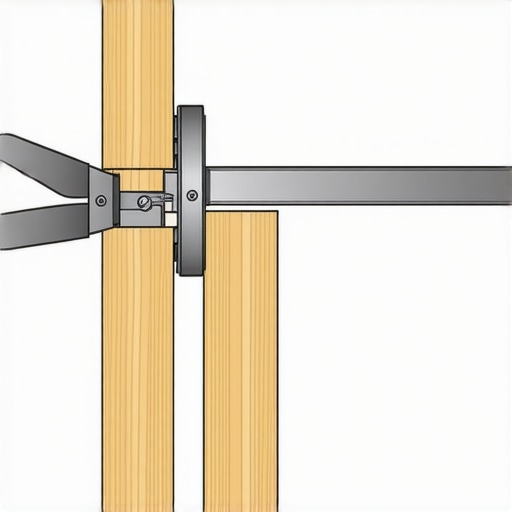 One ‘oops’ factor I learned the hard way involves the ‘moisture trap.’ If your garage or bathroom wall is an exterior wall, those metal studs act as thermal bridges. When you drive a metal anchor through them, you’re creating a tiny cold point where condensation can form inside the wall. Over time, this moisture can lead to corrosion or mold. That’s why I always follow the moisture barrier rule for cabinets on cold outer walls. It’s an advanced step, but it’s what separates a five-year fix from a fifty-year installation. Have you ever noticed mystery moisture behind your built-ins? Let me know in the comments—I’d love to help you troubleshoot it. Before you finalize your layout, make sure you’ve looked at creative storage solutions for vanities to declutter in style or innovative storage solutions to transform your bathroom. The last thing you want is a rock-solid shelf that’s in the wrong place.To keep your storage walls from becoming a liability, you need to think about the friction and vibration that naturally occurs in a home. Over the years, I’ve realized that the initial install is only 90% of the battle. The remaining 10% is choosing the right tools that don’t compromise the metal’s integrity. For instance, I’ve stopped using standard black oxide drill bits. They tend to ‘skate’ on the surface of 20-gauge steel, creating an oval-shaped hole that weakens the anchor’s bite. I exclusively use cobalt bits now; they bite instantly and leave a crisp, circular hole that ensures your snaptoggle sits perfectly flush. This is critical when you are following an expert guide to flawless vanity installation tricks and tips, as even a millimeter of play can lead to a countertop that isn’t level.
How do I maintain these systems over time?
Metal is prone to thermal expansion and contraction, which can slowly loosen fasteners that aren’t mechanically locked. Once a year, I do a ‘torque check’ on my garage racks. If I see any hairline cracks in the drywall around the mounting points, it’s a sign that the stud is flexing too much. This usually happens when the load isn’t balanced. To fix this, I often integrate the heavy-duty wall track for organizing garden tools, which ties multiple studs together and acts as a secondary skeleton for the wall. According to technical documentation from Hilti regarding cold-formed steel connections, the pull-out strength of a fastener is significantly enhanced when the load is distributed across the ‘flange’ rather than concentrated on a single point of the ‘web.’ By checking your anchors annually, you prevent the metal from fatiguing. 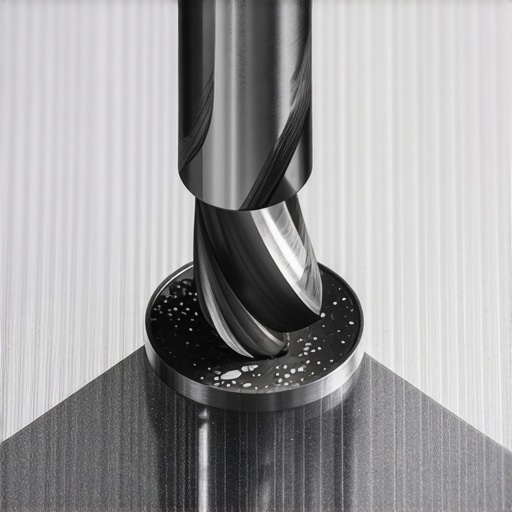
Why Cobalt Bits are Non-Negotiable for Steel
If you have ever felt the frustration of a drill bit smoking while you try to penetrate a stud, you’re likely using the wrong alloy. Cobalt bits are designed to handle the heat of boring through hardened metal. When I was working on a project involving top storage ideas for 2025, I found that the precision of the hole dictated the success of the entire custom build. A clean hole means the toggle flips open exactly where it should, providing the maximum surface area for the clamp. This precision is what allows you to transition from simple shelving to more complex systems, like innovative built-in solutions for small rooms. Looking forward, the industry is moving toward ‘smart’ modular tracks that click directly into pre-punched metal studs. Until that becomes the standard for residential builds, your best bet is to stick to the ‘clamp and cleat’ method I’ve described. If you’re feeling brave, try swapping out one of your sagging plastic-anchored shelves for a snaptoggle and plywood cleat combo this weekend—you will feel the difference in stability the moment you tighten the bolt. For those just starting out, I recommend reviewing the step-by-step guide to vanity installation for beginners to get the basics of wall-weight physics down before tackling a full garage overhaul.
The Three Hardest Lessons I Learned the Screaming Way
One lightbulb moment for me was realizing that metal studs have a ‘memory.’ If you over-torque a screw and strip the hole, that spot is dead forever. Unlike wood, which you can tooth-pick and glue, metal just stays mangled. Now, I always set my drill clutch to a low setting to prevent that heart-sinking spin. Another hard-won truth? The sound is your best tool. A hollow ‘clack’ means your toggle didn’t flip; a solid ‘thud’ means you’ve successfully clamped the flange. Finally, I learned that vertical spacing is more important than horizontal frequency. You don’t need a screw every three inches; you need one perfectly placed anchor at the top where the leverage is highest. These subtle shifts are what turn a weekend project into a professional-grade installation.
The Tool Bag Essentials for Metal Stud Success
I never step into a garage without my cobalt drill bits. While standard bits overheat and dull on the first stud, cobalt slices through 20-gauge steel like a hot knife through butter. I also swear by a long-reach magnetic level. Since metal studs are magnetic, the level stays put while you mark your plywood cleats, freeing up your hands to handle the heavy lifting. If you are looking to integrate innovative storage solutions to transform your bathroom, these tools are equally vital for those tricky narrow gaps. Lastly, always keep a box of 1/4-20 snaptoggles in your kit. They are the only anchors I trust for anything heavier than a picture frame. This is the same level of precision I recommend when following a step-by-step guide to vanity installation for beginners.
Your Path to a Rock Solid Home
Stepping back and seeing a perfectly level, rock-solid shelving unit is one of the most satisfying feelings in DIY. You’ve moved past the ‘hope and a prayer’ method of wood screws and graduated to true mechanical engineering. By mastering these metal-stud tactics, you are no longer limited by the builder’s choice of materials. Whether you are aiming for effortless storage solutions for a tidy stylish home or an industrial-strength garage workshop, you now have the blueprint to make it happen safely. Don’t let the thinness of the metal intimidate you—control the clamp, and you control the wall. #IMAGE_PLACEHOLDER_E# Have you ever had a shelving unit fail because of the wrong hardware? I’d love to hear your ‘crunch’ stories or your success tips in the comments below!