

I remember the exact moment I realized my “weekend warrior” plumbing job had gone sideways. It was 11:30 PM, and I was reaching for a clean towel when my fingers grazed a damp, swollen patch of wood at the bottom of my vanity. My heart sank. I’d spent weeks researching choosing the perfect vanity style, only to have a $5 plastic washer threaten the whole thing. The worst part? I’d seen the moisture days earlier but convinced myself it was just condensation. It wasn’t. It was the slow, silent killer of bathroom furniture.
Don’t Let a Slow Leak Rot Your Bathroom Investment
The reality of bathroom plumbing is that it’s often “out of sight, out of mind” until your floorboards start to buckle. If you’ve discovered a puddle or noticed that musty smell every time you open the cabinet doors, you’re likely dealing with one of three common culprits: a failed seal, a loose slip nut, or the classic DIY blunder of over-tightening. I’ll be honest—early in my career, I used to crank down on those plastic nuts with a massive pipe wrench, thinking tighter was better. I was wrong. Over-tightening actually cracks the washers and leads to the very leaking vanity plumbing we’re trying to avoid. Today, I’m going to show you exactly how to diagnose the source of the moisture and, more importantly, how to implement moisture-proof base fixes so you don’t lose your vanity to rot. Have you ever opened your cabinet only to find a soggy surprise waiting for you?
Is it Too Late to Save the Cabinet Base?
You might be worried that once the wood starts to swell, the vanity is a total loss. While it’s true that mold can begin to grow on damp surfaces in as little as 24 to 48 hours according to the Environmental Protection Agency, caught early, most damage is reversible. Whether you’re working with innovative storage solutions or a standard builder-grade unit, the fix usually involves more than just a bucket. If you’re just starting out, checking out a step-by-step guide to vanity installation can help you see where the original setup might have failed. We’re going to dive into the mechanical fixes and the structural saves that keep your bathroom looking sharp and smelling fresh.To stop the rot, you first have to find the ghost in the machine. I always start with a dry paper towel and a flashlight. Wrap the towel around each joint, turn the faucet on full blast, and wait for that tell-tale damp spot. Usually, you’ll find it’s not a burst pipe but a loose slip nut or a degraded washer. If you’re seeing moisture but the pipes look dry, you might actually have a drainage issue or a poor seal where the sink meets the countertop. This is a common culprit in why your vanity plumbing is leaking into the cabinet base.
Stop the Water Before It Ruins Everything
Once you’ve identified the leak, it’s time to get your hands dirty. Most modern vanities use plastic P-traps with hand-tightened nuts. If yours is leaking, resist the urge to grab the biggest wrench in your toolbox. I learned this the hard way during a bathroom remodel in a 1920s bungalow. I thought I’d be ‘thorough’ and cranked down on a plastic nut with a heavy pipe wrench. The sickening snap of the plastic threads taught me a lesson I’ll never forget: in plumbing, tight is good, but over-tight is a disaster. Using a vanity installation hack like applying a tiny bit of pipe joint compound to the threads can give you a better seal without needing to use brute force.
Hand-Tighten Only or You’ll Regret It
When you’re putting things back together, ensure the tapered end of the washer is pointing toward the joint. Tighten the nut by hand until it’s snug, then give it just a quarter-turn more with your fingers—not a tool. If it still drips, it usually means the washer is misaligned or dirty, not that it needs more pressure. For those dealing with more complex setups, like a vanity drawer that hits the plumbing, you might need to offset your P-trap to create clearance. 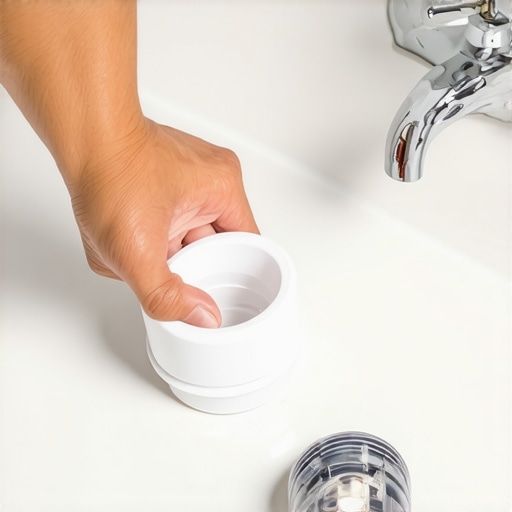
Seal the Deal and Save the Wood
Fixing the leak is only half the battle; now you have to deal with the moisture that’s already there. If your cabinet base is soft but not crumbling, you can often save it by drying it out completely with a fan for 24 hours. After it’s bone dry, I like to apply a specialized wood hardener to the affected area. This is a key part of 4 moisture-proof base fixes for rotting bathroom vanity cabinets.
Create a Barrier That Actually Works
After the wood is reinforced, don’t just leave it exposed. Line the bottom of your cabinet with a waterproof mat or a piece of vinyl flooring cut to size. This creates a secondary catch-basin that prevents future drips from ever touching the wood again. It’s a simple move that’s often overlooked in a step-by-step guide to vanity installation, but it can save you thousands in replacement costs down the road. If your vanity sits on a particularly cold surface, like a basement slab, consider the moisture barrier fix for vanities on cold basement floors to prevent condensation from rotting the wood from the bottom up.It’s easy to get obsessed with the aesthetics of grain and stain, but I’ve seen more “high-end” solid wood vanities fail than I care to admit. People often think that “solid wood” equals quality, but in the micro-climate of a steamy bathroom, it’s actually a liability. Solid wood moves. It breathes. It swells. According to the Architectural Woodwork Institute (AWI), engineered cores like high-density moisture-resistant plywood often provide superior dimensional stability in high-moisture environments. When you’re looking to maximize your space with custom vanities, choosing a material that won’t warp and throw your door alignment out of whack is more important than the label on the box.
Solid Wood Isn’t Always the Hero You Think
In my experience, high-grade plywood or even specific composite materials are often the smarter play for bathroom cabinetry because they are cross-laminated, which prevents the directional expansion that causes solid wood to crack. This is the first nuance many DIYers miss: the more expensive material isn’t always the right tool for the job. If you are aiming for vanity installation hacks that save time and money, start by matching your material to your humidity levels.
The Invisible Gap That Makes Pros Look Like Amateurs
Then there’s the “straight wall” delusion. I’ve seen homeowners try to force a vanity flush against a wall only to find a massive gap at the top. This is where expert guide to flawless vanity installation tricks come into play. You have to scribe. If you don’t, you’re left with a jagged line of caulk that screams “amateur hour.” Whether it’s learning how to scribe built-in cabinets to slanted kitchen floors or walls, that extra thirty minutes of work defines the final look. I once spent four hours scribing a single side panel just because the plaster was as wavy as the ocean. Was it tedious? Absolutely. Did the client think I was a magician because the cabinet looked like it grew out of the wall? You bet. 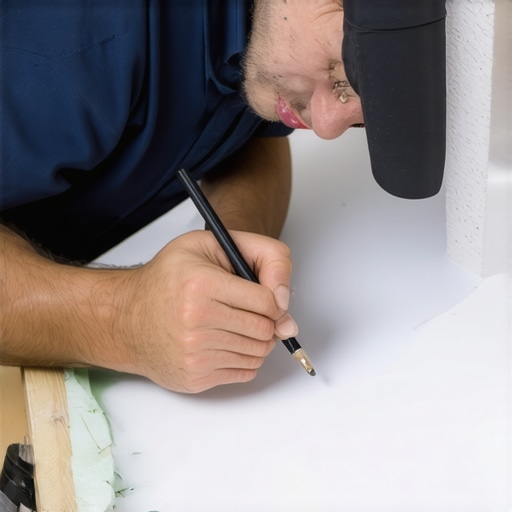
Can Your Wall Actually Support That Massive Quartz Top?
How do you handle a floating vanity when the wall is completely out of plumb or structurally weak? This isn’t just about looks; it’s about physics. If you’re using tactics for supporting heavy quartz counters on standard wood vanities, a wall that isn’t plumb means your weight distribution is off. You might need to use the scribing trick for cabinets against uneven masonry to ensure the frame sits perfectly level while the front remains aesthetically aligned. I’ve seen floating units literally tear the drywall paper because the installer didn’t account for a bowed stud behind the vanity. It’s those little nuances that separate a weekend project from a lifetime investment. Have you ever fallen into this trap where a “simple” install turned into a structural nightmare? Let me know in the comments.I’ve spent years lugging around a heavy toolbox, but the three things that never leave my side are a high-quality contour gauge, a self-leveling cross-line laser, and a small tub of wax-based wood polish. If you are following an expert guide to flawless vanity installation tricks, you will realize quickly that your eyes lie to you, especially in tight bathroom quarters. A laser level does not. I personally use a Bosch GLL 30 because it is small enough to fit inside a cabinet carcass but accurate enough to catch a 1/16th-inch dip in the floor. This level of precision is vital when you are trying a step-by-step guide to vanity installation and want the doors to hang perfectly straight without dragging on the frame.
How do I keep my custom bathroom vanity looking new for decades?
Maintenance is not just about wiping down the counter; it is about mechanical upkeep. According to technical documentation from Blum, high-quality hinges are tested for up to 200,000 opening cycles, but they only hit that mark if they stay aligned. If your doors start to sag, it is not just an aesthetic issue; the weight puts lateral stress on the mounting screws, eventually stripping the wood fibers. I always keep a PoziDriv screwdriver handy—specifically a PZ2—because using a standard Phillips bit is the quickest way to cam out and ruin the adjustment screws on European-style hinges. If you notice your hardware is not performing like it used to, check out why your soft close drawers are slamming and the tension fix to restore that high-end feel. 
Smart Features Are No Longer Optional
Looking toward the future, I see a massive shift toward what I call ‘active’ storage. We are moving past simple shelves and into innovative storage solutions to transform your bathroom that include integrated UV-C sanitizing lights for toothbrushes and hidden wireless charging pads embedded directly into the wood. In the next few years, top trends in vanity designs you need to know in 2025 will focus heavily on moisture-sensing technology. Imagine a vanity that pings your phone the second that tiny plastic washer starts to fail, long before you ever smell the rot. To stay ahead of the curve, I recommend trying one advanced move: install a moisture-resistant lining and a leak-detecting sensor in your cabinet base this weekend. It is a $30 investment that can save a $3,000 vanity. If you are looking to truly optimize, consider creative storage solutions for vanities to declutter in style and integrate these sensors during the reorganization process.
The Hard Truth About Those ‘Quick’ Plumbing Fixes
Over the years, I’ve realized that a bathroom vanity isn’t just a piece of furniture; it’s a living component of your home’s infrastructure. Here are a few lightbulb moments from my own trial and error:
- The ‘Hand-Tight’ Illusion: While we talk about not over-tightening, the real secret is checking those nuts again a week later. Vibrations and temperature changes often loosen plastic fittings during the first few days of use.
- Silicone is Your Best Friend: Never skip the bead of silicone where the vanity meets the wall. It’s not just about aesthetics; it prevents rogue splashes from dripping down the back and feeding the rot you can’t see. If you’re dealing with weight issues, knowing how to support quartz counters on custom floating vanities will save your drywall.
- Sub-Frames Save Lives: For heavy stone tops, I always recommend the structural sub-frame move for supporting massive quartz top vanities to take the stress off the cabinet walls.
My Go-To Kit for a Lifetime of Dry Floors
I don’t just buy tools; I invest in peace of mind. Here is what stays in my truck for every job:
- Wera Lasertip Screwdrivers: The micro-roughened surface bites into the screw head, which is essential when you’re adjusting European hinges in a dark corner. This prevents the ‘cam-out’ that ruins expensive door fronts.
- Govee WiFi Water Sensors: This is my ‘pro tip’ for clients. Tucking one of these behind the P-trap is the only way to truly sleep soundly after a DIY install. It pings your phone before a drip becomes a flood.
- Blum Technical Manuals: I trust the engineering behind why your soft close drawers are slamming and the tension fix because they provide the exact tolerances needed for a ‘forever’ feel.
#IMAGE_PLACEHOLDER_E#
Build Something That Lasts Beyond the First Splash
Stepping into a bathroom remodel can feel like a high-stakes game of Tetris, but remember that the goal isn’t just to finish—it’s to create a space that serves you. Whether you decide to maximize your space with custom vanities or stick with a classic setup, the attention you pay to the plumbing and the structural integrity now will pay dividends for decades. You’ve got the tools and the knowledge; now it’s time to stop the leaks and start the transformation. Have you ever discovered a leak that had been hiding for months? Let me know in the comments below!