

I still remember the sinking feeling of stepping into my master bathroom at 6:00 AM only to hear a soft, wet squelch. A tiny, slow-dripping joint behind the drywall had finally let go, turning my beautiful custom wood vanity into a giant sponge. By the time I noticed, the bottom three inches of the particleboard side panels had swollen up like wet bread, completely ruining the finish. It was a costly, frustrating disaster that could have been avoided with a few simple steps. If you are currently remodeling or just trying to protect your existing bathroom setup, you do not have to suffer the same fate. Today, we are diving into the exact methods to shield your cabinetry from the ground up, ensuring a minor puddle does not turn into an expensive replacement bill. Have you ever walked into your bathroom only to find an unexpected puddle threatening your beautiful cabinetry? The waterproofing fix for high-use vanities is something many homeowners overlook until it is far too late. Let us make sure you are not one of them.
The Costly Mistake of Trusting Bare Wood and MDF
When I first started tackling bathroom renovations, I foolishly assumed that standard cabinet seals would protect against standing water. They do not. MDF and standard plywood act like straws, drawing moisture upward through capillary action. According to research on structural wood preservation by the Forest Products Laboratory, unprotected wood composites can lose up to 50% of their structural integrity after just a few cycles of wetting and drying. That is why relying on the factory finish of your vanity base is a recipe for disaster. During my first big DIY project, I skipped sealing the raw bottom edges of a sink cabinet. Within six months, routine splashes from my kids’ bath times had already caused the base to warp and split. To prevent this, you need to establish a true physical barrier before vanity installation even begins.
Is extra waterproofing actually worth the hassle?
You might wonder if spending a Saturday afternoon sealing and lifting your cabinet is truly necessary, especially if you do not have a history of plumbing leaks. The short answer is yes. Bathrooms are inherently wet environments, and even if you never experience a major pipe burst, high humidity and minor floor spills will eventually find their way under your cabinet. Applying a dedicated barrier, such as utilizing moisture barriers for vanities in high-humidity bathrooms, saves you thousands of dollars in structural damage down the road. It is the cheapest insurance policy you can buy for your bathroom. By taking action now, you can seamlessly integrate these protective steps into your regular vanity installation hacks to keep your storage safe, dry, and looking beautiful for decades.
Step-by-Step Waterproofing Shield for Vanity Bases
To shield your bathroom storage from inevitable spills, you need to think of wood cabinetry like a dry sponge. If you leave the raw edges open to the elements, they will suck up water from your bathroom floor. During one of my early bathroom overhauls, I had to replace a brand-new cabinet because the bottom raw edge of the kickboard absorbed water from a minor toilet overflow. It bloated like a cheap piece of cardboard. Ever since that messy, expensive lesson, I have used a three-layer sealing technique that ensures the base of the cabinet remains completely impervious to moisture.
Seal Raw Edges with Marine Grade Epoxy or Silicone
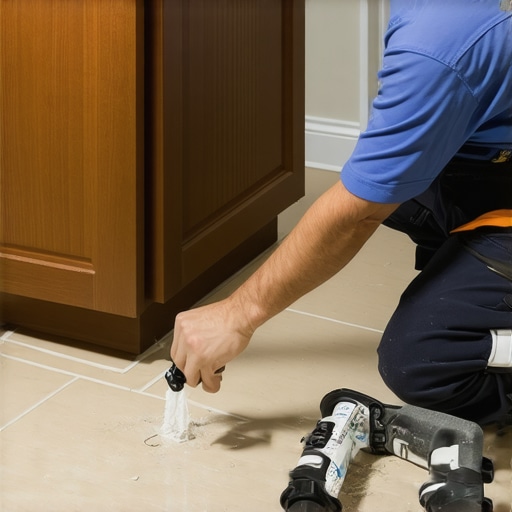
The first line of defense is sealing the raw, unpainted edges at the very bottom of your cabinet. Turn the vanity upside down before you begin your vanity installation. You will notice that many manufacturers leave the bottom edge of the kickboard or side panels completely raw. To fix this, apply a thin, even layer of 100% silicone caulk or marine-grade epoxy directly onto these exposed edges. Use your finger or a plastic spreader to press the sealant deep into the wood pores. Let it cure completely. This acts like a rubber boot for your cabinet, preventing capillary action from drawing puddle water upward into the wood fibers.
Elevate the Base to Break Contact with Wet Floors
Even with a solid seal, keeping wood in direct contact with a wet tile floor is a ticking time bomb. You must create a physical gap. The best way to do this is by using solid plastic leveling legs or non-porous shims instead of wooden ones. When working on tricky bathroom layouts, utilizing 7 tactics for leveling vanities on sloping tile floors ensures your cabinet is perfectly balanced while keeping the wood base elevated just a fraction of an inch off the ground. Once leveled, fill that tiny gap with a high-quality mildew-resistant silicone. This simple step keeps your beautiful cabinetry completely dry, even if your kids turn the bathroom floor into a temporary swimming pool.
Prepare for Plumbing Accidents Inside the Cabinet
Water does not just attack from the outside; a loose pipe joint under the sink can quietly rot your cabinet floor from the inside out. To prevent this, apply a heavy-duty silicone bead around all plumbing penetrations where the pipes exit the back of the vanity cabinet. Next, install a thick, rubberized under-sink mat. I started doing this after finding a slow leak from a P-trap that had been dripping unnoticed for three weeks. The rubber mat caught the water, saved the cabinet floor, and made cleanup as simple as wiping it dry. If you are dealing with cold basement installations, you should also consider the moisture barrier fix for vanities on cold basement floors to stop moisture from seeping up through concrete slabs and rotting your lower shelving and storage units. Taking these proactive measures keeps your bathroom storage safe, dry, and structurally sound for years to come.
The Great Moisture Trap Almost Everyone Overlooks
When you read standard home improvement forums, everyone tells you the same thing: just slap on some silicone and buy a standard unit. But in my years of tearing out rotted bathroom bases, I have realized that the industry standard advice is fundamentally flawed. People assume that sealing the outer edges of a vanity is enough to protect it. It is not. The real culprit is not the occasional splash on the outside; it is the silent, high-pressure humidity microclimate that develops underneath and behind your cabinet. The space between your vanity and a cold tiled wall acts like a moisture magnet, condensing water vapor out of the air daily.
Many DIYers also fall into the trap of purchasing trendy, pre-assembled storage units without assessing their structural limits. If you are upgrading to heavy stone tops, you need to understand that standard cabinet frames are not built to support that weight in a humid environment. In fact, ignoring structural integrity often leads to catastrophic failures, which is why understanding why your heavy quartz vanity is is cracking the cabinet frame is so vital. Have you ever fallen into this trap? Let me know in the comments below.
Why does my bathroom cabinet still warp even though I sealed all the edges?
The answer lies in vapor transmission and unfinished back panels. According to a study on residential moisture mechanics by the Building Science Corporation, water vapor can easily penetrate micro-gaps in standard polyurethane finishes, especially when trapped in unventilated dead spaces. When you seal only the visible edges, you leave the entire rear panel of your cabinetry exposed to the cold, damp wall. To prevent this warp-inducing cycle, you must create a ventilation gap or back-bead the unit with mold-resistant silicone to prevent stagnant air from pooling behind the cabinet. Failing to account for these microscopic forces is a major reason why vanity installations degrade years before they should.
Another critical mistake is choosing the wrong support mechanisms during installation. Standard wooden shims rot, and basic wall anchors slip under the tension of a settling house. When dealing with heavy bathroom storage or floating designs, relying on subpar mounting methods will pull your drywall apart. To solve this, professional installers rely on advanced techniques like 7 reinforcement tactics for wall-hung bedroom vanities to ensure the cabinet stays structurally sound forever. Don’t let a simple lack of foresight ruin your beautiful custom storage upgrades.
My Personal Toolkit for Bulletproof Vanity Installations
Over the years, I have moved away from basic store-bought installation kits. If you want your bathroom storage to survive decades of steam and splashes, you need professional-grade gear. My absolute favorite tool for setting up any new cabinet is a high-precision laser level paired with heavy-duty polymer cabinet shims. Unlike wood shims, which rot and compress under load, polymer shims are entirely unaffected by floor moisture. When you are mastering your step-by-step guide to vanity installation for beginners, pairing these shims with a premium grade polyurethane construction adhesive like Loctite PL Premium is what separates the amateurs from the pros.
For cutting perfect openings for plumbing, a standard hole saw often splinters the fragile backing of modern cabinetry. I now exclusively use a variable-speed plunge router with a template guide. It creates clean, splinter-free cuts that are incredibly easy to seal. Once the cuts are made, I immediately coat the raw interior rings with a layer of heavy-duty exterior wood sealer before final assembly. It is these tiny, precise details that keep your storage structurally sound and prevent your expensive cabinet doors and drawers from binding over time.
How do I maintain my waterproofed bathroom cabinetry over time?
Maintaining your setup is not a set-it-and-forget-it ordeal. Every six months, you should conduct a quick, five-minute inspect-and-wipe routine. Crawl under your sink with a strong flashlight and inspect the seals around the plumbing lines. If you notice any condensation or slow drips, address them immediately. According to the structural guidelines from the Wood Components Manufacturers Association (WCMA), even high-quality sealed surfaces can degrade if subjected to continuous standing water for more than 72 hours. Re-apply a thin bead of mildew-resistant silicone to the base perimeter every two to three years to ensure your waterproofing fix for high-use vanities remains intact as your home naturally settles.
I also recommend keeping a small moisture absorber pack inside your deepest vanity drawers, especially if you utilize smart storage solutions to optimize small bathroom spaces where air circulation is restricted. This simple maintenance step stops humid microclimates from warping your inner cabinet shelving. Looking ahead, I predict we will soon see smart, moisture-sensing baseboards integrated directly into high-end top trends in vanity designs you need to know in 2025, which will alert homeowners of micro-leaks via their smartphones before any wood swelling can even begin. For now, taking manual control of your cabinet maintenance is your best defense. I highly encourage you to try the marine-grade epoxy sealing trick on your very next project; it is a total game-changer for durability.
Over the years, I have helped dozens of homeowners fix avoidable bathroom remodeling mistakes. While many focus solely on the aesthetic placement of their cabinets, neglecting the physical environment surrounding the installation is what ultimately cuts their lifespan short. Here is what I have learned from years of tearing out compromised wood bases and rebuilding them to last a lifetime.
The Hardest Lessons I Learned Salvaging Warped Bathroom Cabinetry
Through trial, error, and several flooded floors, I have developed a set of non-negotiable rules for any high-use bathroom install:
- Gravity always wins: No matter how carefully you wipe down your counter, water runs downhill. If your vanity base does not have a protective barrier, floor moisture will find its way into the wood fibers.
- Factory finishes are never enough: Most store-bought cabinets are finished only on the visible exterior. The back, underside, and raw edges are left entirely unprotected.
- Preventative sealing saves thousands: It takes only twenty minutes to apply marine epoxy to raw edges during vanity installation, saving you the immense headache of a full tear-out later.
- Never ignore plumbing micro-leaks: Even a tiny, single drip per hour from a loose drain joint will rot a cabinet floor within months if you do not have a protective under-sink tray.
My Essential Toolkit for Bulletproof Installations
To ensure my vanity installations survive decades of steam, splashing kids, and occasional plumbing mishaps, these are the exact tools and materials I never start a job without:
- 100% Silicone Caulk (Mold-Resistant): Essential for sealing raw edges, plumbing penetrations, and backing gaps. I avoid cheap acrylic caulks as they shrink and crack over time.
- Marine-Grade Epoxy: My secret weapon for treating the very bottom raw edges of the cabinet kickboard to stop capillary action completely.
- Solid Polymer Shims: Instead of traditional wooden shims that rot, I use non-porous polymer shims paired with 7 tactics for leveling vanities on sloping tile floors to keep wood elevated from standing water.
- Heavy-Duty Rubber Under-Sink Mats: A simple, removable liner that acts as a catch-pan for unexpected pipe drips, protecting the cabinet floor from warping.
Take Control of Your Next Bathroom Upgrade
Waterproofing your cabinetry is not about overcomplicating your renovation; it is about protecting your hard-earned investment. By taking a few extra minutes to seal raw edges and raise your base off the wet floor, you can ensure your beautiful storage solution remains structurally sound and gorgeous for decades to come. Have you ever struggled with a warped cabinet base or a hidden plumbing leak? Let me know in the comments below!