

I remember the first time I hauled a custom-built, heavy oak vanity into a newly tiled bathroom, feeling like a champion, only to set it down and watch it rock like a rickety chair at a dive bar. It was devastating. The tile looked beautiful, but it had a slope so aggressive you could practically ski down it toward the floor drain. I tried to ignore it for a second, thinking maybe the weight of the quartz would settle it. Big mistake. I ended up with a vanity that leaned so far left the drawers would slide open on their own as if the house were haunted. If you have ever felt that sinking feeling in your gut when your bubble level tells you your floor is a liar, you are in the right place. Today, I am going to show you how to beat gravity and get that rock-solid finish even when the ground beneath you refuses to cooperate.
Make Your Vanity Stand Tall on a Crooked Floor
Installing a vanity on a perfect subfloor is a dream; installing one on a sloping tile floor is the reality most of us face in older homes or wet rooms. I learned the hard way that you cannot simply ‘shim and pray.’ My early attempts involved shoving cedar shakes under the corners, which worked for about a month until the humidity caused them to compress and rot, leaving me with a wobbly vanity on uneven tile all over again. The secret is not just about filling the gap; it is about creating a structural foundation that can handle the massive weight of modern countertops. According to the National Kitchen & Bath Association (NKBA), a standard vanity with a stone top can easily weigh over 200 pounds, and all that pressure on an unlevel base will eventually cause your miter joints to fail or your plumbing to leak. Have you ever walked into your bathroom and noticed a weird gap between your backsplash and the wall? That is almost always a leveling issue that started at the floor.
Is this extra leveling work actually worth the headache?
You might be tempted to just caulk the gap and call it a day, but trust me, your future self will hate you for it. When your cabinet is out of plumb, your hinges have to work twice as hard. Eventually, they will sag, and you will be left wondering how to fix uneven gaps in your cabinet doors. Getting the base right is the ‘make or break’ moment of any bathroom remodel. We are aiming for a finish that looks like the vanity grew out of the floor, not like it was dropped there by accident. In the next few sections, we will dive into expert vanity installation tricks that go way beyond simple plastic shims, including some heavy-duty maneuvers for those of you dealing with serious height differences. We will even touch on the specific leveling move for slanted floors that most contractors keep as a trade secret. Ready to stop the rocking and start the locking?
Find the highest spot before you touch a tool
The biggest mistake I see beginners make is starting their leveling process at the low end of the floor. If you do that, you will find yourself trying to sink the vanity into the tile, which is impossible without a jackhammer. Instead, grab your longest level—a 4-footer is best—and find the highest point on the floor where the vanity will sit. This is your ‘Zero Point.’ Everything else will be built up to match this height. I remember a job in a Victorian-style home where the floor dropped two full inches from right to left. I initially tried to shim it, but the gap was so large it looked like the vanity was trying to escape. That is when I realized I needed a more aggressive approach. For those extreme cases, you should use the leveling move for vanities on slanted floors, which involves creating a level reference line on the wall first, rather than trusting the floor at all.
Scribe the base for a seamless look
If you want that high-end, custom-built look, you have to move beyond plastic wedges. Scribing is the art of transferring the floor’s specific ‘wiggle’ onto the wood of your vanity base. You set the vanity in place, level it perfectly with temporary blocks, and then use a compass or a dedicated scribe tool to trace the floor’s contour onto the kickplate. Once you trim that line with a jigsaw or a power planer, the cabinet will sit flush against the tile. This is the gold standard for the scribing move for flawless cabinet gaps on natural stone. It eliminates the need for ugly caulk lines that eventually turn yellow and peel. 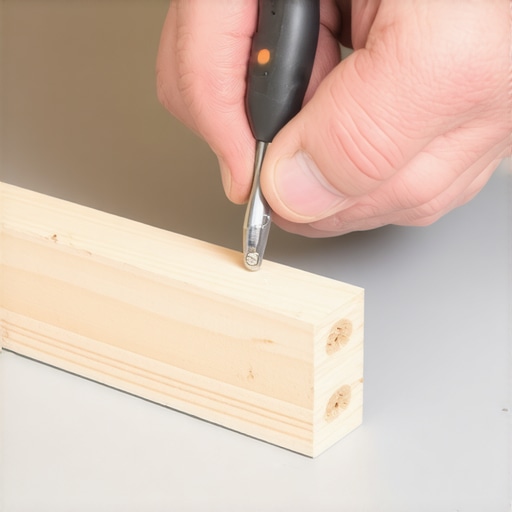
Build a hidden sub-frame for heavy quartz
When you are dealing with a heavy stone top, you cannot rely on the thin plywood sides of a budget cabinet to hold the weight if it is resting on shims. The pressure is too concentrated. In these scenarios, I always build a ‘ladder frame’ out of pressure-treated lumber that sits inside or under the vanity. This frame carries the load directly to the floor. I once installed a massive 72-inch double vanity with a 3cm quartz top that started to crush the cedar shims I’d tucked underneath. The drawers started sticking within a week. I had to go back, pull the whole thing out, and implement the hidden sub-frame move for supporting massive quartz top vanities. Since then, it hasn’t budged a millimeter. If you are worried about the longevity of your setup, especially in damp environments, consider 5 moisture-proof bases for bathroom cabinets on wet floors to prevent the wood from wicking up water.
Lock it to the wall to prevent the lean
Leveling isn’t just about the floor; it is about the relationship between the cabinet and the wall. Even if your floor is level, your wall might be bowed like a cheap recurve bow. Once your base is set, you must shim the gap between the back of the vanity and the wall before driving your screws into the studs. If you skip this, the screws will pull the vanity backward as you tighten them, warping the cabinet box and ruining all your hard leveling work. This is one of the most overlooked expert vanity installation tricks. By shimming the wall gaps, you ensure the cabinet stays square, which is the only way to avoid the nightmare of wobbly vanity legs on uneven tile. Always use a long screw that penetrates at least 1.5 inches into the framing to ensure that the vanity doesn’t tip forward once the heavy sink and countertop are added.
Many contractors will tell you that as long as the bubble on your level is centered, the job is done. In my experience, that is a dangerous oversimplification. A vanity can be perfectly level but still structurally compromised if the weight distribution is uneven. This is what I call the ‘support vs. level’ myth. While everyone focuses on the aesthetics of a level countertop, they often ignore how that weight is actually reaching the floor. According to the Architectural Woodwork Institute (AWI), large-scale cabinetry must have a continuous load path to the floor to prevent the box from racking under the weight of heavy stone tops. If you are only supporting the vanity at three points to get it level, the middle of the cabinet will eventually sag, leading to cracked miter joints or, worse, a cracked quartz top.
Why a perfectly level vanity can still fail
The trap most people fall into is trusting the cabinet’s integrity more than the physics of the material. When you use expert vanity installation tricks like heavy-duty plastic shims, you must ensure they are placed directly under the vertical gables of the cabinet. If you shim the front kick-plate but leave the side panels floating, you are essentially turning your vanity into a bridge that wasn’t engineered to hold a 300-pound slab. This is why I always recommend the hidden sub-frame move for supporting massive quartz top vanities. By building an internal skeleton, you transfer that weight directly to the joists, regardless of how wonky your tile layout is. Have you ever fallen into this trap? Let me know in the comments.
Does the stone thickness change your leveling strategy?
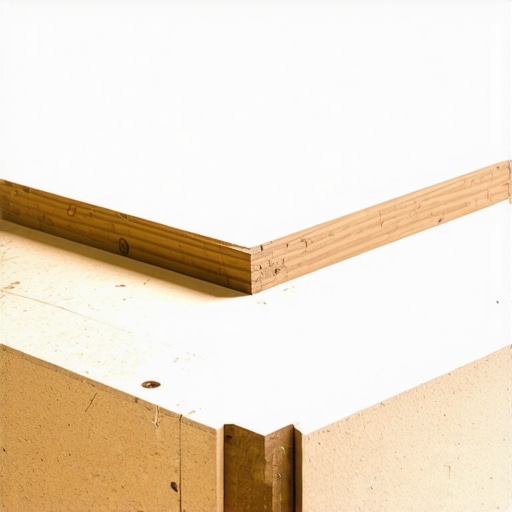
Absolutely. If you are installing a 3cm slab versus a 2cm slab with a laminated edge, the ‘give’ in the cabinet is much less forgiving. A 3cm slab is incredibly rigid; if your base isn’t dead flat across the top, the stone won’t flex—it will snap. This is where the advanced move of planishing the top of the cabinet comes in. After you have used the leveling move for vanities on slanted floors, take a long straight-edge across the top of the cabinet box. If there is a dip, you don’t just add more shims at the floor; you add micro-shims on top of the cabinet before the stone is set. This prevents the ‘air gap’ that causes stone failure. Failure to do this often leads to the plumber being blamed for a wobbly vanity on uneven tile when it was actually a structural support issue all along.
Stop the slow-motion disaster of moisture wicking
Another nuance pros often miss is the capillary action of wood on wet tile. Even if you level the vanity perfectly, if you haven’t used 5 moisture-proof bases for bathroom cabinets on wet floors, the wood will eventually soak up water like a sponge. This causes the bottom of the cabinet to swell, which ruins your scribe lines and throws the whole unit out of level again. It is a frustrating cycle. If you want a finish that stays perfect for a decade, you must isolate the wood from the tile using a non-porous material. Combine this with the scribing move for flawless cabinet gaps on natural stone to ensure a tight fit that doesn’t rely on massive beads of caulk. Remember, caulk is a sealant, not a structural filler. If you’re relying on it to hide a quarter-inch gap, you’ve already lost the battle against gravity. Getting these small, technical details right is what separates a DIY weekend project from a professional-grade installation that adds real value to your home.
Upgrade Your Toolbox to Beat Gravity
I used to think my old bubble level was the only tool I needed until I worked on a job where a floor was so warped that the bubble just couldn’t give me the precision I needed for a massive double-vanity. That is when I switched to the Stabila 80 AS-2 Digital Level. If you are serious about avoiding a wobbly vanity on uneven tile, a digital level is a game-changer because it tells you exactly how many degrees or tenths of an inch you are off. This precision is vital when you are implementing expert vanity installation tricks like micro-shimming for quartz. I also swear by the AccuScribe Pro. It’s a simple tool, but it is the only way to get a perfect scribe line on a cabinet base when your floor looks like the rolling hills of Kentucky. Using these specific tools ensures your installation isn’t just ‘good enough’ for today, but structurally sound for decades.
How Can I Keep My Custom Built-ins Looking New?
Maintenance is the part everyone ignores until a drawer starts sticking or a door hangs crooked. Every six months, you should check your hinge tension. As cabinets settle, the weight of the doors can cause microscopic shifts. If you notice a change, you need to address the hardware immediately. For those who used vanity installation hacks that save time and money, don’t forget to inspect the silicone seal at the back of the counter. Moisture is the silent killer of custom woodwork. I always recommend the waterproof sealant move for vanity backsplashes to ensure that zero water migrates behind the cabinet. According to the Blum Technical Catalog, soft-close mechanisms are rated for 200,000 cycles, but only if they are perfectly aligned; if your cabinet is out of plumb, you are cutting that lifespan in half. If things start feeling sluggish, look into why your soft-close drawers are slamming and the tension fix.
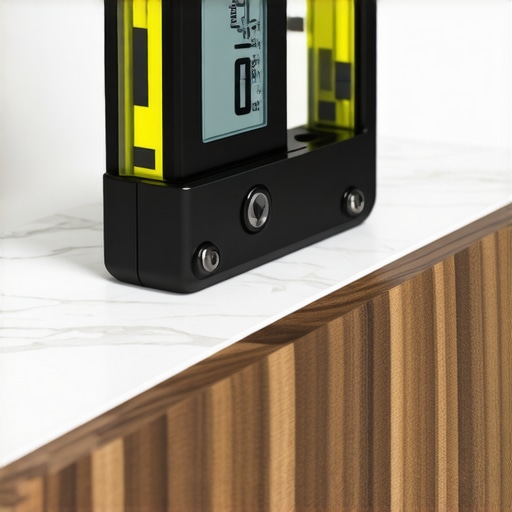
Looking ahead, I see a major shift toward modular internal components. While the outer shell of our vanities and built-ins remains custom and fixed, the internals—the creative storage solutions for vanities—are becoming more adaptable. In 2025 and beyond, expect to see more steel-reinforced frames integrated directly into wood cabinetry. This ‘hybrid’ approach allows for even thinner profiles without sacrificing the strength needed for heavy 3cm stone. We are moving away from bulky wooden bases toward sleek, cantilevered designs that still offer the storage of a traditional unit. If you are planning a remodel, I strongly suggest you try the hidden sub-frame move for supporting massive quartz top vanities on your next project. It is the single best way to ensure your beautiful stone doesn’t become a cracked disaster in three years. Go grab a digital level and check your current setup—it is the one tool that changed my career and saved my back.
Lessons from the Jobs I Had to Redo
One of the most expensive mistakes I ever made was assuming that “level enough” was acceptable for a heavy stone top. Here is what I know now after years of trial and error: First, never trust your eyes over a calibrated tool; a quarter-inch slope looks flat until you set a heavy marble slab on it. Second, the shim you use today is the pivot point for a gap in your cabinet doors tomorrow if it is not structurally sound and properly fixed. Third, always over-engineer your base. If you think it needs four shims, use a sub-frame. It is about creating effortless storage solutions that do not groan or shift under the weight of a busy morning routine. If you skip the leveling, you are essentially building a house on sand.
Tools That Turn Amateurs into Pros
To get a professional result that stops a wobbly vanity on uneven tile, I rely on a few non-negotiables that I keep in my service truck at all times. I always carry a Bosch Power Planer because it turns a tedious scribing job into a five-minute task. For the structural side, I use GRK Cabinet Screws; they have a built-in washer head that prevents the wood from splitting when you are pulling the vanity tight to the wall. Finally, I recommend reading the NKBA Kitchen & Bathroom Planning Guidelines for specific weight ratings. It is the industry bible that explains why these expert vanity installation tricks are necessary for safety. I also suggest keeping a few vanity installation hacks in your back pocket for when the house settling throws your plumbing out of alignment.
#IMAGE_PLACEHOLDER_E#
Build a Foundation That Stands the Test of Time
Installing a vanity is not just about plumbing and aesthetics; it is about the satisfaction of knowing your home is structurally solid. When you take the extra hour to scribe the base or build a sub-frame, you are not just leveling a box—you are mastering your environment. This level of care is what turns a simple renovation into a long-lasting legacy. With the right creative storage solutions for vanities, you will have a space that feels as good as it looks. Go ahead, start that project and do not be afraid to use a few extra shims to get it right. Your future self—and your level—will thank you. Have you ever had a vanity drawer that just would not stay closed no matter how many times you adjusted it? Let me know in the comments below!