

I still remember the sudden, terrifying crack of splitting drywall. It was a chilly Tuesday morning, and my wife had just sat down on our newly finished, DIY floating shower bench to shave her legs. In a split second, the beautiful cedar seat pitched forward, leaving her on the floor and me staring at two massive, ragged holes in our custom tiling. I had relied on standard structural screws and simple wall framing, thinking it would easily hold. I was dead wrong. That costly, messy failure sent me on a deep dive into heavy-duty wall support, eventually leading me to discover what professionals call the cantilever bracket move.
The Hidden Danger of the Sagging Shower Seat
Floating bathroom seats look incredibly sleek, offering that high-end, spa-like aesthetic we all crave. But without the right internal support, they are a ticking time bomb. The human body exerts an incredible amount of leverage when sitting on a bench that has no legs for support. If you do not plan for this load behind the wall, you will inevitably end up with cracked grout, damaged tiles, or worse, a complete structural collapse. Whether you are looking into smart storage solutions to optimize small bathroom spaces or designing a luxurious wet room, securing your seating safely must be your absolute top priority.
Today, we are going to dive into how to properly anchor these floating seats using heavy-duty cantilever steel supports. According to home safety and engineering standards published by the International Code Council (ICC), grab bars and residential seating must withstand a concentrated load of at least 250 pounds—though I personally aim for double that capacity to sleep soundly at night. If you want to avoid the exact disaster I went through, you need to understand how the structural plate move for cantilevered bathroom benches keeps your walls intact. Have you ever noticed your floating vanity or bench shifting slightly when you lean on it? If so, you might already be dealing with a weak foundation.
Is a cantilever bracket actually worth the extra wall prep?
I get this question all the time from skeptical homeowners. They look at the price of thick structural steel brackets and wonder if they can just get away with standard framing. The short answer is a resounding yes, it is absolutely worth it. When I built my first floating bench, I tried to skip the heavy steel plates because I didn’t want to tear open the drywall. That single mistake cost me thousands in retiling fees later. Just like learning how to fix floating vanities that move when leaned on, reinforcing your seat with heavy-duty brackets prevents the micro-movements that eventually destroy your tile grout and break your waterproofing seals.
How to Anchor Your Bench Behind the Tile
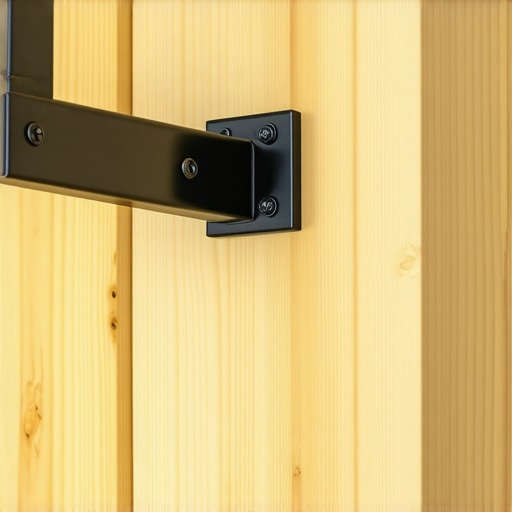
Installing a cantilever support is like building the chassis of a racing car; the strength is entirely hidden beneath the shiny exterior. When I remodeled a master bathroom in a drafty 1920s craftsman, the homeowner wanted a clean, floating cedar bench over delicate hand-painted tiles. Instead of relying on flimsy wood blocking, I exposed the studs and prepared to mount heavy-duty steel. To do this right, you must first notch your wall studs so the vertical arm of your cantilever bracket sits perfectly flush with the framing. If the steel protrudes even a sixteenth of an inch, your cement backer board will bow, ruin your tile lines, and eventually crack your waterproofing layer.
Cut the Studs to Recess the Steel
Use a plunge router or a circular saw set to the exact thickness of your steel bracket—usually 1/4 inch or 3/8 inch. Carefully cut out the notch on the face of the studs where the brackets will live. When I first tried this years ago, I freehanded the cuts with a reciprocating saw and ended up with a sloppy, uneven recess that made the bench tilt downward. Now, I always use a simple wood guide clamped to the stud to ensure a perfectly flat, level recessed channel. If you are working on other heavy bathroom fixtures, applying similar structural mindfulness is just as critical as learning how to support double-sink vanities without center legs.
Drive the Structural Screws Home
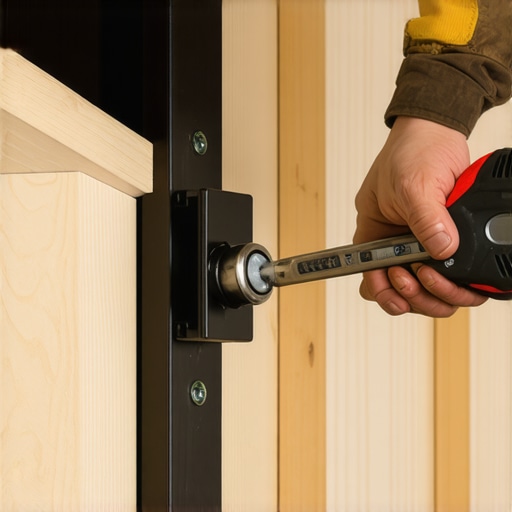
Once your brackets sit flush in the stud notches, it is time to secure them. Toss those standard drywall screws aside; they have zero shear strength and will snap under pressure. You need heavy-duty structural wood screws, preferably 5/16-inch diameter lag design, penetrating at least three inches into the center of the stud. I learned the hard way to pre-drill every single pilot hole. On that craftsman job, I skipped pre-drilling on a tough Douglas fir stud, sheared the head off a lag screw halfway in, and spent an hour swearing while trying to drill out the hardened steel. Pre-drill, align your bracket, and drive the screws home until they are tight and flush against the steel plate.
Waterproof Like Your Tile Depends on It
With the brackets solidly mounted to the studs, you can now hang your cement backer board. However, the steel arms protruding from the wall present a major waterproofing challenge. Water will find any gap, run down the bracket, and rot your framing from the inside out. Use a high-quality liquid waterproofing membrane or specialized flashing tape around the penetration points. Generously apply the sealant where the bracket exits the wall. Think of this step like applying the protective measures needed for 7 moisture barriers for vanities in high-humidity bathrooms. Once sealed, you are ready to thin-set and tile directly over the wall, leaving only the clean, solid horizontal steel arms ready to receive your bench seat.
When discussing high-end, floating bathroom features, most DIY enthusiasts and even some general contractors fall victim to a massive misconception: they believe that sheer, brute-force blocking is enough. In my early days, I was convinced that stuffing a wall cavity with as many scrap 2x4s as possible would make a structure bulletproof. It makes intuitive sense, doesn’t it? More wood should equal more strength. But in reality, wood shrinks, warps, and flexes under localized pressure. Relying solely on wood blocking for high-load cantilevered structures actually guarantees micro-movement over time, which is the ultimate enemy of waterproof grout lines.
Instead of packing the wall with lumber, true structural stability comes from isolating the load. Heavy-duty steel brackets distribute the force across the entire vertical run of your studs rather than twisting individual horizontal blocks. If you are also planning a sink area remodel, ignoring these load distribution mechanics is exactly why your heavy quartz vanity is cracking the cabinet frame. Let’s face it: wood is a dynamic, living material that reacts to bathroom humidity; steel is not.
Why does my bathroom bench still creak even with steel brackets installed?
This is the exact question that separates the amateurs from the seasoned professionals. If you have installed cantilever brackets and still hear a distinct, unsettling creak when you sit down, you have likely fallen into the “fastener play” trap. Many installers use standard wood screws that don’t perfectly match the diameter of the bracket’s mounting holes. Over time, even a half-millimeter gap allows the bracket to shift slightly against the stud under load, creating friction. According to research from the Forest Products Society, wood fibers compress permanently under concentrated, repetitive loads if there is any initial movement. To eliminate this, you must use tight-tolerance structural lag screws and apply a thin layer of construction adhesive behind the steel bracket before driving the screws home. This completely eliminates the micro-gaps that cause creaking and eventual structural failure.
Another overlooked trap is ignoring the floor-wall connection when updating your bathroom layout. When homeowners transition to a minimalist aesthetic, they often swap traditional cabinetry for wall-hung alternatives. However, without adjusting the underlying support, they end up searching for how to fix floating vanities that move when leaned on because the wall studs are flexing under the levered weight. Always look at the entire wall system as a single structural unit. Have you ever fallen into this trap and had to deal with creaking tile or sagging seats? Let me know in the comments below!
If you are looking to expand your bathroom update beyond the shower, consider browsing our smart storage solutions to optimize small bathroom spaces to ensure your entire redesign is both incredibly functional and structurally sound.
When you shift your focus from the basic installation steps to long-term preservation, maintaining a cantilevered system becomes a game of moisture control and joint inspections. Every year, I perform a quick check on my custom bathroom installations. I take a flashlight, peer underneath the bench, and inspect the joint where the support arm emerges from the tile. If you notice any hairline cracks in the grout or silicone at this junction, water is already finding its way to your framing. For high-moisture spaces, I rely heavily on professional-grade tools like a pinless moisture meter to check the surrounding wall area without poking holes in my expensive finishes. Taking these proactive steps is just as crucial as executing the waterproofing fix for high-use vanities in Farmington Hills bathroom remodels.
How do I maintain my floating bathroom structures over time?
The secret to keeping your cantilevered bench or heavy floating features solid for decades lies in maintaining the elasticity of your sealant joints. Wood, steel, and tile expand and contract at completely different rates. Because of this thermal and moisture fluctuation, standard hard grout will eventually crack at the point of penetration. I always scrape out old, hardened sealants every three to five years and replace them with a premium, 100% silicone sealant that offers high movement capability. If you are caring for other modern built-ins, matching the right material to the job is key—which is why knowing how to stop garage cabinet doors from swelling in humidity will save your storage systems from warp and wear.

Looking ahead, the future of heavy-duty bathroom design is moving toward integrated, pre-fabricated steel chassis systems that tie directly into the home’s subfloor rather than relying solely on the wall studs. According to technical bulletins from the National Tile Contractors Association (NTCA), minimizing deflection in the substrate is the single most important factor for preventing tile failure. The trend is moving away from field-modified wood framing and toward engineered, welded-steel framing cages that can support thousands of pounds without a single millimeter of sag.
If you are planning to update other areas of your home with this clean, floating aesthetic, the same engineering principles apply. You can learn how to support floating desks or entertainment systems using 6 hidden steel brackets for heavy-duty built-in office desks to make sure your work surfaces never bow or wobble. I highly encourage you to try my advanced tip on your next project: apply construction adhesive directly behind your steel brackets before driving those structural lag screws home. It completely isolates the metal from the wood, eliminating creaks for good.
When you shift your focus from the basic installation steps to long-term preservation, maintaining a cantilevered system becomes a game of moisture control and joint inspections. Every year, I perform a quick check on my custom bathroom installations. I take a flashlight, peer underneath the bench, and inspect the joint where the support arm emerges from the tile. If you notice any hairline cracks in the grout or silicone at this junction, water is already finding its way to your framing. For high-moisture spaces, I rely heavily on professional-grade tools like a pinless moisture meter to check the surrounding wall area without poking holes in my expensive finishes. Taking these proactive steps is just as crucial as executing the waterproofing fix for high-use vanities in Farmington Hills bathroom remodels.
How do I maintain my floating bathroom structures over time?
The secret to keeping your cantilevered bench or heavy floating features solid for decades lies in maintaining the elasticity of your sealant joints. Wood, steel, and tile expand and contract at completely different rates. Because of this thermal and moisture fluctuation, standard hard grout will eventually crack at the point of penetration. I always scrape out old, hardened sealants every three to five years and replace them with a premium, 100% silicone sealant that offers high movement capability. If you are caring for other modern built-ins, matching the right material to the job is key—which is why knowing how to stop garage cabinet doors from swelling in humidity will save your storage systems from warp and wear.
Looking ahead, the future of heavy-duty bathroom design is moving toward integrated, pre-fabricated steel chassis systems that tie directly into the home’s subfloor rather than relying solely on the wall studs. According to technical bulletins from the National Tile Contractors Association (NTCA), minimizing deflection in the substrate is the single most important factor for preventing tile failure. The trend is moving away from field-modified wood framing and toward engineered, welded-steel framing cages that can support thousands of pounds without a single millimeter of sag.
If you are planning to update other areas of your home with this clean, floating aesthetic, the same engineering principles apply. You can learn how to support floating desks or entertainment systems using 6 hidden steel brackets for heavy-duty built-in office desks to make sure your work surfaces never bow or wobble. I highly encourage you to try my advanced tip on your next project: apply construction adhesive directly behind your steel brackets before driving those structural lag screws home. It completely isolates the metal from the wood, eliminating creaks for good.
The Hardest Lessons I Learned on the Road to Sag-Free Seating
My journey from that disastrous drywall split to flawless floating installations taught me three critical things that standard manuals leave out. First, never trust wood framing alone to remain perfectly static in high-humidity zones. The constant moisture cycles will eventually cause the lumber to warp and pull. Second, skipping the pre-drilling step when installing heavy-duty lag bolts is a recipe for sheared heads and endless frustration. Finally, I realized that relying on brute-force blocking instead of elegant load distribution is what causes wall-hung features to sag and ruin expensive tile layouts. Planning your load paths before making a single cut is the difference between a lifetime of structural stability and a costly, middle-of-the-night collapse.
My Essential Toolkit for Heavy Wall Builds
To get professional results, you need to rely on the right structural gear and guidance. First, I highly recommend picking up high-grade structural lag screws like the Spax or GRK heavy-duty fasteners rather than standard carriage bolts. Second, a high-quality liquid membrane like Laticrete Hydro Ban is indispensable for securing the penetration zones where steel arms meet tile backer boards. For step-by-step guidance on aligning the surrounding cabinetry features, consult the expert guide to flawless vanity installation tricks tips. Finally, refer directly to the structural design bulletins published by the National Tile Contractors Association (NTCA) to verify deflection limits before laying your expensive stone.
Take the Leap and Frame with Confidence
Designing a spa-like retreat should be an exciting journey, not a source of constant structural anxiety. By shifting your approach from standard wood blocking to robust cantilever steel supports, you guarantee that your sleek, floating aesthetic remains incredibly stable for decades to come. Armed with the right brackets, proper waterproofing membranes, and structural lag screws, you are fully prepared to build a seat that is as tough as it is beautiful. Why wait to elevate your space with dynamic, modern designs? If you want to explore more ideas for surrounding fixtures, dive into innovative storage solutions to transform your bathroom and get your dream project started today.
Have you ever had a floating seat or vanity shift when you sat down or leaned on it? Let me know about your experiences in the comments below!