

I’ll never forget the sound of my first major renovation ‘oops.’ It wasn’t a crash—it was a slow, agonizing groan coming from the master bathroom wall. I’d spent weeks hunting for the perfect double-sink vanity, finally landing on a sleek, wide unit that promised a modern, airy look. I was obsessed with the idea of a ‘floating’ aesthetic, which meant one thing: no center leg. But as I set that massive slab of quartz on top, I realized I hadn’t planned for the physics of gravity. I’d made the classic amateur mistake of trusting standard drywall screws to do a job that required structural engineering. It’s a terrifying feeling watching your expensive investment start to pull away from the studs, and I don’t want you to feel that heart-drop moment.
The Hidden Physics of the Floating Double Vanity
In this guide, I’m going to walk you through the exact methods I now use to ensure a rock-solid installation. We’re going to talk about real structural reinforcement that lets you keep that clean look without compromising safety. Whether you’re looking at top trends in vanity designs or just trying to maximize your space with custom vanities, the support system hidden behind those doors is everything. Many people assume the cabinet box itself is the strength, but without that center leg, you are essentially asking your wall to carry the weight of a small refrigerator. [IMAGE_PLACEHOLDER]
Will this setup actually collapse the first time someone leans on it?
It’s the most common fear I hear from my neighbors. And it’s a valid one. A double vanity with two sinks and a stone top can easily weigh upwards of 400 pounds—and that’s before you fill it with heavy bottles of shampoo and lean on it while brushing your teeth. According to guidelines from the National Kitchen & Bath Association (NKBA), wall-hung fixtures must be able to withstand significant downward pressure beyond their own static weight. If you just screw into the studs and call it a day, you might end up wondering why your heavy quartz vanity is cracking the cabinet frame or pulling your drywall into a concave mess. Have you ever stood back from a project and realized the weight was far more than you anticipated? Tell me I’m not the only one who has had to call for backup at the last second!
How to Stop the Sag Before It Starts
I used to think that a couple of extra screws would solve everything. I was wrong. My early failure taught me that 7 reinforcement tactics for wall-hung bedroom vanities aren’t just suggestions—they are the law if you want to skip that center leg. You need to think about internal bracing and potentially a cleat hack even if you have wood studs. Following an expert guide to flawless vanity installation means looking at what’s behind the plaster. In the next section, we’re going to dive into the specific hardware and framing tricks that will make your vanity feel like it’s part of the house foundation rather than a fragile shelf hanging by a thread.
Stop Worrying About Gravity with a Solid Wall Foundation
The biggest misconception in bathroom remodeling is that a few cabinet screws into wood studs provide enough lateral and vertical support for a floating unit. Think of your floating vanity as a giant lever; the further the front edge extends from the wall, the more force it exerts on the top fasteners. To combat this, you need to implement 6 heavy-duty wall fixes for massive quartz top vanities that focus on spreading that load across multiple points of contact. If you are working with an older home, you might even need to learn how to secure floating vanities to double layer drywall where the standard screw depth just doesn’t provide the necessary grip. In these cases, the vanity isn’t just hanging; it’s practically trying to rotate off the wall, and the top row of screws is your only line of defense against a catastrophic failure.
The Secret Support of a Hidden Ledger Board
I once tried to level a 72-inch oak vanity solo. I had it perfectly positioned, or so I thought, until I started the plumbing. Without a bottom support, the unit shifted just a quarter-inch as soon as I leaned into the cabinet to connect the P-trap, enough to make the drains leak later. That’s when I started using what I call the ledger board move. You screw a 2×4 or a heavy plywood strip into the studs exactly where the bottom back edge of the vanity sits. This temporary or permanent shelf carries the static weight while you drive your primary fasteners, ensuring the unit stays perfectly level even as you add the heavy quartz top. 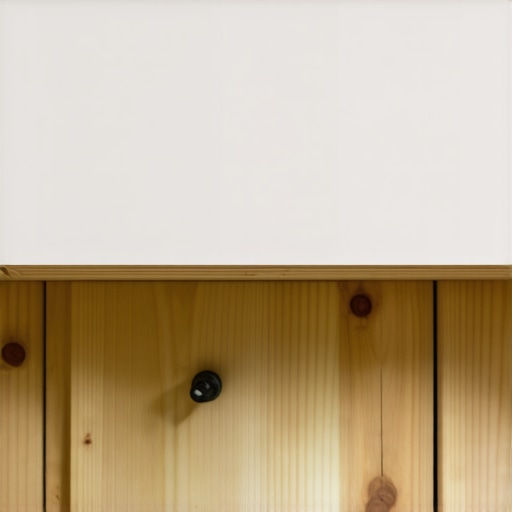
When Steel Studs Change the Game
If you open your wall and find metal instead of wood, don’t panic, but don’t use wood screws either. You can’t just drive a standard fastener and hope for the best; steel studs will pull or shear under the weight of a stone-topped double vanity. You need a specific cleat hack for mounting vanities to steel studs that involves heavy-duty toggles or specialized blocking installed behind the metal. This provides the ‘bite’ necessary to hold several hundred pounds. It’s the difference between a vanity that feels like a rock and one that develops a terrifying wiggle every time you lean on the sink to brush your teeth.
Internal Stiffeners and Scribing for a Flush Fit
Beyond the wall, the cabinet itself often needs help because most off-the-shelf units aren’t built for a ‘legless’ life. I always recommend adding 6 heavy-duty L-brackets for reinforcing custom built-in units inside the top corners where the vanity meets the wall. These brackets tie the face frame directly to the wall-mounting rail, preventing the box from pulling apart under the weight of the countertop. Also, never assume your wall is flat. Using the scribing hack for fitting vanities against out-of-plumb walls ensures the back of your cabinet is in 100% contact with the surface. If there’s even a tiny gap, the tightening screws will pull the cabinet into the void, bowing the frame and eventually cracking your stone top or causing drawer misalignment.
Ditch the Myth that Studs Are Your Only Support
Everyone tells you the same thing: find the studs, use long screws, and you’re golden. But in my experience, that’s exactly how you end up with a tilted cabinet. A common industry ‘truth’ is that studs provide all the vertical support you need, but this ignores the reality of shear force and rotational torque. When you have a massive double vanity, the studs are just the starting point. You aren’t just holding weight up; you are preventing the unit from pulling forward and out. This is why a step-by-step guide to vanity installation for beginners often misses the advanced necessity of ‘blocking’—installing solid wood between the studs before the drywall goes up. Without that continuous solid surface, your screws are doing all the work at tiny, vulnerable points. According to the Architectural Woodwork Institute (AWI) Quality Standards, wall-mounted cabinetry must have specific internal blocking to prevent ‘racking,’ which is when the box itself begins to twist because the weight isn’t distributed evenly across its frame.
Why does the unit flex when I open the bottom drawer?
This is the advanced nuance most homeowners miss. You might have the vanity securely anchored, but if the cabinet box itself lacks rigidity, it will groan every time you access your creative storage solutions for vanities. When you extend a 22-inch drawer filled with hair dryers and heavy lotions, you are effectively lengthening the lever arm of the vanity. That extra foot of weight hanging in mid-air exerts massive pressure on the top-rear fasteners. This is where stop drawer sag in bedroom closets with internal bracing techniques become relevant in the bathroom too. I’ve seen beautiful installs fail not because the wall gave way, but because the cabinet’s own back panel separated from the side walls under the strain of a heavy drawer. 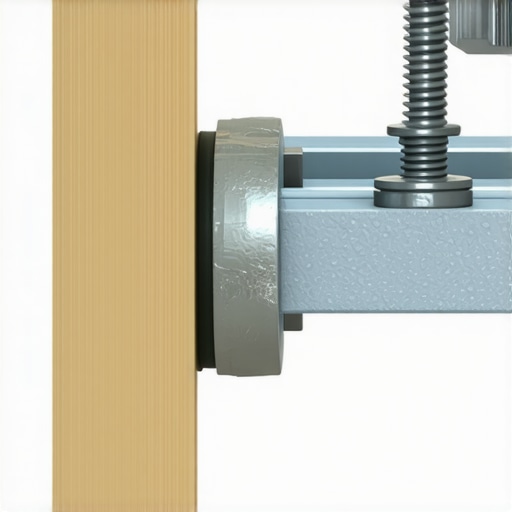
Stop Using Standard Wood Screws for Dynamic Loads
The ‘Oops’ factor here is the hardware choice. Many DIYers reach for 3-inch gold construction screws, but those aren’t rated for the lateral shear of a 400-pound stone assembly. You need structural lag screws or GRK-style fasteners that won’t snap if the house settles slightly. If you don’t upgrade your hardware, you’ll eventually see why your heavy quartz vanity is cracking the cabinet frame—the fasteners stay in the wall, but the cabinet box begins to slide down them. Using 6 heavy-duty wall fixes for massive quartz top vanities includes switching to these wider-head structural screws that spread the load across more of the cabinet’s mounting rail. I also recommend using the internal brace move for extra long floating shelves logic: reinforcing the corners of the vanity with steel to ensure the box stays a perfect 90-degree rectangle forever. Have you ever fallen into the ‘two screws and a prayer’ trap? Let me know in the comments below!
Why Your Two-Foot Spirit Level is Lying to You
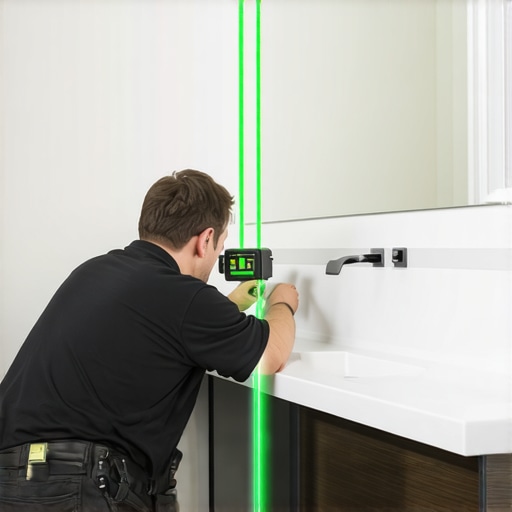
When you are installing a 72-inch double vanity, your biggest enemy isn’t just weight; it is cumulative error. I learned the hard way that a standard two-foot bubble level is virtually useless over long spans. If you are off by just a hair on the first stud, that error is magnified by the time you reach the sixth. Now, I never start a project without a 360-degree green beam laser level, like the Huepar 902CG. It throws a perfectly level line across the entire room, allowing me to check the floor slope and the wall plumb simultaneously. This is one of those vanity installation hacks that save time and money because it eliminates the ‘install, remove, shim, repeat’ cycle that plagues most DIY efforts.
For the hardware itself, I’ve stopped using standard drills for the heavy lifting. I switch to an impact driver with structural lag screws. The sheer torque ensures the screw seats fully into the stud without stripping the head—a disaster that usually happens when you’re halfway through a heavy install. If you find the wall isn’t perfectly flat (and they never are), you’ll need the scribing tool for cabinets against textured plaster walls to create a custom-fit edge. This prevents that unsightly gap where the cabinet meets the wall, ensuring the weight is distributed flush against the surface rather than hanging on the screw threads alone.
How do I keep my heavy floating vanity from sagging after five years?
Maintenance is where most people drop the ball. A floating vanity is a dynamic system; the house settles, and humidity causes wood to expand and contract. According to the ANSI A161.1-2022 standards for kitchen and vanity cabinets, performance testing for wall-mounted units involves rigorous weighted load tests that simulate years of use. To maintain this standard at home, I recommend a ‘six-month check-up’ where you tighten the primary mounting bolts. Over time, the vibration of drawers opening and closing—especially if you’ve packed them with creative storage solutions for vanities—can slightly loosen the fasteners. I also apply a bead of high-grade silicone between the vanity and the wall. This acts as both a moisture seal and a secondary adhesive that helps resist that forward-tilting ‘shear’ force.
The Future of Integrated Vanity Tech
Looking ahead to 2025 and beyond, I’m seeing a massive shift toward ‘smart’ floating units. We aren’t just hanging boxes anymore; we are hanging tech hubs. As you enhance your home with sleek built-in vanities, you’ll likely be looking at internal power strips for hair tools and built-in LED floor ‘wash’ lighting. This requires planning for smart bathroom vanity wiring hacks for a flush cabinet finish so that the electrical doesn’t interfere with your structural bracing. The goal is a seamless look that handles the moisture of a bathroom without shorting out or pulling the drywall down. Don’t forget to implement 7 moisture barriers for vanities in high humidity bathrooms if you’re using these tech-heavy designs, or you’ll find yourself dealing with warped frames within the first year. If you’re in a specific climate, like the Midwest, you might even need the waterproofing fix for high-use vanities in Farmington Hills bathroom remodels to combat local humidity spikes. I challenge you to try the ‘scribe-and-sand’ method on your next install; it’s the single biggest difference between a DIY job and a professional custom built-in.
The Hard Lessons I Learned From a Falling Sink
Looking back at my renovation mishaps, I realized that a beautiful bathroom isn’t just about the finish; it’s about the physics we don’t see. Here are the lightbulb moments that changed how I approach every install:
- Rotational torque is your real enemy. It isn’t just the 400 pounds of stone pressing down; it’s the way that weight pulls the top of the cabinet away from the wall. If you don’t reinforce the top rail, the most expensive quartz in the world won’t save you from a structural failure.
- Drywall is just a decorative skin. I used to think a heavy-duty toggle was enough, but for a double vanity, you must have solid wood or steel behind the surface. If the studs aren’t where you need them, you have to open the wall and add blocking—no exceptions.
- Leveling is a three-dimensional game. You have to be level across the length, but also plumb against the wall. This is why I always use the scribing hack for fitting vanities against out-of-plumb walls to ensure there is zero gap for the cabinet to pivot into.
The Gear That Keeps My Installs From Sagging
I’ve stopped gambling with standard hardware store kits. If you want a result that mirrors a professional shop, you need to invest in the right anchors. I never start a floating project without GRK structural screws; they have the shear strength to handle dynamic loads that would snap a standard wood screw. For the internal structure, I always add 6 heavy-duty L-brackets for reinforcing custom built-in units to bridge the gap between the cabinet sides and the mounting rail. Finally, if you are a novice, don’t skip the step-by-step guide to vanity installation for beginners to ensure your plumbing lines up perfectly with your new structural supports.
Mastering the Art of the Floating Aesthetic
There is nothing quite like the feeling of stepping into a bathroom and seeing a massive, heavy vanity seemingly hovering in mid-air. It creates a sense of luxury and space that floor-mounted units just can’t match. By following these reinforcement tactics, you aren’t just building a cabinet; you’re creating a permanent architectural feature. As you look toward top trends in vanity designs you need to know in 2025, remember that the most impressive designs are the ones that feel rock-solid the moment you lean on them. Take the time to do the hidden work correctly, and you can enhance your home with sleek built-in vanities that will remain perfectly level for decades to come. What is the heaviest item you’ve ever tried to hang on a wall solo? Let me know in the comments below!