

It was 2:00 AM on a Tuesday when the crash happened. It sounded like a localized earthquake in my master bedroom. I stumbled out of bed, threw open the closet door, and found a devastating mountain of wood, drywall dust, and every single jacket I own piled on the floor. The culprit? My cheap closet rod had literally ripped right out of the drywall, taking chunk of plaster with it. I learned the hard way that when you pack a closet full of heavy winter coats, standard plastic wall cups and tiny drywall anchors simply do not stand a chance.
The Midnight Collapse That Changed How I Build Closets
After sweeping up the mess, I realized that conventional hanging hardware is fundamentally flawed. It relies on downward shear strength on a single point of drywall. We have all been there, trying to cram just one more hanger onto an already packed bar. But gravity always wins. If you are tired of dealing with sagging rods, loose brackets, and the inevitable midnight collapse, there is a better way to secure your wardrobe. Today, I am going to show you how a custom wall-to-wall brace can permanently solve this headache and give you the peace of mind you deserve.
Is a wall-to-wall brace actually worth the extra effort?
You might be wondering if you really need to go through the trouble of building a dedicated wall-to-wall brace. Can’t you just buy stronger anchors? Trust me, I tried that. Early in my DIY journey, I made the classic mistake of simply buying larger plastic toggle bolts, thinking they would solve my problems. Spoiler alert: they did not. They just ripped out even bigger chunks of drywall the next time around. The truth is, without distributing the load across the entire width of the space, even the strongest individual anchor will eventually fatigue the surrounding wall material. If you have ever had to secure heavy closet-rods in crumbling plaster walls, you know that standard hardware is a recipe for disaster. According to structural safety data compiled by the International Association of Certified Home Inspectors, drywall alone has almost zero structural holding capacity for dynamic, downward pull forces, making stud or solid wood bracing an absolute necessity for heavy loads. By creating a continuous timber or metal brace that spans from wall to wall, we transfer that heavy downward pull into horizontal compressive strength against the opposing studs.
This method works wonders for tight spaces too. Just like integrating slim pull-out fixes for deep reach-in bedroom closets, a wall-to-wall bracing system maximizes your physical footprint without sacrificing structural integrity. Have you ever walked into your closet only to find your main hanging rod bowed down like a sad smile? Let me know in the comments below if you are dealing with a sagging rack right now. Let’s get into the step-by-step process of prepping your walls for a brace that will never let you down.
Step-by-Step Anatomy of an Unshakeable Closet Support
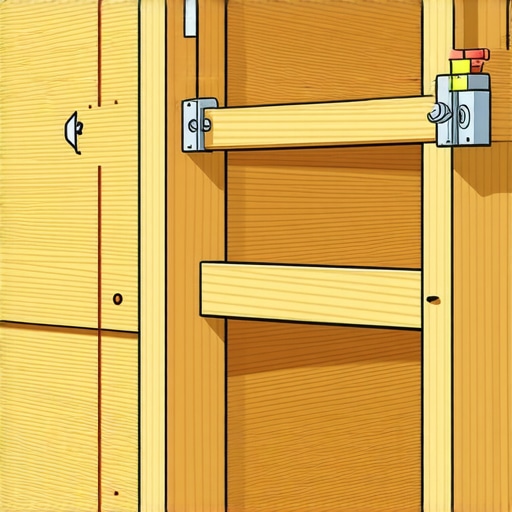
To construct a closet system that laughs at heavy winter gear, you must think of your closet walls as a single unified system. The secret lies in a three-piece continuous ledger system. Instead of relying on a tiny bracket screwed into crumbling sheetrock, you will mount a robust hardwood cleat across the entire back wall, flanked by matching side cleats that lock together. This creates a solid wooden girdle around your closet perimeter, transferring all downward force into structural compression. I used a similar, heavy-duty technique years ago when I needed to secure built-in cabinets to walls with no studs in an old Victorian home, and that system is still rock solid today.
Locating and Marking Studs with Dead-Eye Accuracy
Never trust a cheap stud finder blindly. I once rushed this step in a master bedroom remodel, missed a double-stud corner by half an inch, and ended up with a series of useless swiss-cheese holes in the plaster. Instead, use a strong neodymium magnet to find the exact drywall screws holding your drywall to the framing. Slide the magnet in an ‘S’ pattern across the wall until it snaps onto a screw head. Mark this point. Measure 16 inches outward to locate the adjacent studs. Verify each spot with a finishing nail tapped gently through the wall before you even think about cutting your wood timber.
Fabricating the Cleats and Scribing to Out-of-Plumb Walls
Buy a straight, knot-free 1×4 hardwood board—poplar, maple, or oak work best. Avoid cheap pine, which can warp under continuous load. Cut your back cleat to the exact length of the back wall. If your walls are severely bowed, use a standard scribing tool for cabinets against textured plaster walls to trace the wall profile onto the back of your timber, then shave down the excess with a hand plane. This ensures there are no gaps where the cleat can flex away from the wall under extreme weight.
Mounting the Cleats with Structural Fasteners
Do not use standard drywall screws for this installation; they lack the shear strength and will snap under tension. Use 3-inch structural wood screws with a washer head. Pre-drill countersink holes in your wood cleat at each marked stud location. Hold the board to your level line, insert the screws, and drive them home. The wood should pull tightly against the drywall, compressing it slightly without cracking. For the side walls, cut two smaller cleats that butt firmly against the back board. Screw these side pieces directly into the side studs to lock the entire U-shaped assembly in place. This heavy-duty approach mimics the core principles used to reinforce wall-hung bedroom vanities, where vertical shear forces are incredibly high.
Installing Heavy-Duty Metal Rod Flanges
With your wooden frame secured, you can now attach your rod cups. Position heavy-duty steel or brass flanges directly onto the side cleats. Instead of using the tiny screws that came in the packaging, swap them out for 1-1/2 inch wood screws that will bite deep into your newly installed hardwood side support. When you drop your heavy-duty steel closet rod into these sockets, the weight is distributed outward and downward across the entire three-wall network, completely eliminating single-point failure.
When you dive deep into the world of home organization, you quickly realize that standard residential building standards are shockingly inadequate for how we actually live. The consumer-grade wire shelves and hollow wall anchors sold at your local big-box retailer are designed for a minimalist wardrobe, not real-world storage. Let’s dig deeper into what really happens behind your drywall when you hang fifty pounds of winter jackets on a single bar, and bust the most common myths surrounding heavy-duty home storage installations.
Why do professional woodworkers avoid heavy-duty drywall anchors?
The biggest myth in the DIY community is that a premium toggle bolt can replace solid wood blocking. Many homeowners believe that if an anchor is rated for 75 pounds in 1/2-inch drywall, using four of them means a closet system can easily support 300 pounds. In reality, structural engineers at the Forest Products Laboratory have demonstrated that continuous, static tension on gypsum board causes a phenomenon known as “drywall creep.” Over time, the gypsum core slowly pulverizes under constant stress, causing the anchor to loosen even if it never technically “snaps.” If you rely solely on these anchors for heavy fixtures, you will eventually experience a catastrophic structural failure.
This is why experienced builders use structural timber ledger boards or steel backing plates to bridge the gap between studs. For instance, when constructing floating bathroom features, professionals always implement a robust reinforcement tactic for wall-hung bedroom vanities rather than relying on standard wall anchors. By transferring the pull force directly into the vertical studs, you eliminate the risk of drywall fatigue entirely.
Another critical mistake is failing to account for lever-arm physics. A closet rod or a deep shelf acts as a lever. The further out your clothes hang from the wall, the more the downward force is multiplied into a pulling force at the top of your bracket. This is why we see so many heavy-duty installations fail even when the homeowner used decent fasteners. If you are struggling with deeper shelving units or heavy drawers, you must use internal structural engineering techniques. For example, learning how to stop drawer sag in bedroom closets with internal bracing can prevent your cabinet boxes from warping and binding under heavy loads over time.
Whether you are mounting a closet rod, securing custom cabinets, or tackling a master bath remodel, always design your supports for the absolute worst-case scenario. Have you ever fallen into this trap and had a supposedly “heavy-duty” anchor pull right out of your wall? Let me know in the comments below.
When you move past basic setups and commit to high-capacity storage, maintaining those installations becomes just as critical as the initial build. Over the years, I have realized that even the sturdiest systems require occasional check-ups to combat the silent effects of seasonal weight shifts and building settling.
How do I maintain structural closet systems over time?
Every six months, when you swap your spring wardrobe for heavy winter coats, perform a quick structural audit. I take five minutes to inspect the joints where the hardwood cleats meet the drywall. Look closely for hairline fractures in the paint or caulk around your ledger boards. If you notice any separation, it means your home is settling or the wood is adapting to humidity changes. To prevent these minor shifts from turning into major issues, keep a high-quality ratcheting stubby screwdriver on hand to test the tightness of your bracket screws. Wood naturally expands and contracts, and a quarterly quarter-turn of your primary fasteners can make all the difference. For those managing more complex bedroom setups, keeping an eye on your cabinetry components is vital; knowing how to stop drawer sag in bedroom closets with internal bracing will save your hardware from grinding and wearing out prematurely.
My personal go-to tool for ensuring absolute alignment during these routine checks is the stabila magnetic pocket level. It is tiny enough to fit inside tight corner cleats and incredibly accurate. If you ever need to pivot to other storage areas of the house, like bathroom spaces, maintaining that level foundation is just as critical. Many homeowners face shifting issues over time, which is why utilizing a waterproof shim move for vanities on wet room floors is so effective for keeping moisture from rotting out the base of your structural supports.
Looking ahead, the future of home storage is moving rapidly toward modular, steel-reinforced smart systems. I predict we will see a major shift toward hybrid wood-and-metal cabinetry design, where structural steel sub-frames are completely hidden inside beautiful, custom-milled hardwood. This matches the techniques we are already seeing in high-end architectural millwork, such as using specialized steel stud tactics for garage racks that actually hold under extreme weight. By combining the natural beauty of custom timber with the unyielding strength of integrated steel, we can build thinner, sleeker storage that carries triple the weight of traditional designs.
If you want to ensure your home remains incredibly organized, highly functional, and structurally sound, I highly recommend looking into other integrated storage areas. For instance, you can explore how to built-in storage ideas to declutter and enhance your home can seamlessly tie your entire bedroom aesthetic together while keeping your daily essentials perfectly organized. I encourage you to try the three-piece continuous ledger system on your very next closet upgrade—it is a total game-changer that will give you absolute peace of mind.
It was 2:00 AM on a Tuesday when the crash happened. It sounded like a localized earthquake in my master bedroom. I stumbled out of bed, threw open the closet door, and found a devastating mountain of wood, drywall dust, and every single jacket I own piled on the floor. The culprit? My cheap closet rod had literally ripped right out of the drywall, taking chunk of plaster with it. I learned the hard way that when you pack a closet full of heavy winter coats, standard plastic wall cups and tiny drywall anchors simply do not stand a chance.
The Midnight Collapse That Changed How I Build Closets
After sweeping up the mess, I realized that conventional hanging hardware is fundamentally flawed. It relies on downward shear strength on a single point of drywall. We have all been there, trying to cram just one more hanger onto an already packed bar. But gravity always wins. If you are tired of dealing with sagging rods, loose brackets, and the inevitable midnight collapse, there is a better way to secure your wardrobe. Today, I am going to show you how a custom wall-to-wall brace can permanently solve this headache and give you the peace of mind you deserve.
Is a wall-to-wall brace actually worth the extra effort?
You might be wondering if you really need to go through the trouble of building a dedicated wall-to-wall brace. Can’t you just buy stronger anchors? Trust me, I tried that. Early in my DIY journey, I made the classic mistake of simply buying larger plastic toggle bolts, thinking they would solve my problems. Spoiler alert: they did not. They just ripped out even bigger chunks of drywall the next time around. The truth is, without distributing the load across the entire width of the space, even the strongest individual anchor will eventually fatigue the surrounding wall material. If you have ever had to secure heavy closet-rods in crumbling plaster walls, you know that standard hardware is a recipe for disaster. According to structural safety data compiled by the International Association of Certified Home Inspectors, drywall alone has almost zero structural holding capacity for dynamic, downward pull forces, making stud or solid wood bracing an absolute necessity for heavy loads. By creating a continuous timber or metal brace that spans from wall to wall, we transfer that heavy downward pull into horizontal compressive strength against the opposing studs.
This method works wonders for tight spaces too. Just like integrating slim pull-out fixes for deep reach-in bedroom closets, a wall-to-wall bracing system maximizes your physical footprint without sacrificing structural integrity. Have you ever walked into your closet only to find your main hanging rod bowed down like a sad smile? Let me know in the comments below if you are dealing with a sagging rack right now. Let’s get into the step-by-step process of prepping your walls for a brace that will never let you down.
Step-by-Step Anatomy of an Unshakeable Closet Support
To construct a closet system that laughs at heavy winter gear, you must think of your closet walls as a single unified system. The secret lies in a three-piece continuous ledger system. Instead of relying on a tiny bracket screwed into crumbling sheetrock, you will mount a robust hardwood cleat across the entire back wall, flanked by matching side cleats that lock together. This creates a solid wooden girdle around your closet perimeter, transferring all downward force into structural compression. I used a similar, heavy-duty technique years ago when I needed to secure built-in cabinets to walls with no studs in an old Victorian home, and that system is still rock solid today.
Locating and Marking Studs with Dead-Eye Accuracy
Never trust a cheap stud finder blindly. I once rushed this step in a master bedroom remodel, missed a double-stud corner by half an inch, and ended up with a series of useless swiss-cheese holes in the plaster. Instead, use a strong neodymium magnet to find the exact drywall screws holding your drywall to the framing. Slide the magnet in an ‘S’ pattern across the wall until it snaps onto a screw head. Mark this point. Measure 16 inches outward to locate the adjacent studs. Verify each spot with a finishing nail tapped gently through the wall before you even think about cutting your wood timber.
Fabricating the Cleats and Scribing to Out-of-Plumb Walls
Buy a straight, knot-free 1×4 hardwood board—poplar, maple, or oak work best. Avoid cheap pine, which can warp under continuous load. Cut your back cleat to the exact length of the back wall. If your walls are severely bowed, use a standard scribing tool for cabinets against textured plaster walls to trace the wall profile onto the back of your timber, then shave down the excess with a hand plane. This ensures there are no gaps where the cleat can flex away from the wall under extreme weight.
Mounting the Cleats with Structural Fasteners
Do not use standard drywall screws for this installation; they lack the shear strength and will snap under tension. Use 3-inch structural wood screws with a washer head. Pre-drill countersink holes in your wood cleat at each marked stud location. Hold the board to your level line, insert the screws, and drive them home. The wood should pull tightly against the drywall, compressing it slightly without cracking. For the side walls, cut two smaller cleats that butt firmly against the back board. Screw these side pieces directly into the side studs to lock the entire U-shaped assembly in place. This heavy-duty approach mimics the core principles used to reinforce wall-hung bedroom vanities, where vertical shear forces are incredibly high.
Installing Heavy-Duty Metal Rod Flanges
With your wooden frame secured, you can now attach your rod cups. Position heavy-duty steel or brass flanges directly onto the side cleats. Instead of using the tiny screws that came in the packaging, swap them out for 1-1/2 inch wood screws that will bite deep into your newly installed hardwood side support. When you drop your heavy-duty steel closet rod into these sockets, the weight is distributed outward and downward across the entire three-wall network, completely eliminating single-point failure.
When you dive deep into the world of home organization, you quickly realize that standard residential building standards are shockingly inadequate for how we actually live. The consumer-grade wire shelves and hollow wall anchors sold at your local big-box retailer are designed for a minimalist wardrobe, not real-world storage. Let’s dig deeper into what really happens behind your drywall when you hang fifty pounds of winter jackets on a single bar, and bust the most common myths surrounding heavy-duty home storage installations.
Why do professional woodworkers avoid heavy-duty drywall anchors?
The biggest myth in the DIY community is that a premium toggle bolt can replace solid wood blocking. Many homeowners believe that if an anchor is rated for 75 pounds in 1/2-inch drywall, using four of them means a closet system can easily support 300 pounds. In reality, structural engineers at the Forest Products Laboratory have demonstrated that continuous, static tension on gypsum board causes a phenomenon known as “drywall creep.” Over time, the gypsum core slowly pulverizes under constant stress, causing the anchor to loosen even if it never technically “snaps.” If you rely solely on these anchors for heavy fixtures, you will eventually experience a catastrophic structural failure.
This is why experienced builders use structural timber ledger boards or steel backing plates to bridge the gap between studs. For instance, when constructing floating bathroom features, professionals always implement a robust reinforcement tactic for wall-hung bedroom vanities rather than relying on standard wall anchors. By transferring the pull force directly into the vertical studs, you eliminate the risk of drywall fatigue entirely.
Another critical mistake is failing to account for lever-arm physics. A closet rod or a deep shelf acts as a lever. The further out your clothes hang from the wall, the more the downward force is multiplied into a pulling force at the top of your bracket. This is why we see so many heavy-duty installations fail even when the homeowner used decent fasteners. If you are struggling with deeper shelving units or heavy drawers, you must use internal structural engineering techniques. For example, learning how to stop drawer sag in bedroom closets with internal bracing can prevent your cabinet boxes from warping and binding under heavy loads over time.
Whether you are mounting a closet rod, securing custom cabinets, or tackling a master bath remodel, always design your supports for the absolute worst-case scenario. Have you ever fallen into this trap and had a supposedly “heavy-duty” anchor pull right out of your wall? Let me know in the comments below.
When you move past basic setups and commit to high-capacity storage, maintaining those installations becomes just as critical as the initial build. Over the years, I have realized that even the sturdiest systems require occasional check-ups to combat the silent effects of seasonal weight shifts and building settling.
How do I maintain structural closet systems over time?
Every six months, when you swap your spring wardrobe for heavy winter coats, perform a quick structural audit. I take five minutes to inspect the joints where the hardwood cleats meet the drywall. Look closely for hairline fractures in the paint or caulk around your ledger boards. If you notice any separation, it means your home is settling or the wood is adapting to humidity changes. To prevent these minor shifts from turning into major issues, keep a high-quality ratcheting stubby screwdriver on hand to test the tightness of your bracket screws. Wood naturally expands and contracts, and a quarterly quarter-turn of your primary fasteners can make all the difference. For those managing more complex bedroom setups, keeping an eye on your cabinetry components is vital; knowing how to stop drawer sag in bedroom closets with internal bracing will save your hardware from grinding and wearing out prematurely.
My personal go-to tool for ensuring absolute alignment during these routine checks is the stabila magnetic pocket level. It is tiny enough to fit inside tight corner cleats and incredibly accurate. If you ever need to pivot to other storage areas of the house, like bathroom spaces, maintaining that level foundation is just as critical. Many homeowners face shifting issues over time, which is why utilizing a waterproof shim move for vanities on wet room floors is so effective for keeping moisture from rotting out the base of your structural supports.
Looking ahead, the future of home storage is moving rapidly toward modular, steel-reinforced smart systems. I predict we will see a major shift toward hybrid wood-and-metal cabinetry design, where structural steel sub-frames are completely hidden inside beautiful, custom-milled hardwood. This matches the techniques we are already seeing in high-end architectural millwork, such as using specialized steel stud tactics for garage racks that actually hold under extreme weight. By combining the natural beauty of custom timber with the unyielding strength of integrated steel, we can build thinner, sleeker storage that carries triple the weight of traditional designs.
If you want to ensure your home remains incredibly organized, highly functional, and structurally sound, I highly recommend looking into other integrated storage areas. For instance, you can explore how to built-in storage ideas to declutter and enhance your home can seamlessly tie your entire bedroom aesthetic together while keeping your daily essentials perfectly organized. I encourage you to try the three-piece continuous ledger system on your very next closet upgrade—it is a total game-changer that will give you absolute peace of mind.
The Hardest Lessons I Learned Scraping Drywall Off My Winter Wardrobe
Through years of trial, error, and covered in plaster dust, I have come to realize that structural wall storage is less about cosmetic appeal and more about mechanical engineering. First, never underestimate the power of sheer leverage. A hanger holds clothing three to four inches away from the mounting plane; this turns your entire closet rod into a continuous pry bar trying to peel your fasteners out of the studs. Second, cheap pine lumber will betray you in high-humidity seasons by warping and backing out your carefully driven screws. Lastly, always finish your wood cleats before you mount them to the wall. It is nearly impossible to paint or seal a custom ledger assembly once it is wedged tightly between three drywall surfaces without leaving ugly drips.
The Precise Gear I Count on for Heavy-Duty Installs
When you are building load-bearing custom built-ins or high-capacity closets, you cannot rely on bargain-bin tools. Here is the specific, battle-tested gear I use to guarantee my projects stay put forever:
- Spax PowerLags or GRK Cabinet Screws: These heavy-duty structural fasteners feature built-in washers and aggressive threads that pull wood flush against framing with incredible clamping force, avoiding the shearing risks of traditional drywall screws.
- Stabila Magnetic Pocket Pro Level: A compact, ultra-precise leveling tool that fits easily into narrow corner assemblies and snaps onto metal flanges, ensuring your ledger system is perfectly horizontal.
- Starrett Pointed Scribe: Crucial for tracing out-of-plumb walls accurately so your back support timber nests flawlessly against the sheetrock without air gaps.
Bring Unyielding Stability to Your Next Closet Project
Building a workspace or closet that handles heavy coats, massive drawers, and seasonal storage does not have to be an intimidating chore. By stepping away from cheap hollow-wall anchors and committing to a continuous, structural timber system, you take control of your home’s structural health. When you choose to upgrade your closets with these rugged, professional-grade wood cleats, you are not just hanging up your coats—you are investing in a lasting home upgrade that guarantees your hard work will stand firm for decades to come.
Have you ever had a heavy closet rod or a wire shelving unit fail on you in the middle of the night? Let me know about your DIY triumphs and disasters in the comments section below!