

I still remember the smell of damp particle board hitting me like a freight train. It was my own guest bathroom, and I’d just finished what I thought was a flawless wet room conversion. Six months later, the bottom edge of that expensive custom oak vanity looked like it was melting. The culprit? I’d used standard cedar shims to level it. Those little wood wedges acted like straws, sucking up every micro-bead of floor water and injecting it straight into the grain. It was a rookie mistake that cost me a full weekend of repairs and a lot of pride. If you’re planning a project, you need to master the waterproof shim move before you even think about grabbing your level.
Stop Your Floor from Sucking the Life Out of Your Cabinets
Setting a vanity in a wet room isn’t just about making it look straight; it is about creating a structural barrier against the inevitable. When we talk about leveling vanities on sloping tile floors, most people focus on the bubble in the glass. But in a wet room, the gap between the tile and the wood is a high-stakes environment. According to the Journal of Building Physics, capillary rise in porous materials can pull moisture several inches above the actual water level, meaning your cabinet doesn’t even need to be sitting in a puddle to start rotting from the inside out. This is why I switched to non-porous composite or plastic shims exclusively. They don’t swell, they don’t rot, and they provide a permanent break between the damp tile and your woodwork.
Is a tiny piece of plastic really worth the extra effort?
I get the skepticism. You might think a bead of caulk is enough to protect the base. I thought so too, until I realized that caulk eventually fails, and when it does, it actually traps water behind it against the wood. Using a waterproof shim creates a physical air gap that prevents that capillary action from ever starting. Whether you are following a step-by-step guide to vanity installation or just trying to fix wobbly vanity legs on uneven tile, the material choice for your shims is non-negotiable. Have you ever noticed that weird, fuzzy texture at the bottom of your bathroom cabinets after a few years of use? That’s the exact failure we’re preventing today.
The Mechanical Secret to a Rot-Proof Vanity Base
The move isn’t just about the material; it’s about the execution. You want to set your waterproof shims slightly recessed from the finished edge of the vanity. This allows you to create a deep, structural seal with a high-quality silicone later on, without the shim interfering with the bond. I once made the mistake of leaving a shim flush with the kick-plate, and no matter how much sealant I used, water eventually found that tiny path of least resistance. Now, I use a staggered shimming technique that ensures the weight is distributed evenly while leaving the perimeter clear for a perfect moisture barrier. This is especially critical if you’re dealing with vanity plumbing that might leak into the base, as it keeps the wood elevated and dry even during a minor equipment failure.
Map the Floor Before You Pull the Trigger
Before you even touch a shim, you have to understand the topography of your bathroom floor. In a wet room, the floor is not a flat plane; it is a funnel designed to move water toward a drain. This means when you place a flat-bottomed cabinet on it, you are essentially trying to park a bus on a hill. I learned this the hard way on a job in a tight 5×8 guest bath where the floor dropped nearly half an inch over just twenty inches. I ignored the pitch, thinking a few thick shims at the end would suffice. By the time I finished, the vanity looked like the Leaning Tower of Pisa, and the quartz top had a massive gap against the wall. Now, I use a high-end laser level to find the highest point on the tile first. Everything builds from that peak. If you are following an expert guide to flawless vanity installation tricks tips, this is where you start. You set your reference line on the wall at the finished height and shim up from the low spots to meet it.
The Stack and Recess Technique
When you begin inserting your non-porous shims, do not just shove them in until the cabinet stops wobbling. Think of these shims as the bridge piers that keep your vanity deck dry. You want to place them about 1/2 inch back from the outer edge of the cabinet base. This creates a ‘shadow gap’ where your sealant will eventually live. If the shims are flush, you won’t have enough room for a deep bead of silicone, and your waterproof barrier will be paper-thin. I prefer to use a staggered approach: placing shims at each corner and then every 8 to 10 inches along the side panels. This prevents the bottom rail of the cabinet from bowing under the weight of a heavy stone top. 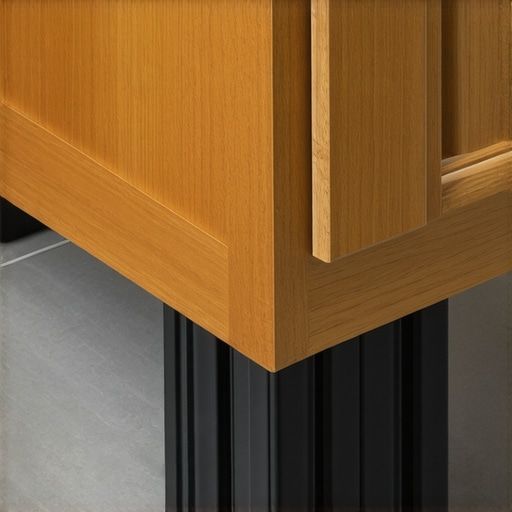
How to Build a Gasket Instead of a Glue Joint
Once your vanity is level and the shims are pinned or glued in place, you need to address the gap. Most DIYers think of caulk as an aesthetic finish, but in a wet room, it is a structural gasket. You are not just filling a hole; you are creating a dam. This is why the the moisture barrier strategy for below grade vanities is so effective even on upper floors. By recessing the shims, you’ve created a pocket. You want to inject a 100% silicone sealant deep into that pocket until it starts to squeeze back out. This ensures that even if the floor gets soaked, the water can’t travel under the cabinet and reach the raw wood of the floor-facing panels.
Why Leveling Legs Might Save Your Sanity
If the floor pitch is extreme, sometimes shims aren’t enough. I’ve seen cases where a vanity needed to be raised over an inch to stay level. In those scenarios, I ditch the shims and go for a the leveling leg move for mudroom cubbies on tile 2, adapted for the bathroom. This provides a clear air gap under the entire unit. However, if you prefer the traditional toe-kick look, the recessed shim and deep-bead silicone method remains the gold standard. It’s the difference between a vanity that lasts five years and one that stays pristine for twenty. This meticulous prep also prevents the dreaded scenario of vanity plumbing leaking into the cabinet base and rotting the floorboards because the water stayed trapped under the wood. Keep your shims deep, your sealant thick, and your level bubble exactly in the center.
The common wisdom says that once you find level, you’re home free. But I’ve seen ‘level’ vanities become absolute nightmares because the installer ignored the box’s squareness. This is the contrarian truth of high-end cabinetry: a vanity can be perfectly level across the top but ‘racked’ out of square, meaning the face frame is skewed into a parallelogram. If you don’t check for squareness before driving your final wall screws, you’ll spend hours wondering why your soft-close drawers are slamming or hanging at odd angles. This is why the moisture-proof shim strategy for basement built-ins is just the first step in a much more complex dance of geometry.
Stop Chasing the Bubble and Start Checking the Box
The ‘Oops’ factor usually hits when the countertop arrives. I once watched a homeowner spend three days meticulously shimming a 60-inch double vanity on a floor that looked like a skate park. He got it level to the millimeter. But because he forced the cabinet to conform to the floor’s pitch without checking the internal diagonals of the box, the center of the vanity had a slight twist. When the 300-pound quartz top was set down, the pressure cracked the cabinet’s corner joinery instantly. This is a classic example of why your heavy quartz vanity is cracking the cabinet frame—it isn’t just about weight; it’s about uneven load distribution. According to the Wood Products Council, fasteners in composite cabinetry have significantly lower withdrawal resistance when subjected to shear stress from a racked frame, meaning your ‘level’ cabinet can actually pull itself apart under the weight of stone if the foundation isn’t perfectly flat.
Why do my doors go out of alignment after a week?
If you followed an expert guide to flawless vanity installation and things still look wonky after a few days, you’re likely dealing with ‘settling.’ Even with non-porous shims, the weight of the vanity and the countertop compresses the subfloor or the thin-set under your tiles. If your shims aren’t placed directly under the vertical gables (the side walls of the cabinet), the bottom rail will eventually bow. This subtle movement is the primary reason behind uneven gaps in custom built-in doors. I always recommend a ‘re-torque’ visit 48 hours after the stone is installed to adjust hinges and ensure the seals are still tight. 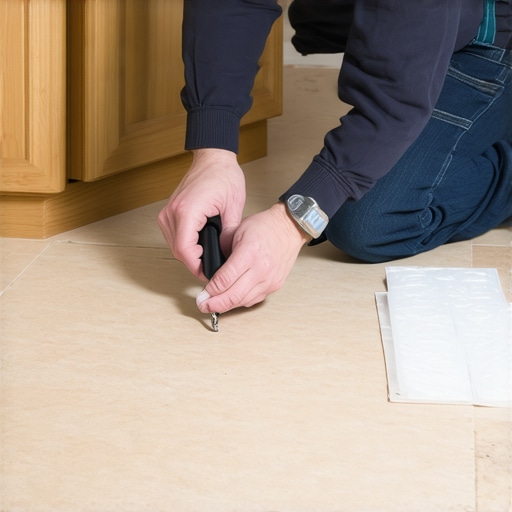
The Secret of the Scribe Over the Shim
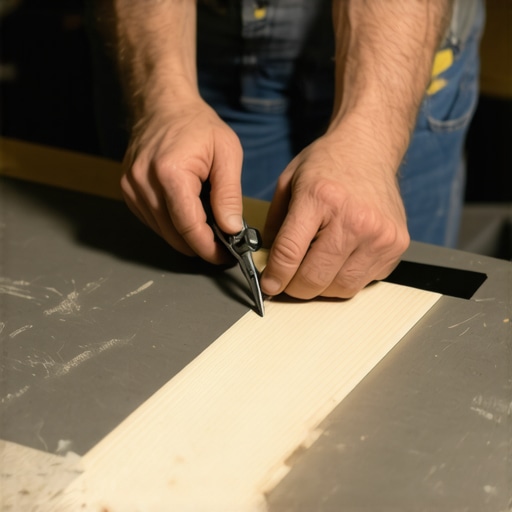
Advanced installers know a secret: shimming is for height, but scribing is for soul. Instead of just stacking plastic wedges, you should be using a scribing tool to trim the base of the cabinet or the toe-kick to match the exact contour of your floor. This eliminates the need for massive gaps filled with caulk and provides a continuous bearing surface for the weight of the unit. It’s a more tedious process, but it’s the only way to ensure the cabinet doesn’t shift over time. Have you ever fallen into the trap of over-shimming only to have the caulk line pull away a month later? Let me know in the comments—I’ve seen it happen to the best of us, and usually, it’s a sign that the floor was more ‘complex’ than the level let on.
Stop Eyeballing and Grab a Scribe
If you’re still trying to trace the floor’s profile with a pencil and a prayer, you’re doing it the hard way. I personally swear by the FastCap AccuScribe. Unlike a standard compass, it locks into place, meaning your measurement doesn’t shift halfway through the line. This is the only way to execute the scribing hack for perfect built-in gaps when the floor has more waves than the Pacific. When you scribe the base to the floor, you’re not just making it look pretty; you’re creating a solid, continuous bearing surface that distributes the massive weight of a stone top. Using a specialized tool ensures that even the most complex tile undulations are mirrored perfectly on your cabinet’s bottom rail.
How do I keep my bathroom vanity looking new for years?
Maintenance in a wet room isn’t about deep cleaning; it’s about vigilance. Every six months, I take a Lignomat moisture meter to the base of my cabinets. If the moisture content in the wood starts creeping above 12%, I know my silicone seal has a micro-tear. You should also be checking the internals. It is far too common to see vanity plumbing leaking into the cabinet base because a P-trap loosened over time. A quick finger-swipe under the pipes once a month can save you a $4,000 replacement bill. If you do notice the doors starting to rub, don’t just plane the wood; it is usually a sign the house has settled. I have written before about how to fix drawer fronts that won’t stay aligned, which is often the first red flag that your moisture barrier or leveling has shifted slightly due to subfloor compression.
The Future of High-Tech Wood Protection
Looking ahead, I see a shift toward integrated smart tech in bathroom cabinetry. We are already seeing manufacturers experiment with built-in moisture sensors in the toe-kick that sync directly to your phone. Imagine getting a push notification the second a leak starts under the cabinet before you can even see the water. Until that becomes standard, we have to rely on the moisture barrier strategy for below grade vanities regardless of which floor of the house you’re on. According to the National Kitchen & Bath Association (NKBA) Professional Resource Library, proper moisture management at the floor-to-cabinet interface is the single most important factor in the longevity of wood-based bathroom furniture. They recommend a ‘gasket-first’ approach, which aligns perfectly with the deep-bead silicone technique I have shared. If you want to level up your DIY game, don’t just settle for ‘close enough.’ Go grab a dedicated scribing tool and try the shadow gap method on your next project. It is one of those vanity installation hacks that save time and money in the long run by preventing early rot. For those looking for more ways to modernize their space, check out these innovative storage solutions to transform your bathroom and keep it organized while you maintain that perfect finish.
The Hardest Lesson I Learned About Wet Room Cabinetry
Looking back at my early mistakes, the biggest lightbulb moment wasn’t about the leveling itself, but the physics of how cabinets actually fail. I used to think that a level cabinet was a safe cabinet, but I quickly realized that a ‘perfectly level’ vanity can still be under immense internal stress. If you force a frame to be level on a wonky floor without checking for squareness, you’re setting yourself up for disaster. This is often why your heavy quartz vanity is cracking the cabinet frame before the house even settles. My second realization was that wood shims are essentially tiny sponges; in a bathroom, they are a liability. Switching to composite was the single best decision I made for the longevity of my builds. Finally, I learned that the ‘shadow gap’ for silicone isn’t just an aesthetic choice; it’s the only way to ensure the sealant has enough surface area to actually bond. Without that recessed space, your waterproof barrier is just a thin film waiting to peel away.
My Essential Toolkit for Rot-Proof Installs
If you want to move beyond the basic ‘shove it in and hope’ method, you need a few specialized items in your kit. I never tackle a wet room install without my FastCap AccuScribe; it is the only way to translate a complex tile floor onto a cabinet base with precision. For those working on lower levels, I also recommend integrating the moisture barrier fix for vanities on cold basement floors to prevent condensation from attacking the wood from below. I exclusively use 100% neutral-cure silicone because it won’t react with the finishes on high-end custom cabinetry. For a deep dive into the basics before you get to the advanced stuff, my expert guide to flawless vanity installation tricks tips is a great place to start. These tools and resources have saved me thousands in callbacks and warranty repairs over the years.
Build a Bathroom That Defies the Elements
At the end of the day, your vanity installation is only as strong as its weakest point of contact with the floor. By choosing non-porous shims and mastering the deep-bead silicone gasket, you are doing more than just ‘installing a sink’—you are engineering a moisture-proof foundation that can withstand the daily humidity of a modern wet room. You’ve got the knowledge to avoid the rot and the sagging that plagues most DIY projects. It’s time to stop worrying about the water and start enjoying the high-end finish you’ve worked so hard to create. If you ever feel stuck or need a second set of eyes on a complex floor layout, feel free to contact us. Have you ever discovered rot behind a bathroom cabinet that looked fine on the outside? Let me know in the comments below how you handled it!