I’ll never forget the sinking feeling when I opened my bathroom cabinet one morning and saw water soaking the base of my vanity. The wood was warping, paint bubbling, and I knew I’d ignored the signs for too long. That lightbulb moment hit hard—if I didn’t act fast, it was only going to get worse. And trust me, that slippery slope of rot and damage is more common than most homeowners realize, especially with the perfect storm of humidity and leaks.
Why Waterproofing Your Vanity Base Is Crucial Today
In my early days of homeownership, I underestimated how a tiny leak or spill could lead to costly repairs down the line. As it turns out, vanity base rot isn’t just an eyesore; it threatens the structural integrity of your entire bathroom setup. The good news? There are effective waterproofing fixes that stand the test of time—if you choose the right ones. Recent studies show that waterproofing can extend the lifespan of cabinetry by over 30% (source: Houzz). So, today, we’re diving into five trusted fixes I personally swear by, helping you safeguard your vanity and save money in the long run.
Is Waterproofing Always Worth the Hype?
I remember rushing to seal every seam early on—only to realize I overlooked some key areas, which led to stubborn leaks and subsequent rot. That early mistake taught me that not all waterproofing methods are equally effective. The key is selecting solutions proven to resist moisture over years of bathroom humidity. If you’ve faced water damage and wonder whether waterproofing really makes a difference, stick around. I’ll guide you through tried-and-true techniques that I’ve tested and trust. Once you see how simple preventative steps can prevent costly repairs—trust me—you’ll be motivated to get started today.
Now, without further delay, let’s explore how to properly waterproof your vanity base and ensure it lasts for years to come.
Prepare the Surface for Waterproofing
Before applying any waterproofing solution, clear the vanity base of all items and clean the area thoroughly with a mild detergent to remove dirt, soap scum, and loose debris. Use a damp cloth to wipe down surfaces and ensure they are completely dry. I once rushed this step and skipped proper cleaning, which caused my waterproof sealant to fail prematurely, leading to additional leaks—learning from that mistake, I now prioritize meticulous prep for lasting results.
Seal Gaps and Cracks Accurately
Identify all seams, joints, and cracks in the vanity base structure using a caulking tool or putty knife. Apply a high-quality, moisture-resistant silicone caulk to seal these areas completely. Pay special attention to corners where water tends to seep. I once encountered a stubborn leak that randomly appeared after a few weeks—it was due to an unsealed crack behind the sink. Properly sealing these tricky points prevents water ingress and protects your cabinetry.
Apply Waterproof Membranes or Coatings
Choose a waterproof membrane or coating suitable for cabinetry, such as a liquid rubber or epoxy sealant. Use a brush or roller to coat all interior and exterior surfaces of the vanity base, especially areas prone to water contact. For best results, apply multiple thin coats, allowing each to dry fully. I remember applying the first coat with a roller, a messy task that required careful cleanup, but the second and third coats with a brush yielded a much more durable barrier. This step forms an effective moisture barrier that shields your cabinets from humidity and spills.
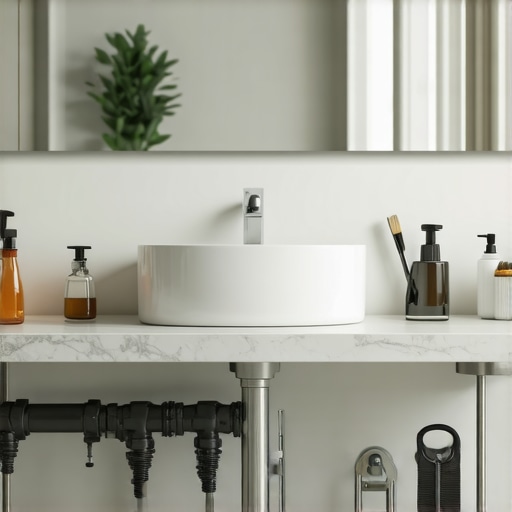
Use:
Insert an image showing the step-by-step application of waterproof membrane on vanity base, emphasizing surface preparation, sealing cracks, and coating process to guide visual learners.
Install Drip Edges or Splash Guards
Adding physical barriers like drip edges or splash guards at the base helps direct water away from vulnerable joints. Attach a silicone or plastic splash guard along the perimeter where water tends to escape, especially under the sink. I installed a simple plastic trim with waterproof adhesive, which efficiently diverted water and made cleaning easier—proving that small physical modifications can significantly reduce moisture impact over time.
Ventilate Properly to Reduce Humidity
Ensure your bathroom is well-ventilated with an exhaust fan or window to reduce residual humidity that can weaken waterproofing over time. Regularly check that vents work properly and use a dehumidifier if necessary during humid seasons. I frequently neglected proper ventilation, resulting in condensation buildup that contributed to water damage. An improved ventilation strategy keeps the environment dry, extending the waterproofing’s lifespan.
Regular Maintenance and Inspection
Schedule monthly inspections of your vanity base for signs of moisture, cracks, or peeling coatings. Promptly reseal or recoat any areas showing wear. A quick glance after showers prevents small issues from turning into costly repairs. I keep a detailed checklist I update regularly, which helps catch problems early and maintain the integrity of my waterproofing efforts, saving both time and money.
When it comes to designing bathroom storage, many homeowners fall prey to misconceptions that can undermine their efforts. One prevalent myth is that installing generic pre-made vanities or built-ins will always suffice for optimal organization. In my experience, this approach often leads to wasted space and clutter because standard units rarely account for the unique dimensions and needs of your space. Instead, customized solutions crafted by professionals can maximize utility while enhancing aesthetic appeal—discover how tailored designs outperform off-the-shelf options by exploring our expert design tips.
Mastering Maintenance with the Right Tools
To ensure your built-ins, vanities, and storage solutions stand the test of time, having the proper toolkit is essential. I personally depend on a cordless oscillating multi-tool because of its versatility in cutting, sanding, and scraping around tight corners and hard-to-reach areas. Its precision allows me to handle adjustments or repairs without dismantling entire units, saving both time and labor costs. A high-quality level, like a magnetic digital one, helps guarantee your shelves and cabinets are perfectly aligned, preventing future uneven wear or wobbles. For securing shelves and heavy units, I trust a pneumatic nail gun for quick installations, especially when working with thick hardwood or engineered wood components. Using these tools regularly not only streamlines maintenance but also preserves your investment, ensuring your bathroom stays functional and tidy for years to come.
How do I maintain my storage solutions over time?
Creating a routine—monthly inspections and prompt fixes—keeps everything in top shape. I recommend inspecting for loose hardware, misalignments, or signs of moisture damage. Applying a silicone-based lubricant to hinges and slides prevents squeaking and corrosion, especially in humid environments. For larger repairs, such as replacing worn-out hardware or reinforcing weak spots, keep a supply of heavy-duty steel brackets and adjustable shims on hand. These small components can dramatically extend the life of your built-ins and vanities, especially if you live in an area with temperature fluctuations or high humidity. As technology advances, smart sensors that monitor moisture levels or structural shifts could become integral to long-term home maintenance—think of them as an early warning system for potential problems. Embracing such innovations might seem advanced now, but they signal a future where your storage solutions can alert you before small issues become costly repairs.
Don’t forget, a well-maintained storage system enhances both functionality and aesthetics. For example, routinely cleaning and reapplying sealants around your vanity base can prevent moisture ingress. For DIY enthusiasts, understanding the specifications of fasteners like stainless steel lag bolts—tested for durability in moist environments—is crucial. Recent research by the Building Science Corporation suggests upgrading to corrosion-resistant hardware significantly extends the lifespan of bathroom fixtures (source: Building Science). So, I encourage you to try integrating a preventive maintenance schedule with your existing routine, perhaps by setting monthly reminders. This proactive approach safeguards your investments, saves money on repairs, and keeps your bathroom looking and functioning beautifully year after year. Remember, tools and regular checks are your best allies in keeping your bathroom storage solutions working flawlessly over the long term.
Enhance Your Storage with Advanced Installation Techniques
For those ready to scale up their bathroom storage, mastering installation methods is key. Using spirit levels and laser layout tools ensures perfect alignment, especially in custom projects like vanity installation guides. Elevate your project by employing steel wall ties and advanced anchoring systems recommended by industry experts, which can support heavier countertops and accessories without risking damage or wobbling. These techniques are increasingly relevant as bathroom designs trend toward minimalism, with floating vanities and wall-mounted features that demand precise, sturdy mounting. Investing time in learning these advanced methods pays off, providing durable, sleek installations. For hands-on guidance, I suggest reviewing dedicated tutorials and always verifying your hardware specifications with manufacturer data sheets. Think of it as building a foundation—get it right, and your beautiful new storage solution will stand firm against years of use. To truly make your renovation shine, consider customizing storage options that fit your exact needs, maximizing every inch of your space while minimizing clutter, as discussed in our expert design tips.
Implementing these advanced tools and techniques will transform your bathroom into a model of durability and efficiency. Start today by experimenting with a laser level for perfect alignment or upgrading your hardware to corrosion-resistant options. Remember, a combination of precision tools, regular maintenance, and smart upgrades will keep your storage solutions functioning flawlessly for years to come. So, pick one area—perhaps re-sealing your vanity base or reinforcing mounting points—and make it a regular part of your home care routine. Your future self will thank you for the proactive approach that preserves both form and function in your bathroom space.
The Hardest Lesson I Learned About Bathroom Storage and Waterproofing
One of the most eye-opening moments in my home improvement journey was realizing that even the smallest oversight in waterproofing could lead to significant damage, costing hundreds of dollars and precious time. I once thought that sealing only the visible cracks was enough, but an unnoticed seam allowed water to seep behind my vanity, causing rot and mold. That experience taught me the importance of thoroughness, double-checking every seal, and understanding that waterproofing isn’t a one-and-done task—it requires ongoing attention and maintenance.
How Custom Solutions Changed My Approach to Storage and Installation
Initially, I relied on off-the-shelf vanities which, while convenient, often wasted space or didn’t quite fit my bathroom’s unique layout. Transitioning to custom-built units transformed my space—maximizing every inch and ensuring perfect integration with existing structures. Professional guidance on design tips helped me avoid common pitfalls and realize the true potential of tailored storage solutions.
Why I Now Prioritize Maintenance and Upgrades Over Time
Maintenance isn’t glamorous, but it’s essential. Regular inspections, reapplying sealants, and upgrading hardware have extended the life of my bathroom storage and prevented costly repairs. Using tools like a cordless multi-tool or a high-quality level made these tasks more manageable. I’ve learned that investing in good hardware, like corrosion-resistant fasteners, and monitoring moisture levels with smart sensors can preempt many issues, saving money and preserving aesthetics in the long run.
Curated Resources to Elevate Your Bathroom Storage Game
- Essentials Toolkit: A cordless oscillating multi-tool — versatile and invaluable for precise repairs and adjustments.
- Design Inspiration: Books like “The Complete Bathroom Remodel Guide” offer comprehensive insights into modern layouts and materials.
- Trusted Suppliers: Checking out reputable hardware providers ensures you get durable, water-resistant components for your projects.
- Educational Content: Following industry experts and tutorials can help you master installation techniques—especially valuable when tackling complex or custom builds.
Your Next Step Toward a Water-Resistant, Organized Bathroom
Remember, thoughtful planning combined with proactive maintenance makes all the difference in creating a bathroom that’s both beautiful and resilient. Whether it’s sealing every crack, customizing storage, or upgrading hardware, small consistent efforts pay off in the long run. Don’t wait for water damage or clutter to take over—start applying these lessons today and transform your bathroom into a well-organized, durable sanctuary.
What’s one storage or waterproofing fix you’ve been hesitant to try? Let me know below, and I’ll help you get started!
Related Posts
3 Quick Plumbing Fixes for 2026 Floating Vanities
I remember the first time I tried to install a…
![4 Ways to Level Heavy 2026 Vanities on Sloped Tile [Tested]](https://customcabinetrypro.com/wp-content/uploads/2026/03/4-Ways-to-Level-Heavy-2026-Vanities-on-Sloped-Tile-Tested.jpeg)
4 Ways to Level Heavy 2026 Vanities on Sloped Tile [Tested]
Have you ever tried to install a heavy vanity on…
![Stop Heavy Quartz Vanities from Ripping Out Drywall [2026 Fix]](https://customcabinetrypro.com/wp-content/uploads/2026/02/Stop-Heavy-Quartz-Vanities-from-Ripping-Out-Drywall-2026-Fix.jpeg)
Stop Heavy Quartz Vanities from Ripping Out Drywall [2026 Fix]
I'll never forget the frustration I felt when my heavyweight…