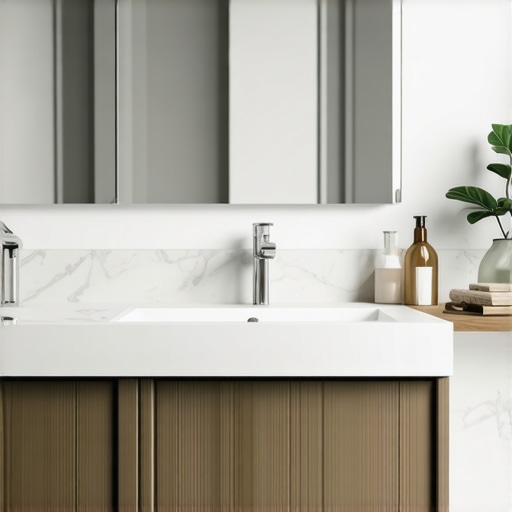
I can’t tell you how many times I’ve stared at a newly installed vanity, only to find it warped, cracked, or downright ruined within a few years. One lightbulb moment hit me hard when I realized that the real culprit behind these nightmares was unseen water damage sneaking in from the base. That sinking feeling, knowing my investment was slowly deteriorating because I overlooked a simple waterproofing step, was frustrating. But the good news is, I discovered effective solutions that can put an end to vanity base rot for good.
Why Waterproofing Matters More Than Ever
In the world of home renovation, waterproofing isn’t just a buzzword—it’s a necessity. Especially for bathroom vanities, where water, humidity, and accidental spills are part of daily life. Early on, I made the mistake of assuming that sealing the edges once was enough. Wrong. Water constantly finds tiny gaps, seeping into the wooden or particleboard bases, causing swelling, mold, and eventually rot. This isn’t just about aesthetics; it’s about preserving your investment and ensuring your space remains functional and hygienic. According to industry experts, poor waterproofing can lead to structural damage that costs thousands of dollars to repair, making proper waterproofing a no-brainer for long-term durability. Want to see how to safeguard your vanity? Read on for five waterproofing fixes that truly last.
Seal the Base with Waterproof Membranes
Start by applying a high-quality waterproof membrane directly onto the vanity base. Use a paint roller or brush to ensure even coverage, especially around edges and corners where water is most likely to penetrate. I once tried sealing a vanity without a membrane, only to find water seeped through and caused swelling within months. The membrane acts like a raincoat for your wood, blocking moisture before it causes harm.
Install a Waterproof Skirt or Panel
Attach a waterproof panel or skirt made from PVC, acrylic, or other non-porous materials to the bottom of the vanity. Secure it tightly to prevent water from sneaking behind. Think of it as giving your vanity a waterproof belt—an additional barrier to water intrusion. I installed a PVC panel under my vanity, which was a game changer, preventing splashes from reaching the wood base.
Use Silicone Sealant Wisely
Apply a bead of clear silicone sealant along all joints, seams, and around the vanity’s perimeter where it meets the wall or floor. Silicone remains flexible and waterproof over time, sealing tiny gaps water could exploit. During my first attempt, I overlooked sealing the back edges, and water accumulated behind the vanity, leading to rot. Proper sealing keeps the water out and your vanity solid.
Ensure Proper Drainage and Ventilation
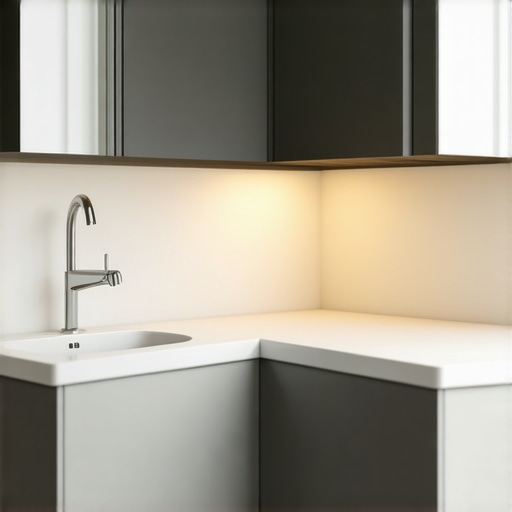
Good drainage is essential to prevent water pooling near the base. Position the vanity slightly elevated on shims to promote airflow underneath, reducing moisture build-up. Additionally, improve bathroom ventilation with exhaust fans and vents to reduce humidity levels. I added a vent to my bathroom, which significantly reduced moisture and prolonged the life of my vanity.
Regular Maintenance and Inspections
Inspect your vanity periodically for signs of leaks or water accumulation. Promptly fix any plumbing issues to prevent water from seeping into the base. A quick check with a moisture meter every few months can help catch problems early. I once caught a slow leak early, preventing extensive damage and costly repairs.
When it comes to incorporating built-in storage and vanities into your home, many homeowners jump straight to the aesthetic or basic functionality without understanding the complex nuances that ensure longevity and seamless integration. Surprisingly, a prevalent misconception is that installing a vanity or storage system is a straightforward process that doesn’t require precise planning or attention to detail. In reality, overlooking these subtleties can lead to issues like premature damage, inefficiency, or even costly remodeling down the line.
Why Do So Many Storage Installations Go Wrong Despite Good Intentions?
One key mistake is assuming that standard solutions fit all spaces. Every home has unique architectural quirks, such as uneven walls, sloped floors, or existing plumbing and electrical setups. Neglecting these factors often results in poor alignment or structural stress, which can compromise the integrity of the installation over time. For instance, custom-designed built-ins that account for these nuances will perform significantly better than off-the-shelf options. Such bespoke solutions also avoid common pitfalls like gaps, wobbling, or water damage vulnerabilities, especially when properly sealed and reinforced. To explore effective strategies, check out how creative built-ins can transform your space into both functional and aesthetic marvels.
Another misunderstood aspect is the importance of anchoring systems. Many assume that basic nails or standard brackets suffice; however, especially for heavy or asymmetrical fixtures, specialized steel braces and wall anchors are indispensable. Proper reinforcement prevents sagging, wobbling, and even detachment that can occur with frequent use or shifting structures. For heavy vanities or cabinets, understanding and implementing the right hardware is crucial. There’s a wealth of expert tips on heavy-duty brackets that can prevent these issues before they start.
Myths also persist around the installation timeline. Many believe DIY projects save time and money, but without proper preparation, they often lead to rework, delays, and frustration. For advanced projects, consulting professional installation guides and considering custom solutions ensures a smoother process. If you’re interested in detailed guidance, take a look at step-by-step vanity installation for insights.
Furthermore, the role of waterproofing and moisture control is often underestimated. Many homeowners install storage or vanities without integrating advanced moisture management, leading to mold, warping, or rot—issues that can be silently undermining the investment. Proper waterproofing, from membranes to sealing joints, requires nuanced application that many overlook. For a deep dive into making your storage solutions last, see expert recommendations at venting and waterproofing tips.
The hidden nuance in all of this is the understanding that storage solutions aren’t merely functional but structural elements that must be planned with an eye toward future maintenance, load-bearing capacity, and environmental factors. Ignoring these subtleties often results in avoidable repairs or replacements, undermining your original investment. Now, I’d love to hear—have you ever fallen into this trap? Let me know in the comments. Remember, the key to successful storage design lies in mastering these unseen yet critical details.
Invest in Reliable Equipment for Longevity
When it comes to maintaining your built-ins, having the right tools makes all the difference. I personally swear by a high-quality cordless drill like the Makita XFD10Z for its power and battery life, which allows me to tighten or adjust brackets quickly without interruption. For precision tasks, I use a Bosch Digital Level to ensure that shelves and panels remain perfectly aligned, preventing future sagging or wobbling. These tools not only save time but also prevent mishaps that can compromise your storage integrity.
Embrace Smart Maintenance Techniques
Establishing a regular inspection routine is crucial. I recommend checking your storage and vanity fixtures every six months for signs of wear, loose screws, or moisture buildup. During these inspections, I use a moisture meter—such as the Protimeter Aquant—to detect hidden water intrusion behind panels or under cabinets, which could cause damage over time if left unchecked. Addressing small issues early prevents costly repairs down the line and prolongs the lifespan of your investments. Additionally, applying a light coat of furniture wax or sealant on wooden surfaces annually helps protect against humidity and surface scratches.
The Power of Proper Cleaning and Ventilation
Keeping your storage solutions dust-free and well-ventilated is often overlooked but essential. I use a handheld vacuum with a soft brush attachment to remove dust from tight corners and a microfiber cloth with a mild cleaner for surfaces. For built-in vanities, ensuring airflow beneath and around the units reduces moisture buildup that can lead to mold or rot. Installing small, discreet vents or using dehumidifiers in humid environments can dramatically improve the long-term condition of your cabinetry.
Looking Ahead: Where Will Maintenance Tools Go in the Future?
Advancements in smart home technology suggest that integration of IoT devices—like moisture sensors that alert you to water leaks in real-time—will become standard. These devices can proactively notify you of potential issues, allowing for timely repairs that protect your investments effortlessly. As the trend evolves, expect maintenance routines to incorporate more automation, reducing the manual effort required to keep your storage solutions in top shape.
How do I maintain my built-in storage and vanities over time?
Consistent inspections, utilizing precise tools like digital levels and moisture meters, and adopting proactive cleaning habits are key. I highly recommend trying out a moisture meter like the Protimeter Aquant—it’s a game-changer for early water damage detection. Incorporating these advanced tips will help ensure your storage solutions remain functional and beautiful for years to come. For more ideas on protecting your cabinets, visit effortless storage solutions.
Lessons the Hard Way in Bathroom Storage Smarts
One of my biggest lightbulb moments was realizing that rushing through waterproofing or ignoring detailed reinforcement can turn a dream vanity into a nightmare. I used to assume that standard materials and quick fixes would last, but experience taught me that paying attention to unseen details—like sealing every crack or choosing the right wall anchors—makes all the difference. The toughest lesson? That neglecting these subtle yet crucial steps often results in costly repairs and a compromised space. Now, I prioritize precision and expert advice, knowing that the longevity of my storage solutions depends on it.
Tools and Insights That Elevate Your Storage Game
I trust the Bosch Digital Level for ensuring perfect alignment, preventing future wobbling or gaps. For moisture detection, the Protimeter Aquant has been an eye-opener, catching hidden water issues before they escalate. Combining these with professional-grade sealants and reinforced steel brackets, I’ve created built-ins that withstand daily wear and moisture exposure. For deeper understanding, I recommend exploring creative built-ins—they’ve transformed how I approach seamless storage design. Investing in quality tools and reliable resources is the secret to lasting results.
Your Next Step in Confidently Creating Durable Spaces
Embrace the journey of crafting storage solutions that stand the test of time by paying attention to every detail, no matter how small. Your bathroom deserves built-ins that are as resilient as they are beautiful. Remember, mastery comes from continuous learning and applying expert tips—your space is worth the effort. Dive into resources like effortless storage ideas to stay inspired and informed. Start today, and turn your vision into a durable, stylish reality.
Related Posts
Effective Vanities & Storage: Top Tips for Seamless Installation in 2025
It was a morning like any other, but as I…
4 Stealth Wall Fixes for 2026 Floating Pocket-Door Vanities
I'll never forget the moment I opened my bathroom vanity…
5 Hidden Bracing Fixes for 2026 Kitchen Corner Vanities
It was a morning like any other—until I opened my…