

I’ll never forget the sinking feeling I had three years ago. I’d just spent a small fortune on a high-end jewelry safe. It weighed a solid 250 pounds. I figured, “Hey, who’s going to walk away with that?” I tucked it into my master bedroom closet, felt pretty good about myself, and went about my life. Then, a buddy of mine who works in security gave me a reality check. He showed me a grainy security clip of two guys using a simple $20 moving dolly to roll a ‘heavy’ safe right out a front door in under ninety seconds. My heart dropped. That safe wasn’t a fortress; it was just a very expensive suitcase for a thief.
The Day I Realized My 200-Pound Safe Was a ‘Takeaway’ Box
Most of us think that because a safe is a bear to lift, it’s secure. We spend hours looking for the perfect spot in our creative built-ins for seamless storage, only to forget the most critical step: making it part of the house. I made the classic rookie mistake of trying to secure mine to a flimsy particle board shelf. I actually heard the wood groan and crack as I tightened the first bolt. It was embarrassing. If you’ve ever felt that frustration of a DIY project going south, you aren’t alone. Have you ever tried to secure something heavy only to realize your closet floor or shelving wasn’t up to the task? The truth is, even the best built-in storage ideas to declutter can’t hide a safe that isn’t properly anchored. You need to get past the carpet and the padding to reach the real meat of the home. I learned the hard way that how to anchor heavy safe cabinets to subfloors is the only way to sleep soundly at night.
Is All This Bolting Really Worth the Extra Effort?
You might be thinking that your safe is too hidden or too heavy for anyone to bother with. But consider this: according to the Master Locksmiths Association, most residential burglaries are “smash and grab” jobs where time is the enemy. If a thief sees a safe, they don’t pick the lock; they take the whole box. If it’s bolted down, you’ve effectively won the battle because they aren’t going to stick around to pry it off a structural joist. It’s about turning a ninety-second getaway into a twenty-minute ordeal.
Why Gravity Alone Won’t Protect Your Valuables
We often worry about things like how to stop deep bedroom drawers from binding or making sure our bedroom wardrobes are fixed with floor anchors so they don’t tip, but a safe requires a different level of commitment. It’s not just about stability; it’s about resistance. When I finally committed to doing it right, I had to peel back my high-pile carpet and confront the subfloor. It felt invasive at first, like I was tearing up my beautiful home. But once those lag bolts bit into the wood, I felt a sense of security that weight alone never gave me. [image_placeholder] If you’re tired of worrying about your heirlooms, let’s get into the nitty-gritty of how to actually bridge the gap between your safe and your home’s foundation.
Peel Back the Mask to Find Real Support
Think of your home’s structure like a skeleton. If you’re just attaching a heavy safe to the “skin”—the carpet, padding, or even a decorative wardrobe floor—you’re basically tying a brick to a balloon. It looks secure, but it has no structural integrity. When I first started with custom storage, I assumed the floor was just the floor. I didn’t realize that between my safe and the solid wood joists sat two inches of fluff and plywood that offered zero resistance. You have to get physical. Pull back the corner of the carpet and use a high-quality stud finder to map out the joists. If you’re working on an uneven surface, you might even need to consider 4 tactics for leveling cabinets on old sloping floors before you even think about drilling. A safe that isn’t level is a safe that’s easier to pry.
Stop Relying on Gravity and Start Using the Joists
I learned this lesson the hard way during a renovation. I was installing what I thought was a foolproof security cabinet inside a closet. I didn’t bother checking the joist direction. Halfway through, I realized my bolts were just hanging in the air beneath the subfloor because I’d missed the wood by an inch. I had to patch the holes and start over, which is never fun when you’re working in a cramped closet. To avoid this, mark your joist centers clearly on the wood. This is the same principle professionals use for the hidden sub-base for leveling heavy media walls on carpet. You need a solid connection that bridges the gap between the heavy object and the earth. Imagine trying to hold a heavy weight while standing on a mattress; you need to find the solid floor underneath to be stable.
The Best Hardware to Lock Your Safe in Place
Standard wood screws are for picture frames, not security. You need hardware that can withstand hundreds of pounds of prying force. For most residential wood subfloors, 3/8-inch lag bolts are the gold standard. They act like a permanent anchor, biting deep into the grain. However, if you are working with a different setup, such as a concrete slab in a garage, you’ll need to pivot to 4 heavy duty floor anchors for sliding pantry systems or similar masonry-rated hardware. Using the wrong bolt is like using a zip-tie to lock a gate—it might look okay at first glance, but it won’t hold up under pressure. 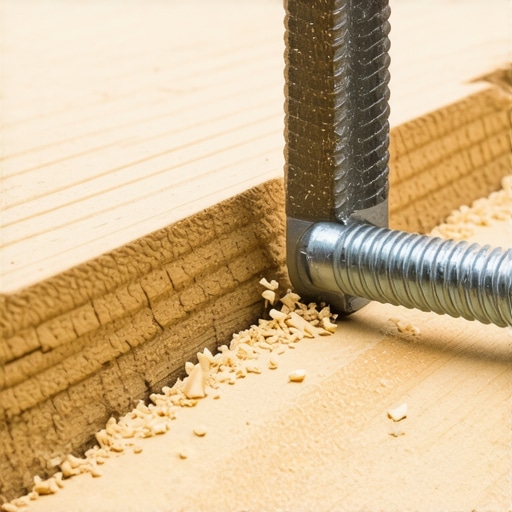
Master the Lag Bolt Pattern
Don’t just throw a single bolt in the center and call it a day. A single point of failure is a gift to a thief with a pry bar. You want a staggered layout. This creates multiple angles of resistance. I usually follow the lag bolt pattern for heavy tool chest anchoring to ensure that even if one side is attacked, the other three stay locked down. When I did this for my jewelry safe, I used four 4-inch bolts. It was overkill, sure, but when I tried to shake that safe after I was done, the entire house shook with it. That’s the feeling of actual security. It turns a standalone object into a permanent part of your home’s foundation.
Preparation Prevents a Project Disaster
Before the first drill bit touches the wood, you must clear the area. This isn’t just about making space; it’s about protecting your home’s infrastructure. Check for electrical wires or plumbing lines running through those joists. I once watched a neighbor hit a water line because he was “sure” nothing was there. It turned a simple ten-minute installation into a multi-thousand-dollar insurance claim. Taking ten minutes to verify what’s beneath the surface is the most valuable part of the process. This attention to detail is why how to anchor heavy safe cabinets to subfloors remains the definitive method for high-value protection. Ensure your drill bits are sharp and your pilot holes are deep enough to prevent the wood from splitting, which is a common mistake when dealing with older, drier lumber.
But here is the thing that most ‘pro’ guides won’t tell you: sometimes, even a perfectly drilled hole isn’t enough if you’re fighting the wrong battle. Most people assume that once a safe or a heavy vanity is bolted down, the job is finished. I call this the ‘Set and Forget’ fallacy. In my years of working with custom cabinetry, I’ve seen more projects fail from long-term structural fatigue than from immediate weight issues. You might think your massive marble-topped vanity is solid because it’s heavy, but without the internal support move for heavy stone vanities, you are essentially asking a wooden box to defy the laws of physics forever.
Heavy Stone Doesn’t Guarantee a Stable Vanity
Common wisdom suggests that weight equals stability. I used to believe that too, until I saw a high-end bathroom renovation where the vanity had literally pulled the drywall away from the studs. The weight of the stone top wasn’t keeping the vanity down; it was acting as a lever, prying the cabinet off the wall every time someone leaned on it. If you are aiming to maximize your space with custom vanities, you have to account for the center of gravity. A heavy top requires more than just floor bolts; it requires a structural connection that transfers that weight directly into the wall framing. I’ve found that using the steel plate move for drywall mounted floating vanities is often the only way to prevent that slow, agonizing tilt over time.
Why Does Your Built-In Creak Despite Being Bolted Down?
This is a question I get constantly from homeowners who have followed every DIY guide to the letter. If your floor-to-ceiling unit or safe cabinet still ‘groans’ when you walk past, the culprit isn’t the bolts—it’s the ‘creep’ effect. According to the Forest Products Laboratory, wood under a constant, heavy load undergoes a phenomenon called creep, where it slowly deforms over months or years. If you didn’t use a the hidden sub-base for leveling heavy media walls on carpet, the carpet padding is likely compressing unevenly, creating tiny gaps that allow for movement. This movement is what causes that annoying squeak, and more importantly, it slowly loosens your lag bolts through vibration.
The Secret to Fitting Units Against Out-of-Square Walls
Another ‘trap’ that catches even seasoned builders is the assumption that your walls are actually 90 degrees. They aren’t. Ever. If you bolt a heavy safe or a built-in cabinet tightly against a wall that has a slight bow, you are actually putting the cabinet under tension. Over time, this tension will cause doors to misalign or hinges to snap. I always rely on the scribing trick for installing vanities against out-of-square walls to ensure the cabinet sits naturally against the floor and wall before I even think about the first anchor. It’s about fitting the furniture to the house, not forcing the house to fit the furniture. Have you ever fallen into this trap where a project looked perfect on day one but started ‘settling’ into a mess a month later? Let me know in the comments below, and let’s figure out where the structural weak point might be.
I spent years thinking my standard cordless drill was enough for everything. Then I met a professional cabinet maker who showed me why my ‘secure’ installations were actually loosening over time. He didn’t just use a drill; he used a high-torque impact driver paired with GRK structural screws. Unlike traditional lag bolts that require massive pilot holes and can split wood if you’re off by a hair, these structural screws have a built-in washer head and a tip that bites into the grain like a shark. If you are serious about how to anchor heavy safe cabinets to subfloors, you need to ditch the hardware store mystery bag and invest in fasteners designed specifically for shear strength. When I am working on a project like a step-by-step guide to vanity installation for beginners, I always emphasize that the tool in your hand dictates the longevity of the joint. For instance, if you are trying to how to fix shaky garage workbenches with cantilever brackets, a standard wood screw will eventually snap under the lateral vibration of a saw. I’ve also found that using a professional moisture meter is a non-negotiable step. The National Wood Flooring Association (NWFA) technical guidelines state that wood moisture content should ideally be within a narrow range of the subfloor’s levels before you lock it down. If you ignore this, the wood will shrink, your bolts will loosen, and you will be left with a wobbling mess regardless of how hard you tightened the screws.
How do I keep these heavy-duty installs from failing over time?
Once the safe or the vanity is in, most people think the story is over. It isn’t. Every six months, I do what I call a ‘tension walk.’ I check the doors and drawers to see if they are still tracking straight. If you notice you need to stop cabinet doors from warping in humid bathrooms, it is usually a sign that the environment is winning against your structural hardware. I have started applying the moisture barrier rule for cabinets on cold outer walls as a standard practice because condensation is a silent killer for custom wood. Looking ahead, I believe we are moving toward ‘smart cabinetry’ that includes integrated sensors to alert you if a subfloor is shifting or if a leak has started behind a heavy built-in before the damage becomes permanent. Until then, we rely on the basics: the right steel, the right torque, and a little bit of vigilance. Go into your bathroom right now and give the vanity a firm nudge; if it moves even a millimeter, grab a socket wrench and check those floor anchors today.I’ll never forget the sinking feeling I had three years ago. I’d just spent a small fortune on a high-end jewelry safe. It weighed a solid 250 pounds. I figured, “Hey, who’s going to walk away with that?” I tucked it into my master bedroom closet, felt pretty good about myself, and went about my life. Then, a buddy of mine who works in security gave me a reality check. He showed me a grainy security clip of two guys using a simple $20 moving dolly to roll a ‘heavy’ safe right out a front door in under ninety seconds. My heart dropped. That safe wasn’t a fortress; it was just a very expensive suitcase for a thief.
The Day I Realized My 200-Pound Safe Was a ‘Takeaway’ Box
Most of us think that because a safe is a bear to lift, it’s secure. We spend hours looking for the perfect spot in our creative built-ins for seamless storage, only to forget the most critical step: making it part of the house. I made the classic rookie mistake of trying to secure mine to a flimsy particle board shelf. I actually heard the wood groan and crack as I tightened the first bolt. It was embarrassing. If you’ve ever felt that frustration of a DIY project going south, you aren’t alone. Have you ever tried to secure something heavy only to realize your closet floor or shelving wasn’t up to the task? The truth is, even the best built-in storage ideas to declutter can’t hide a safe that isn’t properly anchored. You need to get past the carpet and the padding to reach the real meat of the home. I learned the hard way that how to anchor heavy safe cabinets to subfloors is the only way to sleep soundly at night.
Is All This Bolting Really Worth the Extra Effort?
You might be thinking that your safe is too hidden or too heavy for anyone to bother with. But consider this: according to the Master Locksmiths Association, most residential burglaries are “smash and grab” jobs where time is the enemy. If a thief sees a safe, they don’t pick the lock; they take the whole box. If it’s bolted down, you’ve effectively won the battle because they aren’t going to stick around to pry it off a structural joist. It’s about turning a ninety-second getaway into a twenty-minute ordeal.
Why Gravity Alone Won’t Protect Your Valuables
We often worry about things like how to stop deep bedroom drawers from binding or making sure our bedroom wardrobes are fixed with floor anchors so they don’t tip, but a safe requires a different level of commitment. It’s not just about stability; it’s about resistance. When I finally committed to doing it right, I had to peel back my high-pile carpet and confront the subfloor. It felt invasive at first, like I was tearing up my beautiful home. But once those lag bolts bit into the wood, I felt a sense of security that weight alone never gave me. [image_placeholder] If you’re tired of worrying about your heirlooms, let’s get into the nitty-gritty of how to actually bridge the gap between your safe and your home’s foundation.
Peel Back the Mask to Find Real Support
Think of your home’s structure like a skeleton. If you’re just attaching a heavy safe to the “skin”—the carpet, padding, or even a decorative wardrobe floor—you’re basically tying a brick to a balloon. It looks secure, but it has no structural integrity. When I first started with custom storage, I assumed the floor was just the floor. I didn’t realize that between my safe and the solid wood joists sat two inches of fluff and plywood that offered zero resistance. You have to get physical. Pull back the corner of the carpet and use a high-quality stud finder to map out the joists. If you’re working on an uneven surface, you might even need to consider 4 tactics for leveling cabinets on old sloping floors before you even think about drilling. A safe that isn’t level is a safe that’s easier to pry.
Stop Relying on Gravity and Start Using the Joists
I learned this lesson the hard way during a renovation. I was installing what I thought was a foolproof security cabinet inside a closet. I didn’t bother checking the joist direction. Halfway through, I realized my bolts were just hanging in the air beneath the subfloor because I’d missed the wood by an inch. I had to patch the holes and start over, which is never fun when you’re working in a cramped closet. To avoid this, mark your joist centers clearly on the wood. This is the same principle professionals use for the hidden sub-base for leveling heavy media walls on carpet. You need a solid connection that bridges the gap between the heavy object and the earth. Imagine trying to hold a heavy weight while standing on a mattress; you need to find the solid floor underneath to be stable.
The Best Hardware to Lock Your Safe in Place
Standard wood screws are for picture frames, not security. You need hardware that can withstand hundreds of pounds of prying force. For most residential wood subfloors, 3/8-inch lag bolts are the gold standard. They act like a permanent anchor, biting deep into the grain. However, if you are working with a different setup, such as a concrete slab in a garage, you’ll need to pivot to 4 heavy duty floor anchors for sliding pantry systems or similar masonry-rated hardware. Using the wrong bolt is like using a zip-tie to lock a gate—it might look okay at first glance, but it won’t hold up under pressure.
Master the Lag Bolt Pattern
Don’t just throw a single bolt in the center and call it a day. A single point of failure is a gift to a thief with a pry bar. You want a staggered layout. This creates multiple angles of resistance. I usually follow the lag bolt pattern for heavy tool chest anchoring to ensure that even if one side is attacked, the other three stay locked down. When I did this for my jewelry safe, I used four 4-inch bolts. It was overkill, sure, but when I tried to shake that safe after I was done, the entire house shook with it. That’s the feeling of actual security. It turns a standalone object into a permanent part of your home’s foundation.
Preparation Prevents a Project Disaster
Before the first drill bit touches the wood, you must clear the area. This isn’t just about making space; it’s about protecting your home’s infrastructure. Check for electrical wires or plumbing lines running through those joists. I once watched a neighbor hit a water line because he was “sure” nothing was there. It turned a simple ten-minute installation into a multi-thousand-dollar insurance claim. Taking ten minutes to verify what’s beneath the surface is the most valuable part of the process. This attention to detail is why how to anchor heavy safe cabinets to subfloors remains the definitive method for high-value protection. Ensure your drill bits are sharp and your pilot holes are deep enough to prevent the wood from splitting, which is a common mistake when dealing with older, drier lumber.
But here is the thing that most ‘pro’ guides won’t tell you: sometimes, even a perfectly drilled hole isn’t enough if you’re fighting the wrong battle. Most people assume that once a safe or a heavy vanity is bolted down, the job is finished. I call this the ‘Set and Forget’ fallacy. In my years of working with custom cabinetry, I’ve seen more projects fail from long-term structural fatigue than from immediate weight issues. You might think your massive marble-topped vanity is solid because it’s heavy, but without the internal support move for heavy stone vanities, you are essentially asking a wooden box to defy the laws of physics forever.
Heavy Stone Doesn’t Guarantee a Stable Vanity
Common wisdom suggests that weight equals stability. I used to believe that too, until I saw a high-end bathroom renovation where the vanity had literally pulled the drywall away from the studs. The weight of the stone top wasn’t keeping the vanity down; it was acting as a lever, prying the cabinet off the wall every time someone leaned on it. If you are aiming to maximize your space with custom vanities, you have to account for the center of gravity. A heavy top requires more than just floor bolts; it requires a structural connection that transfers that weight directly into the wall framing. I’ve found that using the steel plate move for drywall mounted floating vanities is often the only way to prevent that slow, agonizing tilt over time.
Why Does Your Built-In Creak Despite Being Bolted Down?
This is a question I get constantly from homeowners who have followed every DIY guide to the letter. If your floor-to-ceiling unit or safe cabinet still ‘groans’ when you walk past, the culprit isn’t the bolts—it’s the ‘creep’ effect. According to the Forest Products Laboratory, wood under a constant, heavy load undergoes a phenomenon called creep, where it slowly deforms over months or years. If you didn’t use a the hidden sub-base for leveling heavy media walls on carpet, the carpet padding is likely compressing unevenly, creating tiny gaps that allow for movement. This movement is what causes that annoying squeak, and more importantly, it slowly loosens your lag bolts through vibration.
The Secret to Fitting Units Against Out-of-Square Walls
Another ‘trap’ that catches even seasoned builders is the assumption that your walls are actually 90 degrees. They aren’t. Ever. If you bolt a heavy safe or a built-in cabinet tightly against a wall that has a slight bow, you are actually putting the cabinet under tension. Over time, this tension will cause doors to misalign or hinges to snap. I always rely on the scribing trick for installing vanities against out-of-square walls to ensure the cabinet sits naturally against the floor and wall before I even think about the first anchor. It’s about fitting the furniture to the house, not forcing the house to fit the furniture. Have you ever fallen into this trap where a project looked perfect on day one but started ‘settling’ into a mess a month later? Let me know in the comments below, and let’s figure out where the structural weak point might be.
I spent years thinking my standard cordless drill was enough for everything. Then I met a professional cabinet maker who showed me why my ‘secure’ installations were actually loosening over time. He didn’t just use a drill; he used a high-torque impact driver paired with GRK structural screws. Unlike traditional lag bolts that require massive pilot holes and can split wood if you’re off by a hair, these structural screws have a built-in washer head and a tip that bites into the grain like a shark. If you are serious about how to anchor heavy safe cabinets to subfloors, you need to ditch the hardware store mystery bag and invest in fasteners designed specifically for shear strength. When I am working on a project like a step-by-step guide to vanity installation for beginners, I always emphasize that the tool in your hand dictates the longevity of the joint. For instance, if you are trying to how to fix shaky garage workbenches with cantilever brackets, a standard wood screw will eventually snap under the lateral vibration of a saw. I’ve also found that using a professional moisture meter is a non-negotiable step. The National Wood Flooring Association (NWFA) technical guidelines state that wood moisture content should ideally be within a narrow range of the subfloor’s levels before you lock it down. If you ignore this, the wood will shrink, your bolts will loosen, and you will be left with a wobbling mess regardless of how hard you tightened the screws.
How do I keep these heavy-duty installs from failing over time?
Once the safe or the vanity is in, most people think the story is over. It isn’t. Every six months, I do what I call a ‘tension walk.’ I check the doors and drawers to see if they are still tracking straight. If you notice you need to stop cabinet doors from warping in humid bathrooms, it is usually a sign that the environment is winning against your structural hardware. I have started applying the moisture barrier rule for cabinets on cold outer walls as a standard practice because condensation is a silent killer for custom wood. Looking ahead, I believe we are moving toward ‘smart cabinetry’ that includes integrated sensors to alert you if a subfloor is shifting or if a leak has started behind a heavy built-in before the damage becomes permanent. Until then, we rely on the basics: the right steel, the right torque, and a little bit of vigilance. Go into your bathroom right now and give the vanity a firm nudge; if it moves even a millimeter, grab a socket wrench and check those floor anchors today.
The Brutal Truth About Anchoring Into Joists
After years of trial and error with custom storage, I’ve realized that the secret isn’t just the bolt; it’s the preparation. First, I always verify joist locations from a crawlspace or basement whenever possible. Stud finders can be fooled by double-layers of plywood or old adhesive. Second, I’ve learned to never bolt directly through carpet padding. I always cut a small, clean square of padding out so the safe or cabinet base makes direct contact with the subfloor. This prevents the “bounce” that eventually loosens hardware. Third, I always use a shop vac while drilling to keep sawdust out of the safe’s internal locking gears. These small moves separate a DIY headache from a professional result.
My Go-To Gear for Structural Security
When I’m tackling a project that requires maximum holding power, I don’t browse the bargain bin. I start with GRK Structural Screws; their shear strength is unmatched, and they often eliminate the need for the giant, wood-splitting pilot holes required by old-school lag bolts. For driving them, a high-torque impact driver is essential. A standard drill is great for a step-by-step guide to vanity installation for beginners, but for 4-inch structural screws, you need the percussion of an impact tool to seat them fully. Finally, a digital moisture meter ensures you aren’t anchoring into wet wood that will shrink and loosen your work within a year. This is especially true when creating creative built-ins for seamless storage where tight tolerances are required for a high-end look.
Take Control of Your Home Security Today
You now have the roadmap to move from worry to certainty. Peace of mind isn’t something you can buy in a box; it’s something you build with the right tools and a bit of sweat. By mastering how to anchor heavy safe cabinets to subfloors, you are taking a proactive step to protect what matters most. Whether you are bolting down a jewelry safe or ensuring your expert guide to flawless vanity installation tricks tips are put to good use, the effort you put in now pays dividends in long-term stability. Don’t wait for a “what if” moment to regret skipping the anchors. #IMAGE_PLACEHOLDER_E#
Have you ever encountered a surprise plumbing line or electrical wire while drilling into your subfloor? Let me know about your DIY saves or scares in the comments below!