

I remember the day I finally finished my first floor-to-ceiling library unit. I stood back, admired the trim, and then gently pushed a heavy encyclopedia onto the middle shelf. The entire unit leaned two inches to the left. My heart sank. It wasn’t just a small shimmy; it was a structural cry for help. That sickening creak told me everything I needed to know: my joinery was fine, but my anchoring was amateur. We’ve all been there, standing in the middle of a room, staring at a piece of furniture that cost three weekends of sweat and a small fortune in lumber, only to realize it feels as stable as a house of cards. I used to think more screws were the answer. I was wrong. I ended up chewing through my wall studs like a hungry termite, weakening the very structure I was trying to save.
Forget the Shims and Overloaded Screws
The reality is that wood is an organic material. It breathes, it compresses, and eventually, it gives way under the lateral pressure of a heavy load. If you want your furniture to feel like it’s part of the home’s foundation, you have to look beyond the wood aisle. You need the cold, hard rigidity of steel. Whether you are dealing with a massive media center or trying to stop floating vanities from dipping with steel plates, the physics remain the same. Standard fasteners just don’t have the surface area to combat leverage. When I started using recessed steel plates, everything changed. It turned a wobbly bookshelf into a rock-solid architectural feature. I’ve learned the hard way that an expert guide to flawless vanity installation always involves some form of hidden reinforcement that the homeowner will never see, but will definitely feel every time they lean on the counter. Have you ever felt that terrifying ‘lean’ when you finally loaded up your favorite shelves? Drop a comment and let me know—I promise you aren’t the only one who has faced the dreaded built-in tilt.
Is adding steel really worth the extra effort?
You might be skeptical. After all, your grandfather built things out of oak and nails that are still standing. But modern homes use softer framing lumber and thinner drywall that simply can’t handle the same stresses. According to research from the American Wood Council, the lateral load capacity of a standard wood fastener can be significantly compromised by wood shrinkage and grain orientation over time. Steel plates bypass this issue by distributing the load across a much wider surface area of the stud. It’s the difference between holding a heavy weight with one finger versus using your whole palm. By using a hidden sub-frame hack for massive library built-ins, you are essentially grafting the strength of the metal onto the flexibility of the wood. This approach is exactly how you stop wobbly custom built-ins with 4 hidden steel plate fixes that actually last a lifetime. In the next few sections, I’m going to pull back the curtain on the specific hardware I keep in my truck and how to hide it so your guests think your carpentry skills are just that good.
To move from a wobbly shelf to a structural masterpiece, you have to start thinking like a welder, even if you are only working with wood. The first step is identifying exactly where the torque is going to fight you. On a heavy library unit, that is usually the mid-point of the vertical gables where the weight tries to pull the unit away from the wall. Instead of reaching for a bigger screw, I now reach for my router. You need to create a shallow pocket on the back side of your cabinetry. I remember a specific job where I was installing a massive oak floating bench. I tried the usual lag bolts, but the drywall started to crush under the pressure. I had to pull the whole thing down and use the steel bracket hack for floating entryway benches to save the project. By recessing a 1/4-inch steel plate into the back of the wood, I created a surface that would not compress. This allowed the bench to sit flush against the studs, transferring the load directly into the framing of the house.
Ditch the Standard Brackets for Flush Mounting
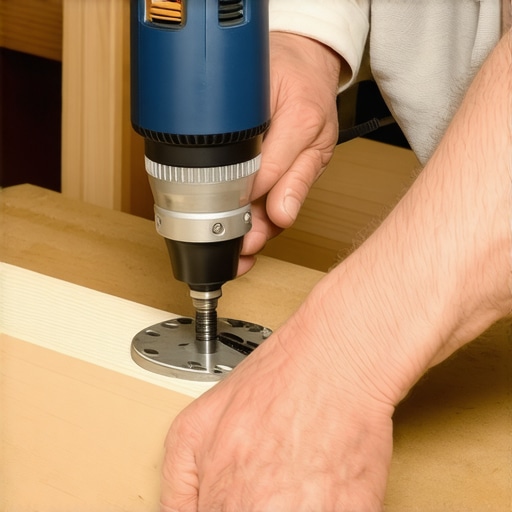
The secret to a professional look is ensuring that your reinforcement remains invisible. If you simply screw a steel plate to the back of a cabinet, you create a gap between the furniture and the wall. This gap is the enemy of stability. You must use a plunge router to create a recess that is exactly the depth of the metal plate. This is how you stop wobbly custom built-ins with 4 hidden steel plate fixes that look like they were built into the original blueprints of the home. When you pull the trigger on that router, you are carving out a dedicated ‘home’ for the steel. Once the plate is seated, it acts like a bone inside a limb, providing rigidity without the bulk. I’ve used this same approach to stop floating vanities from dipping with steel plates, and the results are night and day. A vanity that once groaned when a toddler leaned on it suddenly feels like it is carved out of solid stone.
Target the Center of the Studs Every Time
Physics doesn’t care about your aesthetic; it cares about the center of gravity. When you are mounting these plates, your fasteners must penetrate at least two inches into the center of the wall studs. A common mistake is missing the center and catching the edge of the wood, which leads to ‘blowout’ inside the wall. I always use a small drill bit to probe the edges of the stud before I commit to the final mounting hole. This precision is what separates a DIY attempt from an expert guide to flawless vanity installation. If you find your walls are slightly out of plumb, don’t try to bend the steel. Instead, use the scribing secret for perfect built-ins on rounded drywall corners to ensure the wood meets the wall perfectly while the steel handle the heavy lifting behind the scenes. This combo of internal strength and external finesse is the only way to guarantee a lifetime of service from your custom work.
We need to talk about the most dangerous lie in the home improvement aisle: the 75-pound drywall anchor. Let’s dig deeper into why these are a recipe for disaster. I’ve seen countless DIYers and even some “pros” hang massive upper cabinets or floating units using nothing but these plastic toggles. They see the weight rating on the box and think they are safe. But those ratings are for static weight—a picture frame that never moves. As soon as you add the dynamic load of a person leaning on a counter or a drawer being slammed shut, those anchors become saws. They vibrate and slowly chew through the gypsum core until the whole unit sags. This is often why your built-in cabinets are pulling away from the ceiling. If you aren’t hitting a stud or installing horizontal blocking behind the drywall, you are just waiting for a disaster. Have you ever fallen into this trap? Let me know in the comments—I’ve seen some absolute disasters where the drywall paper was the only thing holding up a whole pantry.
Stop Trusting the Weight Rating on Drywall Anchors
In my years of fixing failed installs, I’ve realized that the “expert” way isn’t just about strength; it’s about managing movement. Wood is a living thing. According to the USDA Forest Products Laboratory’s Wood Handbook, even a minor 1% shift in moisture can lead to significant dimensional changes. Most people bolt their built-ins tight to the wall without accounting for this. If you are working on a bathroom project, you need to use vanity installation hacks that save time and money while respecting the humidity. If the cabinet can’t breathe against the wall, it will eventually buckle or pull the fasteners right out of the studs. This is especially true when you ignore the moisture barrier rule for cabinets on cold outer walls, which can lead to hidden rot behind your beautiful new built-in.
How much movement can your steel bracing actually handle?
When you integrate the steel plates I mentioned earlier, you create a rigid “skeleton,” but you still have to allow the “skin” (the wood) to move. I’ve found that using oversized holes in the steel plates—paired with fender washers—allows the wood to expand and contract without snapping the screws. This nuance is what separates a cabinet that lasts five years from one that lasts fifty. When you are looking for creative storage solutions for vanities, remember that the internal hardware has to survive the environment. I once saw a gorgeous floating oak vanity split right down the middle because it was pinned too tightly between two walls with no room for seasonal expansion.
Another common mistake is ignoring the floor. We focus so much on the wall that we forget the base. For those working on floor-to-ceiling units, you must ensure the weight is transferred to the floor joists, not just the subfloor. This is a critical part of an expert guide to flawless vanity installation. If the floor settles even a fraction of an inch, your wall-mounted cabinets will appear to be “lifting” from the ceiling. Precision leveling and structural blocking are your only defenses against the house moving around your furniture. By combining hidden steel reinforcement with a deep understanding of wood science, you stop being a “cabinet hanger” and start being a structural carpenter.
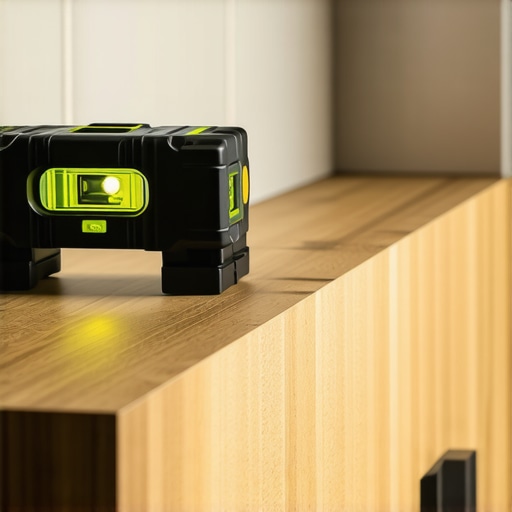
If you’re still using a standard four-foot spirit level for floor-to-ceiling projects, you’re playing a dangerous game of ‘telephone’ with your plumb lines. I eventually traded my old bubbles for the Bosch GLL3-330CG green beam laser because a manual level only tells you about the tool’s length, whereas a 360-degree laser shows you the room’s entire story. When you are trying to figure out how to support extra-wide kitchen drawers without dragging, that 1/16th of an inch difference at the base becomes a half-inch disaster at the top. I’ve seen it time and again: a perfectly built unit that binds because the floor had a slight crown that the installer simply missed with a shorter tool.
Ditch the standard level for a green beam laser
Precision isn’t just for the initial install; it’s the foundation of long-term mechanical health. Maintenance isn’t just about dusting the shelves; it’s about checking the tension on your moving parts. You might notice why your soft-close hinges are snapping after a year of heavy use if the cabinet box isn’t perfectly square. The mechanical stress has to go somewhere, and it is usually the hinges that take the hit. In bathrooms, the stakes are significantly higher. You have to actively stop cabinet doors from warping in humid bathrooms by checking your finish seals every spring. According to the Blum TANDEM plus BLUMOTION Technical Manual, dynamic load capacity is strictly dependent on perfectly parallel runner installation—if your drawer slides are off by even a millimeter, you are essentially cutting their lifespan in half.

Can these heavy-duty installs really last forever?
The short answer is yes, but only if you respect the plumbing. I’ve seen gorgeous $5,000 custom units ruined because the owner didn’t understand why your vanity plumbing is leaking into the cabinet base until the wood had already begun to swell. I recommend using a moisture-detecting alarm inside any sink cabinet. Looking ahead, I suspect we are moving toward a world where carbon fiber reinforcement strips will replace the heavy steel plates I currently use. They offer the same rigidity with a fraction of the weight, making it even easier to recess them into thin cabinet gables. My advice for your next project? Before you drive a single screw, use a laser level to map out the entire wall’s ‘wave.’ You’ll be shocked at how much a ‘flat’ wall actually moves, and identifying those gaps early is the only way to ensure your built-ins look as good in ten years as they do on day one.
Lessons Bought With Sawdust and Sweat
After two decades in the shop, I’ve realized that the most expensive mistake isn’t a bad cut—it’s a lack of foresight regarding gravity. I’ve gone back to jobsites three years later only to find that even the tightest joinery can fail if the wall itself wasn’t prepped correctly. One lightbulb moment for me was realizing that structural integrity isn’t about strength; it’s about managing leverage. This is why I often point people toward a step-by-step guide to vanity installation for beginners before they even touch a piece of hardwood; you have to understand the physics before the aesthetics. Another harsh truth is that most custom pieces fail at the transition points. If you aren’t using the structural fix for floor-to-ceiling library units, you’re essentially relying on the drywall to stay perfect forever—which it never does. I also learned that the sound of a screw biting into a stud is often a liar; it might feel tight today, but seasonal expansion will back that screw out if it isn’t a specialized structural fastener.
Where I Turn When Physics Fights Back
To get results that last, I rely on a very specific set of non-negotiable resources. First, I always keep the USDA Forest Products Laboratory’s Wood Handbook on my tablet; it’s the definitive guide on moisture and movement. For hardware, I’ve moved away from big-box store screws and only use GRK structural fasteners or FastCap Power Head screws because the massive surface area of the head prevents the wood from pulling through under lateral load. If you’re looking for creative built-ins for seamless storage and home aesthetics, these fasteners allow you to hide the mechanics while keeping the strength. Finally, I never start a project without my Stabila digital level; it catches the 0.1-degree slopes that lead to binding drawers six months down the line.
#IMAGE_PLACEHOLDER_E#
Building Something That Outlasts the Mortgage
There is a profound sense of peace that comes from leaning against a cabinet you installed and feeling absolutely zero movement. It changes the way you interact with your home and gives you the confidence to use your space fully. When you take the time to implement these steel-plate reinforcements and precision leveling, you aren’t just hanging a box—you are creating a legacy. Whether you are tackling a massive library or just trying to master vanity installation hacks that save time and money, remember that the invisible work is what defines your craftsmanship. Now that you know the secrets behind the steel, what’s stopping you from making that next project rock-solid? Have you ever had a shelf or vanity start to creep away from the wall after a few months? Let’s talk about your troubleshooting experiences in the comments below.