

I still remember the sound—a dry, gritty crunch followed by a tiny puff of grey dust that settled on my boots. I was trying to mount a massive oak bookshelf in my 1920s bungalow, thinking a few “heavy-duty” plastic anchors would be enough. I was wrong. The wall didn’t just fail; it surrendered, turning into a pile of sand while the shelf tilted dangerously toward my head. If you’ve ever watched a screw spin endlessly in a hole that just keeps getting wider, you know the specific brand of despair that comes with old homes. But after years of trial, error, and way too much spackle, I’ve learned that you can’t fight the plaster; you have to outsmart it.
Stop Treating Your Plaster Walls Like Modern Drywall
The biggest mistake I see—and one I made for far too long—is treating a lath-and-plaster wall like its modern drywall cousin. They are not the same. Drywall is a consistent sheet of gypsum, while plaster is a fickle, layered sandwich of lime, horsehair, and thin wood lath that has likely been drying out since your grandparents were kids. When you try to use standard hardware, you often end up wondering why plastic wall anchors fail for heavy shelving so spectacularly. They simply can’t expand against a material that crumbles upon contact. Today, I’m going to show you how to bypass the dust and find real structural integrity. We aren’t just patching holes; we’re creating a mounting system that will stay put. Whether you are aiming for creative built-ins for seamless storage and home aesthetics or just trying to keep a heavy pantry unit from tipping, the secret lies in the skeleton of the wall, not the surface.
Is it even possible to get a rock-solid hold in old plaster?
I get the skepticism. When the wall feels like it’s held together by hope and old wallpaper, the idea of hanging fifty pounds of books feels like a gamble. However, historic plaster is actually incredibly durable when it’s handled correctly. According to the National Park Service’s preservation guidelines, the strength of plaster relies on the “keys”—the parts of the plaster that squeeze between the wooden laths to lock everything in place. If those keys are broken, you’re in trouble. But if we bridge the gap between those laths or find the studs hiding behind them, the hold is legendary. Early in my DIY journey, I tried to force a floating shelf into a spot with no stud support, using only toggle bolts. I ended up cracking a three-foot section of the finish coat because I didn’t understand how the weight would distribute. Learn from my bruised ego: you need a strategy that respects the age of the house. Have you ever started a project only to realize the wall was literally falling apart behind the paint? Let me know in the comments—I promise you aren’t the only one.
Find the Wood or Build a Bridge
To ensure your shelf doesn’t become a floor ornament, we have to look past the surface. My go-to method involves a combination of searching for original studs and, when those aren’t where we need them, using a structural ledger. If you are working on a smaller scale, you might even consider 4 ways to support heavy mirrors on lath and plaster as a starting point for understanding weight distribution in these rooms.
Forget Your Digital Stud Finder
Digital stud finders are mostly useless on plaster because they cannot accurately see through the varying density of lime and the air gaps between wood lath. Instead, I use a high-powered rare-earth magnet. If you drag it across the wall in a grid, it will “snap” to the iron nails holding the lath to the studs. When that magnet sticks, mark it with a pencil, then move up six inches and repeat. If you get a vertical line of marks, you’ve found your structural gold. I once spent three hours hunting for a stud in a 1910 kitchen, only to find the original builders had used diagonal bracing that threw every standard measurement out the window. If I hadn’t used the magnet trick, I would have turned that wall into Swiss cheese. For those tackling more complex projects, like a full bathroom remodel, following an expert guide to flawless vanity installation tricks tips can provide additional insights on how professionals verify wall strength before the heavy lifting begins. Establishing this structural baseline is the difference between a shelf that holds and one that ends up on the floor.
Drill Small and Slow to Protect the Keys
Plaster is like a giant sheet of hard candy; it’s incredibly durable under pressure but shatters instantly if you shock it. Never drive a screw directly into a plaster wall without a pilot hole. You must drill a pilot hole first, and you should use a masonry bit for the first half-inch of plaster, then switch to a wood bit for the lath and stud behind it. This prevents the “keys”—those little curls of plaster that squeeze behind the wood—from snapping off. If you snap those keys, the plaster will eventually sag and pull away from the wood skeleton. This precision is similar to how you would stop floating shelf wobble with this internal bolt move 2, where careful drilling is the only thing standing between a rock-solid shelf and a collapsed wall.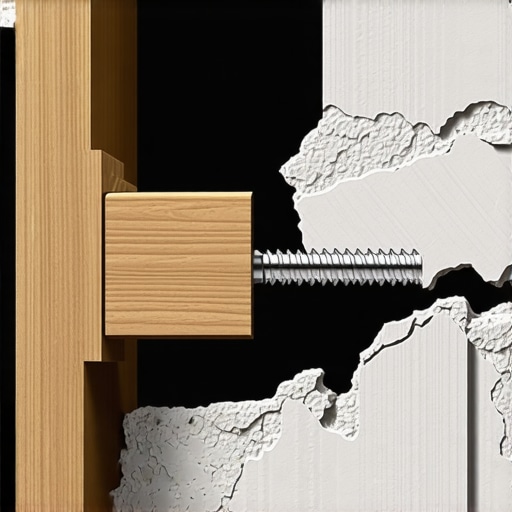
Bridge the Gap with a Structural Ledger
Sometimes, your design requires a cabinet to sit exactly where there is no stud. In modern drywall, you might get away with a heavy-duty toggle, but in old plaster, you risk the “punch-through” effect where the weight simply crushes the lime. To avoid this, I use a structural ledger or cleat. By mounting a horizontal strip of wood—screwed into at least two studs—you create a new, solid mounting surface for your project. This is one of the most effective built-in storage ideas to declutter and enhance your home because it transfers the weight horizontally across the wall’s frame rather than pulling at a single point. I used this method to mount a massive coat rack in my mudroom. By using the structural wall cleat for heavy floating desks as my template, I was able to hide the ledger behind the unit itself, making the installation look seamless and bomb-proof.
Distribute the Weight for Long-Term Stability
The physics of plaster are simple: the more surface area you can engage, the safer your installation will be. If you are mounting something with a small footprint, like a single shelf bracket, consider adding a backplate of finished plywood or hardwood. A wider backplate prevents the metal bracket from digging into the soft plaster under heavy loads. Think of it like wearing snowshoes instead of high heels; the snowshoes keep you on top of the drifts because they spread your weight out. When you apply these vanity installation hacks that save time and money, you are essentially ensuring that your wall isn’t being asked to do more than its brittle surface can handle. For even more stability, especially in moisture-heavy rooms where old plaster can soften over time, checking out innovative storage solutions to transform your bathroom can give you ideas on how to integrate these structural fixes into a modern aesthetic without sacrificing style.
Why Your Heavy-Duty Anchors Might Be Destroying Your Walls
Most DIY guides will tell you to just ‘buy a bigger anchor’ when the wall feels soft. In my experience, that is the fastest way to turn a small hole into a structural disaster. The contrarian truth is that mechanical expansion anchors—the ones that flare out like an umbrella—are often the enemy of vintage lime plaster. While they provide high pull-out strength in drywall, the pressure they exert on the back of old lath creates a concentrated stress point that can cause the surrounding plaster to ‘spall’ or flake away entirely. Instead of relying on brute force, I’ve found that how to stop floating vanities from dipping with steel plates is a much safer approach. By spreading the load across a wider surface area of the studs themselves, you avoid the crushing force that turns 100-year-old lime back into dust. Have you ever tightened a bolt only to hear that sickening pop of plaster breaking behind the wall? Let me know in the comments—I’ve definitely been there.
Can you actually trust a floating vanity on a century-old wall?
It’s the question every renovator asks when they see a 150-pound quartz top in a showroom. The answer is yes, but only if you ignore the surface and look at the ‘crush factor.’ A common trap is ignoring the air gap that often exists between the plaster and the stud. When you tighten a heavy cabinet against the wall, you risk pulling the plaster toward the wood, which causes it to bow and crack. To prevent this, I always use shims or a solid backer. When dealing with modern weights, the internal support move for heavy stone vanities is essential to ensure the cabinet carries the weight, not the brittle wall surface. According to research by the Association for Preservation Technology (APT), lime plaster is significantly less elastic than modern gypsum; it doesn’t bend, it breaks. This is why managing the ‘tension cone’—the area of stress around a fastener—is the secret to a professional-grade installation. 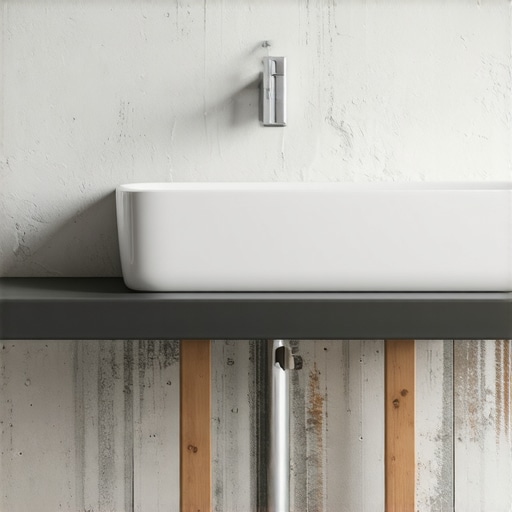
The Moisture Trap Most Professionals Overlook
If you are installing built-ins or vanities against an exterior wall in an old house, you are dealing with a thermal bridge. Old plaster is porous and ‘breathes.’ When you slap a solid cabinet against it, you can trap moisture and cause the plaster to soften over time, leading to fastener failure. To combat this, I always implement the moisture-proof base tactic for basement-built-ins even on upper floors if the wall is particularly cold. This creates a tiny air gap that prevents rot. Similarly, if you are working in a bathroom, you need to know the secret to mounting vanities over radiant floor heat 2 to avoid puncturing vital systems while chasing that elusive structural hold. Lastly, don’t forget the internals; why your large kitchen drawers drag and the support fix often comes down to the cabinet box racking because the wall wasn’t perfectly plumb to begin with. In an old house, nothing is square, but your installation has to be. Take the extra hour to scribe your face frames; your future self will thank you when the drawers still slide like silk five years from now.
The Heavy Duty Gear You Actually Need
Over the years, my toolbox has evolved from a ‘whatever is on sale’ collection to a specialized kit for old-world architecture. If you’re still using a cheap plastic level on a 19th-century floor, you’re just guessing. I’ve switched entirely to long-format box beam levels and a self-leveling cross-line laser. The laser is a game-changer when you’re trying to align a step-by-step guide to vanity installation for beginners with walls that are leaning three degrees to the left. For drilling, I never touch a standard masonry bit anymore. I use multi-purpose carbide-tipped bits—the kind designed for tile, brick, and wood in one go. They cut through the brittle finish coat without vibrating the entire lath structure into pieces.
How do I keep my heavy built-ins from sagging years later?
Long-term stability in a house that ‘breathes’ is all about managing the inevitable movement. Wood expands, plaster stays rigid, and gravity is a constant. I’ve found that even the best installation can show signs of fatigue if the hardware is undersized. This is exactly why your wardrobe rod is bowing and the steel pipe fix becomes relevant; sometimes the standard material just isn’t up to the task of decade-long tension. Every six months, I do a ‘load check’ on my heavy units. If I see a hairline gap forming at the top of a cabinet, I don’t just caulk it—I check the structural ledger. According to technical bulletins from the Building Technology Heritage Library, historic lime plaster continues to carbonize and harden for decades, becoming more brittle as it ages. This means your mounting points actually become more sensitive to vibration over time. To counter this, I always apply the moisture barrier rule for cabinets on cold outer walls to prevent the wood-to-plaster interface from rotting or swelling. 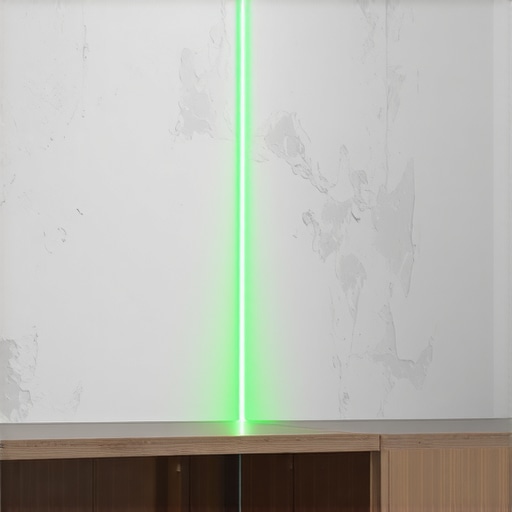
Build for the Future and the Flex
I predict that the next five years of home renovation will move away from permanent, ‘glued-in’ units toward semi-modular structural systems. We are already seeing this in top trends in vanity designs you need to know in 2025, where accessibility and ‘replaceable’ components are becoming standard. When you build today, use oversized hinges to prevent the common headache of why cabinet doors sag and the three hinge solution. It’s much easier to over-engineer the support now than to try and reinforce a crumbling wall three years down the line. If you’re looking for effortless storage solutions for a tidy stylish home, start by upgrading your fasteners to structural GRK screws. They have a built-in washer head that grips the wood lath without crushing the surface. My challenge to you: go find one shelf or cabinet in your house that feels ‘spongy’ and replace one standard screw with a structural one. You’ll feel the difference in the torque alone. We aren’t just making things look pretty; we’re making them permanent.
The Most Expensive Lessons My Old Walls Taught Me
After a decade of renovation, I’ve realized that plaster isn’t your enemy—it’s just a material with a very long memory. One lightbulb moment for me was discovering that the air gap between the plaster and the stud is where most DIYers fail. When you tighten a screw, you’re effectively trying to crush the plaster keys into that void. Instead of brute force, I now always use thin cedar shims to bridge that gap behind the mounting plate. It keeps the wall surface flat and prevents the ‘spider-web’ cracking that ruins a paint job. This is particularly vital when you are maximizing space innovative built-in solutions for small rooms where every inch of wall needs to be structurally sound. Another lesson? Never skip the magnet test. If you don’t find the nail head, you haven’t found the stud. Trusting a 16-inch center on a house built in 1905 is a recipe for a 2 a.m. shelf collapse.
Gear That Actually Survives the Plaster Dust
Standard tools usually choke in a lath-and-plaster environment, but a few specific items have saved my sanity. I swear by GRK Cabinet screws; their recessed heads provide a mechanical advantage that standard wood screws lack. I also recommend checking out maximize your space with custom vanities expert design tips for insights on why structural hardware beats aesthetic hardware every time. For drilling, bypass the bargain bits and go for multi-material carbide tips. They slice through the lime finish without creating the vibration that causes ‘key failure’ behind the wall. Finally, a cross-line laser level is non-negotiable because your floors and ceilings will never be parallel. You have to find a ‘visual level’ that works with the room’s quirks.
#IMAGE_PLACEHOLDER_E#
Go Ahead and Hang That Heavy Cabinet
Don’t let the fear of crumbling plaster stop you from personalizing your space. Whether you are choosing the perfect vanity style for your bedroom or bath or mounting a floor-to-ceiling library, the principles remain the same: find the wood, bridge the gap, and distribute the load. Old houses were built with incredibly dense, old-growth timber that holds fasteners better than anything you’ll find at a modern lumber yard. Once you get past the plaster, you’re anchoring into some of the strongest frames ever built. Your home is a living piece of history, and with these specialized storage solutions, you can make sure your modern additions stay put for another hundred years. Have you ever discovered something truly weird inside an old wall while trying to mount a shelf? Let me know in the comments below—I’d love to hear your old-house horror stories!