Ever opened a closet or bathroom vanity and felt overwhelmed by clutter, only to shut the door in frustration? I’ve been there, too. I remember the lightbulb moment when I realized that my home’s storage was not a lack of space but a lack of smart organization. That realization led me down the rabbit hole of innovative built-in cabinets and storage solutions that truly make a difference. If you’re tired of tripping over clutter and craving a more streamlined, stylish space, then stick around—because today, we’re diving into how to upgrade your home with smart built-in storage that actually works.
Why Modern Homes Need Smarter Storage Solutions
Our homes are evolving, and so are our needs. With more belongings, limited square footage, and a desire for sleek aesthetics, traditional storage just doesn’t cut it anymore. I used to think I needed bigger closets or more furniture, but I was wrong. The secret lies in customizing storage to fit your space and lifestyle—enter built-in cabinets and integrated storage solutions. Not only do they maximize every inch, but they also add a touch of elegance that free-standing furniture can’t match. A recent study by the National Association of Home Builders emphasizes that modern homeowners prioritize smart, efficient storage as a key feature in renovations. That’s because well-designed storage isn’t just about hiding clutter; it’s about creating a home that functions seamlessly and looks polished.
Have you ever faced the dilemma of trying to squeeze everything into your existing closets, only to find it overflowing? I used to cram my belongings into tiny spaces, which inevitably led to chaos. My mistake early on was ignoring the potential of custom solutions tailored specifically to my home’s layout. Instead of building more space, I learned to optimize what I had, and that’s what I want to share with you.
In this post, I’ll show you how smart built-in cabinets and storage solutions can transform your home from cluttered to curated. From selecting the right style to understanding installation tips, I’ll guide you through the process of creating a space that’s both functional and beautiful. Whether you’re considering a bathroom vanity upgrade or a full-scale built-in wardrobe, you’ll find practical advice designed to save you time, money, and stress. Ready to reclaim your space? Let’s get started!
Choose Your Space Wisely
Start by assessing the area you want to upgrade. Take measurements carefully—use a tape measure and note every detail. When I tackled my bathroom vanity project, I drew a simple sketch, marking available space and noting existing fixtures. This helped me visualize what was possible before ordering any materials. Remember, customizing your storage means maximizing every inch, so don’t overlook corners or underutilized spots. For tailored advice, check out built-in storage ideas.
Plan Your Storage Zones
Divide your space into functional zones—think about where you need quick access versus hidden storage. In my living room, I designated a zone for media equipment and hidden compartments for cables. This proactive planning prevents clutter from creeping back in. Use graph paper or digital design tools to map out your layout precisely. The goal is to create a seamless flow where everything has a designated spot, making daily routines smoother.
Source Quality Materials and Hardware
Invest in durable materials like plywood or MDF with a smooth finish. Hardware matters too—soft-close hinges and sturdy handles elevate the quality. I learned this the hard way when cheap hinges kept squeaking. Upgrading to premium hardware made a noticeable difference in function and longevity. For inspiration and technical tips, explore effortless storage solutions. Remember, good materials save you money in the long run by reducing repairs and replacements.
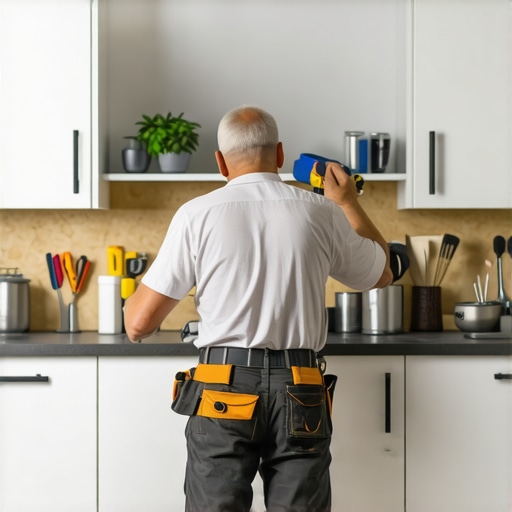
Prepare Your Space for Installation
Clear the area thoroughly—move furniture, cover floors, and ensure good lighting. If you’re replacing an existing piece, remove it carefully to prevent damage. In my case, I used a utility knife to cut through caulking and gently pried the old cabinet free, avoiding wall damage. Precise measurements are critical here; double-check before cutting or drilling. Clarity at this stage saves time and reduces mistakes during assembly. For detailed installation strategies, see installation guides.
Build or Order Your Custom Cabinet
If you’re handy, building your own is rewarding but time-consuming. Measure, cut, assemble, and finish with care. I built a simple frame from ¾ inch plywood, using a circular saw and clamps—an imperfect but educational experience. Alternatively, ordering custom cabinets from experts ensures precision and flawless fit. Many companies offer modular options you can customize online. For a professional touch, review expert installation tips.
Install with Precision
Use a level and stud finder to ensure your cabinet is perfectly aligned. Secure it firmly into wall studs—this prevents wobbling or accidents. When I installed my vanity, I used shims to correct minor unevenness and fastened it with heavy-duty screws. Double-check measurements before tightening everything down. For step-by-step installation techniques, visit installation step-by-step guide.
Finish and Accessorize
Apply paint or finish for a polished look. Install handles, pulls, or soft-close hinges as needed. I added sleek handles that matched my decor, making the cabinetry both functional and stylish. Consider interior organizers or pull-out shelves for added efficiency. These small touches transform your space from good to great, keeping everything accessible yet hidden when needed. For creative ideas, explore creative built-ins.
Maintain Your Investment
Regular cleaning and occasional adjustments keep your built-in storage looking new. Tighten loose screws, clean surfaces with mild soap, and update hardware to refresh the look. Proper maintenance ensures your investment lasts for years, providing reliable, stylish organization. For maintenance tips, see maintenance advice.
Let’s dig deeper into what most homeowners get wrong when upgrading their vanities and storage solutions. A frequent misconception is that DIY installation or choosing the cheapest materials will save money. However, rushing through installation without proper planning can lead to misaligned cabinets, unstable fixtures, or even damage to your walls. For instance, not securing cabinets into wall studs is a common error that compromises safety and durability. This oversight can cause serious issues over time, like wobbling or even detachment. To avoid these pitfalls, always use a stud finder and opt for high-quality hardware—these small investments pay off in long-term stability. For expert insights, check out vanity installation tips that emphasize precision and quality.
Another nuance many overlook is the importance of planning for functionality alongside aesthetics. It’s tempting to pick a beautiful vanity style without considering the internal layout. This mistake often results in insufficient storage or awkward access to essentials. Advanced homeowners plan their storage zones meticulously, including pull-out shelves or internal organizers, to maximize utility. This is especially critical in small spaces where every inch matters. For detailed guidance on smart interior layouts, explore effortless storage solutions.
A common myth is that built-ins are only for large, open spaces. In my experience, even compact bathrooms benefit from custom solutions designed to fit precisely. The key is tailoring the depth, height, and configuration to your specific needs—think vertical storage or corner units that fully utilize underused areas. This advanced approach prevents clutter and creates a clean, polished look. For more innovative ideas, visit built-in storage ideas.
Have you ever fallen into this trap? Let me know in the comments. Remember, the devil is in the details, and proper planning combined with quality execution makes all the difference in achieving a seamless, durable, and stylish upgrade.
Maintaining your custom-built vanities and storage solutions is just as crucial as selecting the right design and materials. Over time, wear and tear can diminish their functionality and aesthetic appeal, but with a few strategic tools and methods, you can keep everything working smoothly for years to come. I personally rely on a combination of specialized cleaning products, simple DIY adjustments, and smart technological tools to ensure my built-ins stay in top condition.
One of my go-to tools is a high-quality cordless drill with a set of precision screwdriver bits. I use it regularly to tighten loose hinges, handles, or any hardware that becomes wobbly over time. This simple step prevents more significant issues like misalignment or damage. For cleaning, I prefer microfiber cloths combined with mild, non-abrasive cleaners—this keeps the surfaces looking new without scratching or dulling finishes. Avoiding harsh chemicals extends the life of your paints and veneers, which is essential for maintaining a polished look.
In addition to manual upkeep, I incorporate digital tools to schedule periodic inspections and updates. Apps like Trello or Notion help me keep track of maintenance tasks, from tightening screws to replacing worn-out hardware. Setting reminders ensures I don’t forget routine checks, which can prevent costly repairs down the line. For those interested in more advanced maintenance, installing small, smart sensors can alert you to humidity or temperature fluctuations that may affect your cabinetry, especially in bathrooms where moisture is a concern. These sensors connect to your smartphone and provide real-time alerts, allowing proactive care rather than reactive fixes.
As the trend toward smart home integration grows, I predict that future storage solutions will incorporate even more sophisticated monitoring and automation. Imagine cabinets that automatically adjust humidity levels or notify you when hinges need lubrication—this is where the industry is headed. Staying ahead of these innovations means investing in quality hardware that’s compatible with smart systems and choosing materials designed for longevity and minimal upkeep.
How do I maintain built-in vanities over time?
Regularly cleaning surfaces with microfiber cloths and mild cleaners is the first step. Tighten loose hardware using a cordless drill, and inspect hinges and handles periodically. For long-term peace of mind, consider installing smart sensors to monitor environmental conditions that could impact your cabinetry. These small investments in maintenance tools and technology will extend the life of your built-ins and keep them functioning flawlessly. To explore more advanced storage management tips, check out effortless storage solutions. Don’t hesitate—try tightening a hinge today or installing a sensor to see the difference in maintaining your home’s storage integrity.
The Hardest Lessons I Learned About vanities, storage solutions, installation, and built-ins
- Missed opportunities happen when I overlooked corners or underutilized wall space, realizing that every inch counts in smart design.
- Choosing cheap hardware might save money upfront but often leads to frustration and costly repairs later. Quality hardware is a small investment that pays dividends.
- DIY building is rewarding but requires patience and precision. Rushing can cause misalignments that undermine the entire project, so take your time and measure twice.
- Proper planning around functionality prevents clutter from creeping back in. Thinking ahead about internal layouts makes all the difference in daily usability.
- Even in small bathrooms, custom solutions tailored to your space can dramatically improve organization and aesthetics. Never underestimate the power of a well-designed corner unit.
My Top Picks for Mastering Storage and Installation
- Expert design tips: These taught me how to optimize space without sacrificing style.
- Innovative storage ideas: These ideas transformed my bathroom into a clutter-free sanctuary.
- Effortless storage solutions: My go-to resource for seamless organization and stylish finishes.
- Installation guides: These detailed steps helped me install with confidence and precision.
Embrace Your Home’s Potential and Take Action
Designing and installing built-in storage isn’t just about aesthetics; it’s about empowering yourself to create a home that truly works for you. Every project I completed boosted my confidence and made my space more inviting. Now, it’s your turn—start small, plan carefully, and don’t be afraid to innovate. Your perfect storage solution is just a few measurements and decisions away. Remember, the journey toward a clutter-free home begins with a single step, so pick up that tool or sketchpad today. Ready to transform your space? Share your plans or questions below—I’d love to hear about your project and help you succeed!”,
Related Posts

Smart Built-ins for Storage & Vanities: Top Installation Tips in 2025
I remember the frustration vividly. I was in the middle…
Expert Installation Tips for Custom Built-in Cabinets & Storage in 2025
My Journey into Custom Built-in Cabinets: A Personal PerspectiveWhen I…
Top Storage Solutions & Built-in Cabinets for Space Optimization in 2025
My Journey to a Clutter-Free Home: Discovering the Power of…