Ever tried to open a closet door only to have half your belongings tumble out? Or spent ages digging through cluttered drawers, wishing there was a smarter way to organize? I’ve been there, and I know the frustration. One lightbulb moment for me was realizing that traditional storage just doesn’t cut it anymore. With modern homes becoming more compact and stylish, we need innovative solutions that blend seamlessly with our spaces while keeping everything accessible and tidy.
Why Smart Storage Matters More Than Ever
In today’s busy world, our homes are more than just places to sleep; they’re our sanctuaries, workspaces, and relaxation zones all rolled into one. But clutter can quickly turn these beautiful spaces into chaos. That’s where smart built-in cabinets come in. They’re not just about aesthetics—they’re about making our lives easier. Imagine a sleek, custom cabinet that hides away your everyday essentials, yet opens effortlessly when you need them. That’s the power of top-tier storage solutions designed for modern living.
Research shows that a well-organized home can reduce stress and boost productivity—something I personally experienced after installing a custom vanity with hidden compartments in my bathroom. It transformed my mornings from frantic searches to calm routines. If you’ve ever felt overwhelmed by clutter, I promise, there’s a way to change that. Today, I’ll guide you through the best strategies and innovative ideas to upgrade your space with smart, built-in storage solutions.
Is investing in built-in storage really worth the effort?
Early on, I made the mistake of opting for quick fixes—cheap shelves that sag and off-the-shelf cabinets that don’t fit. Trust me, that was a mistake I won’t repeat. Built-ins may seem like a big investment initially, but they pay off in the long run—adding value to your home and saving you countless hours of frustration. Curious about how to get started? I’ve found some fantastic tips and tricks, like those shared in vanity installation hacks that save time and money, which can help streamline your project and ensure a seamless fit for your unique space.
So, if you’re tired of the clutter and ready to embrace a smarter, more stylish home, stay tuned. We’re about to dive into the top storage solutions for 2025 — designed to turn chaos into order and style into function. Let’s get started!
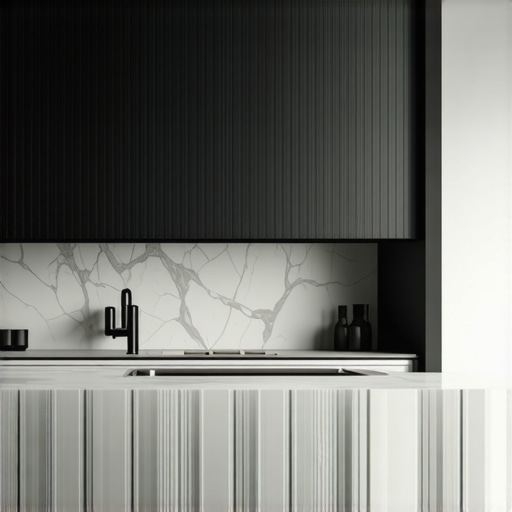
Select the Right Design and Materials
Start with a clear vision of your space and choose designs that complement your home’s style. When I renovated my bathroom, I opted for sleek, minimalist cabinets with durable laminate finishes, making maintenance effortless. Consider materials like high-quality wood, laminate, or metal, which balance aesthetics with longevity. To ensure your choices align with current trends, explore top vanity design trends for 2025.
Plan Your Storage Layout Carefully
Visualize your daily routines and identify what needs to be stored and where. I drew a rough sketch of my bathroom, marking zones for toiletries, towels, and cleaning supplies. Use this plan to determine the size and placement of built-ins. Think of it like designing a toolbox: each item has a specific spot to make retrieval quick. For expert guidance, check out step-by-step vanity installation tips.
Measure Your Space Precisely
Accurate measurements are crucial; even a small error can lead to gaps or fitting issues. I used a tape measure and a level to ensure my measurements were exact, especially for tight corners. Think of this step as laying a foundation—without it, everything else can shift. To avoid common pitfalls, review installation tips for built-in storage.
Create a Detailed Installation Plan
Break down the project into smaller tasks: demolition, framing, cabinetry, and finishing. I scheduled each step, allotting extra time for unexpected delays—like when I discovered uneven wall surfaces that needed patching. This plan acts as your roadmap, reducing stress and ensuring a smooth process. For detailed techniques, see installation guidance for smart storage solutions.
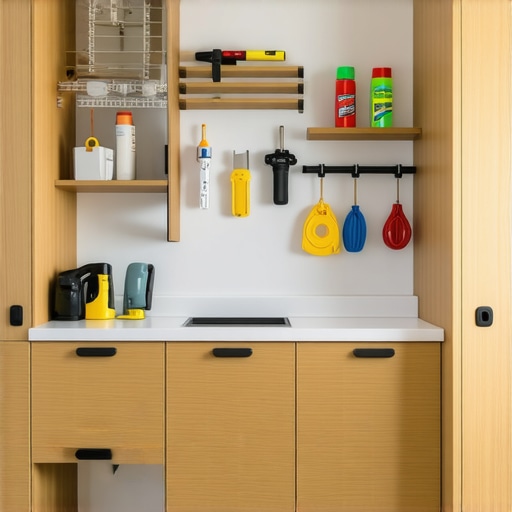
Prepare Your Tools and Materials
Gather all necessary tools—drills, screwdrivers, level, saws—and materials before starting. I organized my supplies on a portable cart to keep everything accessible. Having everything at hand prevents interruptions and keeps the workflow steady. For a comprehensive checklist, visit efficient installation tips.
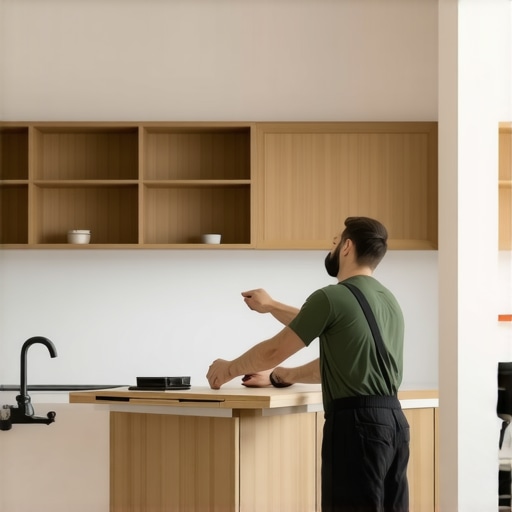
Follow Installation Steps Methodically
Begin with securing the framework or mounting brackets, then attach the cabinets, ensuring they are level. I used a laser level to double-check my work—mistakes in leveling can cause doors to misalign. Tighten all screws securely, and finish with trim and hardware. Think of this process like assembling a puzzle: each piece must fit perfectly for the final picture. For detailed visual instructions, see ultimate installation guide.
Finishing Touches for Seamless Integration
Seal edges, install handles, and test all moving parts. I added soft-close hinges and concealed handles to keep the look sleek. This final step transforms a functional installation into a polished feature. Remember, attention to detail here ensures your built-in storage looks professionally integrated. For finishing tips, check out design and installation tips.
Many homeowners assume that choosing a vanity or storage solution is as simple as picking a style and installing it. However, there are nuanced pitfalls and misconceptions that can trip you up if you’re not aware. In this article, let’s dig deeper into what most people get wrong about vanities, storage solutions, and installation, so you can avoid costly mistakes and achieve that seamless look you desire.
Why Bigger Isn’t Always Better When It Comes to Vanities
A common myth is that larger vanities always mean more storage and better aesthetics. In reality, oversized vanities can crowd your space and hinder movement, especially in smaller bathrooms. Instead, focus on tailored solutions that maximize your available space, like custom-built vanities designed to fit precisely and incorporate smart storage options. For expert tips, see maximizing space with custom vanities.
Don’t Underestimate the Power of Proper Planning
Many overlook the importance of meticulous planning before installation. Rushing into it often leads to misaligned cabinets or hardware that doesn’t function smoothly. One sneaky trap is ignoring the importance of precise measurements and wall conditions, which can cause gaps or uneven surfaces. Always double-check measurements and consider wall irregularities—something I learned the hard way. For detailed guidance, review the step-by-step installation tips.
Advanced Question: How Can I Ensure My Built-Ins Remain Functional Over Time?
It’s a misconception that once built-in cabinets are installed, they are maintenance-free. In reality, high-quality construction and thoughtful design are essential for longevity. Small details like proper ventilation, using durable hardware, and ensuring seamless integration with existing structures prevent issues like warping or hardware failure. Regular inspections and minor adjustments can extend the life of your built-ins significantly. For sophisticated solutions, explore expert advice on durable built-ins.
Another prevalent mistake is underestimating the importance of professional installation. DIY efforts can result in misaligned doors, squeaky hinges, or uneven surfaces, which diminish both function and style. Hiring experienced installers ensures that these nuances are addressed, and your investment pays off in the long run. For reliable installation strategies, see installation hacks that save time and money.
Finally, understanding the importance of material choice is crucial. A common misconception is that all finishes are equal. But, choosing high-quality materials like moisture-resistant laminates or hardwoods tailored to your climate and usage can prevent warping or damage. This nuanced decision can dramatically influence your vanity’s durability and appearance over time. For more on selecting the right materials, visit guidance on material selection.
In summary, avoiding these hidden pitfalls and misconceptions requires a mix of careful planning, expert advice, and realistic expectations. Have you ever fallen into this trap? Let me know in the comments, and stay tuned for more insights on creating a seamless, stylish home that lasts.
How do I keep my built-ins functioning smoothly over time?
Maintaining your custom vanities and storage units requires a mix of regular cleaning, timely adjustments, and using the right tools. I personally rely on a high-quality microfiber cloth for daily dusting, which prevents buildup without scratching surfaces. For deeper cleaning, a mild detergent diluted in water works wonders—avoiding harsh chemicals preserves the finish. When it comes to hardware, I recommend a small Phillips screwdriver and a silicone lubricant spray; these are perfect for tightening loose hinges and ensuring soft-close mechanisms operate seamlessly. Regularly inspecting hinges and drawer slides helps catch issues early before they become costly repairs. For more advanced maintenance, consider investing in a digital caliper to measure any warping or misalignments, especially if you notice uneven gaps or sticking doors. As trends move toward smarter homes, integrating sensor-based lighting or motorized hardware can enhance longevity and ease of use—think about future-proofing your storage with tech that alerts you when maintenance is needed. It’s also wise to keep a detailed maintenance log, noting when parts were last checked or replaced, so nothing gets overlooked. With proper upkeep, your built-ins can serve your home beautifully and reliably for decades. For expert guidance, check out this detailed guide on durable built-ins.

Looking to extend the lifespan of your vanity? Try applying a protective sealant to wooden surfaces annually—this creates a barrier against moisture and wear, keeping your investment looking fresh. Don’t forget, the key to lasting beauty is consistent maintenance—set a reminder to review your hardware and finishes every six months. For a step-by-step approach, visit this maintenance checklist and start implementing these simple yet effective routines today. Your future self will thank you for the effort!
The Hardest Lesson I Learned About vanities, storage solutions, installation, and built-ins
One of my biggest realizations was that rushing the planning stage can turn a sleek storage upgrade into a frustrating ordeal. I underestimated wall irregularities and skipped double-checking measurements, which led to misaligned cabinets and extra work. Patience and meticulous planning are key to avoiding costly mistakes.
Three Myths About vanities, storage solutions, installation, and built-ins That Held Me Back
Believing that bigger vanities always mean more storage was a trap—size can hinder movement in small spaces. Also, thinking DIY installation is always cheaper led to misalignments and hardware issues. Lastly, assuming all materials are equal caused me to overlook durability, which affected longevity.
What Experts Won’t Tell You About vanities, storage solutions, installation, and built-ins
High-quality materials and professional installation are non-negotiable if you want your built-ins to last decades. Regular maintenance, like tightening hardware and applying protective sealants, is often overlooked but essential for longevity. Trusting expert advice saves time and money in the long run.
Curated Resources to Elevate Your Storage Game
- My Essential Toolkit for Storage Projects: A comprehensive set of tools, including laser levels and digital calipers, is crucial for precision. I personally rely on these for flawless results.
- Books That Changed How I View Storage: “The Life-Changing Magic of Tidying Up” by Marie Kondo helped me rethink organization. It’s a great resource for practical tips.
- Where to Go from Here: The vanity installation hacks guide is perfect for mastering DIY projects efficiently and professionally.
Your Turn to Try
Creating built-ins that last and look seamless is absolutely achievable with patience, research, and the right tools. Remember, every mistake is a lesson in disguise, and each upgrade brings you closer to a home that truly reflects your style and needs. Ready to start your storage renovation? Share your plans or questions below—I’d love to hear your experience or help you get started!
Related Posts
Top Built-in Storage Solutions & Installation Tips for 2025
I remember the day I leaned against a towering stack…
Smart Built-in Cabinets & Storage Ideas for Seamless Home Design
My Journey into the World of Built-In CabinetsWhen I first…
How to Fit Custom Built-in Cabinets in Tight Living Room Corners
I vividly remember the moment I shoved a bulky bookshelf…