Have you ever opened a cabinet or closet and felt that sinking frustration—everything’s crammed in, nothing’s where it should be, and you wonder if there’s a smarter way to organize? That was me not too long ago. I kept telling myself, “There’s just not enough space,” but it wasn’t until I finally invested in the right built-in storage solutions that I realized how much potential was hidden behind my walls. It was a game-changer, and I want to help you experience the same.
Why Built-in Storage Is a Game-Changer in 2025
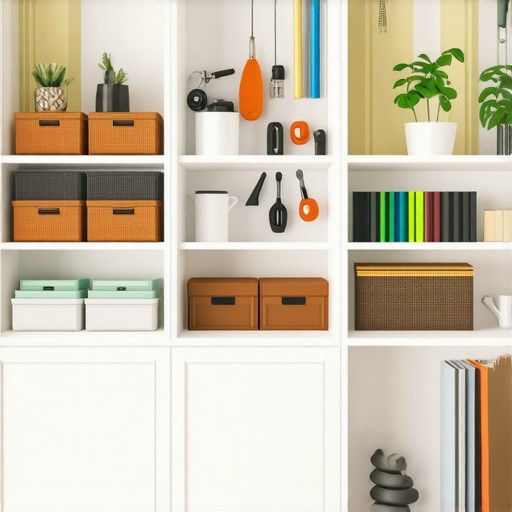
In a world where space is increasingly at a premium, especially in urban homes, built-in storage solutions are no longer just a luxury—they’re a necessity. They offer a seamless look, maximize every inch of your home, and can be customized to fit your unique needs. Plus, with the latest installation tips, you don’t have to be a professional to get it right. I’ve learned that the secret to a truly functional home lies in smart storage, and I’m here to share what I’ve discovered about the best options for 2025.
Is DIY Installation of Built-in Storage Actually Worth the Hype?
Early on, I made the mistake of underestimating the complexity of installing built-ins myself. I thought, “How hard could it be?” Turns out, rushing through the planning or skipping professional advice can lead to costly mistakes. That’s why I recommend checking out resources like step-by-step guides and expert tips for a smooth process. Trust me, taking the time to learn the right techniques will save you time and money in the long run.
Understanding the latest trends and solutions can seem overwhelming, but the good news is that the right built-in storage can transform your space effortlessly. Whether it’s a clever corner cabinet, a sleek walk-in closet, or integrated bathroom vanities, the options are more versatile and stylish than ever. And if you’re worried about durability or fitting your decor style, remember—custom solutions are designed with your specific needs in mind.
So, if you’ve ever faced the frustration of clutter or felt overwhelmed by storage limitations, you’re not alone. The good news is, with the right approach and some expert advice, you can turn your space into an organized oasis. Ready to dive into practical tips? Let’s explore the top built-in storage ideas and installation hacks that will make your home more functional and beautiful in 2025.
Plan Your Space Before You Begin
Start by measuring your room precisely, noting any obstructions like pipes or electrical outlets. I once tried to install a custom cabinet without double-checking measurements, which led to a frustrating redo. Use a tape measure, sketch your design, and consider where you want easy access versus hidden storage. Visiting effortless storage solutions to see what fits your style can be a game-changer.
Choose the Right Materials and Tools
Opt for durable, high-quality materials like plywood or MDF with a veneer finish. Gather essential tools—drill, level, screwdriver, stud finder, and saw. Think of this as assembling a LEGO set, where every piece needs to fit perfectly. I once used a cheap drill that stripped screws, delaying my project by days. Investing in good tools pays off in a seamless finish and fewer headaches.
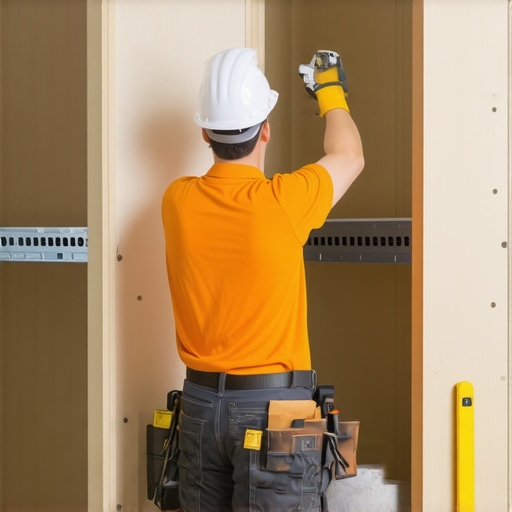
Build a Solid Framework
Create a sturdy frame that can support the weight of your stored items. Use a level to ensure your base is perfectly horizontal—imagine trying to hang a picture on a crooked wall, and everything looks off. Secure the frame to wall studs, which you find using a stud finder. I recommend drilling pilot holes first to prevent splitting the wood.
Assemble and Secure Shelves and Cabinets
Attach shelves or cabinet panels, ensuring they are level and flush. Use clamps to hold pieces in place temporarily. I once misaligned a shelf and had to pry it off, which damaged the material. To avoid this, double-check measurements and use a level frequently. For a sleek look, consider installing soft-close hinges, which you can learn about in vanity installation tips.
Finish with Proper Hardware and Sealing
Install handles, knobs, or push-to-open mechanisms as needed. Seal the edges with a finishing putty or paint for a polished look. I once skipped sealing, and dust accumulated in hard-to-clean spots. Use a level to ensure hardware is aligned correctly, and remember to tighten all screws securely.
Evaluate and Adjust for Functionality
Once installed, load your storage and test accessibility. If a drawer sticks, check the slides and realign. Think of this as tuning a musical instrument—you want everything to operate smoothly. For inspiration on customizing your storage, browse built-in storage ideas for maximized efficiency.
Remember, patience during installation results in a durable, functional, and stylish built-in that lasts for years. Whether you’re tackling a bathroom vanity or a walk-in closet, following these steps ensures your project is successful and stress-free.
Many homeowners jump into built-in storage projects with enthusiasm but overlook some crucial nuances, leading to costly mistakes. As an expert in home organization and custom cabinetry, I’ve seen beginners make errors that compromise both function and aesthetics. Let’s explore the most common pitfalls and how to dodge them, so your installation is smooth and durable.
Why Overconfidence Can Doom Your Built-in Project
One of the biggest misconceptions is thinking that DIY installation is straightforward. Everyone says, “Just follow the instructions,” but the reality is that measurements, material selection, and structural support require a keen eye and experience. Rushing can lead to misaligned shelves, uneven finishes, or even structural instability. I recommend reviewing detailed guides like step-by-step tutorials and consulting professionals when in doubt.
Another common mistake is neglecting precise measurements. Inaccurate measurements can cause doors to misfit, hardware to malfunction, or storage to be unusable. Remember, a small error in measurement can cascade into bigger issues during assembly. Always double-check dimensions and consider visiting storage solutions to see what fits best.
How Material Choices Impact Longevity and Style
Choosing the wrong materials is a subtle mistake that many overlook. Using cheap plywood or MDF with a veneer finish might seem cost-effective initially but can lead to warping, chipping, or fading over time. Opt for high-quality plywood or MDF with durable finishes to ensure your built-ins stand the test of time. For guidance on selecting the right materials, visit smart storage options.
Additionally, the hardware you select matters. Cheap hinges or knobs may seem fine initially but tend to wear out quickly, causing misalignment or difficulty in use. Investing in soft-close hinges and sturdy handles pays off by maintaining the polished look and ease of use for years.
How to Avoid Structural Failures in Built-in Installations
Structural support is often underestimated. A common mistake is anchoring cabinets only to drywall, which can fail under weight. Always locate wall studs with a stud finder and secure your cabinetry to these solid framing elements. This ensures your built-in can support the weight of stored items without sagging or detaching.
Furthermore, ignoring the load capacity during design can lead to sagging shelves or broken panels. Consult expert advice or professional installers to optimize weight distribution, especially for heavier items like books or appliances.
Have you ever fallen into this trap? Let me know in the comments.
By avoiding these common mistakes—overconfidence, measurement errors, poor material choices, and structural neglect—you set yourself up for success. Proper planning, quality materials, and expert guidance are your best allies. For more tips on seamless installation and innovative storage, explore home enhancement ideas.
Once you’ve successfully installed your custom built-in storage, the next step is ensuring it remains functional and attractive for years to come. Proper maintenance and the right tools are crucial for longevity, especially as trends in home organization evolve toward smarter, more integrated solutions. In this post, I’ll share my go-to equipment, software, and methods that help keep built-ins working flawlessly over time.
Invest in Quality Power Tools for Precision
My first recommendation is to use a high-quality, corded or cordless drill with adjustable torque settings. I personally rely on the deWALT XR series drill. Its balanced weight and variable speed allow me to drill pilot holes and drive screws without damaging delicate surfaces. Additionally, a good orbital sander, like the Makita BO5041, helps smooth out rough edges and ensures a professional finish. Clean, precise cuts and smooth surfaces are essentials for durable built-ins.
Use Digital Planning Tools to Keep Up with Trends
Staying ahead in design means leveraging software like SketchUp or 2024’s latest home renovation apps. These tools allow me to visualize storage layouts, test different configurations, and ensure that my installations will meet future needs. When I plan to scale or incorporate new tech—like smart lighting or integrated charging stations—I use these programs to anticipate wiring, power needs, and space adjustments.
Maintain Hardware and Surfaces Regularly
Hardware like hinges, handles, and soft-close mechanisms need routine checks. I recommend applying a small amount of lubricant, such as silicone spray, every six months to keep everything operating smoothly. For surfaces, a gentle cleaner and a soft cloth prevent dust buildup and preserve finishes. If you notice scratches or chips, touch-up kits designed for wood or laminate can restore the look without a full overhaul.
Plan for Long-Term Durability
Choosing weather-resistant finishes and sturdy hardware pays dividends over time. For example, in bathrooms or kitchens, I opt for waterproof sealants and corrosion-resistant hinges. These small investments prevent costly repairs down the line and keep your storage looking pristine. As trends move toward eco-friendly and sustainable materials, I predict that future maintenance will increasingly focus on environmentally safe products that extend the life of built-ins.
How do I maintain built-in storage over time?
Consistency is key. Regular inspections, cleaning, and hardware checks prevent small issues from becoming costly repairs. Incorporating smart sensors that alert you when hinges or seals need attention will be a game-changer in the future, aligning with the ongoing trend toward smart home integration. For now, I suggest setting a quarterly maintenance schedule and using quality tools from brands like Makita or DeWALT to ensure your built-ins stay in tip-top shape. Want to take your maintenance to the next level? Try installing a small, handheld vacuum designed for tight spaces—it’s perfect for quick cleanups in hidden corners and helps extend the lifespan of your storage solutions.
Remember, a little preventative care goes a long way in keeping your custom storage solutions functional and beautiful. For more insights on optimizing your space and ensuring long-term success, check out smart storage maintenance tips.
The Hardest Lesson I Learned About Built-in Storage
One of my biggest surprises was realizing that rushing through measurements can turn a sleek storage idea into a frustrating mismatch. Precision is everything; even a small error can cascade into misaligned doors or unstable shelves. Taking the time to double-check every dimension saved me countless headaches and rework, making me appreciate the value of patience in DIY projects.
3 Myths About Built-in Storage That Held Me Back
I used to believe that built-in storage had to be expensive or professionally installed to look good and last. Turns out, with the right tools and materials—like high-quality plywood and soft-close hinges—you can achieve both style and durability even on a DIY budget. Busting these myths opened up a world of possibilities for creating functional, beautiful spaces without breaking the bank.
What Experts Won’t Tell You About Storage Solutions
Many professionals emphasize the importance of anchoring cabinets to wall studs for stability, but what really changed my game was learning how to distribute weight evenly across shelves and support heavier items safely. This insight prevented sagging and prolonged the life of my built-ins, proving that a little extra planning goes a long way for longevity.
My Essential Toolkit for Home Storage Projects
My go-to tools include a reliable cordless drill, a sturdy level, and a stud finder—brands like DeWALT and Makita have never let me down. These tools ensure every cut, screw, and alignment is precise, giving my built-ins a professional finish that stands the test of time. Investing in quality tools has been a game-changer for DIY success.
Where to Go from Here
If you’re ready to elevate your home organization, start by sketching your space and choosing durable materials. Use software like SketchUp to visualize different configurations before cutting a single piece. Explore expert tips on effortless storage solutions to ensure your project is both functional and stylish. Remember, patience and preparation are your best allies in creating built-in storage that truly transforms your home.
One Reply to “Top Built-in Storage Solutions & Installation Tips for 2025”
Leave a Reply
Related Posts
7 Pro Anchor Tactics for 2026 Floor-to-Ceiling Built-ins
I remember the first time I tried installing a custom…
How to Anchor Heavy 2026 Built-ins to Metal Wall Studs
I remember the first time I tried to install a…
Fixing 2026 Built-in Sag: 4 Heavy-Duty Wall Anchor Tactics
I remember the moment clearly. I was in the middle…
I completely agree with the emphasis on detailed planning before starting a built-in storage project. I’ve learned from my own experience that rushing into measurements often leads to rework and frustration. Using software like SketchUp has been a game-changer for me—visualizing the design and testing different configurations in advance helps avoid costly mistakes Later. One tip I’d add is to also consider future needs—like adding smart home features or larger items you might want to store down the line—and incorporate those into your initial design. I do wonder if anyone has experience with eco-friendly materials? I’m especially interested in sustainable options that still offer durability and a sleek look. This approach not only benefits the environment but can also reduce long-term maintenance costs. How do you balance sustainability with sturdiness and aesthetics in your projects? Would love to hear some insights or recommendations from others who’ve experimented with eco-friendly cabinet components or finishes.