

I still remember the sound of my first major failure. It was 3 AM when a deafening crash echoed through my house, the kind of sound that makes you jump out of bed thinking a tree just hit the roof. My beautiful, eight-foot cedar shelf—loaded with my collection of heavy hardcover books—had finally surrendered to physics. It didn’t just sag; it practically folded. I had used the thickest brackets I could find, but I made the amateur mistake of thinking mass equaled strength. That night, I learned that when you are dealing with massive spans, you aren’t just fighting the weight of the books; you are fighting the weight of the shelf itself. Have you ever spent a whole weekend perfectly leveling a shelf only to see it dipping in the middle just a few weeks later? If so, you know exactly the frustration I’m talking about. Today, I want to show you how to move past the ‘just add more brackets’ phase and embrace the internal torsion box, a structural trick that changes everything for extra-long shelving.
Stop Fighting Gravity with Brackets Alone
When we look at built-in storage ideas to declutter and enhance your home, we often gravitate toward those sleek, thick floating looks. The problem is that a solid slab of wood that long is incredibly heavy. In my early days, I mistakenly thought a solid 2×12 was the pinnacle of strength. I was wrong. A solid piece of wood will eventually bow under its own weight, a phenomenon woodworkers often calculate using the Sagulator, which proves that even the sturdiest lumber has its limits over a long span. By using the internal torsion box move for long floating shelves, you are essentially creating a hollow beam that is stiffer than solid wood but a fraction of the weight. This is the same principle used in aircraft wings and hollow-core doors. It allows you to create innovative built-in solutions for small rooms without needing a forest’s worth of heavy lumber.
Is a hollow shelf really stronger than solid wood?
It sounds counterintuitive, doesn’t it? We are taught that ‘solid’ means ‘quality.’ But in the world of structural engineering, a torsion box—which consists of two thin skins glued to a grid-like core—is far more resistant to twisting and sagging than a solid beam of the same weight. When I finally switched to this method, I was able to bridge gaps I never thought possible. If you’ve been struggling with why particle board shelves sag, the answer is usually a lack of internal structure. By building a skeleton inside the shelf, you provide a path for the load to travel directly to the wall studs. This approach is also a lifesaver when you are trying to maximize your space with custom vanities where you want a clean look without visible supports. Setting the stage for a torsion box build requires a bit more planning than just screwing a board to the wall, but the payoff is a shelf that stays dead-level for a lifetime.To get this right, you need to think of your shelf like an airplane wing. It is light, but nearly impossible to bend. Move away from the idea of a single board and toward a structural assembly. Start by ripping 3/4-inch plywood into narrow strips that match the desired thickness of your shelf. You will create a perimeter frame and then fill the inside with ‘ribs’ spaced every 8 to 12 inches, creating a grid.
Start with a Rigid Internal Grid
The secret to a shelf that stays flat forever is the bond between the skins and the grid. When you glue a piece of plywood to a frame, you create a stressed-skin structure. This distributes the weight across the entire surface rather than concentrating it on a few screws or brackets. If you have ever wondered why particle board shelves sag, it is because they lack this continuous internal support; they are essentially compressed sawdust with no grain to resist gravity. By using high-quality plywood for your internal grid, you ensure the shelf remains straight even under a heavy load of books or decor. 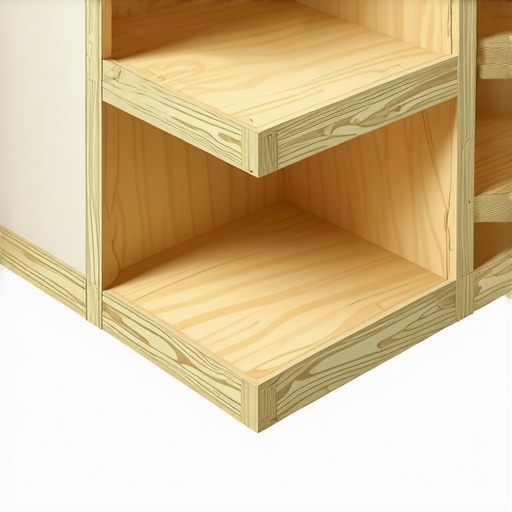
Why Glue is More Important Than Screws
In high-end woodworking, glue is often stronger than the wood fibers it joins. For the internal torsion box move, you want to apply a liberal, even layer of wood glue to every edge of your internal grid before sandwiching it between your top and bottom skins. I learned this the hard way while helping a friend with a kitchen remodel. We were trying to create effortless storage solutions for a tidy, stylish home and decided to just ‘pin’ the skins with a few brad nails to save time. Without a solid glue bond, the skins eventually buckled away from the ribs, and the shelf lost its structural integrity within months. Now, I always use a forest of clamps to ensure that glue bond is absolute.
The Hidden Ledger Strategy
The best-looking shelves have zero visible hardware, which means you need a robust mounting system hidden within the wall. This involves a ‘ledger’ or a ‘cleat’ that is bolted directly into the wall studs. The torsion box is designed with an open back so it can slide over this cleat like a sleeve. If you are applying this logic to a bathroom, following an expert guide to flawless vanity installation tricks can help you understand how to hide these supports behind the cabinetry or within the wall cavity. For extra-long spans that might carry heavy stone or dozens of hardcovers, you might even consider the internal steel support for long floating desks to provide that extra bit of insurance.
Stop the Wobble Before it Starts
Once the shelf is seated on the ledger, you must lock it in place to prevent tipping. Many DIYers skip this final step and then wonder why their shelf feels ‘spongy’ when they place a vase on it. You can stop floating shelf wobble by driving long, countersunk screws through the top skin and directly into the ledger once the shelf is fully seated. This prevents the shelf from sliding forward or pivoting on the cleat. I once installed a massive 12-foot library unit and forgot to lock the bottom edge. Every time someone walked past, the whole unit shivered. A few well-placed screws turned that vibrating shelf into a rock-solid part of the architecture.Let’s dig deeper into a nuance that even some professional contractors miss: the phenomenon of drywall compression. We often assume that as long as our lag bolts are buried deep into a 2×4, the shelf is structurally invincible. But consider the physics of leverage. A floating shelf acts as a massive pry bar; while the top of the mounting bracket pulls away from the wall, the bottom edge is being driven into the drywall with hundreds of pounds of force. Over time, that half-inch of gypsum crumbles under the pressure, causing the shelf to tilt forward. This is a common ‘oops’ factor that leads to that heart-sinking dip. If you are planning a massive project, using the steel plate move for drywall mounted floating vanities or even the internal steel support for long floating desks can spread that load over a wider surface area, preventing the pivot point from crushing your wall. 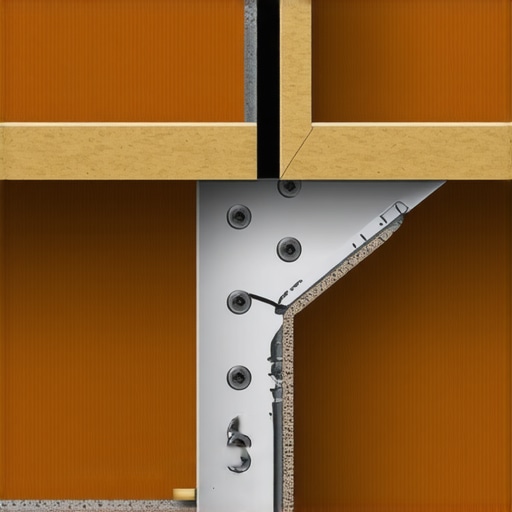
Does your wall have the structural integrity for a ten-foot span?
It is a sophisticated question that separates the amateurs from the experts. In my experience, most people think that adding more screws is the answer, but the real issue is often the lateral stability of the wall itself. If you are mounting to a partition wall that isn’t tied into a header or a double plate, the whole wall can actually flex outward under the weight of a fully loaded torsion box. According to the Architectural Woodwork Institute (AWI) Standards (Section 10), successful installation requires that the site conditions—meaning the wall itself—must meet specific plumb and load-bearing tolerances before the first bracket is even level. If your wall moves when you lean on it, no amount of internal engineering will keep your built-in storage ideas to declutter and enhance your home from failing.
The Scribing Secret That Beats Your Level Every Time
Here is a contrarian truth: your level is sometimes your worst enemy. If you are building in an older home, a perfectly level shelf can look like it is falling uphill if the ceiling or floor is out of whack. Professionals know that ‘looking right’ often beats ‘being level’ in a crooked room. This is why mastering the scribing secret for perfect built-ins on rounded drywall corners is more important than owning a fancy laser level. If you don’t scribe your shelf or face frames to follow the actual contours of the room, you will end up wondering why most floor to ceiling cabinets gap at the top despite your bubble being perfectly centered. When you are trying to maximize your space with custom vanities, following an expert guide to flawless vanity installation tricks will teach you to prioritize the visual lines of the room. Have you ever fallen into this trap of following the level only to realize the room itself was the problem? Let me know in the comments how you handled it!
When you are ready to transition from amateur DIY to true architectural woodworking, your toolkit has to evolve beyond a basic drill and a level. For me, the game changed when I invested in a dedicated track saw—specifically the Festool TS 55. While a table saw is great, the track saw allows you to rip down those long 3/4-inch plywood skins for your torsion box with surgical precision right on the floor. It eliminates the struggle of manhandling a 4×8 sheet through a narrow blade and ensures that every internal rib is identical. If your ribs vary by even a 32nd of an inch, your shelf skins won’t bond correctly, and you’ll lose that structural rigidity we talked about earlier. I also swear by a high-quality compass scribe; if you want to master the scribing secret for perfect built-ins on rounded drywall corners, you need a tool that can lock its position and follow a wavy wall without skipping. This precision is what allows you to maximize your space with custom vanities that look like they grew out of the wall rather than being shoved against it.
The Precision Kit That Actually Saves Your Sanity
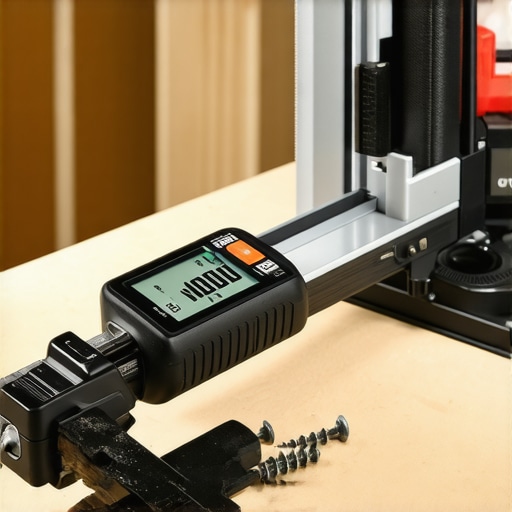
Beyond the saws, I recommend keeping a handful of long-reach markers and a digital angle finder. Walls are almost never exactly 90 degrees, and when you are trying to expertly guide to flawless vanity installation tricks, knowing the exact angle of a corner can save you from three trips back to the miter saw. According to the Journal of Light Construction (JLC), the failure point for most cantilevered shelving isn’t the wood itself, but the shear strength of the fasteners into the wall framing. This is why I always use 3-inch GRK structural screws rather than standard wood screws. They have a built-in washer head that won’t pull through the plywood ledger, even when you’re building the internal steel support for long floating desks. These small upgrades in hardware prevent the microscopic shifting that eventually leads to a sagging shelf.
How do I keep my custom built-ins from failing over time?
Maintenance is mostly about managing the environment. Wood is a living material that breathes, and a ten-foot shelf will expand and contract with the seasons. If you’ve built a torsion box in a high-humidity area, you must stop cabinet doors from warping in humid bathrooms by ensuring the internal cavity has some airflow or is sealed perfectly with a high-quality polyurethane. I always check the mounting screws on my heavy-duty units once a year. If you live near a busy road or a train line, the constant micro-vibrations can slowly back out even the best screws. For units installed against exterior surfaces, always follow the moisture barrier rule for cabinets on cold outer walls to prevent the plywood skeleton from absorbing condensation and losing its glue bond.
Carbon Fiber and the Future of Hidden Support
Looking ahead, I see the industry moving away from heavy timber and toward composite-reinforced grids. We are already seeing high-end shops experiment with carbon-fiber-wrapped internal ribs. This allows for even thinner profiles—shelves that are only an inch thick but can hold the weight of a person. For now, the torsion box remains the king of the workshop, but the integration of thin-gauge steel within the wood skeleton is becoming the new standard for anyone trying to bridge massive spans without vertical supports. If you really want to level up your next project, I challenge you to try a hybrid approach: build your next torsion box with a single piece of 1/8-inch flat-bar steel tucked inside the front edge. It’s an advanced move that turns a ‘strong’ shelf into something virtually indestructible.
The Hardest Lesson I Learned About Large Spans
After my first shelf collapse at 3 AM, I realized that the overbuild mentality often causes more problems than it solves. Here are the lightbulb moments that changed my approach to built-in storage ideas to declutter and enhance your home: Weight is your enemy, not your friend. The heavier the shelf material, the more work the wall has to do just to hold the shelf up before you even add a single book. Physics doesn’t care about your heavy-duty brackets if you are mounting them to a weak point in the wall; you must look at the whole system from the studs out. I finally realized that why particle board shelves sag isn’t just a material failure, but a failure of internal engineering that we can fix with simple plywood ribs.
The Tools I Trust to Keep Shelves Dead Level
I don’t believe in buying every gadget on the market, but for the internal torsion box move for long floating shelves, precision is non-negotiable. I personally rely on a Festool track saw for perfectly straight rips; if those internal ribs are even slightly uneven, the skin of your shelf will look wavy. I also swear by GRK structural screws. When you are implementing the internal steel support for long floating desks, these fasteners provide the shear strength needed to keep the whole assembly from pulling away from the studs. Finally, never underestimate a quality digital angle finder to help you maximize your space with custom vanities in rooms where the corners are anything but square.
Stop Fearing Gravity and Start Building
Building something that spans ten feet without a single visible support feels like a magic trick the first time you do it. By shifting from solid slabs to engineered torsion boxes, you aren’t just making a shelf; you are creating a permanent piece of your home’s architecture. Use these techniques for your next project, whether it is a massive library or a sleek floating vanity installation. Have you ever had a shelf fail or sag at the worst possible moment? Let me know your story in the comments below!