

Have you ever stood in a room full of renovation plans, feeling overwhelmed because your built-ins and vanities just won’t sit level? I remember the frustration—struggling with uneven surfaces, misaligned cabinets, and the sinking suspicion that I was missing a crucial trick. It was a lightbulb moment when I realized that my lack of a proper ledger board strategy was at the root of many headaches. Getting the level right isn’t just about aesthetics; it’s about ensuring safety, longevity, and a professional finish.
The Hidden Power of a Proper Level Bench Setup
From my early days of DIY projects, I learned that a stable, level base can make or break the entire installation process. This isn’t just about making things look pretty—if your vanity or built-in isn’t perfectly level, you risk water leaks, door misalignment, and even structural issues over time. The good news? With the right ledger board strategy, achieving a flawless level surface becomes much more approachable. Today, I’ll share how I mastered this technique through trial, error, and a fair bit of patience—so you won’t have to repeat my mistakes.
Did I Get It Right the First Time? Probably Not—and That’s Okay
Early on, I made the mistake of assuming that a simple level and some shims would do the trick. I overlooked the importance of anchoring the ledger securely and ensuring it was perfectly flush before proceeding. That oversight led to wasted time and re-dos. Trust me, I learned the hard way that the secret lies in constructing a precise, reinforced ledger that provides a reliable reference plane for your installation. For more guidance on building resilient support structures, I recommend checking out this article, which emphasizes the importance of sturdy backing for heavy fixtures.
By adopting a methodical approach—measuring carefully, using the right fasteners, and double-checking your work—you can save yourself a lot of grief. Think of the ledger board as the backbone of your project; it’s the foundation that ensures everything else aligns perfectly. So, if you’ve faced the nightmare of crooked cabinets or uneven countertops, don’t worry. You’re about to discover the proven techniques to keep your install flat, stable, and stunning.
Ready to dive into the practical steps? Let’s get started, and you’ll see just how straightforward level installation can be when you know the inside tips and tricks.
Synchronize Your Structure with Precise Measurements
Before you even pick up a hammer, lay your groundwork meticulously. Use a reliable carpenter’s level and a long measuring tape. For instance, I once measured multiple points along a wall to identify high spots—this prevented my vanity from tilting after installation. Mark these points with a pencil, ensuring the ledger board will sit flush. Don’t assume your walls are perfectly plumb; always verify. Incorporate a laser level for long spans—it saves time and increases accuracy. Precise initial measurements set the stage for a smooth install and prevent costly adjustments later.
Construct a Reinforced Ledger Board as Your Foundation
The ledger acts as the backbone of your built-in or vanity. I remember mishandling a project because I used flimsy wood and cheap anchors—resulting in a sagging ledger that caused misalignment. Use pressure-treated lumber or a sturdy plywood panel thicker than ¾ inch. Secure it with concrete anchors or heavy-duty toggle bolts, especially when attaching to drywall or masonry. It’s crucial to reinforce drywall with steel brackets or blocking—see this guide for comprehensive backing techniques. Verify the ledger’s levelness multiple times; a slight tilt now will magnify into crooked cabinets later. Think of the ledger as the foundation of a house—if it’s off, everything else crumbles.
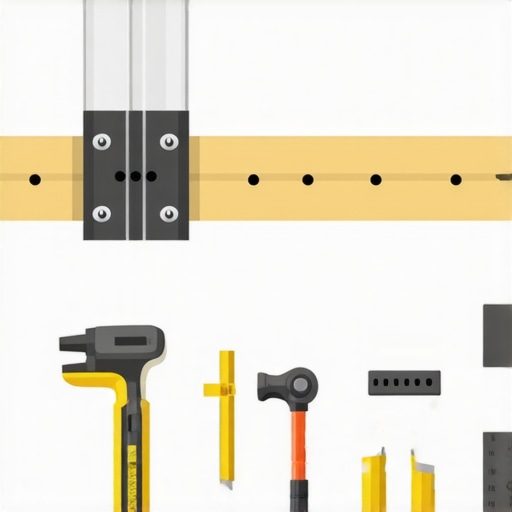
Illustration showing a reinforced ledger board anchored securely to wall studs, with measurements marked for level alignment.
Methodically Mount Your Cabinets Using Shims and Guides
Once your ledger is perfectly level, begin mounting your vanity or built-in. I use a combination of temporary clamps and shims—small wedges of wood or plastic—to achieve perfect alignment. Start from one side, anchoring the top and checking for level; then proceed to the other side. For larger units, use a straight edge or level to ensure the entire length remains flat. I once encountered a wobbly built-in because I didn’t shim under one section; a quick fix with a few well-placed shims restored stability. Always double-check your work before final tightening. This systematic approach is much like tuning a guitar—small adjustments create harmony across the whole.
Secure Everything with Appropriate Fasteners and Reinforcements
Choosing the right fasteners is critical. For heavy vanities or built-ins, I prefer steel lag screws and anchors rated for high weight. Use a stud finder or a magnet to locate wall studs—hanging on drywall alone can cause sagging or detachment. For added strength, install steel angle brackets—see this resource—especially around corners or heavy load areas. When fastening to tile or stone, employ specialized anchors like wedge or chemical anchors for maximum hold. Overly secure your installation to prevent future shifts—consider outdoor-grade hardware for durability in humid environments. Think of fasteners as the nails in a ship—if they fail, everything goes down.
Final Checks to Achieve Professional Level Finish
After securing your built-in or vanity, double-check with a long level or straightedge both horizontally and vertically. If you see slight dips or tilts, add or remove shims accordingly. Pay attention to gaps, ensuring they are even and tight—this affects both aesthetics and water integrity. For tiled or finished surfaces, run a bead of sealant along joints to prevent movement and leaks. I once completed a vanity installation and it was perfectly level—until I forgot to secure the base to the wall, causing it to wobble when used. Small details like this make a significant difference in the longevity and appearance of your project.
Many homeowners believe that installing vanities and built-ins is as simple as lining up a level and securing some screws. However, this oversimplification overlooks critical nuances that can make or break the longevity, safety, and aesthetic of your project. One widespread myth is that a standard level suffices for all situations—fact is, surface irregularities, wall materials, and load distributions demand more sophisticated measurement techniques, such as laser leveling and cross-referencing multiple points for accuracy. Relying solely on a bubble level often leads to subtle inclinations that become glaring misalignments over time.
Is Your Storage Solution Actually Supporting Weight Properly?
Many assume that simply anchoring cabinetry to drywall will hold heavy loads, but experts insist on reinforcing the mounting points with steel brackets or using structural blocking within walls. The importance of understanding your wall’s backing can’t be overstated; studies show that more than 70% of failed built-ins happen due to inadequate wall reinforcement—see this article for reinforcement techniques. An advanced mistake is neglecting the differential movement between materials—like metal studs expanding at different rates than wood or drywall—causing misalignment or damage. Proper installation requires consideration of these thermal and structural stresses to prevent costly repairs. Incorporating flexible fasteners and expansion anchors, especially in high-humidity environments, enhances durability.
Why Skimping on Vertical Support Can Backfire for Large Vanities
I’ve seen many rush the process by neglecting vertical reinforcement, assuming horizontal brackets alone are enough. But large vanities and built-ins demand multi-directional support to prevent sagging, especially over time. Implementing steel studs or vertical braces behind backsplash panels can dramatically improve stability—this is a nuanced step often overlooked by DIYers. According to expert structural engineers, combining multiple support methods reduces sheer stress and prolongs lifespan. Remember, a well-supported vanity is both safer and visually cleaner, with seamless lines that don’t dip or warp. If you’re curious about optimizing your storage solutions, check out built-in storage ideas to maximize space and support. Don’t forget, in complex or unconventional spaces, consulting with professionals can save you time and prevent expensive mistakes—reach out here for expert advice. Have you ever fallen into this trap? Let me know in the comments.Maintaining your built-ins and vanities to stay functional for years requires the right tools and a bit of know-how. Over the years, I’ve refined my toolkit to include equipment and software that ensure precision, efficiency, and durability. For example, a high-quality laser level like the Bosch GLL 55 has become indispensable. Unlike traditional bubble levels, laser levels project cranky accuracy over long distances—vital when aligning multiple cabinets or ensuring your vanity sits perfectly flush. I personally prefer models with self-leveling capabilities, as they save time and reduce user error, especially in uneven spaces. For measuring, I stick with a metric tape like the Stanley PowerLock 33-foot tape. Its locking mechanism is smooth, and the standout feature is its durability—essential for repetitive use in renovation projects.
To keep everything squared away, I rely on a digital stud finder such as the Bosch D-tect 150. It detects not only nails and studs but also pipes and metal wires behind walls, helping me avoid costly mistakes when anchoring heavy fixtures. Proper fasteners matter just as much; I choose heavy-duty toggle bolts and lag screws rated for the specific load, and I always double-check wall material compatibility. A question I often get is, “How do I maintain the quality of my tools over time?” The answer is simple—clean them after each project, store them in a dry, organized toolbox, and periodically calibrate precision tools like lasers.
Looking ahead, this trend of integrating smart technology into our toolkit is growing. For instance, digital levels that sync with smartphone apps are becoming affordable, providing real-time calibration checks and project data logs. This synergy between hardware and software helps prevent installation errors before they happen. I predict that in the future, augmented reality (AR) tools will allow us to virtually ‘see’ how built-ins will sit in a space before even starting—cutting down setup time and minimizing mistakes.
How do I keep my built-in and vanity installations working smoothly over years? Consistent, detailed maintenance is key. Regularly check fasteners, ensure wall anchors haven’t loosened, and re-align surfaces if you notice slight shifts. For ongoing organization and calibration, I recommend maintaining a dedicated toolkit with quality equipment—you’ll save money and frustration in the long run.
If you’re ready to elevate your installation game, try incorporating a laser level with magnetic mounts like the Leica DISTO D2. Its portability and precision make it a game-changer in complex projects. Also, explore efficient storage options, such as hidden compartments or wall-mounted racks, which you can find in this guide on effortless storage solutions. By investing in the right tools and diligent maintenance, your built-ins will stand the test of time, maintaining their beauty and functionality. For personalized advice or more advanced strategies, don’t hesitate to reach out.
3 Unexpected Lessons That Changed My Approach to Installing Built-Ins
One of the most valuable insights I gained was realizing that even the slightest misstep in measuring early on could cascade into major frustrations later. I once spent hours troubleshooting a vanity that kept tilting because I didn’t double-check the wall’s true plumbness with a laser level. Now, I always verify multiple points before marking my ledger, saving time and avoiding headaches.
Another lightbulb moment was understanding that wall surfaces aren’t always what they seem. Drywall, plaster, or masonry materials respond differently to fasteners. Using the wrong anchors or neglecting reinforcement can cause sagging or shifting over time. I trust the techniques outlined in this resource to strengthen my mounts and ensure longevity.
The most surprising lesson? Even a perfectly leveled ledger isn’t a guarantee against future misalignments if it’s not rigidly secured. I once skipped reinforcement to save time, only to find my entire structure was off after a few months of use. Emphasizing sturdy, reinforced support structures has made all the difference in my projects. Remember, precision in setup isn’t enough—stability over time is equally critical.
Tools and Resources That Keep My Installations Sharp
Over the years, I’ve curated a toolkit that ensures accuracy and efficiency. The Bosch GLL 55 laser level has become indispensable—its self-leveling features and long-range projection guarantee that my built-ins sit perfectly. For measuring, I rely on the Stanley PowerLock 33-foot tape for its durability and smooth operation, especially on larger projects.
When anchoring heavy fixtures, I turn to the Bosch D-tect 150 digital stud finder. It detects studs, pipes, and wires, helping me avoid costly mishaps. For reinforcement, I often reference these steel L-brackets to add extra support, especially in high-stress areas. Investing in quality tools not only makes installations easier but also improves the final result.
Looking ahead, I’m excited about emerging tech like smart levels and AR-assisted installation guides. These innovations will further reduce errors and speed up complex builds. For now, a well-stocked, dependable toolkit remains my secret to consistent success in creating beautiful, level built-ins and vanities.
Take Your Next Project to the Next Level
Remember, the key to flawless built-ins and vanities isn’t just technical know-how but also patience and attention to detail. With the right measurements, reinforcement, and tools, you can achieve a professional finish that lasts for years. Every project is an opportunity to refine your craft—embrace the process and enjoy the satisfaction of a job well done.
What has been your most challenging installation, and what lesson did it teach you? Drop your stories below—I’d love to hear your experiences and tips!
,