

I remember the exact moment I’d had enough of my old surface-mounted medicine cabinet. I was leaning in to put my contacts in, and I literally bumped my forehead on the corner of the mirrored box hanging off the wall. It felt like the cabinet was crowding me out of my own bathroom. That clunky thing didn’t just look dated; it stole three inches of precious airspace in a room that was already basically a closet. I decided then and there that the only way forward was to go into the wall. It’s a move that feels intimidating—cutting a hole in your drywall is never a ‘relaxing’ Sunday afternoon project—but the difference it makes in smart storage solutions to optimize small bathroom spaces is absolutely night and day. Today, I’m going to show you exactly how to execute the recessed mounting move so you can stop bumping your head and start loving your layout.
Ditch the Clunky Mirror and Reclaim Your Bathroom Airspace
The transformation from a surface-mounted box to a flush-fit cabinet is one of those innovative storage solutions that feels like a magic trick. One minute you have a heavy glass box weighing down your wall—and making you worry about why your heavy mirror cabinet is tilting—and the next, you have a sleek, high-end look that belongs in a boutique hotel. I’ll be honest with you: I didn’t get this right the first time. Years ago, I tried to install one of these in a 1920s bungalow. I was so excited to get that ‘flush’ look that I didn’t even bother with a stud finder. I just started sawing. Ten minutes later, I was staring at a major vent pipe that I couldn’t move without calling a plumber and spending a thousand dollars. It was a humbling lesson in preparation. Since then, I’ve perfected the art of the ‘wall check’ and framing, ensuring that every custom vanity setup I work on has the perfect mirrored companion. When you combine a recessed cabinet with creative built-ins for seamless storage, the entire room begins to feel cohesive. The secret isn’t just in the hole you cut, but in how you frame it. If you’ve ever dealt with uneven gaps in custom built-in doors, you know that precision is everything. A recessed cabinet requires a perfect ‘rough opening’—essentially a little window frame inside your wall—to hold the cabinet square and true for years to come. Without that structure, your beautiful new mirror will eventually sag or bind.
Does Cutting Into Your Drywall Actually Make Sense?
I get the skepticism. You’re worried about what’s behind that paint—pipes, wires, or the dreaded load-bearing stud. But here is the reality: according to the National Kitchen and Bath Association, ‘hidden’ or ‘integrated’ storage is currently one of the top three requests for modern master suite renovations. People want their clutter gone, and they want their walls to work harder. If you’re already looking at choosing the perfect vanity style, you owe it to yourself to consider the recessed move. It’s not just about aesthetics; it’s about making a five-foot-wide bathroom feel like it’s seven feet wide. Have you ever felt like your bathroom was closing in on you because of bulky furniture? Let me know in the comments, because I’ve been there, and I know exactly how to fix it without a sledgehammer. We are going to walk through how to bypass the common pitfalls and get that professional, built-in finish that lasts for decades.
Map Out Your Wall Before You Start Sawing
The biggest mistake you can make is assuming your wall is empty. Think of your drywall like a gift wrap; you have no idea if there is a beautiful present or a tangle of old coat hangers inside until you peek. Before I commit to a cut, I use a high-quality stud finder to locate the vertical supports. But here is the trick: stud finders lie. To be 100% sure, I drill a tiny pilot hole right where I want the center of the cabinet to be and poke a bent coat hanger inside. If I hit something solid within three inches, I know I need to adjust. This is one of those expert guide to flawless vanity installation tricks tips that prevents you from turning a thirty-minute project into a weekend-long plumbing disaster. If you find a wire, don’t panic. You can often shift your placement slightly or look into smart bathroom vanity wiring hacks for a flush cabinet finish to safely move the obstacle. 
Build a Skeleton for Your New Storage
Once you have cut your rectangular hole, you can’t just slide the cabinet in and hope for the best. You need to create a ‘rough opening.’ Imagine you are building a miniature window frame inside the wall. I learned this the hard way when I installed a heavy mirrored unit in a guest bath without extra support. Three months later, the cabinet had settled about an eighth of an inch, which doesn’t sound like much until you realize the door won’t close because it’s rubbing the frame. To avoid this, you need to install a ‘header’ and a ‘footer’—horizontal pieces of 2×4 that span between the studs. This creates a rigid box that holds the cabinet square. If your wall is slightly out of plumb, which most old houses are, this is your chance to correct it. Precise framing is the best way to avoid uneven gaps in custom built-in doors down the line.
Secure the Cabinet Without Over-Tightening
When the frame is ready, slide the cabinet into the hole. It should be a snug fit, but you shouldn’t have to beat it in with a hammer. If it’s too tight, the cabinet box will bow, and your shelves won’t sit flat. I always use a level on the cabinet flange to ensure the mirror will be perfectly straight. For the actual mounting, don’t just rely on the thin screws that come in the box. If you aren’t hitting a stud directly with every screw, you must use a heavy-duty anchor. I’ve seen many DIYers struggle with why your heavy mirror cabinet is tilting, and 90% of the time, it’s because they used plastic wall plugs that simply can’t handle the weight of glass shelves and toiletries. Instead, use the toggle bolt trick for hanging heavy mirrored cabinets. These bolts expand behind the framing or drywall, providing a ‘butterfly’ grip that won’t budge. I remember a project in a high-rise where the walls were made of thin metal studs; standard wood screws were useless. We switched to toggles, and that cabinet is still rock-solid ten years later. Once secured, use a bead of paintable caulk around the edge to hide any minor gaps between the cabinet flange and your wall. This small detail is what separates a DIY ‘project’ from a professional creative built-in for seamless storage.Most DIY tutorials suggest that the deepest cabinet is the best cabinet, but I’m going to challenge that right now. In my experience, chasing extra depth in a small bathroom often leads to what I call ‘black hole syndrome.’ When you try to squeeze a five-inch deep cabinet into a standard 3.5-inch wall cavity by building out the trim, you lose the very ‘flush’ look that makes innovative storage solutions so appealing. A study by the National Kitchen & Bath Association (NKBA) suggests that visibility and reachability are the primary drivers of bathroom satisfaction, not raw cubic volume. For effortless storage solutions for a tidy stylish home, it is better to have a shallow, well-organized cabinet where nothing can hide behind anything else. One advanced ‘oops’ factor to watch for is the diagonal vent pipe. Many homeowners check for vertical studs but forget that plumbing vents often offset at an angle to avoid obstacles. If you encounter a diagonal pipe, you may need the same spatial problem-solving skills we used when we fixed deep vanity drawers that kept hitting plumbing. 
Can You Safely Recess a Cabinet Into a Load-Bearing Wall?
The common wisdom is ‘never cut a load-bearing stud,’ but as you move into more advanced renovations, you realize that almost anything is possible with a proper header. If the perfect spot for your mirror is blocked by a structural stud, you have to treat the opening like a tiny window. You must install a structural header to redistribute the weight to the adjacent studs. Failing to do this is a recipe for disaster; I have seen cases where the lack of a header led to the home’s weight shifting, which explains why your built-in cabinets are pulling away from the ceiling. If you are also working on the floor level, don’t forget that stability starts at the base. We often use heavy-duty floor bolts for securing entryway benches and vanities to ensure that the entire ‘built-in’ ecosystem stays rock-solid as the house settles. Have you ever cut into a wall and found a surprise that stopped your project cold? Let me know in the comments below, because I’ve probably seen it and fixed it! If you’re still planning your layout, check out my guide on maximizing space with innovative built-in solutions for more layout-saving tricks.
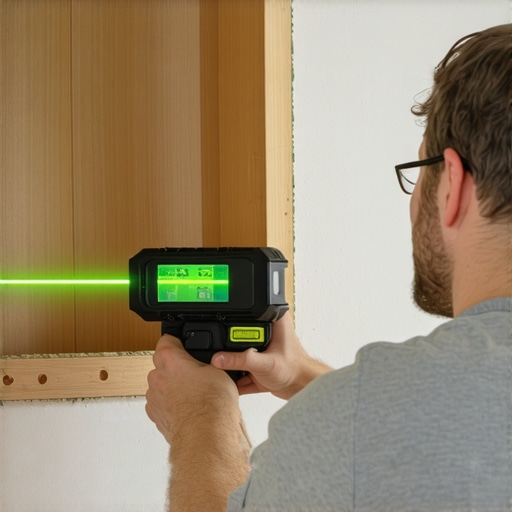
I never start a recessed project without my oscillating multi-tool. A standard drywall saw is too messy and imprecise for the tight tolerances required for a flush finish. I personally use the Milwaukee M18 FUEL oscillating tool because the brushless motor doesn’t bog down when it hits a rogue nail or dense old-growth studs. It allows for surgical cuts that require almost no drywall patching afterward. While following a step-by-step guide to vanity installation for beginners provides the foundation, your choice of equipment determines the final polish. I also swear by a self-leveling cross-line laser, like the Bosch GLL series. It throws a perfectly level green beam across the bathroom, ensuring your cabinet aligns perfectly with the faucet and the backsplash of your custom vanity setup.
How do I maintain my recessed cabinet over time?
Maintenance for built-ins goes beyond just spraying glass cleaner. Every six months, you should check the tension on the hinges. If the door starts to sag or catch, the same logic for why your soft-close drawers are slamming applies here; the hydraulic dampeners can wear unevenly if the cabinet box isn’t perfectly square. Additionally, keep an eye on the perimeter seal. I recommend applying the waterproof sealant move for vanity backsplashes to the outer flange of your recessed cabinet. This prevents steam from a hot shower from migrating into the wall cavity, which is a common cause for why your built-in face frames are separating from the wall. According to the International Residential Code (IRC) Section R307, maintaining specific clearances around bathroom fixtures isn’t just about comfort—it is a safety requirement for egress and accessibility.
Looking at the top trends in vanity designs you need to know in 2025, it is clear that integrated technology is the next frontier. We are seeing more recessed units equipped with internal 110V outlets and USB-C ports for toothbrushes and shavers. This requires you to master vanity installation hacks that save time and money, specifically regarding low-voltage wire routing. If you want a truly high-end result, here is my advanced tip: apply a light coat of paste wax to the back of the cabinet’s decorative flange before you screw it into the wall. This allows the cabinet to ‘float’ slightly against the drywall during seasonal humidity shifts, preventing those annoying hairline cracks in your paint. Give that a try on your next project and watch how much longer your finish stays flawless.
The Hardest Lessons I Learned Behind the Drywall
After years of cutting into walls, I’ve realized that the most expensive mistakes aren’t the ones you see—they are the ones you feel. First, always account for the ‘door swing.’ I once installed a beautiful recessed mirror only to find that it hit the wall-mounted light fixture every time I opened it. It’s a classic example of why maximizing space with innovative built-in solutions requires looking at the 3D footprint of the room, not just the flat wall. Second, don’t trust your eyes when it comes to level. Always use a laser. Houses settle, and what looks straight to your eye will look crooked once the tile goes up. Finally, remember that the depth of the cabinet matters less than the height; adding an extra shelf vertically is often more useful than trying to find an extra inch of depth in a 2×4 wall.
What’s Currently in My Toolbox
To get that professional edge, you need more than just a hammer. I never tackle a bathroom project without my Walabot DIY—it’s a wall scanner that actually shows you the pipes and wires, not just the studs. It’s the ultimate way to avoid a disaster when applying vanity installation hacks that save time and money. I also highly recommend keeping a copy of the NKBA Kitchen & Bathroom Planning Guidelines on hand. It’s the industry bible that ensures your top trends in vanity designs you need to know in 2025 actually meet safety codes. Finally, a high-quality paintable silicone caulk is essential for that seamless transition between the cabinet flange and your wall.
Time to Make Your Walls Work Harder
The transition from a cramped, cluttered bathroom to a streamlined sanctuary starts with that first courageous cut. Don’t let the fear of the unknown behind your drywall stop you from achieving the smart storage solutions to optimize small bathroom spaces you deserve. By following these framing and mounting steps, you are doing more than just hanging a mirror; you are re-engineering your daily routine for comfort and efficiency. If you ever feel stuck or run into a structural stud you didn’t expect, don’t hesitate to contact us for a bit of expert guidance. You’ve got the plan, you’ve got the tools—now go reclaim your bathroom airspace! Have you ever found a ‘surprise’ pipe or wire that forced you to change your storage plans mid-project? Tell me about it in the comments!