

I remember the smell first. It wasn’t the fresh, floral scent of the expensive soap my wife bought for our newly remodeled bathroom; it was earthy, damp, and unmistakably wrong. Only six months prior, I had finished a complete overhaul, following a step by step guide to vanity installation for beginners with what I thought was surgical precision. But as I leaned in to brush my teeth, I noticed a tiny, dark blossom of mold creeping up the drywall right where the marble backsplash met the wall. My heart sank. I had spent weeks picking out the perfect vanity style, yet I’d failed at the one thing that actually keeps a bathroom standing: the waterproof sealant move. I’d made the classic rookie mistake of using a cheap, hardware-store-brand caulk and smoothing it with a spit-covered finger. That ‘dirty finger’ technique created a concave bead that actually collected water instead of shedding it. Today, I’m going to show you how to avoid that mess and protect your investment for the long haul.
Stop Treating Your Backsplash Sealant Like an Afterthought
The vanity is often the crown jewel of a bathroom, especially when you are looking at the top trends in vanity designs for 2025. We obsess over the stone, the hardware, and the finish, but we treat the sealant like a two-minute chore at the end of a long day. That is exactly how you end up with water seeping into your wall assembly. According to the Tile Council of North America (TCNA), sealant joints are the most common point of failure in residential moisture management systems because they are often applied poorly or with the wrong materials. When water sits in that tiny gap, it doesn’t just evaporate; it wicks into the drywall or, worse, drips down the back of the cabinet. If you’ve ever wondered why your vanity plumbing is leaking into the cabinet base, you might want to look at the backsplash first. Sometimes, it’s not the pipes—it’s the splash. We are going to master the ‘two-tape’ method today, a strategy I learned the hard way after that moldy disaster.
Is 100% silicone actually worth the extra ten dollars?
I get asked this all the time by neighbors who see the price difference at the store. The short answer is a resounding yes. Cheap latex ‘kitchen and bath’ caulks are easy to work with, but they shrink as they cure, creating microscopic gaps. High-quality silicone is flexible, mold-resistant, and won’t pull away when your house naturally shifts. Have you ever noticed a gap opening up between your wall and your vanity after a change in seasons? That’s exactly what we’re going to prevent. Tell me, have you ever pulled back a piece of trim only to find a science experiment growing underneath because of a failed seal?
Start with a Surface So Clean You Could Eat Off It
Before you even touch the caulk gun, you have to realize that silicone is like a bad relationship: it won’t stick if there is old baggage. I once tried to re-seal a client’s vanity over a layer of ‘mostly removed’ old caulk. Three days later, it peeled off like a sunburned nose. You need 91% isopropyl alcohol and a lint-free rag. Scrub the stone and the wall until the rag comes back white. If you are working with custom vanities, the last thing you want is a greasy residue from the manufacturing process or dust from the drywall ruining your bond. A clean surface ensures the silicone molecularly bonds to the substrate, creating a permanent gasket.
The Secret to Surgical Lines is Blue Painter’s Tape
This is the step most DIYers skip because it feels ‘extra,’ but it is the difference between a pro job and a disaster. Run a line of blue painter’s tape exactly 1/8th of an inch above the backsplash on the wall, and another line 1/8th of an inch below the top edge of the stone. This creates a ‘channel.’ I used this exact move when I was following an expert guide to flawless vanity installation, and for the first time, the transition looked factory-made. Without the tape, you are relying on the steady hand of a surgeon, which most of us don’t have after three cups of coffee. 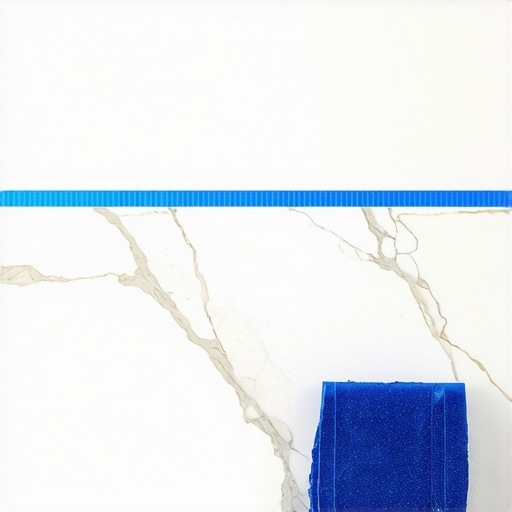
Cut the Nozzle Like You Mean It
Cutting the nozzle is the most underrated skill in the trades. Most people cut the tip too wide, resulting in a bead that looks like a toothpaste accident. You want a tiny, 45-degree angle cut that is no wider than the gap you just taped off. When you squeeze the trigger, move at a steady, rhythmic pace. If you stop, you get a ‘blob.’ If you go too fast, you get a ‘starvation’ gap. Use a dedicated caulking tool—a small rubber square—instead of your finger. The tool forces the silicone deep into the gap rather than just wiping it across the surface. This is one of those vanity installation hacks that saves you a massive headache and potential water damage six months down the road.
How to Handle the Gaps Your Contractor Ignored
If your wall is wavy—and let’s be honest, every wall is wavy—you might see the gap widen and shrink. In extreme cases, you might need to use the scribing secret to trim the stone to fit, but for most minor variances, a consistent bead of silicone will bridge the divide. I once fought a wall in an old Victorian house that looked like a potato chip; the only way to save it was to build a tiny hidden shim and seal over it. If you don’t, you’ll eventually find that leaking into the cabinet base isn’t the only way your floor gets ruined. Secondary moisture protection like moisture-proof bases are great, but the sealant is your first line of defense.
The 45-Degree Pull Strategy
Pull the tape while the silicone is still wet—this is non-negotiable. If you wait for it to skin over, you will rip the edges of your beautiful new seal. I learned that the hard way in a cramped guest bath; I finished the job, grabbed a glass of water, and by the time I came back, the tape took half the sealant with it, leaving a jagged, ugly edge. Strip the tape immediately at a sharp 45-degree angle away from the joint. This leaves a crisp, clean line that looks like it was installed by a machine.
Once you’ve mastered the 45-degree tape pull, you might think you’re in the clear. But here is where the ‘pro’ separates from the ‘DIY enthusiast.’ Most people assume that the biggest challenge of a bathroom remodel is the aesthetics, but the real nuance lies in structural physics and spatial psychology. Everyone tells you to buy the deepest vanity possible to maximize storage, but in my experience, depth is often the enemy of organization. I have seen countless homeowners install massive, deep cabinets only to find that the back half of the shelf becomes a graveyard for expired sunscreen and half-used bottles of mouthwash. Instead of chasing raw volume, you should be looking for innovative storage solutions to transform your bathroom that focus on retrieval rather than just storage.
The Depth Trap That Ruins Functional Storage
The common belief is that more cubic inches equals a better bathroom. It’s a myth. When you are trying to optimize small bathroom spaces, a shallow cabinet with well-planned pull-outs is infinitely superior to a deep, dark cavern. I once worked on a project where the client insisted on a 24-inch deep vanity in a tight powder room. Six months later, they called me back because they couldn’t find anything. We ended up retrofitting the interior with creative storage solutions for vanities like tiered organizers and side-mount racks. Have you ever fallen into this trap of ‘more is better’ only to realize you can’t find your own toothpaste? Let me know in the comments if you’ve ever had to use a flashlight just to find a spare roll of TP.
Can Your Wall Actually Handle a Floating Vanity Without Extra Bracing?
This is the question that keeps professional installers up at night. Floating vanities are all the rage in top trends in vanity designs for 2025, but they present a massive ‘oops’ factor: the cantilevered load. A standard 2cm stone top can weigh upwards of 15 pounds per square foot. Add the weight of the water in a full sink and a person leaning on the edge to put on makeup, and you are looking at hundreds of pounds of downward pressure. You cannot simply screw these into standard studs and hope for the best. According to the North American Architectural Woodwork Standards (NAAWS), wall-hung cabinets require specific blocking or internal reinforcement to prevent a catastrophic failure. I’ve seen vanities pull the drywall right off the studs because the installer didn’t use steel plates to stop dipping or failed to implement a hidden sub-frame move. 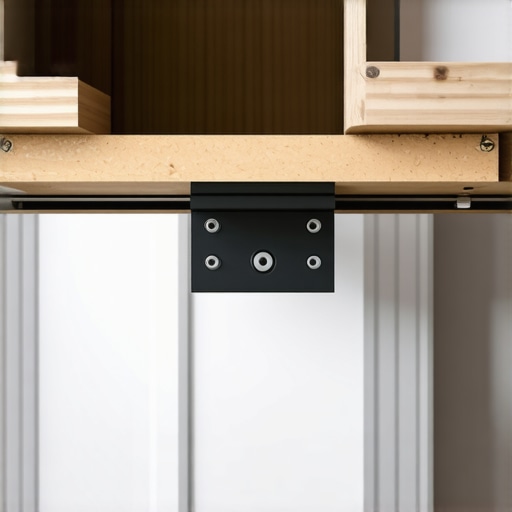
The Structural Lie Most Cabinet Makers Won’t Tell You
Many ‘off-the-shelf’ vanities are built with particle board or thin plywood that isn’t designed to carry the weight of modern 3cm quartz. This is where the structural integrity of your project often fails. If you’re looking at choosing the perfect vanity style, you must check the gauge of the cabinet box. For heavy stone, I always recommend tactics for supporting heavy quartz counters, which often includes adding internal cleats or vertical supports. I once saw a beautiful marble top snap a vanity’s side panel like a toothpick because the weight wasn’t distributed to the floor. If you’re going big, you need to think like an engineer, not just a decorator. This is one of the most common vanity installation hacks: reinforce the box from the inside before the stone goes on. It costs twenty dollars in scrap wood but saves you a three-thousand-dollar countertop. Don’t be the person who ignores the load-bearing limits of their furniture.
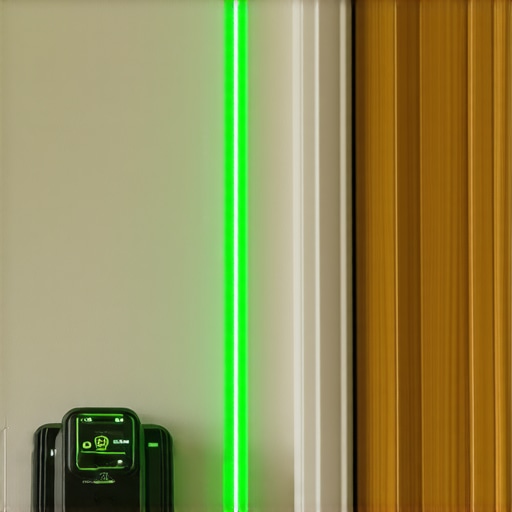
I used to think I was a pro because I had a heavy 4-foot bubble level. I was wrong. In bathrooms, where every wall is out of plumb and floors naturally slope toward the drain, a manual level is just an invitation to frustration. If you want to pull off expert-level vanity installation tricks, you need a self-leveling cross-line laser. I personally use a green-beam laser because it is four times more visible to the human eye than red beams, especially in bright, tiled rooms. It projects a perfectly level datum line across the entire room, allowing you to see exactly where the leveling move for vanities on slanted bathroom floors needs to happen before you even lift the cabinet. Without it, you are just chasing your tail with shims and prayers, hoping the stone top doesn’t look crooked against the horizontal grout lines.
How can you keep your bathroom built-ins looking new for a decade?
The secret isn’t just the initial seal; it’s the six-month inspection cycle. Every half-year, I do the ‘push test’ on my silicone joints. If the silicone has lost its elasticity or shows any sign of delamination from the stone, it’s time for a targeted repair before water finds its way into the substrate. You also need to stop cabinet doors from warping by ensuring your bathroom’s CFM (cubic feet per minute) extraction fan is actually moving air. A simple way to check this is the ‘toilet paper test’—if the fan can’t hold a single square of TP against the grate, it isn’t venting enough moisture to protect your wood finishes. If you ignore this, you’ll eventually find that leaking into the cabinet base isn’t your only problem; the entire finish will start to bloom and peel.
Looking ahead, I predict we will see vanity design pivot toward ‘smart health’ integration. Imagine drawer inserts with built-in UV-C sanitizing lights for toothbrushes or integrated moisture sensors that send a push notification to your phone if they detect a slow drip under the P-trap. We already have innovative storage solutions to transform your bathroom, but the next step is active, tech-driven prevention. Moving parts are always the first to fail, so when it comes to the heavy lifting, don’t skimp on your drawer runners. I exclusively use Blum Movento slides because they offer 4-dimensional adjustment—up, down, side-to-side, and tilt. According to Blum’s technical documentation, these slides are rated for a dynamic load capacity of up to 132 lbs. This is essential if you have deep vanity drawers loaded with heavy blow-dryers and gallon-sized cleaning supplies. If your drawers are already dragging, you might need to look at how to support extra wide drawers to prevent the frame from racking over time. Finally, if you are dealing with a floating setup, ensure you’ve used steel plates to stop dipping. I highly recommend you try the ‘toilet paper test’ on your bathroom fan tonight; it is the easiest way to tell if your custom cabinets are currently at risk of moisture-induced failure.
Three Hard Truths About Bathroom Longevity You Won’t Find on the Box
After years of fixing ‘remodels gone wrong,’ I’ve realized that the glossiest brochure won’t tell you about the structural physics of a wet room. First, silicone is a gasket, not a glue. If you are using it to physically hold a heavy backsplash against a wall without proper construction adhesive, it will eventually shear. Second, the ‘Toggle Bolt’ lie: never trust a wall anchor for a vanity that a child might climb or an adult might lean on. If you can’t hit a stud, you must implement a hidden sub-frame move to transfer that weight. Finally, remember that ventilation is a structural requirement. If your exhaust fan is weak, even high-end custom vanities will eventually see finish failure or delamination. I’ve seen thousand-dollar cabinets ruined by a fifty-cent moisture problem.
Tools That Turn a Weekend DIY Into a Professional Grade Build
If you want your bathroom to look like a high-end hotel, you need to stop guessing. I personally rely on a Huepar Green Beam Laser Level; it creates a consistent datum line that prevents the ‘crooked tile’ effect. For hardware, I strictly use under-mount slides to prevent the drawer drag that often occurs when homeowners try to overload their storage. When planning your layout, look for effortless storage solutions that prioritize visibility. If you have to move more than two items to find your daily moisturizer, your vanity design has failed you. I also recommend keeping a small bottle of 91% isopropyl alcohol in your kit—it is the only way to ensure the surfaces are truly prepped for a permanent waterproof seal.
Stop Dreaming and Start Building Your Sanctuary
The transition from ‘planning’ to ‘doing’ is where most people get stuck, but you are now armed with more technical knowledge than the average contractor. You know how to spot the top trends in vanity designs for 2025, how to properly brace a floating load, and how to create a silicone bead that won’t grow mold in six months. Your bathroom isn’t just a utility space; it is the most used room in your home. By focusing on the structural ‘bones’ and the precision of the sealant, you are ensuring that your investment remains a source of pride rather than a source of stress. Have you ever dealt with a vanity that started pulling away from the wall or sagging in the middle? Let me know your horror stories—or your wins—in the comments below!