

I stood there, sweat stinging my eyes, staring at the side of a custom walnut built-in that cost more than my first truck. All I could see was a jagged, ugly gap where the wood met the fireplace. The brickwork was ‘rustic,’ which is just a fancy way of saying not a single brick was flush with its neighbor. I’d spent forty hours in the shop aiming for perfection, only to realize the house I was working in was fighting me every inch of the way. Early on, I used to think I could just hide these gaps with a fat bead of caulk. I tried that once on a vanity installation, and within six months, the wood moved, the caulk cracked, and I had a very unhappy client calling me back. It was a blow to my pride and my wallet. Today, I’m going to show you how to avoid that embarrassment with a simple trick that makes your cabinets look like they were custom-molded to the masonry. This works whether you are maximizing space in small rooms or building a dream library.
Your Brick Walls Are Never Straight and That is Okay
It is frustrating when your level says one thing and the wall says another. But here is the reality: according to the Brick Industry Association, masonry tolerances allow for significant ‘wonkiness’ while still being structurally sound. This means your job as an installer is to adapt, not to complain. I remember the first time I had to fit built-ins into out-of-square alcoves and I tried to force the cabinet to sit flush by shimming it out. It just looked crooked from the front. The secret is scribing—marking a line that mirrors the wall’s imperfections onto a filler piece. When you do it right, especially when fitting built-ins against stone fireplaces, the results are breathtaking. Have you ever spent an entire day fighting a piece of trim that just wouldn’t sit flat? Tell me I’m not the only one who has considered just walking away from a project over a quarter-inch gap.
Is Scribing Really Worth the Extra Effort?
You might be tempted to just cover the gap with some bulky molding and call it a day. While that might work for creative storage solutions for vanities tucked away in a bathroom, it won’t cut it for high-end built-ins. A clean scribe line creates a shadow gap that looks intentional and professional. Even on tricky surfaces like natural stone, this method ensures a tight fit that handles the natural movement of your home without cracking. It separates the ‘handyman’ look from the ‘master carpenter’ finish.
[IMAGE_PLACEHOLDER]
Let’s dive into the simple tools you need to stop fearing those uneven walls once and for all.
Get Your Cabinet Level Before You Ever Touch a Pencil
Before you can even think about marking a line, you have to lock the cabinet in its final home. If the cabinet is leaning even a hair, your scribe line will be a lie. I learned this the hard way while working on a set of mudroom lockers for a client in a 1920s farmhouse. I didn’t spend enough time on the base, and by the time I scribed the top, the whole unit looked like it was falling into the next room. Use shims to get the carcass perfectly plumb and level. If you are working on a floor that is a disaster, you might need the same logic used for how to level garage cabinets on sloped concrete floors. Once it is stationary, clamp a ‘filler’ piece—a strip of matching wood—to the side of the cabinet, overlapping the wall by an inch or two.
The Simple Geometry of a Compass and Painter’s Tape
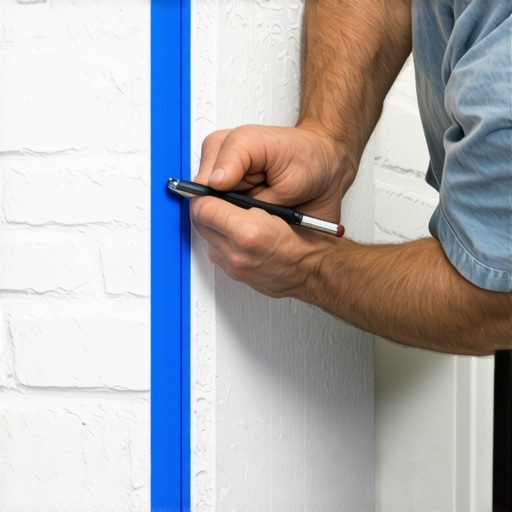
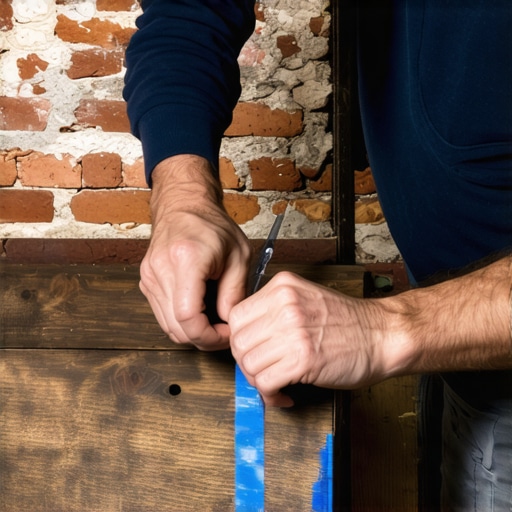
This is where the magic happens. Grab a standard school compass or a dedicated scribing tool. I like to cover the edge of my wood with blue painter’s tape first; it makes the pencil line pop and prevents the wood fibers from splintering when you make your cut. Set the compass point to the widest gap between your wood and the brick. Now, run the metal point along the brick while the pencil side stays on your wood. It is like tracing a map of a coastline; every bump and dip in the masonry is perfectly mirrored onto your lumber. This is the exact same principle I use for the scribing move for flawless cabinet gaps on natural stone.
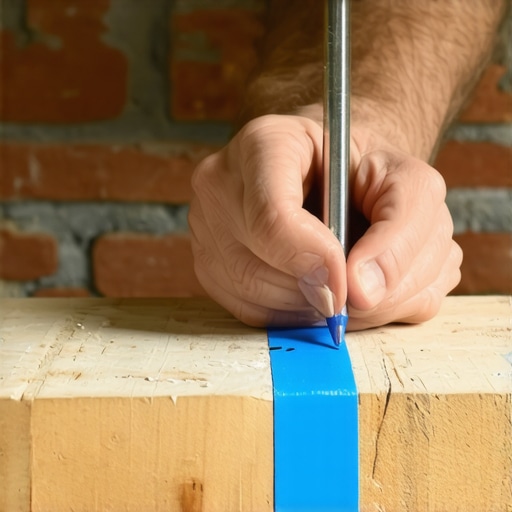
Back-Beveling Your Way to a Seamless Joint
Don’t just cut straight down that line. If you do, the back edge of the wood might hit a protrusion in the brick before the front edge does, leaving you with an ugly gap. You want to ‘back-bevel’ the cut. Tilt your jigsaw blade at a 10-degree angle so you are removing more material from the back of the wood than the front. This creates a sharp, knife-like edge that touches the wall first. I once spent an entire afternoon on a vanity installation for a bathroom with wavy plaster walls and I forgot to back-bevel. I had to sand the piece four separate times to get it to sit flush. Save yourself the headache; cut it once with a bevel and it will snap into place like a puzzle piece. This is one of those vanity installation hacks that save time and money that separates the pros from the DIYers. Whether you are following a guide or tackling a dream project, this one move solves 90% of your fitment issues.
Fine Tuning the Fit with a Power Sander
Even with a perfect cut, you might have a tiny high spot that prevents the wood from seating. Use a belt sander or a coarse-grit orbital sander to slowly shave down the back-beveled edge until the piece slides home. When you push that wood against the brick, it should look like the tree grew right out of the mortar. When I’m working to secure mudroom lockers or heavy built-ins, I often find that the final 1/16th of an inch of sanding is what makes the client’s jaw drop. It makes the cabinetry look integrated into the architecture rather than just screwed onto it. Think of your scribe piece as a bridge between the rigid, straight world of cabinetry and the chaotic, wavy world of masonry.
Most installers will tell you that a zero-gap finish is the holy grail. I am here to tell you that if you aim for absolute zero, you are asking for a service call next July. Wood is essentially a bundle of straws glued together; it sucks up moisture and swells. If you have not left a ‘seasonal gap’ or used a flexible finish, that scribe you worked so hard on will literally crush itself. I learned this the hard way on a project involving flawless vanity installation tricks where I over-tightened the side fillers. By summer, the drawers were sticking because the carcass had compressed under the pressure of the expanding wood. When you are learning vanity installation, few people emphasize that the house is a living, breathing entity.
The Invisible Enemy Lurking Behind Your Drywall
Beyond movement, there is the persistent issue of the ‘cold wall’ effect. If you are mounting units against an exterior wall without considering the moisture barrier rule for cabinets, you are essentially creating a petri dish for mold. This is a nuance often missed in basic built-in storage ideas. You need a small air gap or a physical barrier to prevent condensation between the warm room air and the cold masonry. If you ignore this, the back of your expensive walnut cabinet will eventually rot from the inside out, regardless of how perfect the scribe looks on the front. I have seen beautiful creative built-ins ruined within three years because the installer forgot this simple physics lesson.
How Much Room Does Wood Actually Need to Breathe?
According to the Wood Handbook published by the USDA Forest Products Laboratory, wood can change in dimension by as much as one percent for every four percent change in moisture content. That might sound small, but on a 36-inch vanity or a wide library unit, that is over a quarter-inch of potential movement. If you do not account for this, you will inevitably see built-in cabinets pulling away from the ceiling or mid-span bowing that ruins the aesthetics. It is why I always leave a tiny ‘reveal’ rather than a tight butt-joint whenever possible.
The Plumbing Ghost That Haunts Your Progress
The ‘Oops’ factor that bites even seasoned pros is what I call the ‘plumbing ghost.’ You get the cabinet perfectly scribed and leveled, only to realize the P-trap is two inches too low because you did not map the wall before the unit went in. This leads to vanity plumbing leaking into the cabinet base because of forced, improper connections or excessive cutting of the cabinet floor. Take the time to map your utilities with a template before the heavy lifting starts. Similarly, when installing larger units, you must ensure the structural fix for floor-to-ceiling library units is handled during the framing stage, not as an afterthought. Have you ever fallen into this trap? Let me know in the comments.
I’ve carried a lot of tools over the years, but if you want to scale up from basic DIY to professional-grade results, you need more than just a jigsaw and a prayer. I never walk onto a job site without my FastCap AccuScribe. It’s a specialized tool with an articulating head that allows for micro-adjustments that a standard school compass simply cannot match. When I’m working on innovative storage solutions to transform your bathroom, that 1/32nd of an inch is the difference between a seamless fit and a gap that haunts me at night. I also rely heavily on a self-leveling cross-line laser. It’s my ultimate source of truth when the house is trying to lie to me about its ‘level’ floors. If you’re serious about flawless vanity installation tricks, a laser level is non-negotiable for setting your heights and checking for floor humps before you ever set a cabinet in place.
How can I keep my custom woodwork looking new for decades?
Installation is only half the battle; the rest is surviving the environmental changes of your home. According to the Architectural Woodwork Institute (AWI) in their Quality Standards Illustrated, the ideal relative humidity for interior woodwork should be maintained between 25% and 55%. If your home swings outside those ranges due to seasonal changes, your beautiful scribes will eventually open up or, worse, cause the wood to buckle. To mitigate this, I always recommend a high-quality conversion varnish for any wet areas. This is vital to stop cabinet doors from warping in humid bathrooms where steam is a constant threat. Every six months, I tell my clients to check their hinges; a quick turn of a screwdriver can prevent a door from rubbing and ruining the finish on your face frames. If you’ve implemented smart storage solutions to optimize small bathroom spaces, that hardware takes a beating from daily use, so stay on top of the lubrication and alignment.
I genuinely believe we are moving toward a world dominated by digital templating. Professional installers are already starting to use 3D laser scanners to map a room’s footprint with terrifying accuracy. Imagine taking a 360-degree scan of a stone fireplace and having your CNC machine cut the scribe line perfectly before you even leave the shop. While that technology is expensive today, it’s where the top trends in vanity designs for 2025 are headed. For now, most of us still rely on our eyes, our hands, and a sharp pencil. If you are feeling stuck on a project or your gaps are wider than your patience, don’t be afraid to reach out to a professional through a contact us page; sometimes a ten-minute conversation saves ten hours of expensive rework. I want you to try one thing on your next project: spend an extra hour on your scribe piece using the back-bevel method I described earlier. It will change the way you look at your finished work forever.
The Hardest Lessons I Learned the Hard Way
Over two decades of custom cabinetry, I have realized that the gap isn’t your enemy—it is your canvas. When I first started, I used to view an uneven wall as a failure of the builder. Now, I see it as an opportunity to prove I’m a craftsman. One lightbulb moment for me was realizing that scribing isn’t just about the cut; it’s about the prep. If your base isn’t solid, your scribe will never be right. That is why I always recommend you maximize your space with custom vanities expert design tips to ensure the foundation is as perfect as the finish. Precision over speed is my mantra; it is better to take three thin passes with a sander than one heavy cut that you can’t take back. Also, trust the tape—blue painter’s tape isn’t just for paint; it’s a sacrificial layer that saves your expensive wood from splintering. Finally, never forget that your wood needs to breathe. Even the tightest scribe needs to respect the moisture barrier rule for cabinets on cold outer walls to avoid long-term damage.
Reliable Resources That Upgraded My Workflow
If you want to move past the frustration, you need the right tools. I don’t get paid to say this, but the FastCap AccuScribe changed my life. It’s affordable and handles curves that a standard compass can’t touch. For those looking to dive deeper into aesthetics, I highly recommend choosing the perfect vanity style for your bedroom or bath to see how different profiles react to lighting and shadows. I also suggest keeping a digital copy of the AWI Quality Standards handy; it’s the ultimate defense when a client asks why you left a tiny reveal for seasonal movement. These effortless storage solutions for a tidy stylish home often depend on these tiny, technical details that most people never see.
Your Next Move Toward a Flawless Installation
The first time you take a jigsaw to a piece of expensive molding, your hands will probably shake. That is normal. But once you see that wood snap tight against an ‘impossible’ wall, you will never go back to using caulk as a crutch. Whether you are executing built-in storage ideas to declutter and enhance your home or just trying to fix a single wonky shelf, the principles remain the same: level the unit, mark the line, back-bevel the cut, and sand to fit. You have the knowledge now, so go get your hands dirty. What is the most frustrating wall you have ever had to work around in your home? Let me know in the comments below!