

I still remember the smell of fresh sawdust and the sinking feeling in my stomach when I pushed my first “masterpiece” against the bedroom wall. It was a floor-to-ceiling bookshelf, and I’d spent three weeks in the garage perfecting every joint. But the moment it hit the carpet, the whole thing leaned forward like a drunk uncle at a wedding. There was a massive, ugly gap at the ceiling, and the base looked like it was sinking into a marshmallow. I tried shimming it, but the shims just disappeared into the pile. That was the day I realized that carpet is the ultimate enemy of a flush finish—unless you know the secret of the scribe.
Stop Fighting Your Carpet and Start Scribing
Most DIYers—and even some pros who should know better—think they can just sit a heavy unit on top of the rug and call it a day. But here is the reality: carpet is a moving target. If you’ve noticed why your integrated wardrobe is pulling away from the ceiling, it’s usually because the floor is compressing at a different rate than the wall is settling. I made the mistake early on of thinking I could just screw the top into the studs and the carpet would “give up” and stay flat. Instead, the weight of the books caused the unit to pull the screws right through the backing. It was a mess. We want creative built-ins for seamless storage and home aesthetics, not a structural hazard. To get that high-end look, you have to treat the carpet as a temporary obstacle rather than a foundation. This involves building a sub-base that makes direct contact with the subfloor or using a scribing method that accounts for the height of the pile and the tack strip.
Is it really possible to get a flush fit on top of carpet?
I get this question all the time from neighbors who are terrified of cutting into their expensive Berber or plush pile. The short answer is yes, but you have to stop “leveling” and start “fitting.” According to data from the Carpet and Rug Institute (CRI), residential carpet padding can compress by more than 50% under the concentrated load of a heavy cabinet. That is a massive amount of movement to account for. If you don’t compensate for that compression, you’ll eventually find yourself searching for how to fix wobbly custom built-ins. Have you ever spent hours getting a unit perfectly level, only to have it tilt the moment you loaded it up with clothes or books? It’s soul-crushing. Today, I’m going to show you the specific scribing technique that allows your built-ins to look like they grew out of the wall, even if you’re working with the shaggiest carpet in the neighborhood. We are going to dive into the physics of the “plinth base” and how to mark your lines so that when the unit finally settles, it lands exactly where it’s supposed to be—perfectly plumb and flush with the ceiling.
Build a Rock-Solid Foundation Before the Cabinet Touches the Floor
Building directly on top of the pile is like trying to build a skyscraper on a stack of sponges. You need a dedicated plinth or ‘ladder base’ that sits hidden beneath the actual cabinet. This base is your sacrificial lamb—it is what you will be cutting and shaping to match the floor’s secret contours. I remember a job in a 1920s Tudor where the floor dipped two inches over a six-foot span. If I hadn’t used a sub-base, the expert guide to flawless vanity installation tricks tips would have turned into a nightmare of shims and sawdust. Instead of a single piece of furniture, think of your project as a two-part system: a structural base that handles the floor’s unevenness and the ‘pretty’ cabinet that sits perfectly level on top of it. This separation of concerns is exactly what separates DIY projects from professional built-in storage ideas to declutter and enhance your home.
Find Your High Point and Mark the Squish
First, you have to find the high point of the floor. Set your level across the area where the unit will sit and slide it until you find the ‘peak.’ That is your benchmark. Everything else gets scribed down from there. If you are installing a step by step guide to vanity installation for beginners, you might think you can skip this, but even a small unit will tilt if one side hits a hidden tack strip and the other hits soft padding. Use a scrap block of wood to press down on the carpet as you measure; this simulates the weight of the final unit and prevents the ‘floating’ look that ruins so many installs.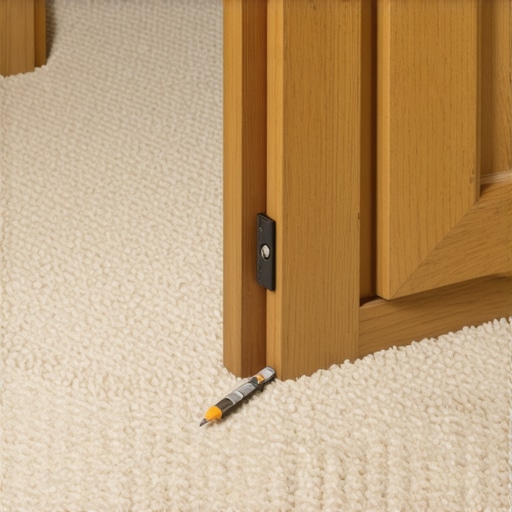
Mark Your Lines While the Carpet Screams for Mercy
Professional installers often use a compass or a dedicated scribing tool for cabinets against textured plaster walls 2 to transfer the floor’s profile onto the plinth. Here is the trick: do not just scribe to the top of the carpet fibers. You need to press your level down firmly to simulate the weight of a fully loaded unit. I once spent four hours scribing a media center to a thick shag rug only to realize I had measured the ‘uncompressed’ height. As soon as we loaded the books, a half-inch gap appeared at the ceiling. It looked like the unit was trying to escape the room. Now, I use a block of wood to compress the carpet while I mark my line. This ensures that when the creative built-ins for seamless storage and home aesthetics are finally anchored, they sit exactly where I planned without sinking further.
Secure the Base to the Studs Not the Air
Once your base is cut and sitting level—and I mean laser-level—you need to secure it. If you are dealing with a heavy load, you might need 6 heavy duty l brackets for reinforcing custom built in units 2 to keep things from shifting laterally. In my own home, I learned that stop wobbly custom built-ins usually starts with the floor-to-wall transition. If the back of your base isn’t tight against the wall because of the carpet’s ‘roll’ at the edge, the whole unit will want to tip forward. I usually trim a small strip of the carpet and padding out from behind the base—just enough so the wood can touch the subfloor directly at the very back. This prevents the ‘seesaw’ effect. This is especially critical for maximizing space innovative built in solutions for small rooms where every millimeter of vertical plumb counts toward that high-end, integrated look.Leveling is actually the biggest trap in custom cabinetry. I know that sounds like heresy, but in my twenty years of fitting units into wonky Victorian homes, I’ve learned that a perfectly level cabinet can make a room look like it’s melting. If your ceiling or crown molding has settled at an angle, a laser-level built-in will highlight that discrepancy with a glaring, wedge-shaped gap. I prefer visual leveling—the art of splitting the difference between gravity and the existing architecture so the unit feels integrated rather than inserted. Have you ever fallen into this trap where the level said it was perfect, but your eyes said it was a disaster? Let me know in the comments. We want creative storage solutions for vanities declutter in style that complement the space, not fight it. 
The Heavyweight Mistake Most DIYers Ignore
The most dangerous oops factor is misunderstanding how weight actually transfers through a cabinet. Many people think that once a unit is screwed to the wall, the job is done. But here is the nuance: fasteners are great at resisting shear, but they are often terrible at managing the roll of a heavy unit under load. This is specifically why your heavy quartz vanity is cracking the cabinet frame. According to the Forest Products Laboratory, the withdrawal strength of a screw into the end-grain of plywood is significantly lower than into the face grain. If you aren’t using 7 reinforcement tactics for wall hung bedroom vanities 2, like solid wood blocking or internal ledger strips, you are essentially hanging a hundred-pound stone top on a few threads of metal. Wood is orthotropic, meaning its strength properties differ in three mutually perpendicular directions, so your mounting strategy must account for the grain direction of your cabinet carcass.
Should you trust the spirit level or your eyes?
When you are dealing with how to fix uneven gaps in custom built in doors, the problem usually isn’t the hinges—it is the fact that the box is racked. This happens when you secure a cabinet to a wall that has a hidden hump. As you tighten the mounting screws, the rigid cabinet box is forced to follow the curve of the drywall, twisting the face frame out of square. To prevent this, I always use 6 heavy duty l brackets for reinforcing custom built in units 2 and structural shims specifically at the mounting points. This creates a perfectly flat plane for the cabinet to sit against, regardless of how wavy the plaster or drywall is. Another hidden nuance is the shadow line; by intentionally leaving a small 1/8th inch reveal where the scribe meets the wall, you can hide minor house movements that would otherwise cause a tight joint to crack and fail over time. It is the difference between a door that glides smoothly and one that requires a shoulder nudge every time you want to grab a book. Professional installation is about predicting how the wood will fight you and giving it a place to go before it ruins your finish.
I’ve gone through a dozen different scribing tools in my career, but I always come back to the FastCap AccuScribe Pro. Why? Because the cheap school compasses I used as an apprentice had a nasty habit of slipping halfway through a critical mark. When you are trying to find the scribing tool for cabinets against textured plaster walls 2, you need something with a locking nut and a point that doesn’t dance. I use this tool to transfer the exact ‘squish’ of the carpet pile onto my plinth base. If you’re serious about this, invest in a quality scribe; it’s the difference between a professional finish and a gap that you’re forced to cover with ugly quarter-round molding.
Throw Away Your Cheap School Compass
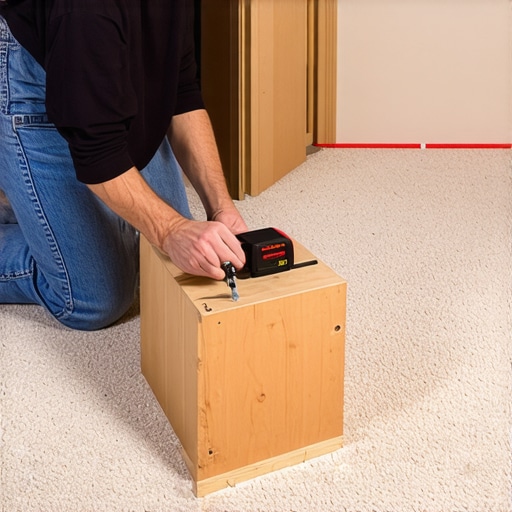
Beyond the scribe, I never start a built-in project without a dedicated laser level—specifically the Bosch GLL series. Bubbles lie, but lasers don’t. I use the laser to project a horizontal line across the entire wall before the cabinet even enters the room. This allows me to see exactly where the floor dips and peaks relative to the ceiling. This level of precision is non-negotiable for expert guide to flawless vanity installation tricks tips. If you aren’t using a laser, you’re just guessing, and in custom cabinetry, a guess is just a mistake waiting to happen.
Why Your Cabinet Will Look Different in Six Months
Wood is a living, breathing material. Even after it’s been kiln-dried and turned into a cabinet, it reacts to the humidity in your home. The Architectural Woodwork Institute (AWI) Quality Standards (Section 10) notes that for premium grade installations, the wood must be allowed to acclimate to the specific environment for at least 72 hours before installation. If you ignore this, that perfect scribe you cut in July will have a 1/16th-inch gap by January. I’ve seen homeowners panic, thinking their house is sinking, when in reality, their built-in storage ideas to declutter and enhance your home are just experiencing natural seasonal contraction. Don’t rush the process; let the wood sit in the room where it will live before you make your final cuts.
How do I keep my built-ins from sagging after the first year?
Maintenance isn’t just about dusting; it’s about checking the structural integrity of your anchor points. Once a year, I recommend checking the alignment of your doors. If you see how to fix uneven gaps in custom built in doors, it might be a sign that the carpet padding has compressed further than initially expected. You may need to tighten your 6 heavy duty l brackets for reinforcing custom built in units 2 to pull the unit back into its original plumb position. In the future, I expect we will see more ‘smart’ leveling systems—perhaps even LIDAR-integrated apps on our phones that can map floor variances to the sub-millimeter before we even cut a single piece of wood.
If you want to take your work to the professional level, try the ‘double-scribe’ method on your next project. Scribe the base once for the rough fit, then after the unit has sat for 48 hours and fully compressed the carpet, do a second, final micro-scribe. It takes more time, but the results are indistinguishable from a factory-integrated wall. Give it a shot on your next alcove project!
What Two Decades of Sawdust Taught Me About Gaps
The most important lesson I’ve learned is that the carpet tack strip is a hidden villain. If your base sits halfway on that rigid strip and halfway on the soft padding, the unit will eventually pivot and lean. I also discovered that if you notice why your built-in face frames are separating from the wall, it is rarely the glue failing; it is usually the cabinet box being forced to follow a bowed wall. Always shim the wall to the cabinet, never the other way around. Professionalism isn’t about having a perfect house to work in; it is about knowing how to hide the house’s imperfections so they never see the light of day.
The Reliable Gear in My Daily Toolkit
I never show up to an installation without my FastCap AccuScribe and a box of composite shims. While cedar shims are traditional, they can compress or split over time; composite shims stay true forever. For those aiming for effortless storage solutions for a tidy stylish home, accuracy during the base-setting phase is what prevents 90% of future callbacks. I also keep a copy of the AWI Quality Standards handy; it is a masterclass in tolerances that helped me maximize your space with custom vanities expert design tips by understanding exactly how much wood can move before it becomes a problem.
Start Your Next Masterpiece Today
There is a deep sense of satisfaction in running your hand across a joint that fits perfectly against a wavy floor. Do not let the carpet or the age of your home intimidate you. Take your measurements twice, trust the physics of the plinth base, and give yourself the grace to learn as you go. Every master craftsman started with a shelf that didn’t quite sit right. If you ever find yourself stuck on a tricky alcove or need help planning built-in storage ideas to declutter and enhance your home, don’t hesitate to contact us. We love seeing these projects come to life. Have you ever encountered a floor so slanted it made your head spin? Let me know how you handled it in the comments below!