

I remember the moment vividly—standing in my cluttered garage, frustration bubbling up. I had this brilliant idea to finally install those sleek garage cabinets to get organized and free up some space. But there was a hiccup: electrical conduits. They ran right where I wanted to mount my cabinets. My initial instinct? Cut and reroute the conduits, which turned into a mess and delayed my project for weeks.
It was then I realized there’s a better way—one that doesn’t involve costly rewiring or risking code violations. The lightbulb went off: mounting garage cabinets over existing electrical conduits is doable, but only if you know the right tricks. Today, I’ll share my proven methods to tackle this challenge head-on, saving you time, money, and headaches.
The Secret to Installing Garage Cabinets Over Electrical Conduits
Many homeowners face this dilemma—how to install sturdy storage without compromising safety or aesthetics. The good news is, with a few strategic adjustments, you can securely mount your cabinets right over those conduits. Implementing these techniques ensures your garage remains both functional and compliant with electrical codes.
Is It Really Safe and Worth the Effort?
Early in my project, I made the mistake of thinking I had to reroute wiring completely. Turns out, mounting cabinets over electrical boxes is permissible if proper clearance and safety measures are taken, according to the National Electrical Code. By using the right mounting hardware and understanding the spacing requirements, you can prevent damage to wires and maintain accessibility for future repairs. It’s a common concern—”Will this compromise electrical safety?”—but with careful planning, it’s perfectly safe and efficient. If you’re curious about more storage ideas that blend seamlessly with your home design, check out creative built-ins for seamless storage.
So, if you’ve faced this exact problem, you’re in the right place. We’ll walk through the step-by-step process to help you mount your garage cabinets confidently and correctly.
Prepare Your Workspace and Gather Necessary Tools
Begin by clearing the area around your installation site, removing any clutter and ensuring good lighting. Assemble essential tools such as a stud finder, cordless drill, level, measuring tape, safety goggles, and appropriate mounting hardware. Remember, safety first—wear protective gear to prevent injuries during drilling or handling heavy panels.
Assess and Mark Safe Mounting Points
Use a stud finder to locate wall studs and electrical conduits behind the drywall. Mark these points with a pencil, making note of the conduit locations to avoid damaging wires. Think of your wall as a map—knowing where the pipes and studs are helps you navigate safely and securely.
Identify the Clearances and Code Compliance
Check local electrical codes for clearance requirements; typically, cabinets can be installed directly over conduits if there’s sufficient space to prevent wire damage. Measure the height and depth of the conduits and mark a clearance zone—usually at least 2 inches above the conduit—so mounting hardware doesn’t come into contact with electrical wires. This step is crucial to prevent future hazards and maintain code compliance.
Customize Your Mounting Strategy
To distribute weight evenly and avoid placing stress on the conduits, you can use spacer blocks or mounting brackets designed for uneven surfaces. Think of these as the shims you’d use under wobbly furniture—great for leveling and creating a gap that preserves safety. Secure the brackets into wall studs, avoiding electrical wiring, and use toggle bolts or anchors in areas without studs, following manufacturer instructions.
Install Reinforced Support Structures
If your wall lacks sufficient studs in the desired mounting area, consider installing a vertical steel or wooden support ledger. This acts like a backbone for your cabinets, distributing weight away from delicate wiring. Secure the ledger into existing studs with heavy-duty screws, ensuring it’s level and robust enough to handle the load.
Mount the Cabinets Carefully
Position your cabinets onto the support brackets or ledger, ensuring all mounting points are aligned and evenly supported. Use a level to check for plumbness; an uneven installation not only looks unprofessional but can lead to structural issues over time. Tighten all mounting screws securely, being cautious not to apply excessive force that could damage electrical conduits.
Double-Check Clearances and Safety
Once mounted, verify that all wires and conduits are free from contact with the cabinet backs or mounting hardware. Adjust spacers if necessary, and ensure that the electrical boxes remain accessible for future inspections or repairs. This step is your quality check—think of it as a final walkthrough before finishing the project.
Finish and Organize
After confirming safety and stability, add your cabinet doors, shelves, and storage accessories. Organize tools and supplies efficiently, maximizing your garage’s functionality. Remember, a well-executed installation over electrical conduits not only looks tidy but also upholds safety standards and enhances your space’s durability.
By applying these precise steps, you transform a potentially daunting task into a manageable DIY project. Every decision—like using support ledgers or spacers—serves to protect your electrical wiring while giving you the sturdy storage solution you envisioned. For more innovative storage ideas, explore creative built-ins for seamless storage.
<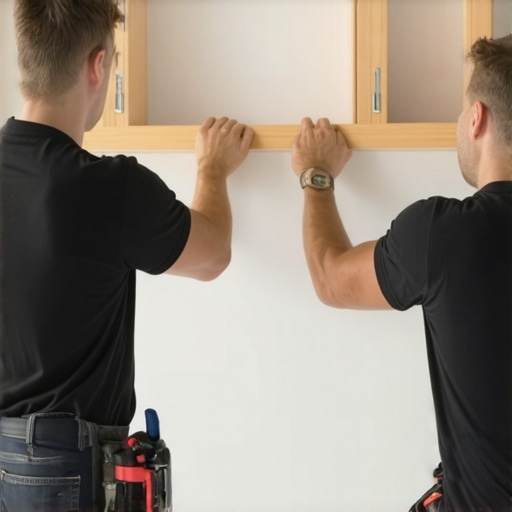 }When it comes to custom built-ins and sleek storage solutions, many enthusiasts and DIYers fall into common traps that compromise both functionality and safety. A prevalent misconception is assuming that bigger or more elaborate installations automatically translate to better usability. In reality, the devil is in the details — nuances that only advanced practitioners understand. For example, striving for maximum concealed storage without considering ventilation or access can lead to moisture build-up and mold, especially in bathrooms or kitchens, as emphasized by experts in cabinetry design. Failing to account for these subtle factors results in costly repairs and aesthetic setbacks. Moreover, a frequent myth is that installing heavy cabinetry against drywall alone suffices. In truth, proper reinforcement, such as internal steel ribs or steel stud bracing, is essential to prevent sagging or detachment — an advanced mistake that can be surprising to many. Want to learn about the precise support tactics that professionals use? Check out this comprehensive guide to reinforcement techniques.
Another common oversight involves ignoring the intricacies of electrical and plumbing runs within walls. Installing built-ins over existing conduits or pipes without adequate planning can damage wiring or cause leaks, leading to safety hazards and expensive fixes. The secret lies in advanced assessment tools like 3D wall scanners that reveal hidden obstacles. Simply put, it’s a mistake to trust bare eye assessments for complex installations. For high-end projects, consulting with professionals ensures voids and obstructions are precisely mapped, preventing future ‘oops’ moments.
A sophisticated question often asked by experienced designers is, “How can I ensure long-term stability in uneven, textured, or crumbling walls?” This challenge demands innovative solutions such as scribing techniques or internal steel bracing that adapt to irregular surfaces without compromising the installation’s integrity. For detailed methods tailored to tricky surfaces, visit this expert scribing guide.
It’s crucial to recognize that design perfection isn’t just about aesthetics—it’s about engineering reliability. The overlooked nuance of proper support, ventilation, and obstacle mapping distinguishes amateur installations from professional-grade craftsmanship. Approach your project with this understanding, and you’ll avoid costly re-dos, ensuring your built-ins stand the test of time.
Have you ever fallen into this trap? Let me know in the comments. For more insights on creating flawless custom projects, explore built-in storage ideas to declutter and enhance your home.
Keep It Working: Tools I Recommend for Built-In Projects
Maintaining the integrity of custom built-ins and storage solutions over time requires the right tools and proactive care. Personally, I swear by a few specialized items that allow me to assess, reinforce, and repair with confidence. For example, a high-quality laser level, such as the Bosch GLL3-80, ensures that my installations remain perfectly aligned, preventing uneven loads or aesthetic issues down the line. I also rely on a stud finder like the Zircon MetalliScan to accurately locate wall studs and hidden electrical wires, avoiding costly mistakes during future modifications.
In terms of reinforcement, steel support brackets specifically designed for heavy built-ins are indispensable. The 6 Heavy Duty L Brackets I use offer exceptional load distribution, especially when hidden inside cabinetry or behind paneling. I recommend installing internal steel ribs, particularly for massive units or long spans, to prevent sagging and maintain structural stability over decades. For this purpose, I often consult detailed guides like the expert reinforcement techniques document, which outlines the best practices adopted by professionals.
Additionally, when dealing with textured or uneven walls, scribing tools like the Bosch GT300 can be game-changers in achieving a flush fit. They adapt to irregular surfaces and reduce gaps, enhancing both durability and appearance. For ongoing upkeep, applying moisture barriers, especially around bathrooms and kitchens, is critical to prevent rot and mold, particularly in areas prone to humidity. Checking and tightening hardware periodically also extends the lifespan of your installations and keeps everything functioning smoothly.
How do I maintain built-ins over time?
Regular inspections are vital. Look for signs of warping, loosening screws, or damaged surfaces. Address issues promptly—tighten loose brackets, replace degraded seals, and touch up paint or finish where needed. Using a soft cloth and mild cleaning solutions helps preserve finishes without causing damage. Over the years, I’ve also found that adding small support elements, like steel plates at stress points, can dramatically increase longevity, especially in high-traffic or load-bearing areas.
As trends evolve, integrating smart monitoring sensors into your cabinets and shelves could provide real-time updates on structural health. The future may bring embedded IoT devices that alert you to shifts or damage, helping you maintain your built-ins proactively. For detailed maintenance procedures and advanced strategies, check out these expert tips.
Don’t hesitate to try installing internal steel bracing or upgrading your hardware with reinforced brackets—these small investments yield long-term results, ensuring your storage solutions stay sturdy and safe for years to come. Remember, regular maintenance combined with high-quality tools makes a significant difference in preserving the craftsmanship you put into your space.
Lessons From the Trenches: The Unexpected Turns in Building Masterpieces
- One insight I wish I had before starting was the importance of detailed wall assessments—trusting your eye isn’t enough; a 3D wall scanner can save you from costly surprises and rework.
- I’ve learned that reinforcing support structures during installation isn’t just smart—it’s essential. Hidden steel bracing might seem extra, but it ensures your built-ins withstand the test of time and heavy use.
- Working over existing electrical conduits is doable, but I discovered that understanding local codes and maintaining proper clearances is the key to safe, compliant, and aesthetic results—never underestimate the power of proper planning.
- Smoothing out textured or uneven walls can make a huge difference. Scribing tools and internal support strategies can help achieve flush finishes, elevating your craftsmanship beyond the basics.
- Lastly, embracing regular maintenance with high-quality tools like laser levels and steel brackets helps preserve your creations and prevent issues before they start, turning a good install into a great one.
Tools and Resources That Elevated My Projects
- The reinforcement techniques guide: This comprehensive resource demystified support strategies for me, ensuring safety and durability.
- Vanity installation guide: Whether you’re rushed or meticulous, following this step-by-step helped me avoid common pitfalls.
- Creative storage ideas: Thinking beyond traditional designs opened up new possibilities for my spaces, maximizing utility without sacrificing style.
- Support fixes for wobbling units: Recognizing the importance of internal support prevented future sagging, maintaining both function and beauty over time.
Your Next Step in Building Confidence
Creating built-ins and storage solutions that stand out requires more than just tools—it demands a mindset of precision, patience, and ongoing learning. Every project is an opportunity to refine your craft and turn visions into enduring realities. If you’re ready to elevate your skills and craft spaces that combine form, function, and longevity, start today by applying these lessons. Don’t shy away from exploring new techniques or investing in quality support—your future self will thank you for the effort. Remember, building exceptional storage solutions isn’t just about filling space; it’s about shaping environments you’ll be proud of for years to come.
What’s the biggest challenge you’ve faced when installing built-ins over existing wiring or uneven surfaces? Share your experience below—I’d love to hear your story!