

I remember the smell of scorched plastic like it was yesterday. I had just spent three weeks crafting what I thought was the ultimate living room centerpiece. It had tight tolerances, hand-selected walnut, and zero visible hardware. It was a masterpiece of creative built-ins for seamless storage and home aesthetics. Then, the homeowner called. Their $2,000 receiver had just shut down for the third time in an hour, and the cabinet doors felt hot to the touch. I had made the rookie mistake of prioritizing the look over the life of the electronics inside. It was embarrassing, expensive, and entirely avoidable. If you are reading this, you probably have a similar setup or are planning one. You want the clutter gone, the wires hidden, and the consoles tucked away. But you are likely worried about that dreaded fan whirring like a jet engine preparing for takeoff. Today, I am going to share the stealth venting trick I developed after that walnut cabinet disaster—a way to keep your gear ice-cold without ruining your design with ugly plastic grates. Have you ever noticed your cabinet doors feeling warm after a long gaming session?
Stop Cooking Your Console Inside Pretty Cabinets
Heat is the silent killer of home theater gear. We often focus so much on built-in storage ideas to declutter and enhance your home that we forget these boxes are essentially little heaters. When you trap an Xbox, a PlayStation, or a high-end amp in a sealed wooden box, you are basically creating a slow cooker. According to the engineering standards at IEEE Spectrum, excessive heat is one of the primary causes of premature component failure in consumer electronics; even a small, consistent increase in operating temperature can significantly shorten the lifespan of motherboards and capacitors. I learned this the hard way when I had to replace a client’s toasted motherboard because I did not account for proper airflow. I thought a few small holes in the back would be enough. I was wrong. Airflow is not just about having an exit; it is about active circulation. Without a clear path for cool air to enter and hot air to leave, that heat just swirls around until something gives. That is where the stealth venting move for built-in media centers comes into play. It is about using the natural physics of heat to your advantage without sacrificing style.
Will My Media Center Still Look Good with Vents?
This is the number one question I get from homeowners who are terrified of seeing a 1990s-style plastic vent screwed into their custom cabinetry. The short answer is: yes, it will look better because you will not see the vents at all. We are not talking about cutting giant holes in your face frames. We are talking about using shadow lines, recessed kicks, and even the hidden cable management trick for built-in desks to create invisible air paths. The goal is to integrate the ventilation into the structure itself so the air moves freely while the gear remains hidden. By the time we are done, you will have a system that stays cooler than a freestanding shelf, all while maintaining that high-end architectural look you are after. It is the difference between a DIY hack and a professional installation that lasts for decades.
Turn Your Cabinet into a Natural Chimney
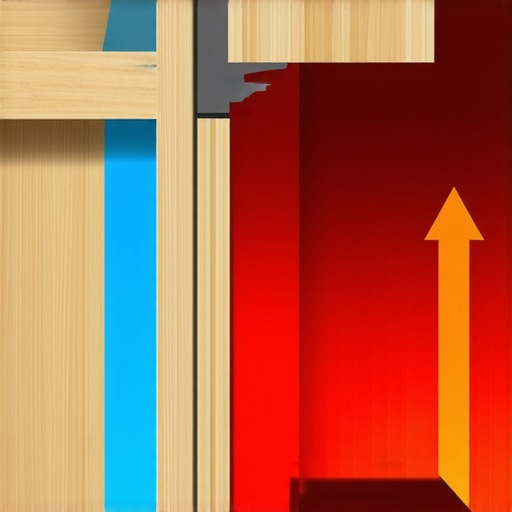
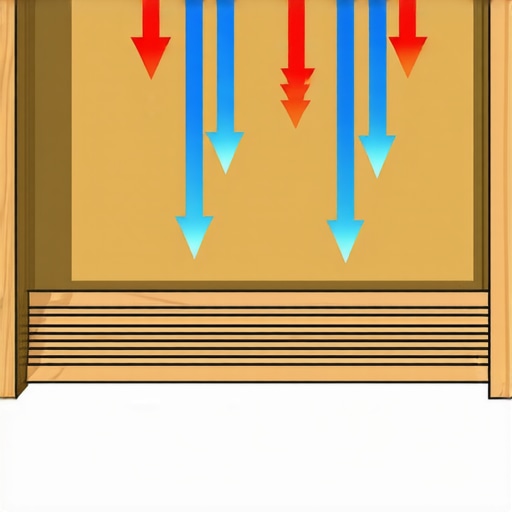
Think of your media center like an old-school fireplace. In a fireplace, the hot air naturally wants to go up and out through the flue. If the flue is closed, smoke fills the room. In your cabinet, if there is no flue, heat fills the box and begins to degrade your hardware. To fix this, you need to master the pressure differential. You want cool air to be sucked in at the bottom and hot air to be pushed out at the top. I call this the Chimney Effect, and it is the foundation of the stealth venting move for built-in media centers. If you only provide an exit, the heat will just linger because there is no pressure to move it. You need a complete circuit of air to keep those internal fans from screaming.
Open Up the Bottom for Better Intake
The first step is creating a discrete entry point for cool air. Most people forget that air is a fluid; it needs a clear path. I usually achieve this by modifying the toe kick. Instead of a solid piece of wood, I create a recessed gap or use a mesh-backed cutout that is hidden by the overhang of the cabinet. This is very similar to the toe kick ventilation fix for under cabinet heaters. Last year, I worked on a sleek mahogany unit where the client was a hardcore gamer. I used a 1/2-inch spacer behind the toe kick, which allowed the entire bottom of the unit to breathe without a single visible vent from a standing position. It looked like the cabinet was floating slightly, but it was actually sucking in a constant stream of cool floor-level air that kept his high-end PC running at peak performance.
Hide the Exhaust in the Shadow Lines
Once you have the intake, the heat needs somewhere to go. This is where most designers fail and just slap a plastic grate on the side. Instead, use a shadow line. A shadow line is essentially a deliberate gap—usually 1/2 inch to 3/4 inch—between the top of your cabinet and the ceiling or crown molding. By holding the cabinet slightly away from the wall or the top trim, you create a massive exhaust port that is completely invisible to the eye. For extra wide units, you have to be careful not to compromise the structure. I often use the hidden support rail for extra wide media centers or 6 stealth steel cleats for large living room entertainment centers to keep the spans rigid while leaving that air gap open behind the face frame. This setup allows the heat from a receiver or gaming console to rise naturally and exit through the top gap, keeping the interior ambient temperature well within the safe zone.
Route Your Wires Without Choking the Airflow
The final piece of the puzzle is cable management. Most people stuff their cabinets so full of wires that the air cannot actually move. It is like trying to breathe through a handful of straw. You need to organize those cables vertically. Use the hidden cable management trick for built-in desks by installing vertical channels at the back corners of the cabinet. This keeps the center of the cabinet clear for air to rise. In that walnut cabinet disaster I mentioned earlier, the cables were a literal bird’s nest blocking the tiny holes I had drilled. Now, I always ensure there is at least three inches of clear space between the back of the gear and the back of the cabinet. This air corridor ensures that the chimney effect actually works, keeping your expensive electronics as cool as if they were sitting on an open shelf while maintaining the high-end look of creative built-ins for seamless storage and home aesthetics.
Most people think that if they drill enough holes in the back of a cabinet, the heat will just find its way out. In my experience, this is the quickest way to ruin a high-end build without actually solving the thermal problem. It is a common myth that Swiss cheese backing is effective; in reality, random holes often create air turbulence that traps heat in pockets rather than moving it out. According to the thermal management guidelines from ASHRAE, effective cooling depends on a laminar flow—a smooth, predictable path where air enters low and exits high without interruption. When you poke holes everywhere, you break the pressure differential needed for that chimney effect I mentioned earlier. You end up with a lukewarm cabinet and a lot of unnecessary damage to your backing.
The real oops factor comes when homeowners start cutting into the structural members of the cabinet to improve airflow. I have seen beautiful creative built-ins for seamless storage and home aesthetics literally start to sag because someone notched out the top rail for a vent. If you are working with extra-wide units, you cannot afford to compromise the frame. This is why I always use the hidden support rail for extra wide media centers. It allows you to maintain the structural integrity of the span while leaving enough of a gap for the heat to escape through those shadow lines. Have you ever fallen into this trap where you prioritized a quick fix over the structural health of the unit? Let me know in the comments.
Why does my quiet fan sound like a jet engine once it is inside?
This is a sophisticated nuance that separates the pros from the amateurs: acoustic resonance. When you mount a high-RPM fan directly to a wooden cabinet wall, the wood acts like the body of a guitar—it amplifies the vibration. You might have the best cooling in the world, but if the cabinet hums every time the gear turns on, the design has failed. The trick is using silicone gaskets and decoupled mounts. It is the same logic we use when we investigate why your built-in face frames are separating from the wall; it is all about managing movement and vibration. If you are building a floating unit, you also need to account for the massive weight of modern gear and stone tops. Without learning how to support quartz counters on custom floating vanities, that heat-warped wood will eventually give way under the load of a heavy amp or a marble topper.
Finally, never ignore the environment outside the box. If you are installing these units in a basement or a high-humidity area, the heat inside the cabinet is not just a threat to the electronics; it is a catalyst for wood movement. Heat plus moisture equals warping. I always recommend the moisture barrier strategy for below grade vanities even for media centers in finished basements. It prevents the wood from absorbing ground-level dampness while the internal gear is baking it from the inside out. Following an expert guide to flawless vanity installation tricks tips will help you navigate these invisible environmental factors that can turn a custom project into a repair nightmare.
I have seen too many people spend thousands on a custom installation only to let it rot or overheat because they didn’t have a maintenance plan. If you want these pieces to last, you need to stop thinking of them as furniture and start thinking of them as living systems. Wood moves, electronics breathe, and houses settle. To stay ahead of the curve, I rely on a specific toolkit that goes beyond a standard drill and level.
Use an Infrared Thermometer to Find the Hot Spots
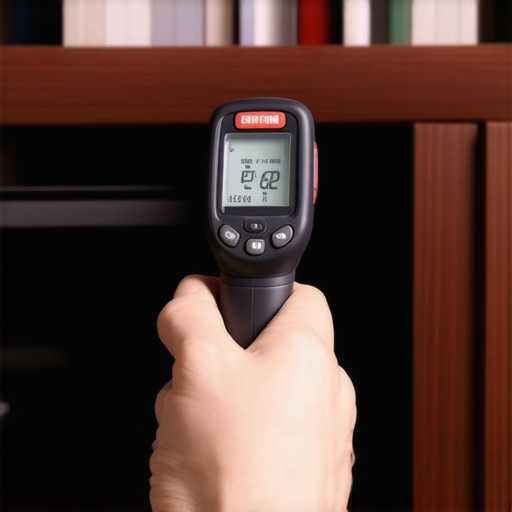
Before I consider a job finished, I take a laser infrared thermometer and scan the cabinet while the equipment is running at full load. It is the only way to know if your venting strategy is actually working. You are looking for ‘dead zones’ where heat is pooling in a corner. If I see a 15-degree jump between the bottom shelf and the top corner, I know I need to adjust the intake. I personally use the Fluke 62 Max+ because it is rugged and accurate enough for professional HVAC standards. According to the technical whitepapers from Noctua regarding their NF-A12x25 fans, maintaining a consistent pressure-to-airflow ratio is more important than raw CFM (cubic feet per minute) for cooling restricted spaces. If your thermometer shows a spike, your airflow is likely turbulent rather than laminar.
How do I keep my doors from warping over time?
The number one maintenance call I get involves doors that no longer sit flush. In a media center, the heat inside dries out the back of the door while the front remains at room humidity, causing a cup. To prevent this, I always suggest using 7 moisture barriers for vanities in high humidity bathrooms logic even in the living room. Sealing all six sides of every panel is mandatory. If you start seeing issues, you need to learn how to fix uneven gaps in custom built-in doors before the hinges become permanently strained. Every spring and fall, take five minutes to check the tension on your soft-close hardware; a little adjustment goes a long way in preventing a total hardware failure.
The Smart Cabinetry Revolution is Coming
Looking ahead, the days of passive vents are numbered. I predict that by 2030, high-end built-ins will come standard with integrated thermal sensors that talk directly to your home’s HVAC system. We are already seeing the beginning of this with automated fan controllers that ramp up based on internal probes. I am currently experimenting with ‘smart’ toe kicks that open and close based on the temperature of the receiver. It sounds like overkill until you realize it can save a $5,000 amplifier from an early grave. If you are worried about your current setup or want to plan for a future-proof installation, you can always contact us for a consultation on thermal management for cabinetry.
My biggest recommendation for you right now? Go buy a $20 digital hygrometer and stick it inside your media cabinet for a week. If the humidity or temperature swings more than 20% when the gear is on versus off, you need to implement one of the venting tricks we discussed today before you see your built-in face frames are separating from the wall due to wood stress.
Hard Truths I Learned the Expensive Way
Over the years, I’ve realized that the most beautiful cabinetry is a failure if it kills the electronics inside. One lightbulb moment for me was realizing that wood doesn’t just hold heat; it reacts to it. If you don’t seal your panels properly, that internal heat will warp your doors before you even finish the first season of your favorite show. I always tell my clients that if they can’t hear the fan, they should at least feel the breeze; if neither is happening, the system is at risk. Another hard lesson was about accessibility. We spend so much time on built-in storage ideas to declutter and enhance your home, but we often forget that dust loves airflow. If you don’t design your vents to be easily vacuumed or your fans to be swapped out, you’re just building a future repair headache. Always prioritize a path for maintenance alongside your path for air.
The Gear I Use to Kill the Heat
I don’t leave thermal management to chance. Here are the specific tools I trust on every high-end media build. First, I exclusively use Noctua NF-A12x25 fans because they offer the best static pressure-to-noise ratio in the world—essential for quiet living rooms. For controlling these, the AC Infinity Controller 67 is my go-to; it allows for automated speed ramping based on real-time temperature probes. Beyond the fans, I never start a project without my Fluke 62 Max+ IR Thermometer to verify those airflow dead zones I mentioned earlier. If you are looking for design inspiration that balances this tech with aesthetics, check out these expert design tips for custom vanities, which share many of the same thermal and moisture principles. Finally, a simple digital hygrometer is the best $20 you will ever spend to keep an eye on how your wood is reacting to the heat over time.
Build for the Gear and the Beauty
Protecting your investment doesn’t mean you have to settle for an industrial look. By mastering the chimney effect and hiding your vents in shadow lines, you can achieve creative built-ins for seamless storage and home aesthetics that actually outperform an open shelf. You’ve put the work into the design; now put the work into the longevity. If you ever run into issues with your wood moving, you can always learn how to fix uneven gaps in custom built-in doors to keep everything looking sharp. Don’t be afraid to experiment with these hidden airflow paths—your electronics and your wallet will thank you for years to come.
Have you ever noticed your cabinet doors starting to sag or warp specifically after the winter heater or summer gaming marathons kicked in? Let me know in the comments below.