

I’ll never forget the sound of three hundred pounds of maple and cast iron hitting my garage floor at two in the morning. It wasn’t just loud; it was the sound of my ego shattering. I’d spent all weekend building what I thought was a rock-solid floating workbench, only to find out that standard lag bolts and ‘heavy-duty’ shelf brackets are a joke when you actually start wrenching on a project. That sickening crunch of the wall studs giving way taught me more about physics than four years of high school ever did. If you have ever felt that slight, terrifying dip when you lean on your workspace, you are already on the path to a disaster.
Standard Brackets Just Wont Cut It for Real Work
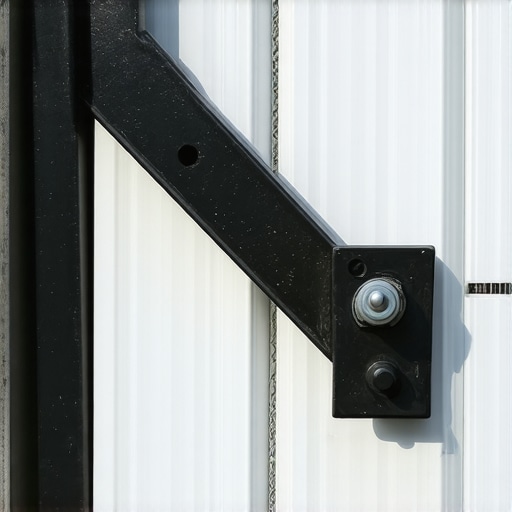
Most people think they can get away with the same hardware used for [creative built-ins for seamless storage and home aesthetics](https://customcabinetrypro.com/creative-built-ins-for-seamless-storage-and-home-aesthetics). I made that exact mistake early on. I assumed that if it could hold a few books, it could hold my engine block. I was wrong. When you are building a floating bench, you aren’t just fighting gravity; you are dealing with leverage. Every inch your bench sticks out from the wall acts as a pry bar against your mounting hardware. This is exactly [why floating desks pull away from walls](https://customcabinetrypro.com/why-floating-desks-pull-away-from-walls-and-the-solution), and for a garage bench, the stakes are even higher. I eventually realized that the only way to get that sleek, legless look without the structural failure was to pivot to a professional-grade steel cantilever system. [image1]
Is a Steel Cantilever Actually Worth the Extra Sweat?
You might be looking at the price of heavy-duty steel and wondering if you can just double up on 2x4s instead. I get it. I’m a cheapskate at heart, too. But here is the reality: wood compresses and fasteners pull. Steel doesn’t care about your heavy vice or that drill press you just bought. According to the American Institute of Steel Construction, the structural integrity and load-bearing capacity of steel-to-stud connections far exceed any timber-based bracing you can DIY in an afternoon. This isn’t just about ‘over-engineering’ your shop; it’s about ensuring that your workspace remains level and safe for the next twenty years. Whether you are doing this in a shop or [maximizing space innovative built-in solutions for small rooms](https://customcabinetrypro.com/maximizing-space-innovative-built-in-solutions-for-small-rooms), the physics remains the same.
Have you ever had a shelf or bench start to sag and just hoped it would stop, or did you tear it down and start over like I did? Before we get into the nitty-gritty of the install, we need to talk about the ‘why’ behind the wobble. Identifying the weak points in your current setup is the only way to ensure the new one stays put. We are going to fix this for good, making sure your bench is as solid as the foundation of your house. It starts with knowing [how to fix shaky garage workbenches with cantilever brackets](https://customcabinetrypro.com/how-to-fix-shaky-garage-workbenches-with-cantilever-brackets) the right way.
To get a bench that doesn’t shudder when you’re hammering a stuck bolt, you have to stop thinking about the wall as a flat surface and start seeing it as a series of vertical spines. Most garage walls are just drywall over pine studs, and if you just slap a bracket on the surface, you’re asking for a collapse. You need to marry the steel to the wood in a way that makes them a single unit. This isn’t much different from [how to anchor tool cabinets to wood stud walls](https://customcabinetrypro.com/how-to-anchor-tool-cabinets-to-wood-stud-walls-2), but with three times the leverage acting against you.
Find the True Center of Every Stud
Forget the beep of a cheap electronic stud finder. I’ve seen those things lie more than a politician. When I was rebuilding my shop last summer, I thought I’d found the sweet spot on a 2×4, only to have the lag bolt chew through the side of the wood because I was 1/4 inch off. Now, I use the ‘probe method.’ Once the stud finder gives me a general idea, I take a tiny 1/16-inch drill bit and poke holes every eighth of an inch horizontally. It looks like a woodpecker attacked my wall, but I know exactly where the edges of that stud are. Finding the absolute center is the difference between a bench that holds an engine and one that rips out of the drywall. If your walls are particularly flimsy, you might even need [the structural wall cleat for heavy floating desks](https://customcabinetrypro.com/the-structural-wall-cleat-for-heavy-floating-desks) to distribute that load across multiple studs before the brackets even go up.
Drive the Lag Bolts With Precision
Once you’ve marked your centers, you need to pre-drill. Never, ever drive a 3/8-inch lag bolt into a stud without a pilot hole; you’ll split the wood, and a split stud has about as much holding power as a wet noodle. Your pilot hole should be slightly smaller than the shank of the bolt. As you drive them in, use a heavy-duty washer. This prevents the head of the bolt from crushing the steel of the bracket or sinking too deep into the wood. I’ve found that using [the lag bolt pattern for heavy tool chest anchoring](https://customcabinetrypro.com/the-lag-bolt-pattern-for-heavy-tool-chest-anchoring) helps ensure you aren’t putting too much stress on a single point of the grain. If you’re mounting three brackets, stagger the heights of the bolts slightly so you aren’t creating a ‘perforation line’ in the wood stud that could cause it to snap under a heavy load.
Eliminate the Diving Board Effect
Even with the world’s strongest brackets, a thin workbench top will flex. If your top is bowing every time you lean on it, you haven’t built a workbench; you’ve built a diving board. I learned this the hard way when I tried to use a single sheet of 3/4-inch plywood. It felt solid until I bolted my 50-pound vice to the end. Every time I pulled on a wrench, the whole top twisted. To fix this, you need to stiffen the ‘lip’ of the bench. You can do this by laminating two sheets of plywood together or, better yet, by understanding [why bench tops warp and the steel c-channel fix](https://customcabinetrypro.com/why-bench-tops-warp-and-the-steel-c-channel-fix). Routing a piece of steel channel into the underside of the wood creates a spine that gravity simply cannot beat.
Protect the Drywall From Crushing
One detail most guys miss is that the bottom of a cantilever bracket wants to push into the wall while the top wants to pull out. This compression can actually crush the drywall behind the bottom of the bracket, causing the whole bench to tilt forward over time. It’s the same physics that explains [how to stop garage tool walls from bowing the drywall](https://customcabinetrypro.com/how-to-stop-garage-tool-walls-from-bowing-the-drywall). To prevent this, I often cut out a small square of drywall where the bottom of the bracket sits and replace it with a solid wood block or a steel shim that transfers the pressure directly to the stud. This keeps the bracket perfectly vertical, no matter how much weight you pile on top.
If you think adding twenty screws to a single stud makes it stronger, you are actually building a perforated failure point. I see this all the time in DIY groups—guys proud of their ‘over-engineered’ benches that are one heavy hammer blow away from a catastrophic split. Structural engineering principles, such as those outlined by the National Association of Home Builders (NAHB) in their Residential Construction Performance Guidelines, emphasize that fastener spacing is as critical as the fastener size itself. When you crowd a 2×4 with too many lag bolts, you are essentially turning that stud into a giant toothpick. Instead of more screws, you need smarter distribution. This is the same reason why [expert-guide-to-flawless-vanity-installation-tricks-tips](https://customcabinetrypro.com/expert-guide-to-flawless-vanity-installation-tricks-tips) focuses on finding the right load-bearing points rather than just drilling more holes.
Why do professional-grade floating units still lean forward?
Even if your brackets are rated for a thousand pounds, there is a hidden nuance called ‘wall deflection.’ Most homeowners assume a wall is a rigid, immovable object. It is not; it is a flexible assembly of wood and paper. When you hang a heavy floating vanity or a workbench, the top of the bracket pulls the stud outward while the bottom pushes in. Over time, the bottom of that bracket will compress the gypsum in the drywall, creating a permanent tilt. I have found that using [the steel plate move for drywall-mounted floating vanities](https://customcabinetrypro.com/the-steel-plate-move-for-drywall-mounted-floating-vanities) is the only way to spread that compression force across a wide enough area to keep things plumb. If you do not address this, no amount of leveling during the initial install will matter six months from now.
#IMAGE_PLACE_HOLDER_C#
Another trap I fell into early on was ignoring the ‘cold wall’ effect. In a garage or a basement, mounting a workbench directly against a concrete or exterior-facing wall creates a micro-climate of trapped moisture. This leads to the back of your wood bench rotting or the steel brackets corroding from the inside out. I now always implement [the moisture barrier trick for vanities against cold walls](https://customcabinetrypro.com/the-moisture-barrier-trick-for-vanities-against-cold-walls) even in my shop setups. A simple layer of plastic or a small air gap can save your structural integrity from the silent killer of mold and rust.
Have you ever finished an install only to realize it was sagging two weeks later? It is a frustrating trap, but usually, it is because you relied on hardware that was not meant for dynamic loads. This is exactly [why plastic wall anchors fail for heavy shelving](https://customcabinetrypro.com/why-plastic-wall-anchors-fail-for-heavy-shelving); they just cannot handle the vibration of a working shop. Let me know in the comments if you have ever fallen into this trap or had a ‘perfect’ install go south because of a hidden wall issue—I would love to hear how you fixed it!I have spent thousands on fancy saws, but the tool that actually saved my shop was a thirty-dollar digital angle gauge. When you are dealing with a 24-inch deep bench, being off by just one degree at the wall translates into a massive, noticeable dip at the outer edge. I personally use a digital level to zero out against the wall itself, ensuring the bracket is perfectly perpendicular to the vertical plane, not just ‘eyeball’ level. If you are just starting your DIY journey, following a [step-by-step guide to vanity installation for beginners](https://customcabinetrypro.com/step-by-step-guide-to-vanity-installation-for-beginners) is a great way to learn the basics of leveling, but for these heavy-duty garage loads, digital precision is your only insurance policy against a slanted, frustrating workspace. 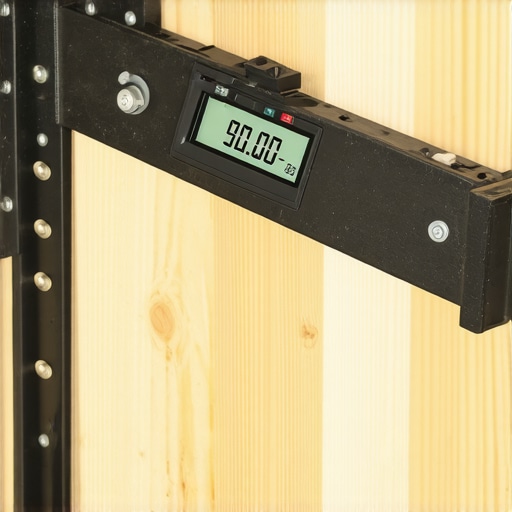
How do you keep a heavy bench level over the years?
Wood is a living material; it breathes. During the humid summer months, your studs swell, and in the dry winter, they shrink. This cycle can actually loosen the bite of your lag bolts over time. According to the American Wood Council’s National Design Specification (NDS) for Wood Construction, the withdrawal capacity of a fastener is heavily influenced by the moisture content of the wood at the time of installation versus its service life. I make it a habit to take my impact driver and check the torque on every main mounting bolt once a year. It usually takes five minutes, but you would be surprised how many ‘quarter-turns’ I find on a bench that felt rock-solid six months ago. This preventive check-up is just as important for a heavy workbench as it is for [smart storage solutions to optimize small bathroom spaces](https://customcabinetrypro.com/smart-storage-solutions-to-optimize-small-bathroom-spaces), where weight and humidity are constant, competing factors.
The Future of Floating Workstations is Modular
The trend I am seeing for 2025 and beyond is a move toward ‘Active Support’ systems—think brackets with built-in micro-adjustment screws that let you re-level a bench without pulling it off the wall. We are already seeing these [top trends in vanity designs you need to know in 2025](https://customcabinetrypro.com/top-trends-in-vanity-designs-you-need-to-know-in-2025) starting to influence industrial shop gear and heavy-duty built-ins. Eventually, the ‘set it and forget it’ mentality will be replaced by systems designed for long-term calibration. If you start noticing that your shop drawers aren’t closing right, it might not be the hardware itself, but a slight shift in the mounting frame; knowing [why your drawer slides bind and the simple realignment](https://customcabinetrypro.com/why-your-drawer-slides-bind-and-the-simple-realignment-2) can save you from a full teardown. My best advice for any serious builder? Don’t just build it—monitor it. Grab a torque wrench this weekend and check your existing wall mounts. If you can get even a partial turn on a bolt, you just saved yourself from a future failure and a very expensive sound in the middle of the night.
What Pro Builders Won’t Tell You About Floating Load Limits
The biggest lightbulb moment for me wasn’t about the steel; it was about the air. I realized that a 1/16-inch gap between your bracket and the stud is enough to ruin your leveling over time. If you don’t use the concrete wedge anchor move for heavy garage racks or structural lag bolts correctly, that gap becomes a pivot point. Also, never trust the ‘load rating’ on the box at the big-box store—those ratings are for static weight, not the dynamic vibration of you hammering a rusted bolt into submission. Finally, I’ve learned that a ‘finished’ bench is never truly finished; it’s a living structure that needs a quick annual check-up to stay safe.
Gear That Actually Earned a Permanent Spot on My Tool Wall
You don’t need a thousand tools to do this right, but you do need the right ones. First, get a digital angle gauge. It’s the only way to ensure your bench has that slight 0.5-degree upward tilt to account for future settling. Second, invest in a high-torque impact driver; hand-ratcheting lag bolts into old-growth pine is a recipe for a shoulder injury and stripped heads. Third, keep some structural shims handy to account for walls that aren’t perfectly plumb. If you’re organizing the rest of the space, check out these built-in storage ideas to declutter and enhance your home to match the quality of your new bench. I also recommend picking up a high-quality wood glue for laminating your bench top—I’ve found that Titebond III is the only thing that stands up to the temperature swings in my uninsulated garage.
Stop Overthinking and Start Bolting
It is easy to get paralyzed by the fear of your wall coming down, but once you understand the physics of leverage and the importance of finding those stud centers, you are ready. Building a heavy-duty floating garage workbench is about more than just clearing floor space; it’s about creating a station where you can work without hesitation. If your wall is already showing signs of stress, you can always stop garage tool wall sag with horizontal steel channels before you mount the main bench. Don’t be afraid to pull the trigger on this project—your floor (and your sanity) will thank you. If you hit a snag or need professional advice on a custom layout, don’t hesitate to contact us for a second opinion. #IMAGE_PLACEHOLDER_E# Have you ever had a DIY project literally fall off the wall? Tell me your horror stories in the comments below!