

It was 3:00 AM on a Tuesday when the crash woke me up. I stumbled into the hallway, heart pounding, thinking someone was breaking in, only to find my brand-new, minimalist bedside setup in a sad heap on the floor. My glass of water had shattered, my phone screen was miraculously intact but covered in drywall dust, and a gaping hole stared back at me from the wall. I had made the classic rookie mistake: relying on plastic drywall anchors to support a gorgeous, solid oak floating piece. That disaster set me on a path to uncover the real engineering trick behind rock-solid wall-mounted furniture, and today I am going to share exactly how to prevent your own late-night disaster.
The Weighty Reality of Floating Furniture
We all love that clean, airy look of furniture suspended in mid-air. It makes small bedrooms feel massive and makes vacuuming a breeze. But here is the hard truth we rarely talk about: those sleek drawers have to fight gravity every single day. When you pull a drawer open, you are not just dealing with the weight of your books; you are applying a leverage force that wants to tear the unit right out of the wall. If you have ever felt your setup wobble when you lean on it to turn off your alarm, you already know something is wrong. To make these pieces truly secure, we have to look behind the drywall at a technique professional builders use for high-end creative built-ins and heavy bath fixtures.
Are floating nightstands actually practical for everyday use?
They absolutely are, but only if you stop trusting basic wall anchors. Early in my DIY journey, I assumed that if an anchor was rated for 50 pounds, it could easily hold a 20-pound drawer. What I did not calculate was the leverage. According to structural engineering principles detailed by the American Wood Council, wood framing fasteners must be anchored directly into solid wood to safely transfer eccentric, cantilevered loads. This means your drywall alone simply cannot handle the rotational pulling force of a cantilevered shelf or drawer over time. If you want a setup that can handle a heavy lamp, your favorite books, and the occasional accidental bump, you need to understand the magic of internal wall support.
The Structural Blocking Secret Revealed
The secret to a lifetime of wobble-free furniture is structural blocking. This involves cutting a small strategic opening in your drywall and installing a solid 2×4 or 2×6 wood block horizontally between your existing wall studs. This solid piece of lumber gives you a massive, secure target to drive your mounting screws into, meaning you do not have to compromise on the exact positioning of your furniture just to hit a single, off-center vertical stud. It is the exact same method professionals use when figuring out how to support floating vanities on thin walls or securing heavy shelving. If you are tired of dealing with loose brackets, it is time to upgrade your installation game. Have you ever had a shelf or cabinet pull away from your wall after what felt like a perfect install?
Before you lift a hammer, you might also want to explore the hidden cleat move for floating nightstands, which pairs beautifully with internal blocking to create an incredibly strong, invisible mounting system that looks clean and professional.
Step-by-Step Anatomy of a Fail-Proof Blocking Installation
To keep your sleek floating setup from ripping out of the plaster, you need to physically anchor it to the skeleton of your home. Think of your wall studs like the bones of your arm; trying to hang a heavy weight on just the skin (your drywall) is guaranteed to end in a tear. By opening the wall and pocketing a solid block of wood directly between those studs, you are essentially creating a custom, unbreakable mounting plate exactly where you want your furniture to live.
Locate the Studs and Plan the Cutout
First, use a reliable stud finder to locate the two vertical studs flanking the area where your floating nightstand or vanity will hang. Once identified, mark the outline of your intended furniture unit directly on the drywall. I always trace a cutout rectangle that is roughly 4 inches high and spans the entire width between the studs, positioned exactly where the unit’s top mounting screws will penetrate. Cutting drywall can feel intimidating, but a sharp drywall saw and a steady hand make quick work of it. Just be sure to shallow-cut to avoid any hidden electrical wires or plumbing lines running through the cavity.
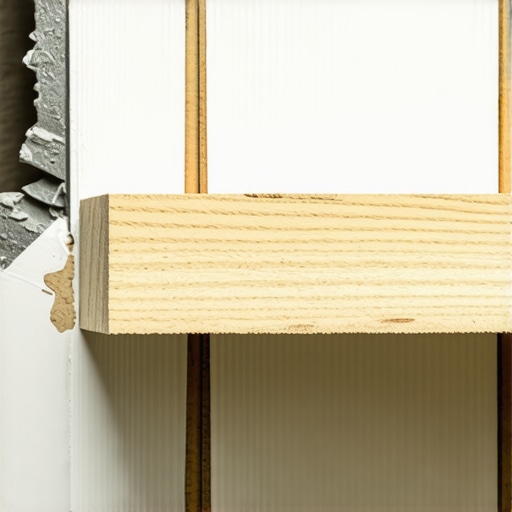
Cut and Position the Horizontal Lumber Block
Measure the exact distance between the two exposed studs. Cut a piece of pressure-treated 2×4 or 2×6 lumber to this precise length. It should fit snugly between the studs like a puzzle piece. To secure it, pocket-hole screws are your best friend. Drill pocket holes into both ends of your block, then drive heavy-duty structural screws through these holes and directly into the vertical studs. When I first tried this on a master bathroom remodel in Farmington Hills, I got lazy and tried to toenail regular drywall screws at an angle instead of using proper structural fasteners. The block split, and I had to rip the whole thing out and start over. Learn from my mess: always use dedicated construction screws to prevent wood splitting and ensure a rock-solid hold.
How to Handle Wall Varieties and Thin Profiles
If you are working with non-standard walls, standard 2×4 blocking might not always fit the bill. For instance, if you are attempting to install floating features on narrower framing, you will need specialized techniques like learning how to support floating vanities on thin 2×3 interior walls. For massive master bedroom setups, utilizing 7 reinforcement tactics for wall-hung bedroom vanities can save you from catastrophic drywall sag. Additionally, if your nightstand or vanity has integrated plumbing or wiring, implementing 5 smart bathroom vanity wiring hacks for a flush cabinet finish inside the wall cavity before patching the drywall will keep your cables clean and completely out of sight.
Patch Drywall and Mount with Confidence
With your structural block securely in place, screw the drywall cutout back onto the studs and the new block. Apply joint compound and fiberglass mesh tape over the seams, sand it smooth, and paint. Now, when you lift your heavy floating furniture piece into place, you do not have to guess or compromise on placement. You can drive your primary mounting screws directly through the back panel of your cabinet and straight into your solid horizontal wood block, achieving a level of security that can easily handle daily wear and tear without a single wobble.
The Floating Furniture Illusion and the Lever-Arm Trap
Most home improvement guides treat floating vanities and heavy nightstands as simple static weights. They tell you to calculate the weight of the box, buy a bracket rated for that load, and call it a day. But in my years of restoring homes and designing custom storage, I have learned that this static calculation is a dangerous illusion. When you pull open a fully loaded drawer, you are not just dealing with gravity; you are creating a high-torque cantilever system. Every inch that drawer extends acts as a lever arm, multiplying the downward force and pulling directly outward on your top wall fasteners. This physical reality is why so many beautiful DIY projects eventually end up sagging or cracking your plaster.
Why does my seemingly rock-solid floating vanity still move when I lean on it?
If you experience movement when applying downward pressure, your wall studs are likely twisting under the rotational force, or your wall-mounting plate is flexing. A study by the American Wood Council on wood framing connection capacities underscores that eccentric loads subject fasteners to combined withdrawal and lateral shear forces. When you lean on a cantilevered vanity, you apply a massive pulling force to the very top of the mounting system. To completely neutralize this rotational torque and eliminate that unsettling flex, you must learn how to fix floating vanities that move when leaned on by introducing rigid structural bracing behind the drywall.
The Common Myth of the Heavy-Duty Toggle Bolt
The biggest myth in the modern DIY community is that heavy-duty hollow-wall anchors or toggle bolts are a suitable substitute for solid wood blocking. I constantly see video tutorials claiming that a toggle bolt rated for 150 pounds can easily hold a floating nightstand or small vanity. In reality, while the metal bolt itself won’t shear, the fragile gypsum core of your drywall will gradually crumble under the constant micro-vibrations of opening and closing drawers. Over a few months, those tiny vibrations widen the pilot hole, the anchor slips, and the entire unit begins its slow, inevitable tilt downward.
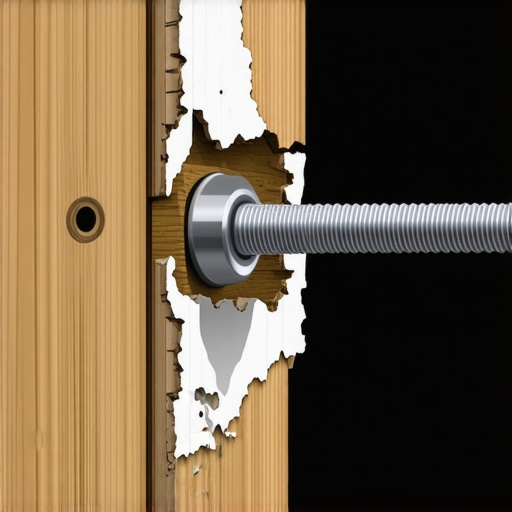
If you want a floating setup that actually lasts a lifetime, you need to stop relying on drywall integrity altogether. For wide bedroom arrangements or bathrooms where you cannot easily open the wall to install horizontal wood blocks, utilizing a heavy-duty steel mounting plate or discovering the stud bypassing plate for off center vanity installation is the professional way to secure your furniture directly to the studs, even when the stud spacing does not align with your design. Have you ever fallen into this trap of trusting high-rated drywall anchors only to have them sag later? Let me know in the comments below.
Crucial Mistakes to Avoid During Your Block Installation
Even when DIYers commit to opening the wall and installing solid wood blocking, they often make the critical mistake of using standard drywall screws to secure their 2×4 framing blocks. Drywall screws are incredibly brittle; they are designed for holding power, not shear strength. When subjected to the constant downward pull of a heavy floating nightstand, the heads of drywall screws can snap clean off. Always use dedicated structural screws or heavy-duty construction fasteners to tie your blocking to the wall studs. Additionally, if you are planning to install floating master bedroom features, integrating the hidden cleat move for floating nightstands or using robust steel reinforcement will ensure your custom bedroom layout remains flawless and completely secure for decades to come.
When you transition from basic DIY setups to advanced wall-mounted installations, relying on standard toolbox basics will only get you so far. Through years of installing heavy-duty creative built-ins and floating counters, I have found that specific precision gear separates a wobbly installation from a permanent one. My absolute secret weapon is a heavy-duty, magnetic stud finder paired with an industrial-grade scribing tool. This combination is non-negotiable because plaster walls are almost never perfectly flat, and ignoring these minor variations will twist your cabinet frame over time, leading to binding drawers and popped joints.
How do I maintain floating storage units over time?
Maintaining a wall-hung unit requires checking the primary anchoring points at least once a year. Wood naturally expands and contracts with seasonal humidity shifts, which can slowly back out lower-grade fasteners. I personally use a torque-limiting screwdriver to verify that the main mounting screws inside the cabinet remain snug against the internal blocking without stripping the wood fibers. If you notice even a millimeter of play when you place weight on the unit, you need to address it immediately to avoid stressing your plaster. Keep an eye on your drawer glides too; heavy loads can cause minor shifting, but utilizing a quick slide alignment trick will keep the movement fluid and prevent the cabinet box from absorbing unnecessary lateral forces.
The Future of Invisible Support and Smart Materials
Looking ahead, the demand for sleek, floor-free aesthetics is only growing. I predict we will see a major shift away from traditional wood framing blocking toward ultra-slim, carbon-fiber and engineered steel bracket systems. These materials allow you to achieve incredible load capacities without needing to open up massive sections of your drywall. Leading architectural hardware manufacturers like Blum are already engineering advanced, adjustable hanging brackets that mount directly into thin metal framing, pointing to a future where heavy structural modifications aren’t even required for floating setups.
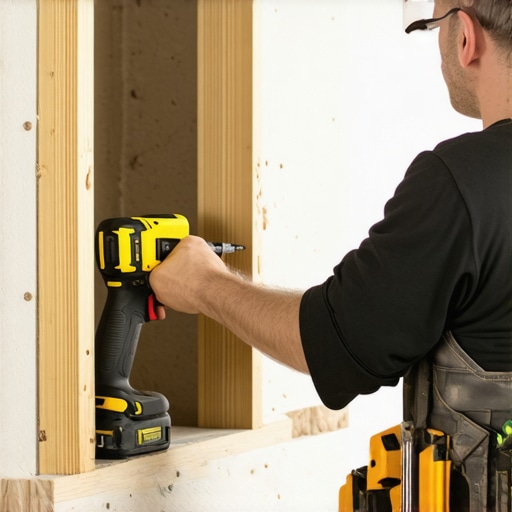
If you are planning to install a wider bedroom unit or a floating sink area, skip the basic hardware store screws and invest in high-quality structural construction screws designed specifically for load-bearing cabinet joints. Give this advanced blocking technique a try on your next weekend project. If you are dealing with tricky room layouts, studying the stud bypassing plate for off center vanity installation will give you the exact blueprint needed to secure your floating furniture perfectly, no matter where your studs are hiding.
What I Wish I Knew Before Hanging My First Wall-Mounted Cabinet
Over the years, I have seen almost every imaginable failure point when it comes to floating installations. Through trial, error, and plenty of patched drywall, here are the real-world truths you need to keep in mind:
- The 10-Percent Rule: A floating unit’s actual weight capacity is about 10% of what wall anchor manufacturers print on the box once you factor in dynamic forces like opening drawers or leaning.
- Studs Move: Houses settle and wood frames warp slightly with seasonal changes. If your unit is anchored solely to drywall, those microscopic movements will slowly loosen the connection.
- Plaster Requires Patience: If you are dealing with historic homes, you cannot treat the lath and plaster like modern drywall. Utilizing professional tips on how to secure heavy closet rods in crumbling plaster walls can prevent massive structural cracks in older bedrooms.
- Gravity Always Wins: No amount of high-end adhesive or specialized tape will substitute for a mechanical connection directly into a vertical stud or a solid horizontal wood block.
The Precision Gear That Saves My Projects
If you want to move past basic DIY and achieve flawless, professional-grade results, you need to elevate your tool bag. These are the three non-negotiable items I bring to every single floating furniture installation:
- Heavy-Duty Magnetic Stud Finder: Unlike cheap electronic sensors that give false readings on dense plaster, a strong rare-earth magnetic finder locates the exact drywall screws holding your drywall to the studs, giving you a 100% accurate map of your wall’s framing.
- Professional Scribing Tool: Walls are never perfectly flat. To prevent your cabinet from twisting and binding its drawers, use a quality scribing tool to fit your cabinet perfectly against the wall profile. If you have textured plaster, learning the nuances of using a scribing tool for cabinets against textured plaster walls is an absolute lifesaver.
- Structural Construction Screws: Replace standard gold wood screws with rugged structural screws. They offer massive shear strength and a built-in washer head that clamps the cabinet backing firmly to your internal blocking without splitting the wood.
Take the Leap and Build for a Lifetime
There is nothing quite like the feeling of stepping back and admiring a perfectly flush, rock-solid floating installation that you built with your own hands. By opening up the drywall and installing proper horizontal wood blocking, you completely eliminate the anxiety of sagging shelves or midnight crashes. This simple structural upgrade transforms a temporary home trend into a permanent architectural feature that adds real value to your space. Whether you are installing sleek creative built-ins, hanging a heavy vanity, or setting up a modern floating nightstand, building it strong behind the wall ensures it will stay beautiful for decades to come.
Have you ever had a floating shelf or wall cabinet start to sag or pull away over time? Let me know what happened and how you fixed it in the comments below!