

There I was, tugging on my “premium” pantry pull-out like I was in a tug-of-war with a stubborn mule. Thud. It hit that invisible wall halfway out, and the sound of grinding metal echoed through the kitchen. It is embarrassing, isn’t it? You spend good money on custom storage, only to have it fight you every time you want a box of pasta. I realized then that my pantry wasn’t broken; it was just slightly out of sync. This isn’t just about an annoying noise; it’s about making your kitchen work for you again. [IMAGE]
Why Your Heavy Pantry Drawer Keeps Catching
I’ll admit, when I first started installing these systems, I thought more force was the answer. I once tried to “re-align” a sticking unit by just yanking it repeatedly, which is a great way to turn a small problem into a broken rail. We often assume the slides are bad, but the reality is usually simpler. If the cabinet walls aren’t perfectly square—and trust me, in most houses, they aren’t—the slides won’t be parallel. When slides aren’t parallel, they fight each other. You can find more about why your integrated pantry pull-out is catching by looking at the geometry of the box itself. One major mistake I made early on was reaching for the spray lubricant. I thought I could grease my way out of a mechanical alignment issue. All I did was create a sticky trap for flour and dust. In reality, you need to stop drawer bind on heavy pantry pull-outs by ensuring the distance between the rails is identical at the front and the back. According to hardware engineering standards from Blum, a misaligned slide can increase the force required to open a drawer by over 50%, leading to premature wear on the ball bearings.
Is this trick actually worth your Saturday morning?
You might think you need a degree in mechanical engineering to fix this, or perhaps you’re worried about stripping the screws in your expensive cabinetry. I get it. But the truth is, this alignment trick takes less time than brewing a pot of coffee. If you’ve been dealing with 6 hidden pull-out fixes for deeper custom kitchen cabinets, you know that the deeper the drawer, the more obvious a tiny alignment error becomes. We are going to solve the tilting, the catching, and that awful grinding sound once and for all. Have you ever felt like you were going to rip the whole cabinet out of the wall just to get a simple snack? Let me know, because you aren’t alone. We can also look at why your pantry pull-out is tilting if the alignment isn’t the only culprit.
Get the Parallel Rail Geometry Right
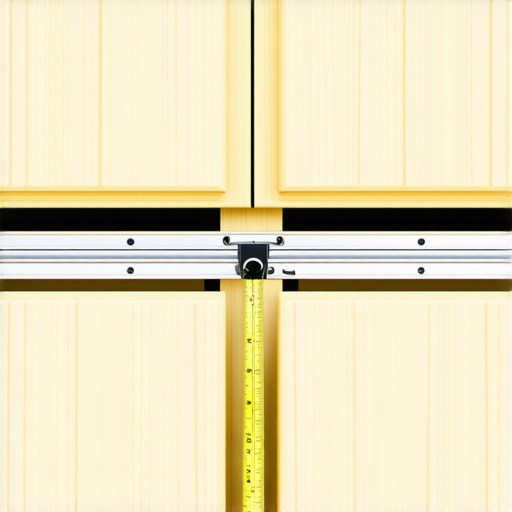
You need to start with a tape measure and a lot of patience. If the distance between your slides at the face frame is 15 inches, it must be exactly 15 inches at the very back of the cabinet. Even a discrepancy of 1/16th of an inch can cause a heavy pantry pull-out to bind because the metal hardware is designed for a very narrow tolerance. I once spent three hours on a job in a farmhouse where the cabinet was built into a slightly curved wall. The drawer was sticking so badly it was actually shaving metal flakes off the rails every time it moved. I had to stop drawer bind on heavy pantry pull-outs by rebuilding the interior mounting surface with a series of stacked veneer shims. This ensures the hardware stays parallel, no matter how wonky the house is. When you ignore this, the ball bearings are forced to fight the sideways pressure, which is exactly why your integrated pantry pull-out is catching during daily use.
Adjust the Rear Brackets for a Perfect Path
Most high-end slides come with rear mounting brackets that allow for a bit of lateral adjustment. Don’t just crank the screws down immediately. Loosen the rear screws just enough so the bracket can wiggle. Slide the drawer all the way back; this naturally forces the brackets into the position they want to be in to accommodate the drawer width. If you find the drawer is still pulling to one side or dipping, you might need to check why your pantry pull-out is tilting, as vertical misalignment is just as problematic as horizontal drift. I’ve found that using plastic shims is often better than wood because they don’t compress over time under the weight of fifty cans of soup. If you are working with deeper units, look into 6 hidden pull-out fixes for deeper custom kitchen cabinets to see how to handle those extra-long extensions that amplify every tiny error.
Reinforce the Mounting Points
A pantry drawer loaded with cast iron pans and flour sacks is essentially a heavy lever trying to pry your screws right out of the wood. Standard 5/8-inch wood screws often aren’t enough for these high-load scenarios. I prefer using euro-screws or even small through-bolts if the cabinet side is accessible and hidden by another panel. When the mounting points flex, the rails flare outward, and the ball bearings lose their track. This is often the hidden culprit when you see how to fix drawer fronts that won’t stay aligned—the base is shifting, so the front can’t possibly stay flush. To prevent the cabinet walls from bowing under the load, you can install 6 heavy-duty L-brackets for reinforcing custom built-in units. These keep the side panels rigid so the rails remain perfectly parallel during the entire travel of the drawer. In my experience, a rigid box is the only way to ensure that silent, effortless feel every time you reach for a snack.
But here is the secret most ‘handy’ neighbors won’t tell you: a rigid box is only half the battle. Many people assume that if you buy the most expensive, heavy-duty slides on the market, you can ignore the cabinet’s internal architecture. In my years of custom work, I’ve seen the opposite be true. Over-engineered hardware often masks structural flaws until it’s too late. Most installers believe that ‘more screws equals more strength,’ but in reality, over-driving screws into the side of a pantry can actually bow the wood, creating the very binding you are trying to fix. You need to focus on how to how to fix uneven gaps in custom built-in doors by checking the frame’s squareness under full load, not just when it’s empty. 
Why Heavy Loads Crack Your Cabinet Frame
I’ve walked into kitchens where the pantry pull-out was literally tearing the face frame away from the box. This happens because people treat the cabinet like a static object, but a 100-pound pantry is a dynamic weight. If you haven’t reinforced the base, you’ll eventually see why your heavy quartz vanity is cracking the cabinet frame, which is the same mechanical failure that happens in pantries. The weight shifts to the front feet, causing the entire unit to lean. This is why I always use 7 heavy-duty floor bolts for securing mudroom entryway benches as a reference for anchoring any tall, heavy unit—even in the kitchen. Without that bottom-up support, the top of the cabinet will eventually pull away from the wall.
Will those heavy-duty slides actually save your pantry if the floor is sloped?
The short answer is no. If your floor isn’t level, your slides will never be truly parallel in three-dimensional space. According to the Architectural Woodwork Institute (AWI) standards, a cabinet unit must be level within 1/8 of an inch over a 10-foot span to maintain the integrity of mechanical hardware. If you’re off by more than that, you’re going to face issues with why your vanity plumbing is leaking into the cabinet base because the entire carcass is twisting. The ‘Oops’ factor here is assuming the floor is flat just because the house is new. I always suggest using the scribing hack for fitting vanities against out-of-plumb walls to ensure the cabinet sits perfectly vertical. Another nuance I’ve discovered is the trap of using wood shims behind the slides. While common, wood shims shrink and expand with the seasons. In a kitchen where humidity fluctuates, those shims change thickness and throw off the tight tolerances of high-end hardware. I switched to using plastic U-shaped shims years ago, and I haven’t had a callback for a sticking drawer since. Have you ever fallen into the trap of over-tightening a screw only to hear that dreaded crack? Let me know in the comments; I’d love to hear your ‘lesson learned’ stories.
I’ve spent thousands of hours in dusty kitchens, and if there’s one thing I’ve learned, it’s that a $200 set of slides is only as good as the $10 tool you used to measure them. I don’t go anywhere without my digital angle finder and a self-centering drill bit. If you’re not using a Vix bit for your hinges and slides, you’re playing a dangerous game with your cabinet’s alignment from day one. When you’re dealing with advanced projects like the internal ribbing secret for long desktop spans, the margin for error is razor-thin. I remember a client who tried to DIY a heavy-duty pantry and used standard drywall screws; six months later, the whole unit was sagging because those screws have zero shear strength. You need to use proper structural fasteners if you want these mechanical systems to last under the weight of a full grocery haul. For those working in tricky older homes, the scribing tool for cabinets against textured plaster walls is an absolute lifesaver for ensuring a flush fit that doesn’t put unnecessary torque on the hardware.
Stop Guessing with Professional Grade Measuring Tools
The biggest mistake I see is ‘eyeballing’ the vertical level. I use a 3-plane green beam laser for every single install because it shows me exactly where the cabinet box is twisting before I ever drive a screw. This level of precision is exactly what I discuss in the expert guide to flawless vanity installation tricks tips. If your pantry is even a fraction of a degree off-plumb, gravity will eventually win, pulling the slides out of parallel. According to technical documentation from Accuride for their 9301 heavy-duty series, the slide requires a precise side clearance of 0.75 inches with a tolerance of only +0.030 inches to maintain its full 500-lb load rating. Anything wider or narrower, and the internal ball-bearing retainers will eventually deform, leading to that ‘gritty’ feeling when you pull the drawer. To fight this, I always integrate 7 moisture barriers for vanities in high humidity bathrooms even in kitchen settings, as humidity can cause the wood to swell and pinch the rails.
How do I keep my heavy-duty storage running smoothly for a decade?
Maintenance isn’t about more grease; it’s about cleanliness. Every six months, I tell my clients to take a vacuum to the slide tracks. Flour, salt, and dust act like sandpaper on the nylon rollers. Once the tracks are clean, a dry PTFE spray—not WD-40—is the only lubricant that won’t attract more gunk. You also need to keep an eye on the hinges of the surrounding cabinetry; you’ll often find why your mudroom locker doors won’t close and the hinge shift is actually caused by the same house-settling issues that throw off your pantry. Checking the tightness of the mounting screws annually is vital. I’ve seen innovative storage solutions to transform your bathroom fail simply because someone ignored a slightly loose bracket for a year. I predict that the future of this niche lies in ‘smart’ hardware—slides with integrated sensors that can alert your smartphone if the drawer becomes misaligned or if the weight limit is being exceeded. We are already seeing carbon-fiber composites entering the high-end market to provide stiffness without the thermal expansion issues of steel. I strongly suggest you try the ‘loosen-and-slide’ trick I mentioned earlier with your rear brackets; it’s the single fastest way to identify a bind without tearing the whole cabinet apart.
Hard-Won Truths from a Decade in the Pantry
I’ve learned the hard way that more screws often lead to more problems; over-torquing a mounting bracket can actually bow the side panel of your cabinet, which is a common reason why your integrated pantry pull-out is catching even after you’ve ‘fixed’ it. Another lightbulb moment was realizing that the sound of the drawer tells the whole story. A rhythmic click usually means a loose ball bearing, while a constant grind is almost always a sign that the cabinet is out of square. I’ve found that the best way to stop drawer bind on heavy pantry pull-outs isn’t to push harder, but to back the screws off a quarter turn and let the hardware find its natural center. If you’re tackling multiple rooms, these same mechanical principles apply to creative built-ins for seamless storage and home aesthetics across your entire house.
The Gear I Actually Use Every Day
To get professional results, you don’t need a warehouse of tools, but you do need the right ones. I never start a pantry job without a self-centering Vix bit; it ensures every screw is perfectly centered in the mounting hole, preventing the hardware from shifting later. I also swear by plastic U-shaped shims because they won’t rot or compress like cedar. For those interested in expanding their skills, my expert guide to flawless vanity installation tricks tips covers the precision tools needed for high-moisture environments. Finally, always keep a can of dry PTFE spray on hand—it’s the secret to keeping built-in storage ideas to declutter and enhance your home functioning like new for years without attracting kitchen grease.
Reclaiming Your Kitchen’s Peace and Quiet
Fixing a stubborn pantry drawer is about more than just convenience; it’s about removing a daily friction point from your life. When your kitchen functions smoothly, the whole home feels more organized and calm. Don’t be intimidated by the heavy-duty hardware; once you master the parallel rail geometry, everything else falls into place. You’ve got this, and your pasta boxes will thank you. Have you ever heard that gut-wrenching ‘crack’ while tightening a screw into a custom cabinet? Let me know in the comments below!