

Ever set up your garage workbench, feeling proud of your DIY skills, only to have it wobble like a jello mold the very next day? I remember the frustration vividly—thinking I’d nailed the installation, only to realize it was wobbling whenever I hammered something down or placed a heavy tool. That lightbulb moment hit me hard: I hadn’t secured it properly, and my quick fix was only temporary.
Wobbly workbenches aren’t just an annoyance; they can be downright dangerous and hinder your productivity. Imagine trying to assemble, repair, or even just organize your tools on a shaky surface—it’s like trying to work on a trampoline. Over time, this instability can cause damage to the workbench itself or even lead to injuries if a heavy tool or part falls.
But don’t worry. Today, I’ll share the proven bolt-down strategies that transformed my shaky setup into a solid, reliable work area. These tips are easy to implement and save you from future headaches—trust me, I’ve been there.
Why Your Garage Workbench Wobbles and How to Fix It
Before jumping into the fix, it’s essential to understand why many workbenches wobble right after installation. Mostly, it’s because they’re not anchored securely into the floor or the wall, especially if they’re placed on uneven surfaces. A common mistake I made early on was assuming that screwing the legs into the frame was enough. Turns out, without additional stabilization, that’s just not the case—especially if the floor isn’t perfectly level.
Proper anchoring methods make all the difference, and there are several proven techniques I wish I’d known sooner. For example, using toggle bolts or concrete anchors can dramatically improve stability. Not only do they prevent the wobbling, but they also increase safety, especially when dealing with heavy or sharp tools.
Have you experienced the frustration of a wobbly workbench? If yes, stay tuned. We’ll go over step-by-step instructions to bolt down your bench securely, ensuring it stays put no matter how much you bang, drill, or hammer on it. When I finally applied these strategies, I was able to focus on my projects instead of fighting a shaky surface.
And if you’re unsure whether your current setup is safe, I highly recommend checking out this expert guide to [flawless vanity installation tricks](https://customcabinetrypro.com/expert-guide-to-flawless-vanity-installation-tricks-tips), which, although they focus on vanities, shares many insights applicable to workbenches and other built-ins.
Now, let’s dive into specific fixes that will give your garage workbench the stability it needs—no more wobbling, just reliable workspace at your command.
Choose the Right Anchors for Your Floor
Start by selecting the appropriate anchors based on your garage’s flooring material. For concrete floors, use wedge anchors or sleeve anchors, which function like a strong handshake—firm and reliable. I once tried to bolt down my workbench with regular screws on my uneven concrete, but it wobbled again within days. Switched to sleeve anchors, and the stability was instant.
Mark Precise Placement Points
Use a tape measure and a pencil to mark where each bolt will go through the workbench’s base. Imagine your workbench as a ship; these marks are your anchor points that keep it from drifting. I made the mistake of eyeballing the placement, which caused uneven pressure, so I started marking with a level and ruler for accuracy.
Drill Properly and Deeply
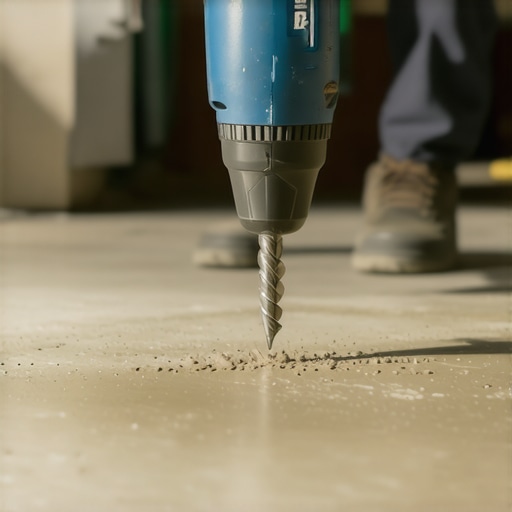
Set your drill to the correct size bit—usually slightly smaller than the bolt diameter. Drill straight down to the depth indicated by the anchor’s specifications, like digging a trench for a tree’s roots. In my first attempt, the holes weren’t deep enough, causing the anchors to be loose and wobble. After adjusting to the right depth, I experienced a noticeable difference in stability.
Insert Anchors and Secure Bolts
Insert the anchors into the drilled holes, ensuring they sit flush with the surface. If you’re using toggle bolts, expand their wings inside the hole, similar to opening an umbrella inside a narrow space. Tighten the nuts gradually, tightening each bolt a little at a time to distribute pressure evenly. My initial uneven tightening created a slight tilt, but once I tightened diagonally, everything sat perfectly stable.
Double-Check Stability and Adjust
Gently shake the workbench to test for wobbling. If it still feels unsteady, ensure all bolts are tightened fully and that the anchors are seated properly. Sometimes, adjusting the bolt tightness by a few turns can drastically improve stability. I learned this after a quick read from this guide.
Additional Tips for Uneven Surfaces
If your garage floor isn’t level, consider using shims beneath the workbench’s feet before bolting it down. Think of shims as tiny puzzle pieces that fill gaps, ensuring the workbench sits flat and firm. My first setup wobbled on the uneven floor until I added shims, which transformed the wobble into rock-solid stability.
 When it comes to installing built-in shelves, vanities, or storage solutions, many homeowners rely on common advice that seems universally accepted. However, these popular beliefs often overlook critical nuances, leading to incomplete results or future headaches.
For example, a frequent misconception is that simply screwing panels into place guarantees long-term stability. While straightforward, this approach can ignore the importance of internal reinforcement and proper anchoring techniques. In my experience, neglecting these details results in sagging shelves or wobbling vanities that undermine your entire project.
Another widespread myth is that choosing decorative hardware over structural support improves the aesthetic. In reality, some high-end finishes can mask underlying stability issues. Advanced techniques, like internal steel bracing or hidden ledger supports, are often necessary to achieve both beauty and durability, especially in heavier constructions.
Let’s address a common trap: assuming that drywall anchors alone suffice for mounting heavy built-ins. This oversight often leads to failures over time, particularly if the anchors aren’t rated for the load or if the mounting surface isn’t solid. Experts recommend combining anchors with internal framing or steel studs for secure, long-lasting installations. For detailed strategies, check this step-by-step guide.
At an expert level, understanding load distribution is crucial. For instance, supporting a large wall-mounted vanity requires calculations of weight and forces, and sometimes the integration of steel brackets or reinforced framing, rather than relying solely on surface-mounted fasteners. Research even shows that proper internal support prolongs the life of your installation—be sure to review the expert tips here.
Beware the common mistake of insufficient planning before installation. Skipping precise measurements and ignoring uneven walls can cause gaps, tilting, or instability. Advanced installers often use laser levels and internal shims to ensure perfect alignment, preventing later adjustments and repairs.
In conclusion, diving beyond surface-level advice and understanding the underlying mechanics and nuances of built-ins and vanities can significantly improve your results and longevity. Whether it’s internal reinforcement, correct anchoring, or load calculations, these details make the difference between a fleeting fix and a permanent, stylish solution.
Have you ever fallen into this trap? Let me know in the comments, and share your own tips or lessons learned from overcoming these common pitfalls.Maintaining durable and flawless built-in installations requires more than just good planning—it’s about having the right tools and methods at your disposal. Personally, I rely on a combination of precision hardware and professional-grade equipment that ensures every project withstands time and use, especially when dealing with intricate storage solutions or custom vanities. For example, I swear by variable-speed cordless drills, specifically models like the Milwaukee M18, which offer excellent torque control—I use this for drilling through stubborn materials or creating precise pilot holes. Pairing that with a quality stud finder, like the Zircon MultiScanner i520, helps me locate internal studs or steel supports, reducing guesswork and avoiding costly errors. It’s critical to select the right anchors too; for heavy built-ins, I favor toggle bolts and steel framing anchors that can support substantial weight, especially on uneven surfaces, as detailed in
https://customcabinetrypro.com/the-internal-steel-rib-move-for-massive-double-sink-vanities-2. Regular calibration of these tools and using laser levels for alignment are game-changers, making sure everything fits perfectly and avoids future sagging or shifting. In the future, I predict that smart tools—like app-connected laser levels or IoT-enabled drills—will become standard, streamlining the process and reducing setup time even further. How do I maintain my tools over time? I keep them meticulously clean, store them in dedicated cases to prevent damage, and routinely replace worn bits and batteries to ensure optimal performance. This proactive approach not only prolongs the lifespan of my equipment but also safeguards the quality of my installations. Don’t hesitate to try upgrading to a professional-grade drill or a digital stud finder—these small investments can significantly improve your results and reduce rework. Remember, choosing the right tools isn’t just about convenience; it’s about making sure your built-ins stand the test of time and daily use.
Lessons That Changed How I Approach Built-Ins Forever
One of the most eye-opening lessons I learned was the importance of internal reinforcement. Initially, I believed that surface fastening was enough, but I soon realized that behind the sleek facade, sturdy internal supports make all the difference. Incorporating steel brackets and hidden braces transformed my installations from shaky to rock-solid—something I now recommend every DIYer prioritize.
Another revelation was the underestimated value of precise measurements and planning. Rushing into a project without detailed plans often led to gaps and misalignments, which compromised stability and aesthetic. Taking the time to measure meticulously and mark anchor points accurately, like I do before drilling, saves time and headaches in the long run.
Lastly, understanding the subtle influence of uneven surfaces on your installation is crucial. Using shims and levelers might seem simple, but these small adjustments can prevent future wobbling or cracking. My experience with uneven floors taught me that acknowledging and adapting to surface irregularities ensures your built-ins stay perfect over time.
Tools and Inspirations That Upped My Built-In Game
For those serious about creating durable, professional-quality built-ins, I rely on a few key tools. A precise laser level, like the laser level guide recommends, takes the guesswork out of alignment. Pairing it with high-quality anchors—such as sleeve anchors for concrete—and internal steel supports, I’ve built fixtures that resist wobbling and damage.
The book