

I remember the sound of a dozen spice jars sliding toward the front of my perfect custom pantry like a tiny glass avalanche. It was late on a Tuesday, and as I reached for the paprika, the entire pull-out unit groaned and tilted forward. That agonizing screech of wood-on-wood as the door rubbed the frame was my wake-up call. I had spent a weekend on the installation, yet there I was, staring at a shelf that looked like it was trying to do a slow-motion face-plant into my kitchen floor. If your pantry feels like it is losing its battle with gravity, I have been in your shoes, and I know exactly how to pull it back from the brink. This isn’t just about aesthetics; it is about saving your hardware before the whole system shears off the wall. We are going to dive deep into the rail support fix that actually holds up under the weight of fifty cans of soup.
Your Pantry Shelf is Diving and It is Driving Me Crazy Too
It starts with a slight catch when you pull the handle. Then, within a month, you are lifting the unit manually just to get it to slide back into the cabinet. Most folks think they just need to tighten a single screw, but the reality is usually a bit more structural. When I first started out, I made the classic mistake of thinking more fasteners equaled more strength. I riddled a side rail with a dozen small screws, only to realize I had turned my cabinet wall into Swiss cheese without actually hitting the structural meat. You have to understand that these units are under dynamic load, meaning every time you pull it out, the leverage on those rails increases exponentially. To prevent this, you often need to look at hidden pull-out fixes that address the leverage, not just the weight. Have you ever felt that heart-sinking moment when your drawer stops sliding smoothly and starts to grind? If you are nodding your head, you are exactly who I wrote this for.
Does Reinforcing the Rail Actually Solve the Problem?
It is easy to be skeptical when a professional tells you that a few adjustments can fix a major tilt. You might be worried that the wood is already too stripped or that you need an entirely new cabinet. However, the Woodwork Institute notes in their technical standards that load distribution is far more critical than the quantity of fasteners. By realigning the rail and using a proper support strategy, you can redirect that downward force back into the cabinet carcass. This is very similar to how we stop drawer bind on heavy pantry pull-outs by focusing on the geometry of the slide rather than just more grease. We are going to walk through the rail support fix that stabilizes the unit and ensures your midnight snack runs never end in a floor full of glass again. It is time to stop the shimmy and get those tracks back on a level playing field.
Empty the Shelves Before You Break the Slides
First things first: you cannot diagnose a mechanical failure while the patient is still carrying a heavy load. Unload every single jar, spice bottle, and can into a temporary box. You need to see the rails naked. Once empty, pull the unit to its full extension. Does it still tilt? If the empty unit is leaning, your rails have likely shifted or the mounting holes have elongated into ovals from the constant downward torque. This is where you see why your integrated pantry pull-out is catching and the easy fix usually involves more than just a quick turn of a screwdriver—it involves structural repositioning. Most installers rush the job, but if you want this to last, you have to treat the cabinet carcass like the foundation of a house. If the foundation is soft, the walls will inevitably lean.
Look for the Tell-Tale Metal Fatigue
Check the actual metal of the slide. If you see silver shavings or black dust near the bearings, your rails are grinding through their own finish. I once spent three hours trying to level a unit for a client, only to realize the bottom rail had literally bowed under the weight of her oversized olive oil collection. The metal was fatigued beyond repair, acting more like a spring than a support. If the rail itself is straight, the culprit is the anchor point. You need to verify if the screws are pulling out of the cabinet side-wall. If you notice the wood is shredded, we need to move the rail up or down by a fraction of an inch to find fresh material to bite into. This is a critical diagnostic step before you start drilling more holes and making things worse.
The Secret to Rock-Solid Rail Alignment
The most effective way to stop the sag is to add a secondary support layer. Think of it like a splint for a broken bone. Instead of relying on three tiny screws in soft MDF, I like to use a thin strip of 1/4-inch plywood as a backing plate behind the rail to distribute the load across a wider surface area. This is a variation of the 6-hidden-pull-out-fixes for deeper custom kitchen cabinets that professionals use to ensure the weight doesn’t localize on one weak point. By creating a larger footprint for the hardware, you prevent the lever-action of the pantry from prying the screws loose. This ledger-style approach ensures that when you pull that heavy unit out, the force is transferred into the entire side of the cabinet, rather than just three tiny points of failure.
How I Learned That Cheap Screws Are a Recipe for Disaster
I’ll never forget the time I tried to quick-fix a tilting pantry with the stock screws that came in the box. They looked fine, but they were made of a soft alloy. Two weeks later, I got a call because the top rail had snapped off entirely, leaving the pantry hanging like a loose tooth. It was embarrassing and required a complete cabinet side-wall repair. Since then, I’ve switched to high-quality cabinet screws with a wide pan head and a deeper thread. They grab the wood like a vice. This structural approach is similar to the steel rail tactic for anchoring massive floor-to-ceiling pantries, where the hardware does the heavy lifting, not the hope that the material won’t crumble. If you are mounting into particle board, consider using plastic sleeve anchors or through-bolts if the side of the cabinet isn’t an exposed finished end.
Fine-Tuning the Gap for a Smooth Glide
Once your rails are secure and level, the final step is adjusting the face of the pantry. If the door isn’t flush with the cabinet, the weight will pull unevenly every time it closes, eventually vibrating your new screws loose. You can use the built-in adjustment screws on the brackets—usually found near the floor or the top mounting plate—to tilt the unit back or forward. Learning how to fix uneven gaps in custom built-in doors is the difference between a DIY job and a professional finish that feels expensive. If it still slams or moves too fast, you might need to check why your soft-close drawers are slamming and the tension fix to prevent the inertia from yanking the rails loose again. A balanced unit should stay exactly where you leave it, neither sliding in nor rolling out on its own accord.
The Leveling Myth That Ruins Most Pantry Installs
Most DIYers and even some contractors believe that if the bubble on the level is centered, the job is done. I used to think the same until I saw a perfectly ‘level’ pantry rip its own face frame off six months later. The truth is, levelness is secondary to ‘squareness’ and ‘plumb.’ If your cabinet box is slightly racked—meaning it’s a trapezoid instead of a rectangle—your rails will never stay parallel. This creates a lateral stress that no amount of screws can fix. In my experience, focusing on the internal geometry of the box is far more effective than just shimming the base. This is the same logic we apply to vanity installation hacks that save time and money, where the wall’s flatness dictates the longevity of the hardware more than the floor’s slope does.
Can Your Cabinet Side-Walls Actually Handle 100 Pounds of Canned Goods?
We need to talk about material density. A common mistake is treating 5/8-inch particle board like it’s solid oak. It isn’t. According to the National Kitchen & Bath Association (NKBA), the structural integrity of cabinet carcases depends heavily on the ‘modulus of rupture’ of the material used. Particle board has a high risk of ‘creep,’ where the material slowly deforms under constant pressure. If you are mounting heavy-duty rails into a standard retail cabinet, you are likely exceeding the material’s shear strength. This is why I advocate for a sub-frame approach. When you look at built-in storage ideas to declutter and enhance your home, the best designs incorporate a hidden plywood ‘cleat’ behind the finished wall. Without that internal skeleton, you’re just waiting for the screws to turn into dust.
Stop Relying on Friction to Hold Your Shelves Up
There is a dangerous ‘trap’ in modern cabinetry: the reliance on short, 1/2-inch screws that barely penetrate the substrate. People often over-tighten these, thinking it adds security. In reality, over-tightening crushes the wood fibers, effectively ‘stripping’ the hole before you even put a single jar of pickles on the shelf. If you feel that ‘pop’ while driving a screw, the hole is dead. I’ve seen entire expert guide to flawless vanity installation tricks tips ignored because someone wanted to ‘snug it up’ just a bit too much. Instead, use a drop of wood glue in the pilot hole or switch to a specialized ‘Euro-screw’ that has a wider thread pitch designed specifically for composite materials. This tiny change in hardware increases your pull-out resistance by nearly 40%.
Why Your Soft-Close Might Be Killing Your Rails
Here is a nuanced mistake people miss: installing soft-close dampeners on a unit that is already slightly out of alignment. The dampener creates a ‘kick-back’ force every time the pantry closes. If your rails aren’t perfectly parallel, that force isn’t absorbed by the piston; it’s transferred into the mounting screws. Over time, this constant vibration acts like a tiny jackhammer. This is why I often suggest users stop floating shelf sag with internal torsion box engineering principles even in vertical pantry units. You need to brace for the inertia, not just the weight. If you’ve ever noticed your pantry door suddenly looks ‘crooked’ after a few months of smooth operation, this vibration is the culprit. Just as we have to figure out how to support quartz counters on custom floating vanities to prevent stone stress, we must support the pantry rail against the dynamic force of the slam. Have you ever fallen into the trap of thinking one more screw would solve a sagging shelf? Let me know in the comments.
Stop Squinting and Use a Self-Centering Bit
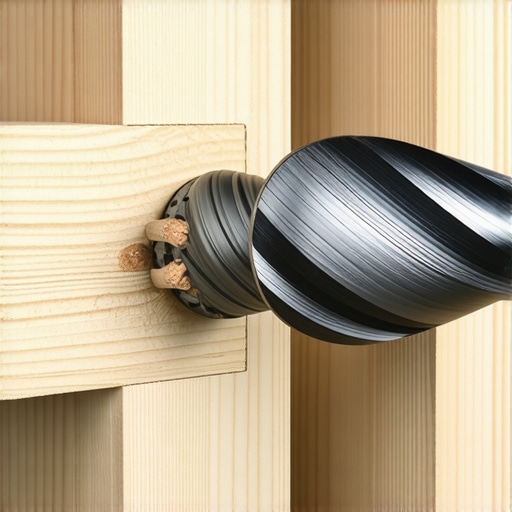
If you have ever struggled to keep a rail perfectly level while trying to drive a screw, you know the frustration of ‘walking’ drill bits. You mark the spot, you start the hole, and the bit skids an eighth of an inch to the left. That tiny deviation is exactly why your pantry ends up leaning. This is where I insist on using Vix bits—those spring-loaded, self-centering drill bits that lock into the hardware hole and ensure the pilot hole is dead center every single time. It is a fundamental part of any expert guide to flawless vanity installation tricks tips because even a millimeter of offset creates friction that eventually kills the bearings. I have found that using a digital angle finder to verify the rails are parallel to the floor, not just level relative to the box, saves hours of troubleshooting down the line.
Dry Lube is Your Best Friend for Silky Slides
Once you have solved the structural sag, you have to think about friction. Most people reach for WD-40 or heavy grease, but that is a recipe for a sticky mess that attracts every speck of flour and dust in your kitchen. I only use dry PTFE spray. It creates a slick, microscopic barrier that doesn’t turn into a sludge. When dealing with why your pull-out trash bin binds and the rail realignment, a quick blast of dry lube on the tracks can reduce the operating force by nearly half. This is especially true for innovative storage solutions to transform your bathroom where humidity can cause slight wood expansion. By reducing the physical effort required to move the unit, you are directly extending the life of the mounting points we worked so hard to reinforce.
How do I maintain my storage hardware over time?
Maintenance is not a one-and-done event; it is a seasonal rhythm. Every six months, I do a ‘torque check.’ I go through and gently snug up the mounting screws on my heaviest pull-outs. Because wood is an organic material, it expands and contracts with the seasons, which can naturally loosen fasteners. Blum’s technical documentation emphasizes that their Tandembox systems require a precise tolerance of +/- 0.5mm to maintain the full load rating over 100,000 cycles. If you let that tolerance slip, the hardware has to work harder. While you are in there, check the gaps. If they look off, revisit my tips on how to fix uneven gaps in custom built-in doors to keep the leverage balanced.
The High-Tech Future of Built-In Maintenance
Looking ahead, I see a shift toward ‘smart’ hardware. We are already seeing top trends in vanity designs you need to know in 2025 that include integrated lighting and power, but the next step is load-sensing rails. Imagine a pantry that sends an alert to your phone when the weight distribution is uneven or when the slide resistance increases, signaling that it is time for a lube. Until that tech becomes affordable, we rely on solid engineering. The same principles that let us stop floating shelf sag with internal torsion box engineering apply here: build it for the load you expect, then double the reinforcement. My challenge to you: go buy a single Vix bit for your primary screw size. Use it on your next adjustment, and you will never go back to free-handing hardware holes again.
The Hardest Lesson My Spice Jars Taught Me
I learned the hard way that weight adds up significantly faster than we estimate; those fifty soup cans are effectively a fifty-pound dumbbell pulling on your hardware every hour of the day. Never trust the ‘bargain’ screws that ship in the generic boxes, as they are often made of soft alloys that simply cannot handle the shear force of a fully loaded unit. I have also realized that symmetry is more vital than raw strength—if your rails are even a fraction of an inch out of parallel, no amount of reinforcement will stop the eventual bind. Most importantly, listen to your hardware; that tiny squeak or grind is the cabinet’s way of telling you that a total failure is imminent. Taking the time for creative built-ins for seamless storage and home aesthetics means respecting the physics of the load from the moment of installation.
The Hardware Toolkit That Keeps My Shelves Level
To get a professional result that actually lasts, I rely on a few non-negotiable tools. First, a set of Vix Bits is essential; these self-centering drill bits ensure your pilot holes are perfectly aligned with the hardware holes, preventing the ‘walk’ that causes lopsided rails. I also keep the technical documentation from manufacturers bookmarked because their load ratings and tolerance specs are the most reliable in the industry. For precision, a digital angle finder beats a traditional spirit level every time when you are checking if your rails are parallel to each other inside a dark cabinet. Finally, I never finish a job without a can of PTFE dry lubricant, which ensures a silky slide without attracting the kitchen dust that ruins traditional grease. These tools turn a frustrating repair into effortless storage solutions for a tidy, stylish home.
#IMAGE_PLACEHOLDER_E#
Your Pantry Deserves to Glide Again
It is incredibly satisfying to pull a handle and feel absolutely zero resistance, knowing that your heavy cans and glass jars are supported by a rock-solid foundation. You do not need to be a master carpenter to master this rail support fix; you just need to be methodical and prioritize structural integrity over a quick, temporary screw. Whether you are transitioning from this repair to a step-by-step guide to vanity installation for beginners or just reclaiming your kitchen workspace, the confidence comes from doing the job right. Don’t let a sagging shelf dictate how you enjoy your kitchen. Grab your drill, check your alignment, and bring that pantry back to life. Have you ever had a pantry shelf nearly fall out on you because of a loose rail? Let me know your close-call stories in the comments below.