

I’ll never forget the sound. It wasn’t a snap, but a slow, agonizing groan of drywall being compressed by a bench that thought it was a slide. I had spent six hours the day before meticulously leveling a white oak floating seat in my own mudroom, only to find it bowing toward the floor by breakfast. It’s embarrassing. You want that sleek, airy look you see in the design magazines, but gravity doesn’t care about your Pinterest board. If you’ve ever sat down and felt that subtle, heart-stopping ‘give’ in your furniture, you know exactly what I’m talking about. We’re going to fix that today.
Gravity Always Wins Unless You Fight Back
The trend of floating furniture is everywhere in 2025, from minimalist bathrooms to sleek entryways. But here’s the cold, hard truth: most standard mounting kits are woefully unprepared for the leverage a human body exerts on a cantilevered seat. I learned this the hard way during my first vanity installation where I relied on standard toggle bolts. I thought they were enough. They weren’t. Within weeks, the unit began to sag, much like many of the floating vanities that dip over time. The problem is leverage. A seat protruding 18 inches from the wall acts like a giant crowbar on your wall studs. If you aren’t biting into the structural heart of your home, you’re just waiting for a collapse. I once had to repair a wall where a client tried to mount a heavy bench using only plastic butterfly anchors—a mistake that cost them a whole Saturday and several sheets of new drywall.
Are these hidden anchors actually strong enough?
It’s a fair question. You’re likely worried that drilling more holes or using ‘stealth’ hardware is just a temporary band-aid. However, structural integrity isn’t about the size of the screw, but the distribution of the load. According to the Architectural Woodwork Institute (AWI), cantilevered supports must be engineered to withstand not just the weight of the material, but the dynamic load of a person sitting down, which can double the pressure instantly. By using a hidden ledger trick or specialized internal bracing, we can transfer that energy back into the framing of the house. We aren’t just ‘hanging’ a seat; we are making it part of the wall. If you want to avoid the common pitfalls of flawless vanity installation, you have to look behind the drywall. Whether you are dealing with traditional timber or learning how to secure to thin metal studs, the principles of physics remain the same. Today, I’m showing you four ways to bypass those frustrations using steel bracket hacks that stay completely out of sight. Have you ever felt that terrifying moment when a seat moves just a fraction of an inch under you? Let me know in the comments—I’ve been there too, and it’s exactly why we’re going to over-engineer this the right way.The first step to a seat that doesn’t sag is finding the actual ‘bones’ of your wall. Think of your floating bench like a diving board. If the base isn’t anchored into something solid, that board is going into the pool with you. In your mudroom, that ‘something solid’ is the structural studs. I once worked on a renovation in an old Victorian where the studs were spaced as if the original builder was just guessing. I tried to rush the job and didn’t use a continuous back-support cleat. I sat on it for a test, felt a sickening pop, and watched my hard work tilt three degrees downward. It was humiliating. Now, I never start without a hidden ledger trick to create a foundation before the bench even touches the wall.
The Skeleton Behind a Rock-Solid Seat
To get that airy, floating look without the structural failure, you need to distribute the weight across multiple points of contact. Instead of relying on a few screws, we use a ‘cleat’ or ‘ledger’ system. This is a strip of high-quality plywood or solid timber screwed into every single stud along the length of the bench. By doing this, you aren’t just asking two screws to hold a human being; you are enlisting the strength of the entire wall. This is a common tactic found in an expert guide to flawless vanity installation because it prevents the ‘hinge effect’ where the weight of the unit pulls the top away from the wall. 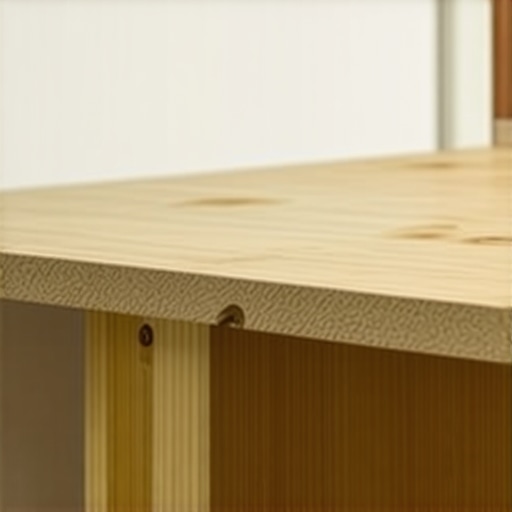
Don’t Trust the Anchors in the Box
Most hardware kits come with standard plastic anchors or small screws. Throw them away. When you are building something people sit on, you need structural lag bolts or heavy-duty GRK screws that bite at least two inches into the center of the stud. If you miss the center, the wood can split, and your support vanishes. I’ve found that how to stop mudroom bench rocking with a stealth ledger often comes down to this initial precision. If your wall is uneven, you’ll need to shim the ledger so it remains perfectly straight, otherwise, your bench will teeter like a seesaw.
Why Studs Aren’t Always Enough
In some modern builds, you might run into metal studs or 2x4s that are already overloaded with plumbing. In these cases, a simple cleat isn’t enough. You have to go internal. This involves opening the drywall and installing horizontal blocking—solid wood bridges between the studs—to create a massive surface area for your mounting hardware. It sounds like a lot of work, but it’s the difference between a bench that lasts twenty years and one that fails in twenty days. This level of preparation is similar to finding innovative storage solutions to transform your bathroom where heavy cabinetry requires extra bracing.
Adding Muscle with Steel Brackets
For those extra-deep benches or heavy stone tops, wood-on-wood contact might still flex. This is where you bring in the heavy hitters. I’ve started using the steel bracket hack for floating entryway benches which involves L-shaped structural steel supports hidden inside the bench itself. These brackets are bolted directly to the side of the studs. When you slide your wooden ‘sleeve’ or bench top over them, the steel handles the tension while the wood provides the beauty. It makes the seat feel like it’s part of the house’s foundation, rather than just an accessory hanging on the surface.Many DIY guides tell you that as long as you hit a stud, you’re golden. I’m here to tell you that’s a dangerous half-truth. In my twenty years of custom cabinetry, I’ve seen more ‘stud-mounted’ seats fail than I care to count. The problem isn’t usually the screw pulling out; it’s the drywall compressing. When you bolt a heavy seat or vanity to a wall, the bottom of the support bracket acts as a fulcrum, crushing the gypsum core of your drywall. Over time, that 1/8th of an inch of compression at the bottom translates to a two-inch dip at the front edge of your seat. If you want to know how to stop floating vanities from dipping with steel plates, you have to address the surface they rest on, not just the wood behind them.
The Torque Trap Most DIYers Ignore
Most people focus entirely on downward weight, but the real enemy is torque. A standard 18-inch deep bench creates massive rotational force. If you’re just using standard wood screws, the sheer stress can actually snap the heads off over time due to the micro-vibrations of people sitting and standing. I’ve transitioned to using the internal steel support for long floating desks even for smaller mudroom benches because steel doesn’t have a ‘memory’ for stress like wood does. Have you ever noticed your built-ins slowly pulling away from the wall after a few seasons? Have you ever fallen into this trap? Let me know in the comments—I’d love to hear how you handled it. 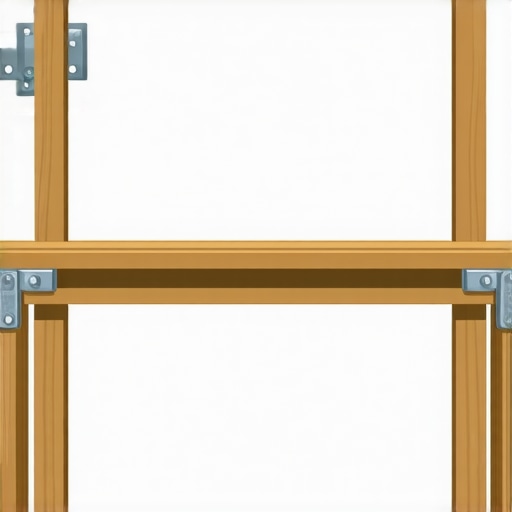
Why do some floating units still dip after a year?
It often comes down to moisture and material fatigue. According to the National Kitchen & Bath Association (NKBA), structural supports must account for a deflection limit of L/360, but most home builders don’t account for the added weight of stone tops or heavy oak. If you are mounting a unit in a bathroom, you also have to stop cabinet doors from warping in humid bathrooms by ensuring your internal framing is sealed against moisture. Without that, the wood swells, the screws loosen, and gravity takes over. For those working with high-end finishes, I always recommend the hidden sub-frame move for supporting massive quartz top vanities. This involves a skeleton of steel or LVL timber hidden inside the ‘floating’ box.
The Myth of the Perfectly Straight Wall
Another nuance experts know that beginners miss is the ‘scribe.’ No wall is perfectly flat. If you bolt a perfectly straight bench to a bowed wall, you are either going to bend your bench or pull the studs out of alignment. I always use the scribing secret for perfect built-ins on rounded drywall corners to ensure the unit fits the architecture, rather than forcing the architecture to fit the unit. By taking the time to shave the back of your mounting cleat to match the wall’s imperfections, you create a 100% contact surface. This maximizes friction and stops the ‘wobble’ before it starts. If you’re ready to move beyond basic shelving and want something truly permanent, check out our expert guide to flawless vanity installation for more advanced framing secrets.
The Precision Gear You Actually Need
To pull off a floating installation that doesn’t groan when a guest sits down, you need more than just a basic drill. I have a rule: if the tool can’t measure within a thirty-second of an inch, it stays in the truck. For high-stakes jobs, I rely on a Stabila 24-inch magnetic level. Why? Because most cheap levels lose their calibration the moment they take a tumble. When you are performing the leveling trick for mudroom benches on tile, even a fraction of a degree off at the wall results in a noticeable tilt at the edge of the seat. I also ditch standard wood screws for GRK structural lag bolts. They have a built-in washer head and are heat-treated to prevent snapping under the immense shear force exerted by a cantilevered load. If you are serious about your build, you need an impact driver with high torque—not a standard drill—to sink those lags deep into the structural heart of the home without stripping the heads.
How do I keep my floating bench rock-solid over the years?
The biggest mistake people make is thinking ‘done is done.’ Wood is a living material; it breathes. According to the Forest Products Laboratory’s ‘Wood Handbook,’ wood can expand or contract significantly based on the relative humidity of your home. This movement can eventually loosen the bite of your anchors. Every six months, I recommend a ‘stress check.’ Simply place a heavy weight on the bench and look at the seam where the wood meets the wall. If you see even a hairline gap opening up, it’s time to tighten your internal supports. For units in bathrooms, I always apply the moisture barrier rule for cabinets on cold outer walls to prevent the back of the unit from rotting or warping, which is the number one cause of long-term structural failure. 
Beyond the Bench: Scaling Up to Massive Storage
Once you master the physics of a floating seat, you can apply these same ‘over-engineered’ principles to larger projects. I’m seeing a massive trend toward entire ‘floating rooms’ where desks, vanities, and even media centers don’t touch the floor. If you are moving toward innovative storage solutions to transform your bathroom, the goal is always to keep the floor clear to create the illusion of more space. However, as you scale up, the weight increases exponentially. You’ll need to ensure your drawer hardware can handle it, or you’ll end up learning how to stop heavy pantry drawers from jumping tracks the hard way. In the near future, I predict we will see more integrated carbon-fiber bracing used in residential cabinetry to allow for even longer spans without any visible support. For now, stick to steel and heavy-duty plywood. If you are feeling stuck on a complex layout, don’t hesitate to contact us for a professional perspective. I challenge you to try the sub-frame method on your next project; once you feel how solid a steel-reinforced seat is, you’ll never go back to simple wood cleats.
The One Mistake That Still Keeps Me Up at Night
When I look back at my early days in custom cabinetry, the lesson that sticks with me most isn’t about the wood—it’s about the ‘creep.’ Creep is the slow, imperceptible deformation of materials under constant stress. I once installed a beautiful maple bench that looked perfect on day one, but because I hadn’t accounted for the grain direction in my internal supports, it began to groan a year later. Now, I always perform a ‘pilot hole test.’ If my drill bit doesn’t pull out dark, dense shavings, I know that stud is soft or compromised, and I move my mounting point. Never assume a stud is solid just because your sensor beeps. I’ve also learned that the best way to handle massive weight is by using the internal torsion box move for long floating shelves, which distributes force much more efficiently than a solid piece of timber ever could.
The Only Tools I Trust to Hold My Weight
To achieve professional results, you have to move beyond the bargain bin at the hardware store. I personally swear by GRK Structural RSS screws; they have a built-in washer head that prevents the screw from pulling through the mounting cleat under high torque. For leveling, a laser level is non-negotiable for long spans, especially when you are considering built-in storage ideas to declutter and enhance your home. If you are just starting out, don’t be intimidated by the technical specs. You can always refer to a step-by-step guide to vanity installation for beginners to get the fundamentals of plumbing and wall-mounting down before you tackle a 200-pound floating seat.
Your Next Step Toward a Floating Masterpiece
Embracing the world of floating furniture is about more than just a modern look; it is about reclaiming your floor space and creating a sense of calm in your home. Whether you are building a mudroom seat or a sleek bathroom unit, remember that the prep work behind the wall is what makes the magic happen in front of it. If you run into a unique structural challenge that this guide didn’t cover, feel free to contact us for a consultation. You have the tools, the physics, and the plan—now it is time to build something that lasts. Have you ever encountered a wall that was so out-of-plumb it made your installation a nightmare? Let me know in the comments below!