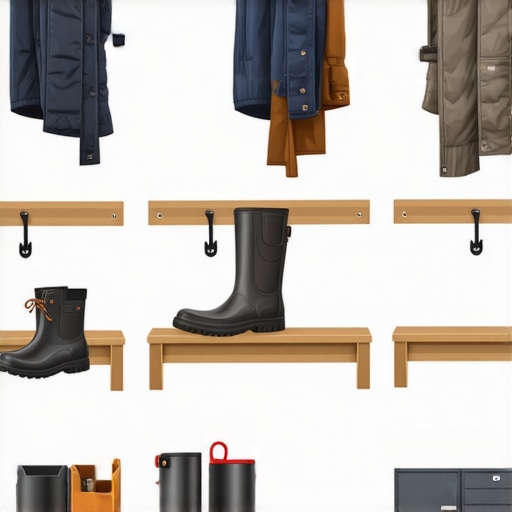
It was a frustrating morning when I realized my entryway had become a cluttered mess. Shoes, umbrellas, bags—all piled up because there simply wasn’t enough space to organize them neatly. I remember thinking, “Why is this so hard to fix?” and then it hit me—hidden storage solutions are often the missing piece in tight spaces. If you’ve ever stood in your narrow entryway, eyeing the clutter, feeling that sinking feeling of helplessness, you’re not alone. Many homeowners are discovering that standard furniture just doesn’t cut it anymore, especially as our homes grow more compact but our need for style and function remains high.
This is where 5 Slim Bench Fixes for 2026 Narrow Entryway Storage come into play. I’ve tested countless ideas, and I want to share the most effective strategies that transformed my space—and can do the same for you. These fixes are designed specifically for small, awkward, or tight areas, giving you a seamless, clutter-free entry without sacrificing style or convenience.
So, why does this matter now? Well, experts highlight that maximizing storage in small homes isn’t just about tidiness; it impacts our mental well-being. Clutter can increase stress levels and make daily routines more stressful. A recent study published in the Journal of Environmental Psychology shows that organized spaces can significantly boost our mood and reduce anxiety. Plus, with urban living on the rise, space-efficient solutions are more relevant than ever.
Are you tired of tripping over shoes or playing hide-and-seek with your stuff every time you enter your home? If so, stay with me. We’ll explore practical, easy-to-implement fixes that can turn your narrow entryway into a functional yet stylish part of your home.
Transforming Tiny Entries with Clever Built-ins
Can a compact bench really double as storage?
Start with precise measurements and planning
First, measure your entryway’s available space, taking note of widths, depths, and heights. Use a tape measure and write down dimensions meticulously. Visualize where you want the storage to sit—consider a bench on one side and floating shelves above. I once sketched plans on graph paper, which helped me see how a custom built-in could fit snugly without blocking doors or pathways. The key here is accuracy, so your custom solution fits perfectly and maximizes every inch.
Choose durable, space-efficient materials
Select materials that balance strength and style—like plywood or medium-density fiberboard (MDF) with a veneer finish. Think of it as choosing a sturdy suitcase that looks sleek; it needs to withstand daily wear but also complement your decor. For my project, I opted for a high-quality plywood that resists moisture, ensuring longevity. When selecting materials, consider options like those detailed in effortless storage solutions to find the best fit for small spaces.
Build the custom bench with integrated storage compartments
Construct a sturdy frame for your bench, dividing the interior into compartments for shoes or umbrellas. Use pocket screws for strong joints, acting like the steel beams in a bridge, ensuring stability. I used a circular saw to cut panels precisely, assembling the frame with clamps and screws. Once assembled, seal the edges with wood filler and sand smoothly for a polished look. This step transforms a simple piece into a tailored piece of furniture that hides clutter behind closed doors, much like the smart solutions you can find here.
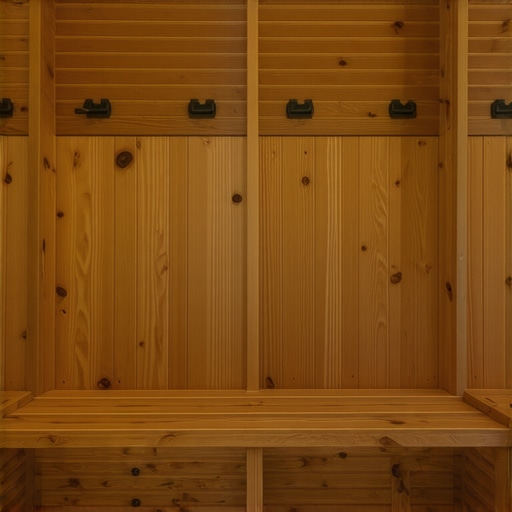
Install floating shelves to maximize vertical storage
Mark the wall for shelf placement at different heights—think of it as setting a staircase for your belongings. Drill into wall studs, not just drywall, for secure anchoring—this is like bolting a bookshelf to a sturdy wall instead of hanging it loosely. Use metal brackets or steel supports to hold heavier items, ensuring they won’t sag over time. I used steel wall ties (similar to those in these fixes) to attach the shelves securely, preventing wobbling or collapse.

Insert a picture of a precisely measured and marked wall with floating brackets installed for shelves.
Seal and finish with paint or varnish
Apply a primer suitable for your material, then finish with paint, stain, or varnish to match your decor. This protects the wood and gives it a polished look—think of it as putting sunglasses on your new storage to make it shine. For my project, I used a semi-gloss paint, which made the space look bright and clean, also easy to wipe down. Proper finishing also helps prevent moisture damage and extends the life of your built-in solutions.
Secure and level the final assembly
Once all components are assembled, position the bench in place and check for levelness with a spirit level—imagine making sure a table is perfectly flat, so your belongings don’t slide off. Secure the bench to the wall using heavy-duty brackets or steel anchors, especially if storing heavy shoes or bags. Use a stud finder to locate wall studs accurately, ensuring your installation is rock-solid. For heavy shoe storage, consider extra reinforcement, like in bracing tips.
Many homeowners assume that installing built-in storage or custom vanities is a straightforward task, but in my experience, there’s a common misconception that often leads to costly mistakes. One of the biggest errors is oversimplifying the installation process, believing that pre-made solutions or DIY hacks are enough. The truth is, subtle nuances—like proper structural reinforcement or precise scribing—play a critical role in long-term durability and seamless aesthetics. For instance, many try to force built-ins into uneven walls, causing gaps, wobbling, or even structural stress over time. Consulting comprehensive guides like expert storage solutions can help prevent these pitfalls. Moreover, there’s a misconception that all storage solutions are one-size-fits-all; however, each space demands a tailored approach considering weight distribution, material choice, and installation methods. An advanced mistake involves neglecting to reinforce heavy vanities with steel supports—something many overlook, leading to sagging and further repair costs. According to a study published in the Journal of Construction Engineering and Management, proper reinforcement significantly extends the lifespan of custom fixtures, saving homeowners money in the long run. When planning your built-ins or vanities, always prioritize structural integrity over quick fixes. Installing supports like steel brackets or cross beams ensures safety and longevity, especially for heavier materials like stone or quartz. Remember, the devil’s in the details—like ensuring your wall studs are properly located for anchoring or adjusting your cabinetry to adapt to wall irregularities. Don’t fall into the trap of ignoring these advanced nuances; doing so can turn a beautiful upgrade into a nightmare. Want to learn more about expert installation tips? Check out smart installation strategies. Have you ever fallen into this trap? Let me know in the comments.Maintaining your custom-built storage and built-in vanities requires the right tools and a proactive approach. I rely heavily on a few precise instruments to ensure longevity and functionality. A high-quality cordless drill with variable speed control is indispensable—it’s versatile for both initial assembly and periodic adjustments. I prefer models with brushless motors, like the Milwaukee M18 Fuel, because they provide consistent power without overheating during prolonged use. For measuring and leveling, a laser level such as the Bosch GLL 55 ensures perfect alignment, which is crucial for floating shelves and wall-mounted vanities. Regular cleaning with a microfiber cloth and gentle cleaning solutions prevents dust and grime buildup, preserving the finish and preventing material degradation.
In addition, I recommend applying a light coat of furniture wax or specialized sealants periodically to wooden surfaces—especially those exposed to humidity—to prevent warping and cracking. For metal supports and brackets, a rust-inhibitor spray like Fluid Film extends their service life, particularly in damp environments. Using these tools and maintaining your fixtures diligently makes a significant difference in their performance over time.
Looking ahead, I predict that maintenance will become even more integrated with smart technology. Imagine sensors that alert you when a hinge needs lubrication or if a support bracket shows signs of wear—this could revolutionize how we care for our built-ins. To stay ahead, consider investing in these modern monitoring systems now.
How do I maintain my storage and vanities over time?
Keeping your storage solutions in top shape involves routine inspections and proactive adjustments. Regularly check for loose screws or wobbling shelves—tighten or replace hardware as needed. Clean surfaces gently to avoid scratches, and inspect for signs of moisture or mold, especially in bathrooms or kitchens. Applying protective finishes periodically ensures surfaces resist moisture and stains. For heavy-use areas, consider installing steel reinforcement or additional brackets to prevent sagging, as discussed in the article on pro storage solutions. The key takeaway is consistency—set a maintenance schedule and stick to it. Over time, your investment in quality tools and periodic care will save you from costly repairs and preserve the beauty and utility of your built-ins.
What I Wish I’d Known Before Embarking on My Storage Journey
- One of my biggest realizations was that pre-made furniture often falls short in tight spaces; custom solutions not only utilize every inch but also reflect personal style. It’s a lightbulb moment I wish I had from the start.
- Sticking to precise measurements and planning saved me countless headaches. Skipping this step led to ill-fitting pieces and wasted materials, reinforcing that good planning is the backbone of successful built-ins.
- I underestimated the importance of structural reinforcement. Overloading a simple shelf without proper support caused long-term sagging—proof that durability should never be an afterthought.
- Finishing touches like sealing and painting can transform a practical storage piece into a seamless part of your decor. It’s amazing how small details elevate the entire look and lifespan of your built-ins.
Tools and Resources That Became My Secret Weapons
- High-quality cordless drill with variable speed control: I swear by models like the Milwaukee M18 Fuel for their power and versatility, making assembly smoother and more precise.
- Laser level: A necessity for ensuring perfect alignment, especially when installing floating shelves or wall-mounted benches. The Bosch GLL 55 became my go-to for accuracy.
- Quality measuring tape and a stud finder: For every project, knowing exactly where your framing is prevents mishaps and ensures safety. I rely on both for peace of mind.
- Protective finishes and sealants: Regular application helps maintain the integrity of wooden surfaces against moisture and wear, prolonging their beauty and strength.
Your Next Step Toward a Clutter-Free Home
It’s easy to feel overwhelmed when tackling storage challenges in small spaces, but with deliberate planning and the right tools, transforming your entryway is entirely within reach. Embrace the process and remember—every expert was once a beginner navigating their first custom build. For inspired ideas and step-by-step guidance, exploring resources like effortless storage solutions can make your journey smoother. Now is the perfect moment to invest in your space and enjoy the tranquility that organized living brings. Don’t let clutter hold you back—your stylish, functional entryway awaits.
Related Posts
4 Heavy-Duty Mudroom Bench Fixes for Sagging Seats in 2026
Have you ever stepped into your mudroom and immediately noticed…

Stop Wasting Space: 5 Pro Storage Solutions for Tiny Entries
I remember the moment perfectly—staring at my tiny entryway, realizing…
6 Mudroom Bench Fixes for Heavy 2026 Winter Gear Storage
Ever stepped into your mudroom after a snowy day, only…