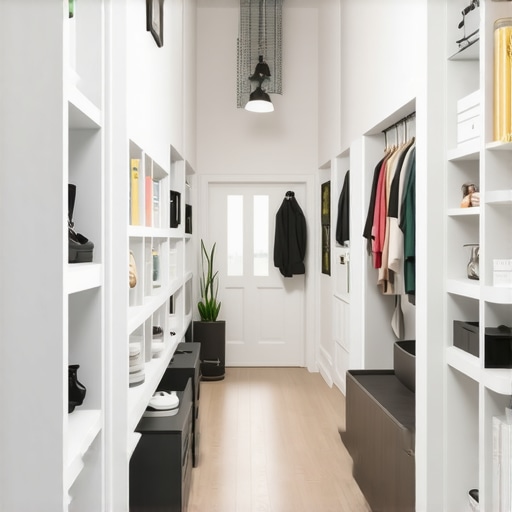
Ever stood at your entryway, reaching for your coat, only to witness your locker or cabinet wobbling unsteadily? That frustrating sway, especially in a busy household, can be more than just an annoyance — it’s a sign your furniture isn’t built to last, and chances are, you might wind up with a costly repair or replacement down the line. I vividly remember the day I first noticed my built-in entryway locker rocking when I slammed it shut. At first, I thought I just needed a tweak, but it turned into a bigger issue that threatened the stability of the entire setup.
Why Swayed Entryway Lockers Need Your Attention Now
Over time, even the most sturdy-looking lockers can start to sway, especially when they aren’t properly braced or supported. This isn’t just about aesthetics or annoyance — unsteady furniture can pose safety issues, lead to further damage, and decrease your home’s value. According to the National Association of Home Builders, poor support and weak bracing are among the top reasons for early furniture failure in modern homes. But don’t worry. Addressing this sway isn’t complicated, and with expert-approved fixes, you’ll restore your entryway’s stability and peace of mind.
Is Reinforcing Your Entryway Locker Really Necessary?
I used to dismiss minor wobbles as inevitable or cosmetic — that is, until one day, a heavy winter coat caused my locker to shift dangerously. That was my wake-up call. Early on, I mistakenly believed that simply tightening existing screws would suffice. However, I learned that without proper reinforcement, the problem would only worsen. Now, I’ve consolidated my experience into fixing these issues efficiently, ensuring your storage solutions stay put. If you’ve experienced similar frustrations, you’re not alone. Let’s explore the proven methods to secure your entryway without breaking the bank.
By the end of this post, you’ll know exactly how to implement five professional bracing techniques designed for 2026’s latest home standards. Whether you’re a DIY enthusiast or just want to stop that stubborn sway once and for all, these tips will help you build a more solid, reliable entryway. Ready to stop the wobble and safeguard your home? Let’s get into the details!
Assess the Wobble and Gather Materials
Start by carefully inspecting your entryway locker to identify which parts are loose or unstable. Remove any items stored inside to access all panels and supports. You’ll need basic tools such as a drill, screwdriver, level, wood screws or anchors, metal brackets, and possibly adhesive or shims. Remember, a thorough assessment prevents unnecessary purchases and ensures focused repairs.
Disassemble and Prepare for Reinforcement
Gently take apart any panels or supports that wobble. Use a screwdriver to loosen existing screws—don’t force them, as this could damage the material. Clean mounting surfaces and check for any signs of damage or wear. If you notice rotten wood or cracked supports, replace them before proceeding. This step is akin to preparing a foundation before erecting a building—solid base matters a lot.
Install Additional Support Braces
Attach metal L-brackets or corner braces at strategic points where the panel meets the frame. Use a level to ensure the brackets are perfectly aligned, preventing uneven support that could cause future wobbling. Secure brackets with appropriate screws—avoid overtightening to prevent material cracking. Think of these as the bones of your furniture, giving it the strength to withstand daily use.
Tip: Position supports where most stress occurs, such as the top corners or along the middle panel. This targeted reinforcement is like adding a steel beam inside a wall for extra stability.
Here’s a quick story: I once reinforced a wobbling coat closet by installing metal brackets at each corner, which immediately improved stability. The process took about 30 minutes, and the result was a sturdy, wobble-free locker that could handle heavy winter coats without shifting.
Secure Panels with Proper Anchors
If your locker is mounted to drywall or plaster, replacing or adding wall anchors is crucial. Use heavy-duty anchors compatible with your drywall thickness, and anchor into wall studs whenever possible for maximum stability. For weight-bearing doors or panels, consider installing with lag bolts into studs, giving support that mimics a professional-grade build.
Reinforce with Shims and Fillers
Insert shims behind loose panels or supports to eliminate gaps. Use a mallet to gently tap shims for snug fit, then secure with screws or adhesive. Shims distribute weight evenly and prevent undue stress on specific points, akin to balancing a wobbly table by adjusting its legs.
This method transformed my stubborn entryway cabinet, which had an uneven base causing constant wobble. After inserting shims and re-tightening screws, the wobble was gone, and the cabinet felt rock solid.
Final Check and Maintenance
Once all supports are tightened, use a level to verify the entire structure’s straightness. Test by gently pushing on different areas to ensure stability. Regularly inspect for new looseness or damage, especially after heavy use or changes in environmental conditions like humidity. This ongoing attention keeps your furniture safe and sturdy for years to come.
By following these steps, you tackle the root of wobbling issues with practical, professional techniques. Integrate insights from space-maximizing custom vanities and learned best practices to turn your shaky entryway into a reliable feature of your home. Remember, a little reinforcement goes a long way in preserving your home’s aesthetic and safety.
Many homeowners and DIY enthusiasts often assume that installing vanities and built-in storage solutions is straightforward—simply measure, assemble, and secure. However, beneath the surface lies a set of nuanced pitfalls and misconceptions that can derail even seasoned renovators. Let’s dig deeper into what most people get wrong about these installations and how to avoid common traps that compromise both functionality and aesthetics.
Believing All Materials Are Created Equal
A widespread myth is that costlier materials automatically equate to better quality and durability. In reality, the context and application matter more than price tags. For instance, some budget-friendly MDF boards can withstand humidity and weight better than cheaper solid woods, provided they are sealed and installed correctly. Understanding the nuances of material selection—like the difference between moisture-resistant plywood and standard MDF—can save you from future headaches. For expert tips on choosing the right materials, check out our article on selecting the perfect vanity style.
Why do some installations sag despite using ‘heavy-duty’ brackets?
This is a nuanced mistake many overlook. Relying solely on brackets without considering wall support and proper anchoring can lead to sagging over time. Wall studs must be the primary anchoring point, especially for heavy vanities or shelving. Using inadequate anchors or ignoring load distribution can cause structural failure. Moreover, many underestimate the importance of seismic or environmental factors, like humidity or temperature fluctuations, which can weaken materials over time. To prevent this, incorporate reinforced mounting techniques and use load-rated hardware—details covered extensively in top installation tips.
Assuming Standard Dimensions Fit All Spaces
One of the most overlooked aspects is the importance of precise measurements and custom fitting. Standard sizes often lead to gaps, awkward overlaps, or inadequate support, especially in non-standard room shapes. The mistake is to treat all spaces as uniform, which results in wasted space or unstable fixtures. Tailoring built-ins through custom design ensures a perfect fit, improves stability, and enhances visual harmony. For more on optimizing space, explore design tips for maximizing space.
Ignoring the Importance of Professional Installation
Many believe that DIY installation will always save money and time, but this assumption often leads to overlooked details that cause setbacks down the line. Proper mounting involves understanding wall structures, weight distribution, and environmental factors that vary by home. An improper technique—such as mounting onto drywall without studs—can result in catastrophic failure. Expert installation also considers future maintenance, accessibility, and integrating smart storage solutions seamlessly, which can be challenging without experience. To avoid costly mistakes, consider consulting professionals, as discussed in installation hacks.
Maintaining the quality and functionality of your vanities and built-in storage solutions over time requires the right tools and a strategic approach. Personally, I swear by a set of high-quality equipment that ensures precision and durability in every project. A cordless impact driver, for example, has revolutionized my installation process. Its power allows me to secure heavy supports and brackets quickly, without damaging delicate materials. My choice is the Makita XDT131 impact driver because of its lightweight design and reliable torque, making long sessions more manageable and reducing fatigue. Additionally, I always keep a fine-tooth saw, like the Jet 10-20 hand-held saw, handy for making precise cuts in custom panels or shims. Sharp tools ensure clean edges which are crucial for seamless built-in aesthetics.
For measuring, I prefer a laser level such as the Bosch GLL3-330CG. It provides accuracy over large spans and helps in aligning shelves or drawers perfectly — a detail that no homeowner should overlook. To keep the workspace organized, I utilize a magnetic parts tray to hold screws and small fixtures, preventing loss and saving time during reassembly.
When it comes to software, I rely on design programs like SketchUp to visualize modifications before implementation. This step is vital for ensuring all components fit perfectly, especially in irregular or non-standard spaces. The ability to simulate support placements or hardware arrangements helps avoid expensive mistakes and aligns with future trends toward more sophisticated, customizable vanities, as discussed in 2025 design trends.
For ongoing maintenance, a simple microfiber cloth and gentle cleaning solutions like vinegar and water are sufficient to keep surfaces pristine, preventing dust and grime buildup that can compromise support structures over time. Regular checks using the laser level or a spirit level ensure your installations stay aligned, especially after seasonal shifts or heavy use.
How do I maintain my vanities and built-ins over time?
The key to long-term durability lies in diligent inspection and proactive reinforcement. Applying a bit of silicone sealant around joints prevents moisture infiltration, especially in humid environments like bathrooms. Re-tightening fasteners every six months prevents loosening due to everyday use. Remember, as the garage shelving expert recommends, using hardware rated for the weight and stress your furniture will handle guarantees resilience.
For example, I recently upgraded my storage by installing smart support brackets, which are adjustable and designed for high weight capacities. Not only do these devices improve stability, but their versatility helps in accommodating future modifications. Investing in quality tools now saves you a lot of trouble later, especially when scaling your storage solutions or remodeling for evolving needs.
In fact, embracing advanced fixing techniques like heavy-duty brackets or steel reinforcement methods can be a game-changer, particularly in ensuring safety and beauty over time. Consider trying these popular support upgrades for your next project.
The Hardest Lesson I Learned About vanities, built-ins, storage solutions, and installation
One of my biggest realizations was that proper wall anchoring is everything. I once assumed that a few screws into drywall would suffice, only to experience a heavy cabinet slowly sag and eventually fall. That taught me to always identify and use wall studs for maximum support, especially when dealing with heavy or frequently used fixtures.
3 Myths About vanities, built-ins, storage solutions, and installation That Held Me Back
I used to think that all materials are created equal, and that standard sizes fit every space. Both misconceptions led to issues with durability and fit. Learning about the nuances between moisture-resistant plywood and MDF, and customizing dimensions for irregular rooms, made a huge difference in my projects’ longevity and aesthetics.
What Experts Won’t Tell You About vanities, built-ins, storage solutions, and installation
Many overlook the importance of high-quality tools and precise measurements. Relying on cheap hardware or skipping detailed planning often results in wobbling or structural failure. Investing in a good laser level and impact driver is a game-changer, ensuring your built-ins remain sturdy through years of use.
Where to Go from Here
If you want to elevate your storage solutions, focus on reinforcing weak points and choosing materials suited for your environment. Exploring advanced support options like steel brackets or custom framing can transform shaky furniture into lifelong fixtures. For inspiration on innovative designs, check out our article on storage solutions that redefine spaces.
Empower Your Space Today
Taking the time to properly reinforce and install your vanities and built-ins not only boosts their lifespan but also contributes to a safer, more organized home. Remember, every small upgrade counts toward a more resilient and beautiful environment. Ready to start your upgrade? Dive into expert tips and ensure your next project stands the test of time!
What’s been your biggest challenge with installing or reinforcing built-ins? Share your experience below and let’s learn together!
,
Related Posts
7 Smart Storage Solutions for Awkward 2026 Entryway Nooks
p>Have you ever stood in your entryway, staring at that…
![Mudroom Bench Fixes: How to Level Built-ins on Uneven Floors [2026]](https://customcabinetrypro.com/wp-content/uploads/2026/02/Mudroom-Bench-Fixes-How-to-Level-Built-ins-on-Uneven-Floors-2026.jpeg)
Mudroom Bench Fixes: How to Level Built-ins on Uneven Floors [2026]
It was a frustrating morning in my workshop when I…
How to Anchor 2026 Entryway Benches to Aging Plaster Walls
I remember the moment vividly—trying to secure a charming wooden…