p>Have you ever stood in your entryway, staring at that awkward nook that seems impossible to utilize? I remember countless mornings frustrated, battling clutter and wasted space in my own home, thinking, “There has to be a smarter way.” That lightbulb moment hit me hard—what if I could turn those tricky spaces into functional, stylish storage? Since then, I’ve been on a quest for the best solutions, and today, I want to share exactly what I discovered. If you’re tired of squeezing shoes into corners or hiding clutter in plain sight, you’ve come to the right place. Together, we’ll explore seven smart storage ideas that can transform your tricky entryway into an organized haven.
Transform Your Entryway with Clever Storage Hacks
For years, I struggled with entryway clutter—a mountain of shoes, umbrellas, and everything in between. It felt like a losing battle until I realized that the key isn’t just buying more storage but choosing the right solutions tailored for those tight, odd spaces. A recent study showed that disorganized entryways can add to daily stress—up to 40%, in fact (source: Psychology Today). So, this isn’t just about aesthetics; it’s about reclaiming your peace of mind. Today, I’ll guide you through these innovative ideas to make your entryway both functional and inviting, no matter how tight or awkward the space might be.
Is Your Entryway Storage Actually Worth the Hype?
Early on, I made a critical mistake—assuming that any storage solution would do. I bought generic hooks and unplanned shelves, only to realize they didn’t fit—and worse, they cluttered more. It’s a common trap: we want quick fixes, but lasting, effective organization requires a strategic approach. Now, I focus on customizing and optimizing every nook. If you’re skeptical about whether these strategies really work, remember that tailored solutions—like those discussed in expert tips for built-ins—actually make a difference. Ready to finally tame your tricky entryway? Let’s get started on the smart solutions that can truly change your space.
Assess Your Space and Define Your Needs
Start by measuring the dimensions of your entryway to identify available areas for storage. Take note of hanging spots, corners, and wall spaces that could accommodate built-ins or shelves. I once pulled out a tape measure and sketched a simple layout on paper, which instantly revealed some overlooked spots that could house slim, rolling carts or wall-mounted organizers. Clearly defining what you need—shoes, umbrellas, keys—ensures your solutions are focused and effective.
Choose Between Custom and Off-the-Shelf Solutions
If your space is irregular or tight, custom-built options often outperform generic furniture. For example, I installed a bespoke bench with integrated compartments that fit perfectly into my nook, making a cluttered corner suddenly functional. To learn more about making precise choices, check out vanity design trends. When selecting, consider materials, accessibility, and how the solution aligns with your overall decor. Custom options, such as those found in creative built-ins, can seamlessly blend utility with style.
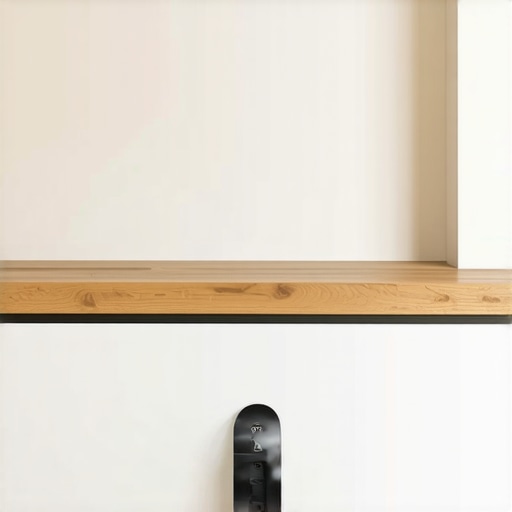
Implementing Built-In Storage Correctly
Installing built-ins requires careful planning, especially in tight or uneven spaces. Think of the process like fitting a jigsaw puzzle—each piece must be precise for a tight seal. For detailed steps, review installation guides. I recommend measuring multiple times before cutting or drilling, and blocking out the space with painter’s tape to visualize the fit. Securely anchoring shelves into studs ensures durability, especially if you plan to store heavier items like winter boots or bags.
Secure Heavy Items with Proper Anchoring Techniques
Heavy-duty anchors or steel reinforcements prevent sagging or falling. For instance, I once added steel brackets under my built-in bench, which held up despite frequent use. When attaching units to walls, ensure you locate and fasten into wall studs using specialized anchors. For practical tips, see mounting heavy furniture.
Optimize Small or Difficult Spaces
In narrow nooks or unusual corners, use vertical space to your advantage. Stack shelves or install pegboards for hanging accessories. I utilized a slim, vertical shoe rack in my tight entryway, which freed up the floor. Consider adjustable shelving systems that adapt as your storage needs change, inspired by built-in ideas. These maximize every cubic inch without sacrificing accessibility.
Maintain and Adjust Your Storage System
After setup, observe how you interact with your storage. If some items are hard to reach or the space feels cluttered, adapt the arrangements. I’ve found that adding slide-out baskets or hooks for frequently used items keeps things organized and accessible. Periodic re-evaluation prevents clutter buildup and ensures your system continues to serve your evolving needs. For more innovative storage solutions, explore storage ideas.
Many homeowners assume that choosing a vanity or installing built-ins is straightforward, but experts know there are nuanced pitfalls that can undermine your entire project. One widespread misconception is that off-the-shelf vanities are always the best budget-friendly choice. While they offer quick solutions, in my experience, they often lead to compromises like poor fit or compromised durability. For a truly seamless look and long-lasting results, considering custom options—such as those detailed in creative built-ins—can be a game-changer.
A common trap is underestimating the complexity of installation, especially when dealing with uneven walls or tight spaces. Many forget that proper anchoring, especially when mounting heavy or floating vanities, is critical. Rushing this step can result in wobbling or even detachment over time. Advanced users should pay attention to detailed guides, like installation tips, to avoid costly mistakes.
Let’s address a myth that often causes frustration: that all built-ins are perfect right out of the box. The reality is that even expertly crafted built-ins require careful scribing and adjustments to fit irregular walls or corners. This hidden nuance means you should allocate time for minor shimming or trimming—an area where many amateurs falter, leading to gaps or uneven surfaces.
An advanced issue pertains to the structural support for heavy vanities. Many assume standard wall anchors suffice, but for substantial stones or custom cabinetry, reinforced framing is necessary. For example, when mounting heavier pieces, consulting expert mounting techniques ensures safety and longevity.
Finally, be wary of the myth that all storage solutions are equally flexible. Modular systems that seem convenient can become limiting if they aren’t adaptable to your evolving needs. Exploring flexible, built-in options—not just decorative but highly functional—can save you future headaches. To avoid locking into rigid solutions, see smart storage ideas.
Have you ever fallen into this trap? Let me know in the comments. The key is knowing these hidden nuances, so your project results not only look great but also stand the test of time. Remember, a well-planned vanity or built-in isn’t just about aesthetics—it’s about mastery of detail and quality craftsmanship.
Ensuring that your carefully installed vanities and built-in storage solutions remain functional and stylish over time requires the right tools and a proactive maintenance routine. I rely on a few specific equipment and methods to keep everything in top shape, and I recommend these to anyone looking to preserve their home upgrades. First, a high-quality cordless drill with a set of precision bits is indispensable for any adjustments or re-tightening that inevitably become necessary as materials settle or shift. I personally prefer a drill with variable speed control, like the DeWalt DCD791D2, because it offers the finesse needed for delicate tasks without risking damage.
Second, a stud finder equipped with deep-scan technology, such as the Bosch GMS120, ensures that fixtures remain securely anchored into the wall studs, preventing sagging or detachment over time. Frequent re-evaluation of anchors, especially in high-traffic areas, helps preempt damage. To maintain the structural integrity of floating vanities or shelves, I use steel reinforcement straps, as recommended in expert installation guides, which greatly extend the lifespan of these fixtures.
Cleaning tools are equally important. I opt for microfiber cloths and gentle wood cleaners to prevent buildup and preserve finishes, especially on natural wood vanity surfaces. For more stubborn stains or residue, a mixture of mild detergent and warm water works wonders, and I avoid harsh abrasives that can scratch delicate surfaces.
As technology evolves, so do the maintenance tools. The upcoming trend points toward smart home integration, where sensors can alert you to moisture, temperature shifts, or even lateral movement in your built-ins, helping you address issues before they become costly repairs. In the future, digital monitoring systems—like smart leak detectors—will make maintenance both simpler and more preventative, saving homeowners thousands in repairs.
How do I keep my vanity and built-ins performing well over the years?
Routine inspections and proactive reinforcement are key. Regularly checking for loose screws, re-tightening fixtures, and ensuring wall anchors remain secure prevent many common issues. Implementing simple maintenance habits, such as cleaning with non-abrasive equipment and scheduling annual inspections using a quality stud finder, will keep your investment looking fresh. Consider adding reinforcement brackets or straps in areas prone to stress; these small upgrades can dramatically improve durability. For detailed guidance on installing or revising your fixtures, explore expert advice and try one of these advanced tips—like reinforcing heavy floating units with steel straps—to ensure your built-ins stand the test of time. This small effort can save you from costly repairs and keep your beautiful space pristine for years to come.
The Hardest Lesson I Learned About vanities, installation, storage solutions, and built-ins
One of the most valuable lessons I uncovered was the importance of precision and patience. In my early projects, rushing the installation led to gaps, uneven alignments, and insecure fixtures. The lightbulb moment came when I realized that meticulous measurement and a willingness to adjust on the fly could dramatically improve the final result. Embracing a mindset of careful planning and accepting that perfect fits sometimes require minor modifications made my DIY endeavors far more successful and stress-free, saving time and rework in the long run.
Three Myths About vanities, installation, storage solutions, and built-ins That Held Me Back
- Off-the-shelf is always better for quick results. I believed ready-made units would save me time, but they often didn’t fit awkward spaces and lacked the custom touches that truly optimize functionality.
- Installation is straightforward and requires minimal planning. Experience taught me that every space has unique challenges, and detailed preparation—including stud location and wall integrity—is essential for lasting, sturdy installations.
- Bigger storage solutions are always the right choice. Sometimes, overestimating storage needs led to bulky, underused fixtures. Tailored, smart solutions optimize space without overwhelming the room’s aesthetic.
What Experts Won’t Tell You About vanities, installation, storage solutions, and built-ins
One hidden insight is that the perfect vanity or built-in often requires minor customizations—like trimming or shimming—to truly fit your space seamlessly. Additionally, reinforcing wall anchors with steel brackets dramatically increases durability, especially when supporting heavy stones or long-term use. Experts also emphasize the value of integrating adjustable shelving and flexible storage options, which adapt over time as your needs evolve. These nuanced details, not always obvious, ensure your investment remains both beautiful and functional for years to come.
My Essential Toolkit for vanities and built-ins
A high-quality cordless drill, such as the DeWalt DCD791D2, is invaluable for precise adjustments and secure fastening. Pair it with a deep-scan stud finder like the Bosch GMS120 to ensure fixtures are anchored into solid wall studs, preventing sagging or detachment over time. For measuring, a laser level helps achieve perfect alignments, making installation easier and more accurate. I also keep microfiber cloths and gentle cleaners on hand to maintain finishes, preserving the aesthetic appeal of natural woods and painted surfaces. These tools have consistently helped me achieve professional results and save headaches during projects.
Why regular upkeep keeps your storage solutions thriving
Maintaining your vanities and built-ins isn’t just about cleaning—it’s about proactive reinforcement. Routine checks for loose screws, re-tightening fixtures, and inspecting wall anchors ensure everything remains secure. Upgrading with steel support straps or reinforcement brackets, especially in high-use areas, prevents sagging and damage. Scheduling periodic evaluations, perhaps biannually, helps catch minor issues before they become costly repairs. Incorporating smart monitoring devices in the future, like moisture sensors, could further protect your investment, signaling problems early and preserving your home’s beauty and function for years to come.
Remember, the key to a stunning, enduring entryway space isn’t just in the initial installation but in the ongoing care and thoughtful adjustments. Every homeowner has the potential to create a seamless blend of style and utility, transforming tricky corners into sources of pride. Dive into these techniques, stay attentive to detail, and your versatile vanity or built-in won’t just be a project but a lasting upgrade that elevates your home.
Related Posts

6 Mudroom Bench Fixes for Heavy 2026 Winter Gear Storage
Ever stepped into your mudroom after a snowy day, only…
How to Hide 2026 Robot Vacuum Docks in Entryway Benches
It was a typical Tuesday afternoon when I finally stumbled…
![Mudroom Bench Fixes: How to Level Built-ins on Uneven Floors [2026]](https://customcabinetrypro.com/wp-content/uploads/2026/02/Mudroom-Bench-Fixes-How-to-Level-Built-ins-on-Uneven-Floors-2026.jpeg)
Mudroom Bench Fixes: How to Level Built-ins on Uneven Floors [2026]
It was a frustrating morning in my workshop when I…