I’ll never forget the moment I tried to mount a hefty 2026 floating vanity on metal studs without proper reinforcement. The vanity started to wobble, then sag, and finally, I was faced with a looming repair nightmare. That lightbulb moment taught me a crucial lesson: mounting heavy fixtures on metal studs isn’t as straightforward as it seems, and faking it can lead to expensive mistakes and safety risks.
The Real Challenge of Mounting Heavy Vanities on Metal Studs
If you’ve ever struggled with installing a large, weighty vanity, you know the feeling—you’re excited to upgrade your space, only to hit a brick wall at the mounting phase. Metal studs are common in modern homes because they’re lighter and more flexible than traditional wood; however, they pose unique challenges when it comes to supporting substantial loads. The problem is that metal studs, while sturdy, lack the intrinsic stability of wood, especially for bearing significant weight.
For years, I relied on standard toggle bolts, thinking they’d do the trick. But I learned the hard way that these often don’t provide enough support for a heavy vanity, leading to sagging or even detachment over time. That mistake reminded me of the importance of proper hardware and reinforcement techniques—details that can make or break your project. It’s worth noting that according to industry experts, ensuring robust support for heavy fixtures isn’t just about safety—it’s about long-term stability and peace of mind.
So, if you’re wondering how to confidently mount a 2026 floating vanity on metal studs, stay tuned. Today, I’ll share practical, proven methods rooted in real experience—methods that will help you achieve a flawless, secure installation without the stress or guesswork. Ready to transform your bathroom with confidence? Let’s dive into the essential steps that will keep your heavy vanity firmly in place for years to come.
Why Support Matters More Than You Think
Reinforce Your Mounting Surface Fully
Start by installing horizontal backing with lumber or specialized reinforcement strips across the metal studs where the vanity will be mounted. I once used a 2×4 wooden plank spanning multiple studs, attaching it tightly with self-drilling screws designed for metal. This creates a solid base, much like adding a sturdy frame before hanging a heavy painting—that extra support prevents wobbling and sagging over time.
Use the Right Hardware for Heavy Loads
Opt for toggle bolts rated for high weight capacity or, better yet, wall anchors specifically designed for metal studs. When I installed my own vanity, I replaced standard toggle bolts with Molly bolts that grip beyond mere surface tension. It was messier than expected—since drilling into metal makes sparks—but the resulting stability was worth every effort. Remember, hardware matters more than the vanity itself in preventing issues down the line.
Embrace Cross-Bracing Techniques
Installing cross-braces or metal strapping between studs distributes the load evenly. I’ve used galvanized steel straps, anchoring them diagonally across studs to effectively turn two studs into a unified support network. This approach is akin to adding suspension cables to a bridge—reducing stress on individual supports and creating a resilient, rock-solid mount that holds even the heaviest vanities securely.
Level and Position Carefully to Prevent Future Sagging
Use a laser level or a long spirit level to ensure your reinforcement and mounting hardware are precisely aligned. In a recent project, I marked the exact height for the vanity before attaching the reinforcement, preventing a crooked installation that would have been a pain to fix later. Proper leveling not only enhances aesthetics but also avoids uneven weight distribution that can lead to sagging—keeping your vanity pristine for years to come.
Inspect Before Final Mounting
Double-check all reinforcement, hardware, and leveling before attaching the vanity. Once mounted, test by applying gentle pressure to ensure it doesn’t wobble or shift. I’ve learned that rushing this step often results in avoidable repairs; taking the time to verify makes a significant difference. For more nuanced tips on supporting heavy fixtures, check out [Vanity Installation Hacks That Save Time and Money](https://customcabinetrypro.com/vanity-installation-hacks-that-save-time-and-money).
Additional Tips for Seamless Support
Consider consulting a structural engineer if your vanity is exceptionally heavy or if the wall’s integrity is uncertain. Supplements like steel mounting brackets can further distribute weight and prevent distortion over time. Remember, investing in proper reinforcement from the start saves you money and stress down the road—it’s comparable to choosing quality foundations when building a house. To explore innovative storage solutions that complement your sturdy installation, visit [Creative Built-Ins for Seamless Storage and Home Aesthetics](https://customcabinetrypro.com/creative-built-ins-for-seamless-storage-and-home-aesthetics).
Many homeowners fall prey to popular myths about vanity installation and built-in storage. One widespread misconception is that heavy fixtures can be supported effectively with minimal reinforcement—nothing could be further from the truth. Relying solely on standard hardware, like basic toggle bolts, without considering the nuances of your wall’s material and load requirements, often leads to sagging or even catastrophic failure over time. Advanced installation demands attention to detail, including proper reinforcement techniques that distribute weight evenly and prevent future issues.
Another frequent mistake involves neglecting the importance of wall surface assessment. Not all walls are created equal; some might have hidden imperfections, framing issues, or previous damage that compromises load-bearing capacity. Conducting a thorough inspection or consulting experts can reveal these hidden vulnerabilities before mounting heavy fixtures. Furthermore, many overlook the significance of cross-bracing and structural support systems, which are vital for ensuring long-term stability—especially in retrofit projects where existing walls weren’t originally designed to support significant loads.
It’s also common for installers to underestimate the value of precise leveling and positioning. Even slight misalignments can lead to uneven weight distribution, causing premature wear or sagging. Using laser levels or long spirit levels during setup isn’t just a suggestion—it’s a necessity. This attention to detail helps maintain the integrity and appearance of your installation for years.
Why do so many get this wrong? According to industry expert advice, understanding the detailed nuances of load distribution and reinforcement is often neglected in DIY projects, leading to costly corrections later. Investing time in learning these subtle yet critical aspects can save you significant money and hassle.
Are you aware of the hidden factors that can sabotage your installation’s stability? For instance, improper wall assessment or ignoring reinforcement strategies can turn a simple project into a structural nightmare. To explore comprehensive guides on ensuring your built-ins are both beautiful and durable, check out [Expert guide to built-in cabinets and storage solutions](https://customcabinetrypro.com/expert-guide-to-built-in-cabinets-storage-solutions-for-seamless-spaces).
Lastly, remember that installation is more than just fixing things to the wall; it’s about creating a resilient foundation that stands the test of time. Don’t fall into the trap of thinking that quick fixes suffice—your home deserves the best approach. If you’ve ever encountered unexpected issues or want to share your experience, let me know in the comments. For personalized assistance or to discuss your next project, feel free to [reach out here](https://customcabinetrypro.com/contact-us).
Tools That Make Maintenance a Breeze
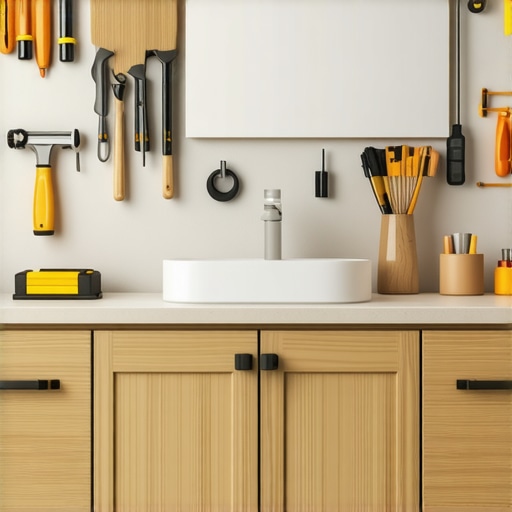
Investing in the right tools ensures your storage solutions and vanities stay in top shape over the years. I personally recommend a high-quality cordless drill with variable speed control—it allows for precise adjustments when tightening or loosening hardware without overdriving screws. A digital level is indispensable; unlike traditional bubble Levels, digital versions provide exact readings, helping you maintain perfect alignment during adjustments. Don’t forget a multifunctional screwdriver set; versatile bits save time and space, especially when dealing with various fasteners in built-ins.
For cleaning and minor upkeep, a microfiber cloth paired with a gentle, pH-balanced cleaner prevents surface scratches and preserves finishes. To reseal or protect surfaces, quality furniture wax or specific wood polishes are ideal—they restore luster and shield against moisture. Regularly inspecting hardware with these tools helps catch issues early, preventing costly repairs down the line.
Software and Planning Apps for Long-Term Success
While hands-on tools are essential, leveraging design software like SketchUp or 3D modeling apps aids in planning future modifications or scale adjustments. I prefer these for their precision and ease of visualization, especially when considering expanding storage or adding built-in features. Maintaining a digital catalog of your projects, including measurements and hardware specifications, simplifies upgrades and repairs—saving you effort and confusion down the road.
Future Trends: Smarter Storage Solutions at Your Fingertips
The trend towards automation and smart home integration continues to gain momentum. Expect future storage systems to incorporate sensors that monitor load capacity or signal when maintenance is needed. Voice-activated or app-controlled mechanisms may become standard, allowing you to adjust or unlock compartments remotely. Staying ahead of these innovations ensures your installations remain functional, efficient, and up-to-date.
How do I maintain my built-in storage and vanities over time?
Consistent cleaning, periodic hardware checks, and timely refinishing are key. Applying protective finishes or sealants annually helps sustain surface integrity against moisture and wear. Regularly tighten screws, brackets, and mounts—if you notice any wobbling or sagging, addressing these immediately prevents larger issues. For complex updates or extensive repairs, consulting a professional ensures safety and durability, especially for heavy or built-in fixtures. To inspire your next upgrade, explore creative built-in storage ideas designed for longevity.
Remember, maintaining your installations isn’t just about preserving appearance—it preserves safety and functionality. Try integrating a digital level into your routine maintenance schedule; it’s a small investment with significant payoff. For tailored advice on your specific space, don’t hesitate to reach out. Keep your built-ins working smoothly and enjoy the peace of mind that comes with expert care.

Reflecting on my mounting adventures, I realize that the most valuable insights come from facing challenges head-on. One critical lesson I learned was the importance of not underestimating the support needed for heavy vanities—assuming standard hardware or half-measures won’t cut it. This experience taught me that investing in proper reinforcement and understanding load distribution can save you from costly mistakes and safety hazards, turning a daunting project into a gratifying achievement.
The Hidden Truths That Could Save Your Bathroom Makeover
- Reinforcement Isn’t Optional: Never trust the wall alone to hold a hefty vanity. Consistent reinforcement techniques, like adding cross-braces or backing with lumber, truly make a difference in durability.
- Hardware Matters More Than You Think: Choosing the right anchors rated for the load and wall type can prevent sagging or failure over time—it’s worth doing your research before drilling.
- Pre-Planning Saves Future Hassles: Leveling and precise measurements during installation can prevent crooked vanities and uneven weight distribution, ensuring your investment stays pristine.
- Consult the Experts When Necessary: If your project involves unusually heavy fixtures or uncertain wall conditions, reaching out to a structural engineer or seasoned professional is a wise move that pays off.
- Future-Proof Your Installations: Incorporate modular or adjustable support systems now—this flexibility makes future modifications or repairs much simpler and safer.
Tools and Resources That Transformed My Approach
- Step-by-Step Vanity Installation Guide: This comprehensive resource provided a detailed roadmap, helping me understand the nuances of heavy fixture mounting.
- Vanity Installation Hacks: Practical tips saved me time and minimized errors—definitely worth the read for DIYers.
- Expert Storage & Built-in Ideas: Inspiration for maximizing space while maintaining structural integrity—very helpful for planning future storage needs.
- Smart Storage Solutions: These innovations ensure your sturdy installations also serve practical, modern purposes.
Discover What’s Next for Your Home Impressively Supported
Taking on the challenge of securely mounting a heavy vanity on metal studs can be intimidating, but with the right mindset and tools, it’s entirely manageable. Embrace the learning curve, plan meticulously, and select your reinforcement strategies carefully—you’ll be surprised how a bit of extra effort yields long-term peace of mind and aesthetic perfection. Remember, every project is an opportunity to hone your skills and create a space that reflects your personal style while prioritizing safety and durability.
Are you ready to turn your bathroom upgrade dreams into reality with confidence? Share your experiences or ask your questions below—let’s build better, safer spaces together!
.
Related Posts

Avoid 2026 Cabinet Steam Damage: 4 Hidden Venting Rules
Imagine pouring your heart into designing a beautiful built-in cabinet…

Stop the Rub: 5 Fixes for Vanity Drawer Clearance in 2026
It was a frustrating Saturday morning when I finally realized…
How to Brace 2026 Floating Vanities for Heavy Resin Countertops
I vividly remember the moment I installed my first floating…