

I’ll never forget the sound—a low, rhythmic creak echoing through my living room at 2 AM. It was the sound of my ambition meeting the laws of physics. I’d spent three weekends building what I thought was a masterpiece: an eight-foot span of custom shelving to house my complete collection of history hardbacks. I figured that using high-quality plywood was enough to defy gravity. I was dead wrong. Within six months, those shelves weren’t just bowing; they were threatening to dump five hundred pounds of knowledge onto my hardwood floors. My biggest mistake was thinking that wood alone—no matter how thick—could handle that kind of distance without help. I tried every trick in the book, including why particle board shelves sag and the plywood replacement techniques, but the span was simply too ambitious. Today, I’m going to share the secret I wish I’d known before I started: steel. We’re going to talk about how five specific steel stiffeners can turn a flimsy plank into a structural powerhouse, ensuring your creative built-ins for seamless storage and home aesthetics stay perfectly level for decades.
[IMAGE_PLACEHOLDER]
Wood Has Its Limits When You Go Wide
The reality is that wood is a living material that reacts to weight and time in ways we often underestimate. Even if a shelf looks straight the day you install it, it’s fighting a losing battle against gravity. According to the USDA Forest Products Laboratory, wood is subject to ‘creep,’ a process where permanent deformation occurs under a constant load, even when that load is well below the wood’s breaking point. This is why the structural fix for floor to ceiling library units 2 almost always involves more than just timber. I learned this the hard way after my third attempt at shimming my bowing units. I realized that if I wanted that sleek, long-span look without a forest of vertical supports blocking my books, I had to look toward metal. Using the internal steel support for long floating desks as inspiration, I started experimenting with steel reinforcement. Have you noticed your own shelves starting to take on a suspicious curve lately, or heard that dreaded midnight creak?
Is metal actually worth the extra effort?
I get it. You’re a woodworker or a DIY enthusiast, not a welder. You might be worried that adding steel stiffeners will make your cozy living room look like a cold industrial warehouse or that the installation will be a nightmare. Trust me, I had those same fears. I worried about the weight, the cost, and whether I could even hide the metal. But the truth is, most of these stiffeners are completely invisible once installed. They don’t require a welding torch or a degree in engineering—just a router and a bit of patience. By the time we’re done today, you’ll see that these five steel solutions aren’t just for heavy-duty workshops; they are the secret weapon for anyone who wants a professional, sag-free finish in their home. Let’s look at the first few options that saved my library and my sanity.
Let the Metal Take the Load
Imagine your shelf as a trampoline. Under a heavy load of books, the fibers on the bottom of the wood are being pulled apart, while the top fibers are being crushed. Steel changes the math because it doesn’t stretch or compress under these loads. One of the most effective ways to integrate this strength is through the C-channel. You don’t just slap it on the bottom; you bury it inside the wood. Using a plunge router and a straight bit, you carve a recess that matches the steel’s profile. This is exactly why bench tops warp and the steel c-channel fix is the professional’s choice for wide spans. If the wood tries to move, the rigid steel walls of the C-channel physically refuse to let it bend.
Carve a Path for True Strength
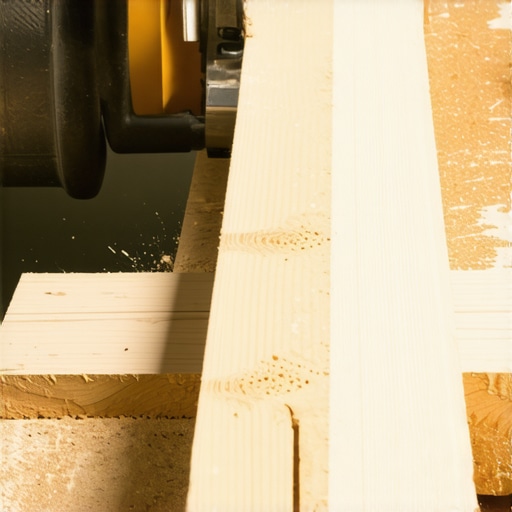
When I was building a ten-foot walnut conference table, I was terrified of the middle sagging over time. I decided to use 1/4-inch thick steel plates. The “messy” part was the routing; I didn’t have a template, and the router kicked back when I hit a particularly dense knot, leaving a jagged scar. I learned that day: always use a guide rail. You want that steel to sit flush or slightly sub-flush. Once the channel is cut, don’t just glue it in. Wood expands and contracts with humidity, while steel stays the same. Use oversized mounting holes for your screws to allow the wood to “breathe” around the metal. This logic applies whether you are working on a desk or considering 4 steel stiffeners for long span kitchen islands 2 to support a massive granite slab.
The Gusset Move for Massive Spans
For projects where you can’t hide a channel inside the shelf—like a thin floating desk—you need to look at the steel gusset strategy for extra wide built-in desks. This involves a triangular bracket that ties the horizontal surface directly into the wall studs. It’s the difference between a shelf that feels like a diving board and one that feels like a sidewalk. I once helped a friend fix a why floating desks pull away from walls and the solution by retrofitting these gussets behind his drywall. We had to cut into the finished wall, but the stability it provided was worth the patchwork. If you’re dealing with a library, the same principle applies: use the internal brace move for extra wide pantry shelves to ensure your heaviest cookbooks don’t turn your cabinetry into a series of wooden smiles.
Bracing for High-Weight Environments
In a workshop or garage, the rules are slightly different. You care less about hiding the metal and more about vertical load capacity. I’ve seen countless people try to build heavy tool walls out of simple plywood, only to find the whole assembly pulling off the wall. You need to stop garage tool wall sag with horizontal steel channels 2 by anchoring steel tracks directly to the studs and then mounting your shelves to those. It creates a unified structural grid. This is similar to the heavy duty rail move for sliding pantry walls, where the weight is distributed across the entire wall rather than a few precarious points. For living areas, you can hide these supports by using 4 steel brackets that save sagging living room media units, which offer the same industrial strength but are designed to be tucked away from the eye.
Let’s dig deeper into why even the most expensive materials fail if you ignore the mechanics of the wall itself. I’ve seen it a hundred times: a DIYer buys the highest grade of timber and the thickest steel channels, then uses standard drywall screws to hold the whole thing up. It’s a recipe for disaster. Most people assume that if a screw is long and you use a lot of them, it’s strong. But in the world of high-load built-ins, the type of force matters more than the quantity of fasteners. In my experience, over-fastening is actually a hidden trap. If you drive twenty screws into a single wall stud, you aren’t making it stronger; you’re effectively perforating it like a piece of notebook paper. This leads to wood splitting and a significant loss in structural integrity. In an expert guide to flawless vanity installation tricks tips, the focus is always on fastener quality and placement, not just sheer volume. The National Design Specification (NDS) for Wood Construction highlights that the shear strength of a fastener—its ability to resist being snapped off by downward pressure—is often more critical than its withdrawal resistance when supporting vertical loads like library shelves.
The Myth of Over-Fastening Your Units
Everyone tells you to find the stud and sink as many screws as possible, but I disagree. I’ve found that using high-quality structural lags with a specific spacing pattern provides far more stability than a cluster of standard woodscrews. When you’re dealing with the the structural fix for wobbly entryway lockers 2, the goal is to create a rigid connection that allows for the slight seasonal movement of the home. If you over-constrain the wood, it will eventually crack or pull the fasteners right out of the wall. Have you ever fallen into this trap? Let me know in the comments. I’ve spent years repairing ‘expertly’ installed units that were actually undermined by their own hardware.
Don’t Let Cold Walls Rot Your Hard Work
Another nuance that most beginners miss is the ‘thermal bridge’ effect. If you are mounting a large built-in or a vanity against an exterior wall, you are creating a pocket where temperature differentials thrive. Without a small air gap or a moisture barrier, condensation can form behind your beautiful cabinetry. Over time, this moisture softens the wood and can even lead to fastener corrosion, causing the unit to pull away. This is why following the moisture barrier rule for cabinets on cold outer walls is non-negotiable for long-term durability. It’s a small detail that separates a five-year project from a fifty-year legacy.
How do you anchor heavy loads into thin metal studs?
If you live in a modern condo or apartment, you’ve likely encountered the nightmare of metal studs. They feel like tin foil when you try to screw into them. You cannot treat them like wood; they have almost zero holding power for traditional threads. For these scenarios, you must use heavy-duty toggle bolts or specialized snap-toggles that grip the back of the metal flange. I’ve used this specific method for how to secure built-in desks to thin metal studs with great success. The key is distributing the load across multiple points so you don’t deform the metal. Whether you are dealing with a desk or the leveling trick for mudroom-benches on tile, understanding the substrate is just as important as the steel you’re putting inside the wood. If you ignore the wall, the most reinforced shelf in the world won’t stay level for long.
I don’t leave the shop without my 12V compact impact driver and a self-leveling three-plane green beam laser. For years, I relied on a traditional bubble level, but when you are applying the leveling trick for mudroom benches on tile, a laser is the only way to ensure your internal steel stiffeners remain perfectly parallel to the horizon. If your routing is off by even an eighth of an inch over a ten-foot span, that steel C-channel will fight the wood as it tries to settle, creating internal tension that eventually leads to surface cracks. I also swear by structural lag screws with a built-in washer head. They have a much higher shear rating than standard gold screws, which is vital when you are supporting the weight of a stone-topped vanity or a floor-to-ceiling library. According to technical documentation from the Blum Comprehensive Catalogue, the longevity of any moving hardware is directly tied to the absolute squareness of the cabinet box; if the box twists even slightly due to poor anchoring, your high-end hinges will experience uneven wear. This is precisely why your soft-close hinges are snapping 2 long before their intended 200,000-cycle lifespan.
Ditch the Bubble Level for a Green Beam
The transition from ‘DIY hobbyist’ to ‘pro’ happened for me the moment I stopped guessing about floor slopes. Most floors are not flat, especially in older homes. When you are trying to achieve effortless storage solutions for a tidy stylish home, your foundation must be perfect. I use a laser to find the highest point of the floor and build my sub-bases from there. If you skip this, your heavy-duty steel-reinforced units will eventually pull at the wall anchors as the weight forces the base to conform to the floor’s dip. This creates a chain reaction of failures, starting with the doors and ending with structural gaps at the ceiling.
How do I maintain these high-capacity storage units over time?
Maintenance is the part most people ignore until something stops sliding. Once a year, you should empty your heaviest drawers and check the mounting screws on the runners. If you notice why your pull out pantry is grinding and the track fix, it is usually a sign that a single screw has vibrated loose, causing the rail to misalign. A quick stop drawer dragging with this under mount slide adjustment 2 can save you from a full hardware replacement. I also recommend checking the tension on your steel stiffeners if they are accessible; wood shrinks in the winter, and you might need to give those bolts a quarter-turn to keep everything snug. Proper maintenance for the structural fix for floor to ceiling library units 2 ensures that the ‘creep’ we talked about earlier doesn’t become a permanent bow.
Why Carbon Fiber is the Next Frontier for Custom Builds
Looking ahead, I suspect we will see a shift away from heavy steel toward carbon fiber composite strips. Carbon fiber offers an incredible strength-to-weight ratio and can be epoxied into much shallower grooves, preserving more of the wood’s natural integrity. We are also seeing the rise of smart cabinetry—units equipped with integrated load sensors that can alert your phone if a shelf is nearing its deflection limit. While that might sound like overkill now, imagine never having to worry about a midnight collapse again because your library ‘texted’ you that it was overloaded. My best advice for you right now? Stop using standard wood screws for heavy loads and switch to structural lags with a specific spacing pattern. It is the single most effective way to upgrade the safety of your home projects today.
The Hard Truths About Why My Early Projects Failed
I spent years thinking that thicker plywood was the only answer for maximizing space innovative built in solutions for small rooms, but it’s really about the reinforcement, not the bulk. The first thing you have to accept is that glue is not a structural fastener when it comes to steel-to-wood bonds; the two materials expand at different rates, and glue alone will eventually shear. One major lightbulb moment for me was realizing that ‘level’ and ‘flat’ are two different things; your shelf can be perfectly level relative to the floor but still have a bow that ruins the look. I also learned that you should never skimp on the depth of your routed channels—if that steel isn’t fully seated, it won’t resist the lateral forces that cause sagging. If you’re just starting, checking out a step by step guide to vanity installation for beginners can ground you in the basics before you move to these advanced steel methods. Finally, remember that every extra pound of steel adds weight to the unit itself, meaning your wall anchors must be twice as strong as you think they need to be.
[IMAGE_PLACEHOLDER]
The Precise Gear I Keep in My Installation Bag
To get these results, I rely on a few non-negotiable tools. First, a high-quality plunge router with a 1/2-inch collet is essential for cutting clean, deep channels for C-brackets. I personally trust the Bosch or Festool lines for their depth-stop accuracy. For fastening, I’ve moved away from standard hardware store screws in favor of GRK structural fasteners; their shear strength is unmatched for holding steel to studs. When it comes to layout, a 360-degree green beam laser level is my best friend, especially when applying vanity installation hacks that save time and money on uneven floors. I also highly recommend keeping a dedicated set of cobalt drill bits specifically for metalwork, as standard high-speed steel bits will burn out the moment they hit a heavy steel gusset. These tools aren’t just about speed; they’re about the precision required to make the wood and steel act as a single, unified component.
Bring Your Toughest Storage Dreams to Life
Building something that lasts for decades is about more than just following a blueprint; it’s about understanding the invisible forces at play. Don’t let the fear of working with metal stop you from creating the wide-span, elegant library or workspace you’ve always wanted. By combining the natural beauty of timber with the rigid strength of steel, you are building a legacy, not just furniture. Don’t forget to use the moisture barrier trick for vanities against cold walls if your project sits against an exterior surface to protect that hard work from hidden condensation. Your home is your sanctuary, and it deserves the structural integrity that only professional-grade reinforcement can provide. Go grab your router, order those steel channels, and finally fix that bowing shelf for good. Have you ever had a long shelf bow so badly it actually cracked the finish? Let me know your worst woodworking nightmare in the comments below.