

I’ll never forget the sound of my favorite ceramic vase shattering on the hearth at 3 AM. For months, I’d ignored the slight tilt of my heavy oak mantel, assuming it was just ‘character.’ In reality, that massive piece of timber was slowly losing its fight against gravity. I made the classic rookie mistake: I tried to beef it up with longer screws and those flimsy plastic anchors you get at the big-box stores. It didn’t work. In fact, it just chewed up my drywall and made the lean even more pronounced. I felt like a failure in my own living room until I discovered the magic of structural steel reinforcement. Today, I’m going to show you exactly how to stop the slump using a low-profile steel plate method that keeps your fireplace looking sharp and your valuables on the shelf where they belong.
Stop Ignoring That Slow Motion Mantel Disaster
If you’ve noticed your family photos are slowly migrating toward the edge of the shelf, you aren’t alone. Most fireplace mantels are installed with insufficient backing, often just toggled into the drywall or nailed into a thin ledger. Over time, the weight of the wood—plus whatever decor you stack on top—creates a lever effect that pulls the fasteners out. It’s a similar headache to why plastic wall anchors fail for heavy shelving when you’re dealing with any real weight. I learned the hard way that you can’t fight physics with more nails; you need a rigid internal spine. By using a flat steel plate bolted directly to the masonry or studs, you create a cantilevered support that won’t budge. This isn’t just about looks, either; a falling mantel is a genuine safety hazard for kids and pets. According to the American Institute of Steel Construction, steel’s high modulus of elasticity means it can provide extreme stiffness in very thin profiles, which is exactly what we need when we don’t want bulky brackets ruining the aesthetic. This technique is actually very similar to the steel plate move for drywall mounted floating vanities, adapted for the unique heat and material challenges of a hearth.
Does a Simple Metal Strip Actually Beat Heavy Duty Brackets?
You might be skeptical that a thin piece of steel can outperform those giant, ornate corbels. I get it. I used to think ‘bigger is better’ until I realized that the secret isn’t the size of the bracket, but the quality of the connection to the wall’s framing. When you integrate steel into the shelf itself, much like the the internal torsion box trick for extra long floating shelves, you distribute the load across multiple points instead of putting all the stress on two or three screws. Have you ever walked into your living room and felt like your mantel was literally bowing under the weight of your holiday decor? If so, you’re ready for a real fix. We also need to consider the interface between the wood and the chimney; often, a the scribing hack for fitting built-ins against stone fireplaces is necessary to ensure the steel plate sits flush against an uneven surface. In the next section, we’ll dive into the specific tools you need to prep your mantel for its new reinforced life.
Get Past the Drywall to the Real Support
To stop a mantel from diving toward the floor, you have to treat the wall like a structural skeleton rather than a decorative skin. If you are dealing with a standard framed wall, your first job is to find the exact centers of the studs. This isn’t the time for a cheap beep-and-flash stud finder; use a magnet or a small drill bit to confirm you’ve hit solid wood. When I was working on a project with crumbling plaster in an old farmhouse, I realized the standard methods wouldn’t cut it. That’s exactly when you need to know how to mount heavy built-in shelves to plaster walls that crumble. For a fireplace, the stakes are higher because of the heat cycles. You need to bolt a 1/4-inch thick steel plate directly to those studs using 3/8-inch lag bolts. Think of this plate as a rigid spine. If you’re mounting onto brick or stone, bypass the mortar joints entirely. Drill into the center of the masonry units and use expansion anchors. I once spent four hours trying to save a client’s poorly installed granite mantel that was held up by nothing but construction adhesive and hope. It was a mess. We ended up having to strip it back to the bare brick and start over with the steel-plate-to-masonry method.
Prep the Timber to Swallow the Steel
The goal is for the steel to be completely invisible once the job is done. This requires ‘recessing’ the plate into the back of the wood. You’ll want to use a plunge router to carve out a pocket that is slightly deeper than the thickness of your steel. This is essentially the same logic used for the hidden plywood cleat for mounting heavy tool walls, but with the added rigidity of metal. When the plate sits flush inside the wood, the weight of the mantel is transferred directly through the steel and into the wall’s framing. 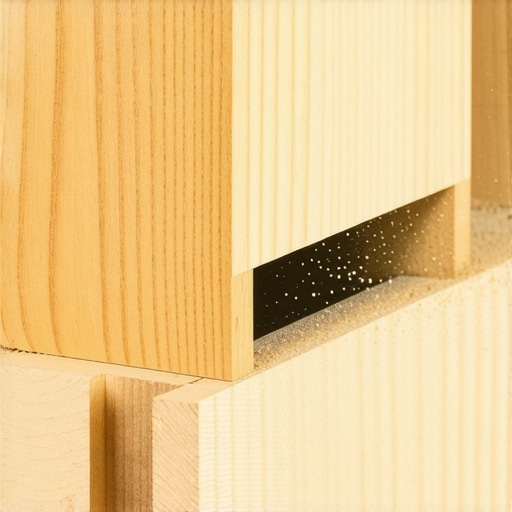
The Secret to a Seamless Marriage Between Metal and Wood
Once your plate is bolted to the wall, the mantel slides over it. But here is the trick: you don’t just let it sit there. You need to secure the wood to the steel from the top or bottom using countersunk machine screws. This prevents the wood from rotating or ‘rolling’ off the support. It’s a specialized version of how to stop floating vanities from dipping with steel plates. I remember one specific install where the mantel was a 150-pound reclaimed beam from a local barn. The homeowner was terrified that the steel would make it look ‘industrial.’ By the time I was finished, you couldn’t see a single scrap of metal, yet I could literally do pull-ups on the edge of that beam. This technique is much more reliable than why your closet rod bracket is pulling out, because you aren’t relying on the sheer strength of a small screw head; you’re relying on the surface area of the entire plate. Finally, if you are working with an uneven surface, remember to use the scribing hack for fitting built-ins against stone fireplaces to ensure the wood meets the stone without ugly gaps.Common wisdom says if a mantel or heavy shelf feels a bit loose, you should just drive another few screws into it. I’m here to tell you that’s a recipe for disaster. In the trade, we call this the ‘Swiss Cheese Effect.’ Every hole you drill into a 2×4 stud or a solid timber beam removes structural material. At a certain point, the density of the wood is so compromised that the fasteners have nothing left to grab. I’ve seen mantels literally peel away from the wall because the installer used twelve screws where four high-quality lag bolts would have sufficed. It’s the same logic I use when I’m explaining why particle board shelves sag and the plywood replacement; it is about the integrity of the material, not just the number of points of contact. One ‘oops’ factor that almost nobody talks about is the ‘over-torque trap.’ When you’re using a power impact driver to sink bolts into a stud, it’s incredibly easy to over-tighten. You think you’re getting it ‘extra snug,’ but you’re actually crushing the wood fibers inside the pilot hole. According to the USDA Forest Products Laboratory, the withdrawal capacity of a screw is directly tied to the integrity of those fibers. Once they’re crushed, your ‘secure’ mantel is essentially held in place by friction alone, which will fail as the wood dries out. 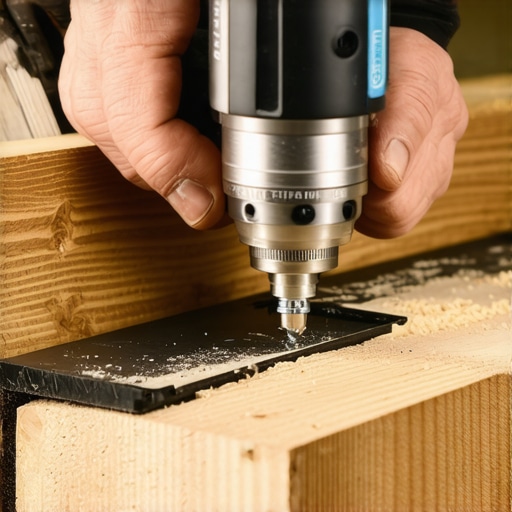
Why Does Heat Make Your Mantel Connection Weaken Over Time?
If you have a fireplace, you aren’t just dealing with weight; you’re dealing with thermal cycles. Wood expands and contracts significantly more than steel. If you’ve bolted a steel plate too rigidly without allowing for a tiny bit of movement, the wood will eventually crack around the fasteners. This is a nuance often missed in even the most creative built-ins for seamless storage. I always recommend using slightly oversized holes in the steel plate—just a fraction of an inch—to allow the wood to breathe without stressing the metal spine. Have you ever fallen into this ‘more is better’ trap and ended up with a wall full of holes? Let me know in the comments. Whether you’re working on innovative storage solutions to transform your bathroom or a massive hearth piece, precision beats power every single time. If you’re really struggling with the wall interface, don’t forget the scribing secret for perfect built-ins to get that professional, gap-free look.Once you’ve wrestled that steel plate into position and bolted your timber down, you might think the job is finished. But a truly professional install is one that stands up to five years of seasonal shifts, not just five days of looking pretty.
How do I keep my heavy installations from shifting over the years?
The biggest threat to your hard work isn’t gravity anymore—it’s the ambient environment. In the winter, your heater dries out the air, causing the wood to shrink. In the summer, humidity makes it swell. This constant movement can eventually loosen even the best fasteners. I make it a habit to check the tension on accessible bolts during my annual deep clean. If you’ve integrated your mantel into a larger system, you should look at this expert guide to flawless vanity installation tricks and tips to see how we handle similar load-bearing issues in bathrooms where moisture is an even bigger factor. I also recommend applying a high-quality wax or oil finish to the back of the mantel—the side facing the wall—before installation. This creates a semi-permeable barrier that slows down the rate of moisture exchange, preventing the wood from warping away from your steel spine.
Don’t Just Set It and Forget It
For those scaling up to massive projects, like full-wall libraries or heavy kitchen features, the principles remain the same. You might find yourself needing a steel reinforced toe kick for heavy appliance storage or similar structural augmentations. According to the Architectural Woodwork Institute (AWI) Quality Standards, Section 10, the integrity of a permanent installation relies heavily on the substrate’s ability to hold fasteners over repeated loading cycles. This is why I refuse to use anything but GRK structural screws or heavy-duty lag bolts. If you are using cheap gold screws from a bulk bin, you’re basically building on a foundation of sand. 
Tools That Actually Make a Difference
If you’re serious about doing this right, stop relying on a plastic bubble level you found in a junk drawer. I personally use a 24-inch Stabila R-Beam level because it’s engineered to withstand drops without losing its calibration. Precision is your best friend when you’re trying to hide a steel plate inside a routed channel. I also swear by the Bosch GLM laser measure for checking the ‘squareness’ of the fireplace opening from a distance. If your masonry is off by even an eighth of an inch, your steel plate won’t sit flat. This attention to detail is the same reason I use a steel gusset fix for large built-in desks; it removes the ‘bounce’ that makes a piece feel cheap. Looking ahead, I suspect we’ll see more ‘smart mantels’ hitting the market—units with integrated heat-shielding and hidden cable runs for soundbars. Staying ahead of top trends in vanity designs and built-ins means thinking about how tech will live with your timber. My challenge to you: on your next project, skip the standard brackets and try the recessed steel plate method. It’s more work, but the first time someone asks ‘How is that even staying up?’ you’ll know it was worth every minute.
The Hardest Lesson I Learned About Gravity and Heavy Timber
If there is one thing that years of custom woodworking has taught me, it is that wood is a living material that never stops moving. When I first started, I thought I could brute-force a heavy mantel into staying put with longer screws, but I was just fighting a losing battle. The real lightbulb moment happened when I realized that a mantel isn’t just a shelf; it’s a cantilevered lever. If you don’t address the internal leverage, you are just waiting for a failure. This is why I always preach about the importance of built-in storage ideas to declutter and enhance your home that rely on structural integrity rather than luck. I also learned that the more is better approach with fasteners actually weakens your studs through the Swiss Cheese Effect. One properly sized lag bolt into a steel spine is worth ten gold screws in drywall. It is a philosophy I carry into every project, whether it is a hearth or creative built-ins for seamless storage.
The Precise Gear That Keeps My Mantels Level for Decades
You cannot achieve professional results with amateur tools. To get that steel plate recessed perfectly, you need a high-quality plunge router with a sharp carbide bit. For the installation itself, I never leave home without my Stabila R-Beam level. It is the only tool I trust to ensure a 100-pound beam is perfectly horizontal without second-guessing. For those working on complex layouts, a Bosch GLM laser is essential for checking squareness across large rooms. I also highly recommend looking into this expert guide to flawless vanity installation tricks and tips because the leveling techniques used for heavy cabinetry are identical to those needed for a rock-solid mantel. Finally, use GRK structural screws; they have the sheer strength needed for these high-stress connections, much like the hardware used in a steel gusset fix for large built-in desks.
Your Turn to Defy Physics with Confidence
Reinforcing a mantel with a hidden steel spine might seem like overkill until you see it in action. There is a deep sense of satisfaction that comes from knowing your home focal point is secured by more than just hope and a few flimsy plastic anchors. Whether you are tackling this for your living room or looking for innovative storage solutions to transform your bathroom, the principles of structural reinforcement remain the same. Take your time, prep your materials carefully, and do not be afraid to go the extra mile for long-term safety. Have you ever had a mantel or heavy shelf start to sag or pull away from the wall after a few years? Let me know in the comments below!